


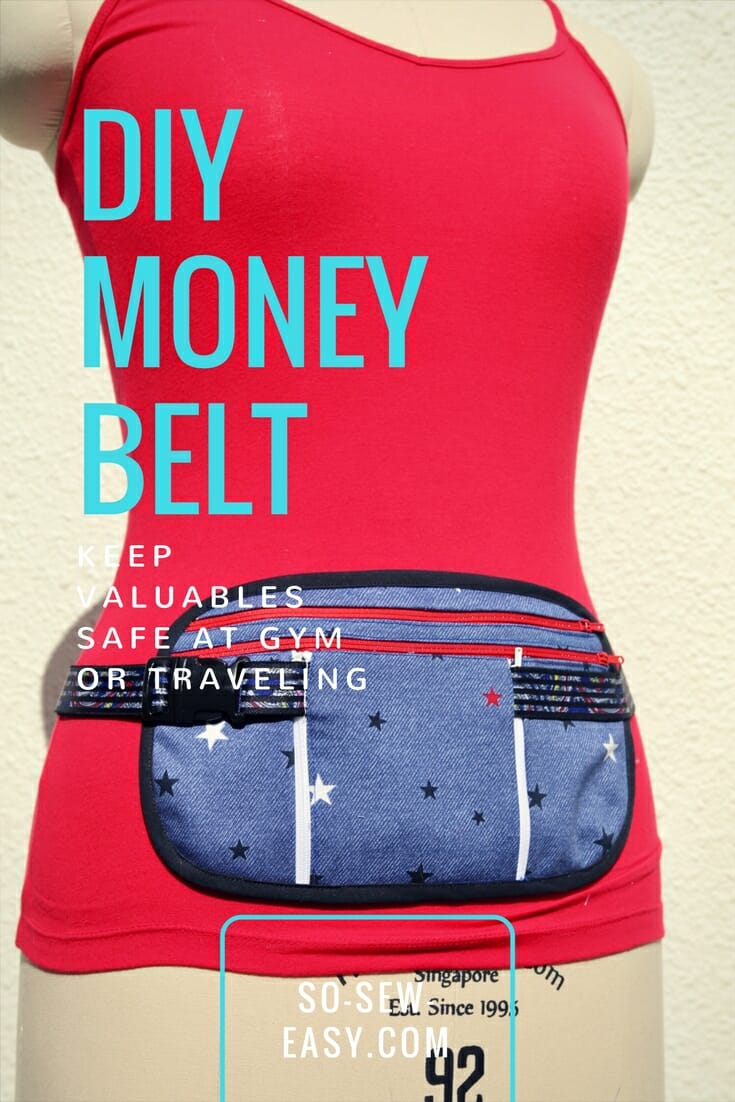
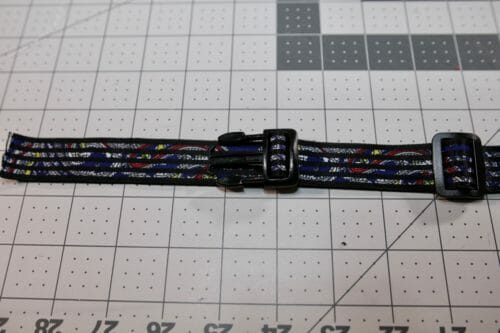
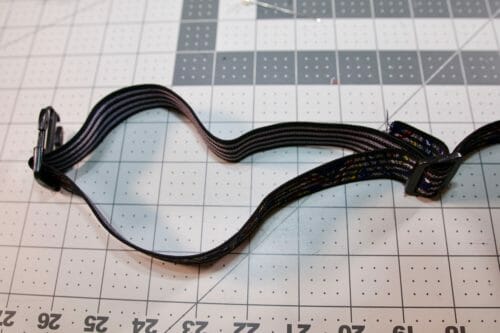
Here's a pattern for a running belt with pockets and an elasticized adjustable strap so you can tailor it to any waist size. This pouch could also be called a money belt, travel belt or sports belt. Place the pouch on your front or back and cover it with a T-shirt and no one will know it is there. There is enough room for a big phone, money, keys and even coins. Keep your valuables safe while at the gym, jogging or traveling.
I have come up with a new scheme for making excuses not to exercise. My gym wear does not have enough pockets. That's it! When I am in the gym, I worry about my phone, the locker key, the earphones, and money. The thing is that all these items plus the towel leave me with the annoying habit of picking and dropping my small baggage every time I change machines. How annoying! I guess I could put all that in the locker and concentrate on doing a workout, but nothing is more boring to me than repeating a motion in 3 sets, just to move to another machine and do the same. So, I need music to avoid quitting within the first 30 minutes of my workout. The funny part of this scheme is that I have begun to avoid walking the dog too. And guess why? Again, I don't have enough pockets… I need a change of attitude, so this new pattern is the way I'm going to do it!
Fabric scraps are ideal for this project. Probably the best fabric for this project is nylon taffeta rated at 190T. I can only dream getting my hands on this though where I live. You may have better luck. By the way, this is Pattern #6 in our New Workout Wardrobe series.
If you're planning to do some traveling this summer, this money belt would not only help keep your most important valuables safe (passport, ID, credit cards, cash, phone) but would make a great accompaniment to an Anti-Pickpocket Bag.
Materials:
- 1/4″ yard oilcloth, canvas, twill, acetate (umbrella fabric) or quilting cotton
- 2 x nylon zipper 14″ long
- 2 x nylon zipper 6″ long
- Decorative elastic or black elastic 1″ wide (amount depends on your waist; add 6″) Mine is 29″ + 6″ = 35″ length of elastic
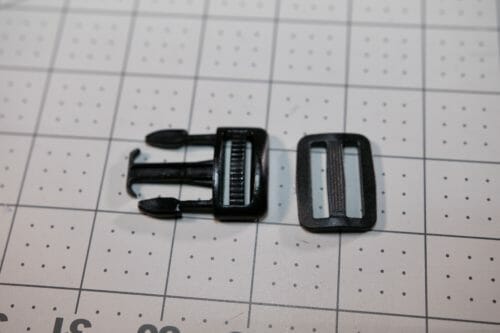
- Plastic buckle (One set) 1″ wide (most match the elastic)
- 1 x plastic slider 1″ wide (most match the buckle set)
- A yard of 1″ wide bias tape
Tools:
- Sewing machine
- Thread
- Zipper foot
- Fabric pencil or Frixion pen
Skill Level:
Confident Beginner: must know how to attach bias tape and follow instructions.
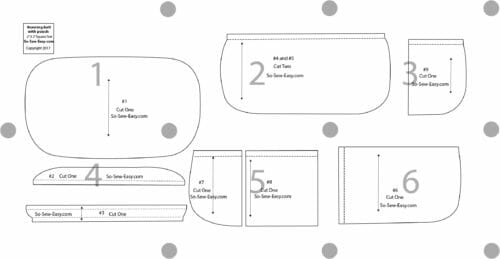
Pattern layout
Pattern Download
You can download the pattern for this DIY Money Belt from our account at Payhip.
For help downloading and printing PDF patterns, please CLICK HERE.
Use the latest version of Adobe Reader with print settings for Actual Size and Landscape. Print the first page first to test the 2″ x 2″ square to make sure the sizing is correct before printing out all the other pages.
How to make the DIY running belt with pouch
There are four layers of fabric and four zippers to attach. I have labeled all the pieces so I will be asking you to join pieces #____ with pieces #____. Cut 3″ off the elastic and put aside. You will need this later. Label all your pieces on the back with a Frixion pen or a fabric pencil. There is no need to purchase bias tape as you can make your own continuous bias tape using this free tutorial.
Follow the steps below in the sequence described. I suggest you label the pattern pieces on the back of the fabric so you do not get lost. We will start to work from the back (close to the body) to the front.
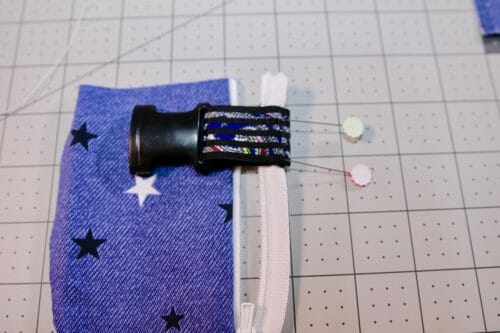
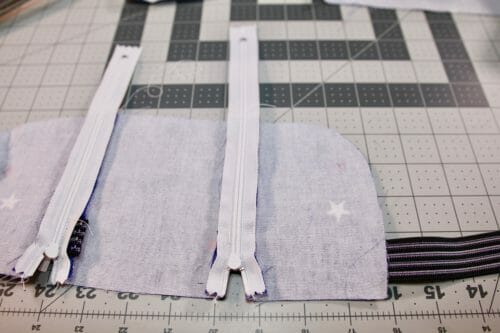
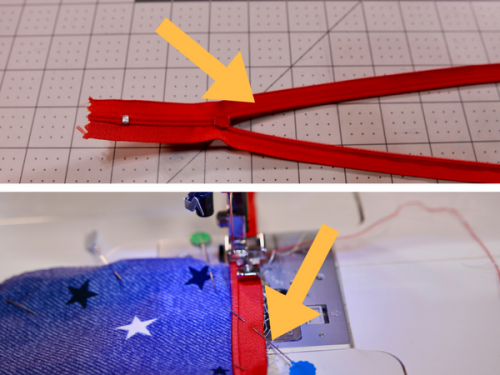
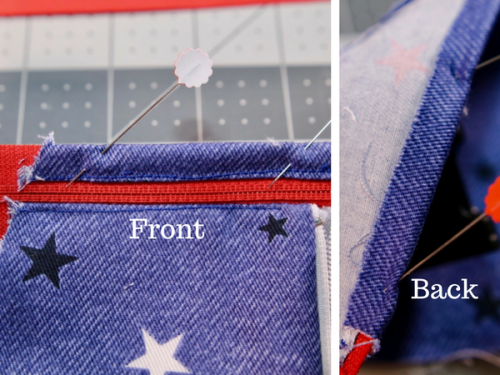
Step One: Joining pieces #9 to #8
Lay the 6″ zipper facing up.
If your elastic has a print like mine, place the print right side up, over the metal stopper of the zipper.
Place piece #8 print side up and align it with the top end of the 6″ zipper.
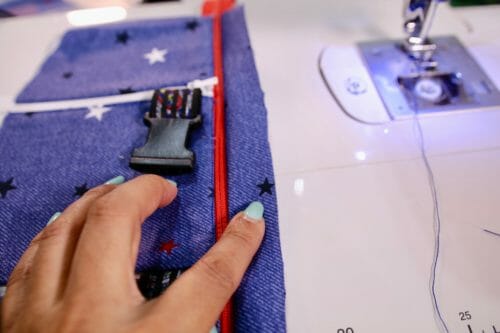
Using your zipper foot and sewing as close to the teeth as possible, sew from the bottom of the zipper to the top. It is easier in that direction.
Print side down, place piece #9 on the right side of the zipper. Sew using your zipper foot as above.
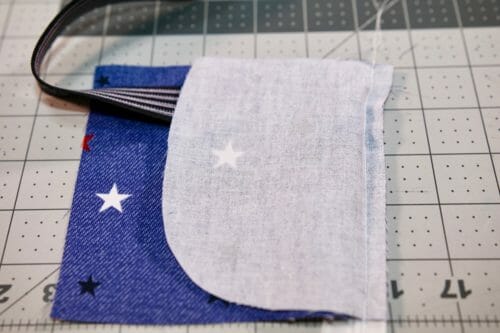
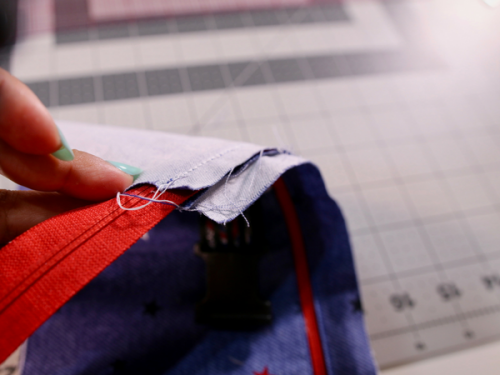
This is what you should have by now.
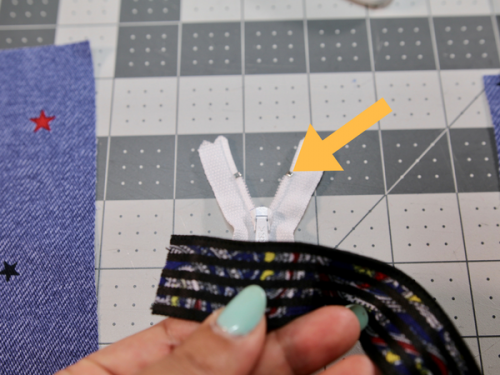
Step Two: Joining piece #7 with #8
Place the second 6″ zipper right side up.
Sew piece #7 to the left side of the zipper as above. Align the top of the zipper with the top of the fabric. The print side of the fabric should face down.
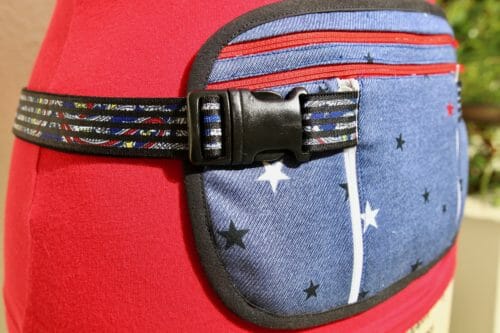
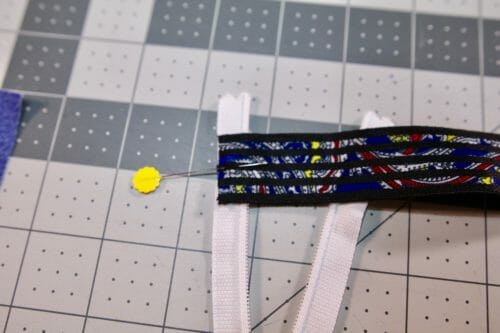
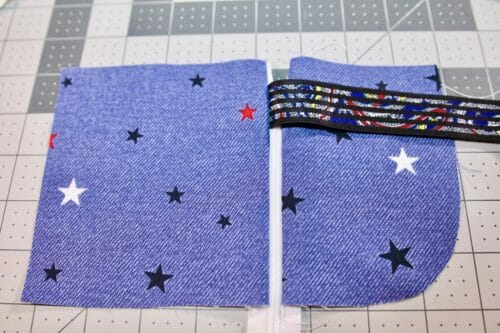
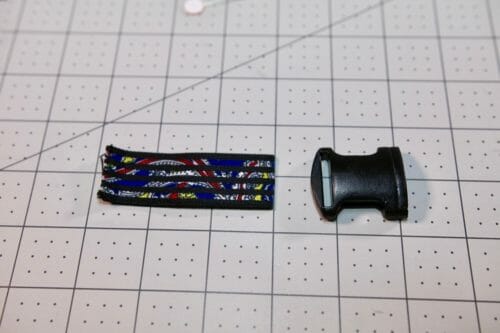
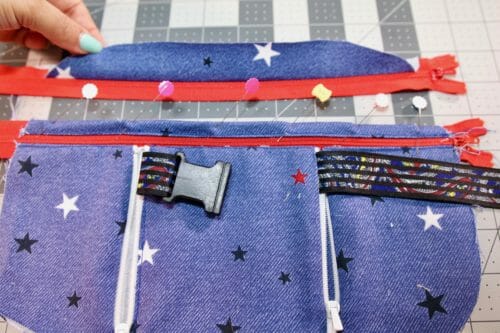
Step Three: Adding one side of the buckle
You will need the 3″ elastic piece that we and the female side of the buckle.
Thread the 3″ elastic piece through the buckle and place it elastic on top of the zipper buckle towards the fabric.
Take it to the machine and sew as close to the teeth of the zipper as possible.
Sew piece #8 to the right side of the zipper. Align the fabric to the top of the zipper.
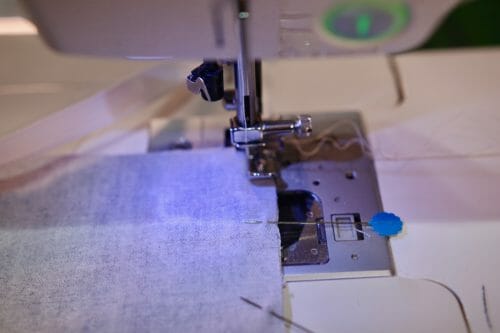
Add pieces print side down #9 and #8 (with the long elastic strap). Both pieces of elastic are effectively under piece #8.
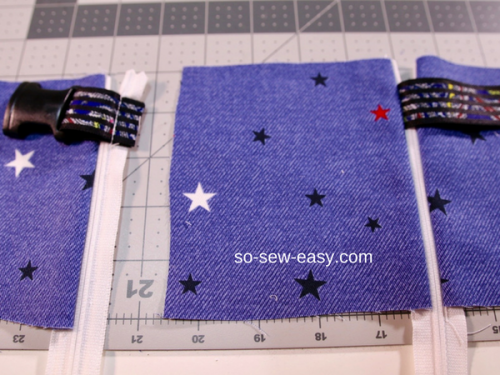
Open the zipper to make it easier to sew. Sew.
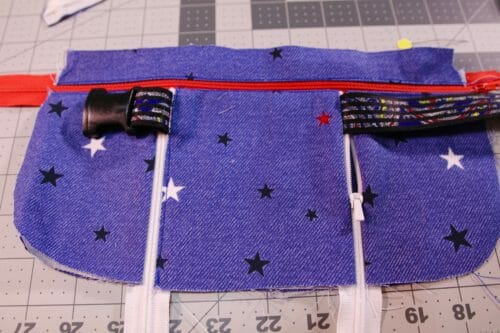
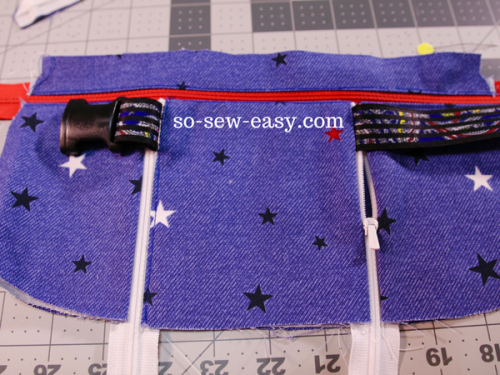
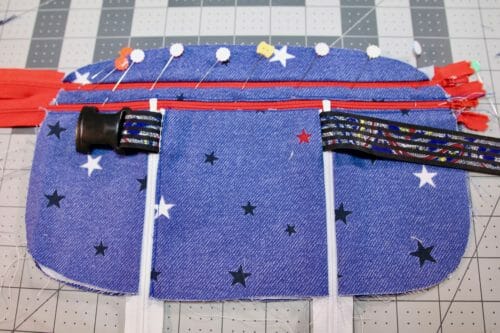
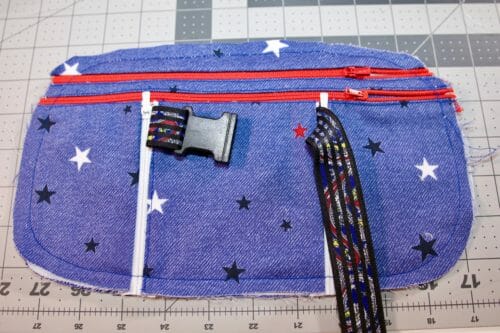
This is what you should have by now.
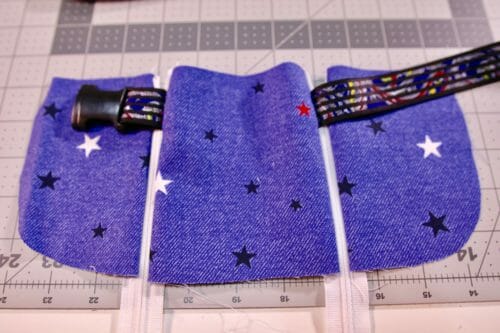
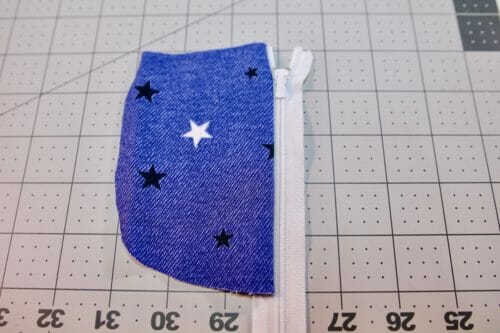
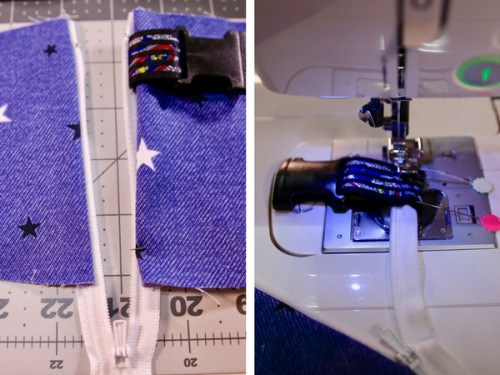
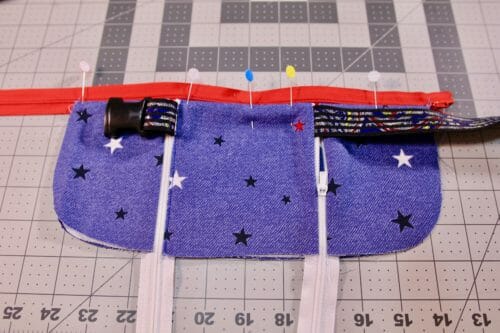
Step Four: Adding piece #6
Flip your work upside down. The curved side is up and the long elastic strap is on your right.
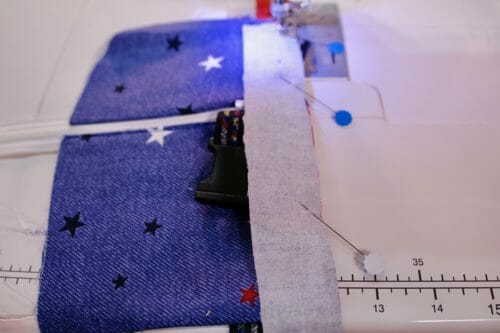
Piece #6 will be placed on top of #8. Align with the straight edges and the zipper tape.
Pick up the work by the zipper edge and take this to the sewing machine and sew.
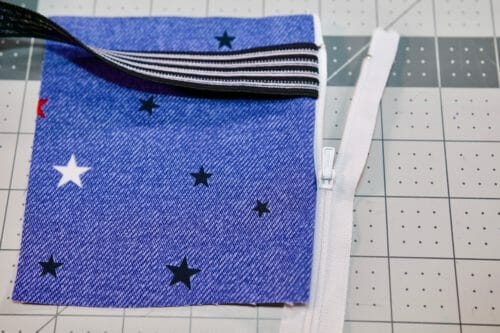
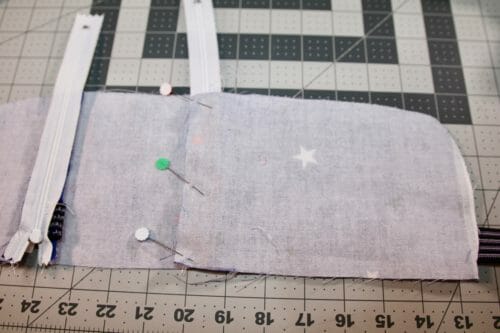
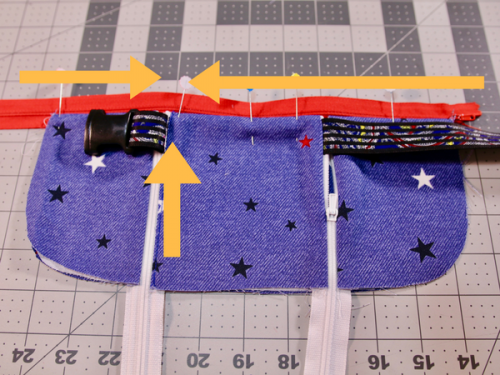
Step Five: Joining pieces #5 and the rest of the work
You will need pieces #5, #4, one of the 14″ zippers and the rest of the work that we assembled above. Remember that pieces #5 and #4 are from the same pattern piece but cut twice.
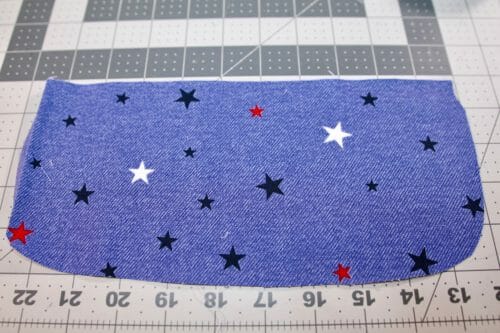
Place piece #5 print side up flat edge to the top.
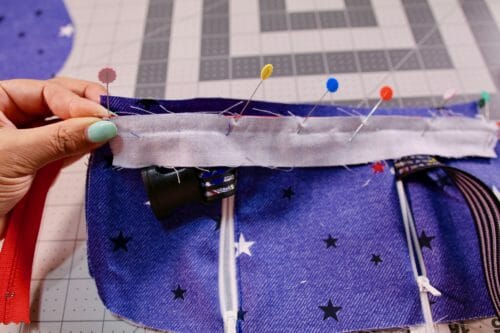
Place the work you've done so far on top. Pin together making sure the zipper tape is straight.
Flip your work to make sure it all lines up.
I suggest you zigzag the top to keep the zipper tape straight. Pinning sometimes is not enough to keep layers together.
(I have grown incredibly disappointed with my machine. No matter what I do, the stitches are loose. Don't be surprised if I move to my industrial machine. Hopefully, your machine will be up to the task.)
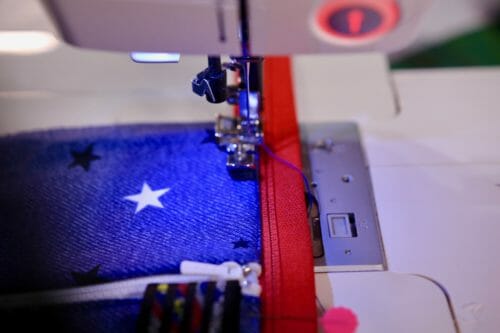
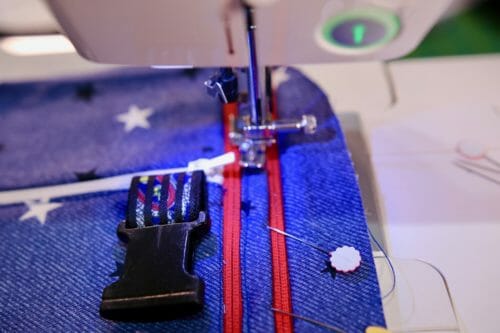
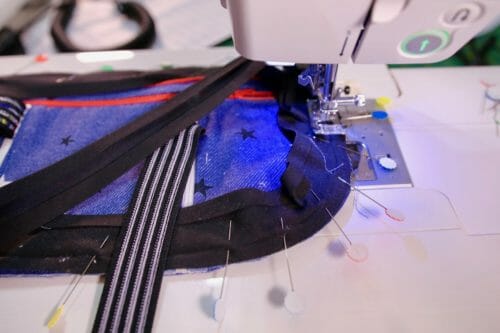
Place the 14″ zipper right side down. Align with the top edge of the running belt. Change the top thread of your sewing machine to match the zipper. Sew the zipper down.

Change your machine needle to match the fabric of the pouch. Make sure your work looks like the picture below. Pin the fabric all together folding the seam allowance towards, the fabric.
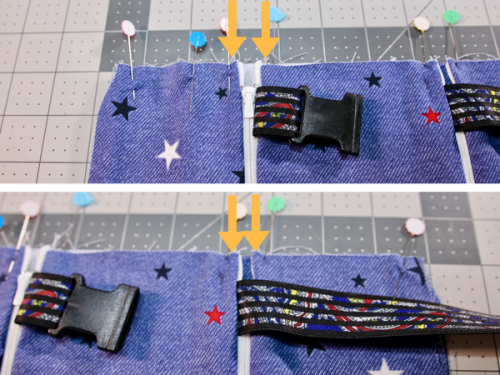
Topstitch from the left to right and from right to left. Stopping both times at the buckle.
Topstitching from left to right use your right side of the zipper foot. Reverse this step from right to left, this means you have to use the left side of the zipper. I do not have a picture of this, but I think you get the picture.
This topstitching will let the zipper lay flat. Check that your seam allowance doesn't show behind the zipper tape. If it does, trim it flush.
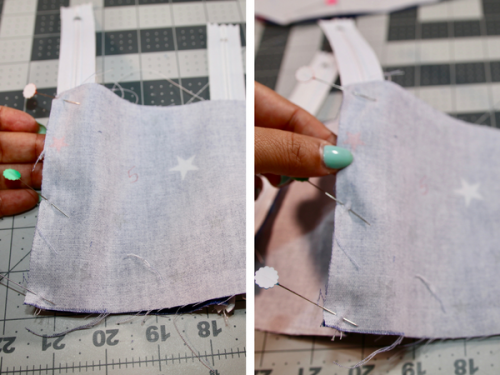
Step Six: Adding piece #4 and #3
Grab piece #3 print side down and lay it on top of the zipper tape. Place piece #4 print side up under all your work and align with the flat edge. You will have a sandwich of piece #4 (print side up), the zipper and piece #3.
Sew as close to the zipper as you can. At this point, you should have four layers in total.
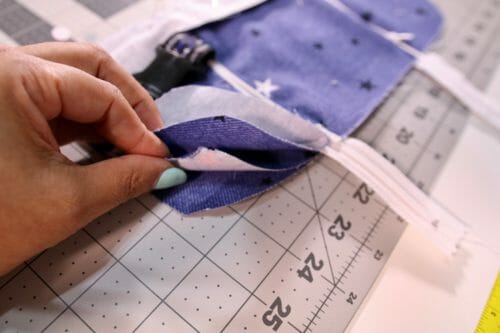
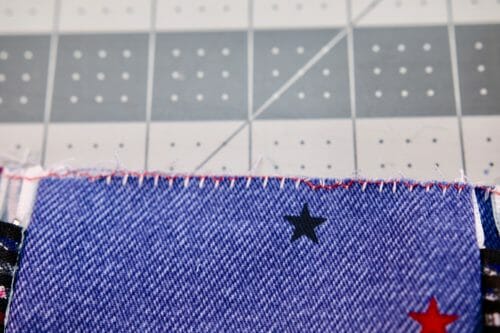
Turn piece #3 print side up and top stitch.
Back view.
This is where you should be by now.
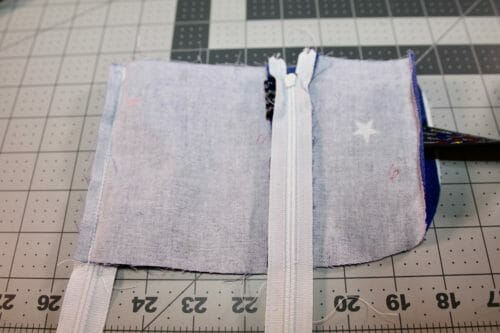
Step Seven: Adding the last zipper and piece #2 to the rest of the pouch
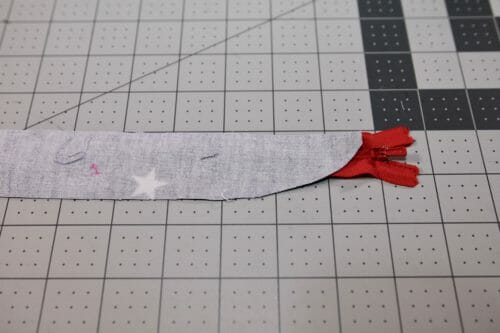
Place your second 14″ zipper right side up so it opens from right to left.
Place piece #2 print side down on the top edge of the zipper. Sew and put aside.
Take the belt/pouch piece and fold the seam allowance over the zipper tape.
Bring back piece #2 and attached zipper.
Pin the combined pieces to the zipper tape of piece #2 as shown below.
Sew using the zipper foot.
Step Eight: Adding piece #1
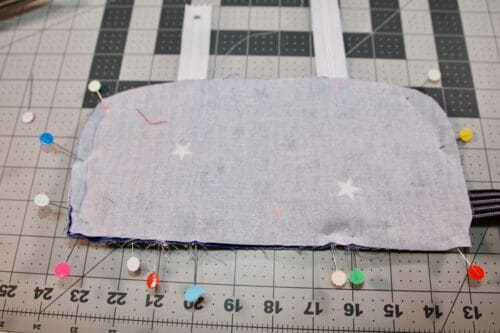
Place piece #1 print side down and pin the rest of the belt on top. Pin all around. Make sure you have the zippers open.
Stay-stitch 3/8″ all around.
Step Nine: Making the adjustable belt
For this step, we will be using the slider (on right) and the male part of the buckle.
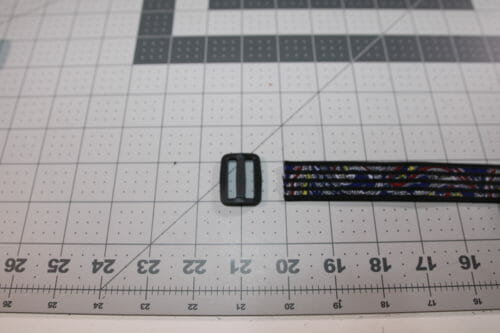
Pass the decorative elastic band print side up, under and through the first hole of the slider. Over the bridge and down the other hole.
Repeat the same procedure with the buckle, under the first hole,
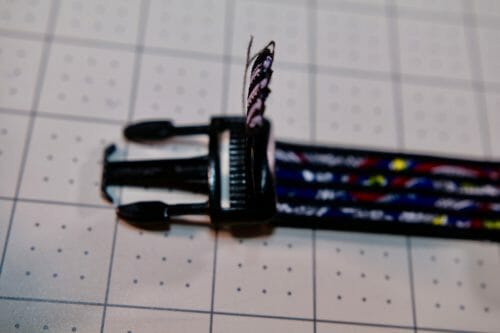
over the bridge, and out the other hole.
Hold the buckle with one hand and pull the end of the elastic about halfway through and fold back the end to the slider. Working on the underside of the slider, thread the end of the elastic in through the first hole and out. Pull towards the buckle and fold the end of the elastic about 1 1/2″. Sew 1/8″ from the edge a few times to secure the elastic.
Step Ten: Finishing up your running belt
Sew bias tape all around the edge. I suggest you start where the elastic will cover when in use to hide the seam. Open your bias tape and place it right side down on the front of the running belt. Fold the end and sew all around following the first crease of the tape. Turn and sew on the right side of the bias tape very close to the stitching line.
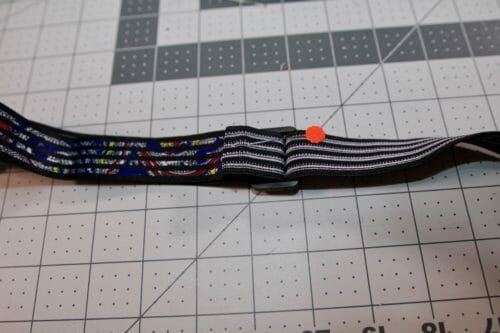
Finally, make a small tack with your machine to make the belt stay horizontal on the pouch. And you're done!
I think I will make another running belt that is a bit more bright next time. This one looks too serious and manly for me. I think I have a Father's Day gift now…
Until next time! Happy sewing!


Hi from South Africa. How do I download and print the pattern pieces and instructions without all the ads and photos? Thanks.
This is great. I have a heart monitor that will shock my heart when having heart attack. Have to keep phone within 6 feet at all times which can be a pain . I have a shoulder strap that carries phone but wanted something for my waist. This fits that need as I can make it to size as to not be so combersome. Thank you so much for this and all the wonderful patterns you have given us!
Thank you for the lovely pattern! I made one yesterday, but it’s not quite right. I really struggled with Step #5. I may wait for a video the make next one. The pictures are excellent, but not quite enough. It gets a bit complicated with all the layer, lol.
Thank you again for the pattern. I have recently discovered your Youtube channel and I’m loving it!
Thank you for your feedback Teresa, you are not the only one that has said this is very confusing pattern, i will have to upgrade the level to advance. Yes a video would make it better but they are so hard to make. But, I am on it…
[…] Running Belt,Travel Belt or Money Belt with Pouch […]
Hi Mayra. I am new to your site and absolutely love your patterns especially the Running Belt tutorial. I am unfortunately unable to download the pattern as I’m asked for a coupon code. Please help. Regards
Hi Pritha, I never asked for any coupon code, not sure where you are getting that from, can you send me a screenshot so I can see what this is about?
I am having trouble attaching piece #6
I don’t understand which side zipper to attach it to
Yes I can see why you would get confused. Please work backward and label the pieces. After you have flipped your work place Piece #6 over #8. You are working on the second layer now.
I’m having trouble attaching #4 and #3. #4 and #5 are supposed to be cut out of the same pattern piece and therefore be the same size. However, #5 attaches to the bottom edge of the zipper tape while #4 attaches to the top edge of the same zipper tape. Once sewn, #4 is too short and doesn’t reach to the bottom of the belt so it’s not aligned with the other pieces. What’s the fix?
Still hoping for help on this
Hi Elara, basically you need to label all the pieces as per the instructions or you will lose your way. Definitely, I am going to have to make a video. I am going to have to make a video
I just completed my money belt. It was fun to make and I will use it on an upcoming trip to Northern Europe.
Hi Taffy, have a lovely vacation, how about a picture of yourself with some spectacular backdrop of your chosen destination in Europe for this post?
[…] had a look through our previous designs and some would work well, particularly the running belt pattern linked below, and maybe even the super popular small backpack pattern that we did a few years ago, […]
Thanks for the pattern. From the photos, I am guessing this finishes at about 11 x 7 inches?
I think this is a great item to have. It frees up your hands when shopping or traveling.
great pattern. How do I obtain the tutorial for the instructions to make. I have already downloaded the pattern.
Thank-you
Pat
Hi Patrica, you can just follow the instructions from the website. It works well if you have an iPad or some form of a tablet. Otherwise, you can use a laptop. Happy sewing!
This looks great thank you so much. Can the vertical zips be undone whilst the belt is fastened?
I did that un purpose to stop pickpockets. Depends how tight your belt is, you need to push your fingers inside to be able to do it. I have never been robbed with this belt.
Thank you so much for an awesome pattern!
It is my pleasure Dawn!
This is exactly what I am looking for for an upcoming trip to Europe!! Can’t wait to get it cutout and sewn!! Thank you!!
This is perfect for Europe! Stops the pickpockets;)
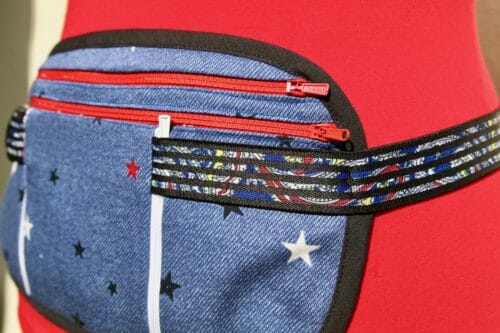
Thank you for this pattern. It looks like the elastic is covering the top of the zippers on the two front pockets. Is that correct? Seems like that would make it difficult to unzip and get stuff out of those two pockets without removing the belt completely. I’m hoping for a money belt I can wear under my clothes and just hike up my shirt and get things out any pocket without having to remove it. Will that work?
The two little pockets are good for a folded bill,a card or perhaps one key nothing else. I use it to hide emergency cash and my house key. You can easily modify it by sewing the elastic so it exposes the head of the zipper. (I tend to be paranoid about leaving the house without a key and a bit of cash)The pocket with the zippers in read is where you can stash money and a phone. It lays flat which is what I was looking for, if you want more bulk check out the belted pouch it looks good both in fabric and vynil. Hope that answers you question.
Thanks for the reply. I’m now at the point where “piece #6 will be placed on top of #8. Align with the straight edges and the zipper tape.” The photo directly below that instruction shows the number 5 written on the back of the fabric (not #6). Also, my piece #6 extends all the way over piece 8 to the left edge of the second zipper. In your photo, it only covers piece 9 up to the zipper on the right. (hope that made sense). What am I doing wrong?
It looks like you have labeled the pieces incorrectly, could you go back and look at what you have done? You need to work backwards from piece #9.
Thanks. I figured it out and finished the belt. I was taking the instructions a bit too literally. One more question though. On the page of the PDF that has instructions for printing the pattern, there is the following instruction:
“Also note that you will need to cut two straps at 4 inches by 22 inches, for which no pattern piece is supplied – it’s just a rectangle! You can draw the straps on the reverse of your fabric to cut.”
I cut those pieces in addition to the pattern pieces as instructed, but never used them. I didn’t see anywhere in the instructions where it called for them and my belt is complete. For future reference, where were they supposed to be used?
Hi Imajean, thanks for letting me know, I sometimes recycle the template of the instructions. That is why I no longer add the instructions on the PDF. I don’t think anyone understand how long a pattern take to make and share for free. Happy that the belt pattern worked out for you. Now you have material for a pair of handles for a tote bag. I have a few patterns around, for free as well. Hope you have enough fabric for a tote bag.
yes that was a mistake on the making of the PDF, I have a VA and sometimes she takes another template of a post and used it but forgets to take this line of. I will amend the post so people will know they are not supposed to cut this straps. Don’t worry though the strips are the perfect length to make a very nice pair of bag straps.
Perhaps Imajean was looking at the numbers that printed on the pattern pieces. In at least two cases, those are not the pattern piece numbers.
Thanks for the pattern I really love it as it stays so flat when on, easy to wear over or under clothes. Made mine out of medium weight cotton fabric. Not much choice where I bought the elastic banking but looks OK. I do find that I can’t put heavy things in it or it pulls down – maybe need a firmer elastic but that’s OK works for money & cards and I don’t even notice it when wearing it. Photos here You mention at the end to bar-tack somewhere but you don’t say or show where
Hi Ishka, you tack where the elastic meets the fabric to make sure the elastic won’t move up and down when you run. It is very nice the belt you have made, and yes it is only for carrying the phone, some coins and bill or cards while you are running.
I made this belt for my 2 1/2 years old grandson, so he can take his dinky toys everywhere he goes.
Thanks from the Netherlands.
What a great use for this design. Thanks for sharing the idea.
This pattern turned out really well! I used narrower bias tape and cut two of piece number one because I wanted a bright colored lining for the back zipper pocket. Thank you, Mayra, for the nice pattern.
WOW, this is a beautiful belt, better than mine. Love it:)
Cant find how to download the pattern. Thanks for help.
Malin, Sweden
HI Malin it is on page two.
I am unable to see the’button” to access the running belt travel belt pattern. Please be more specific. Thank you. evelynhouska77@gmail.com
I thought you might find it amusing to know that the acetate fabric at Amazon.ca is $66.46 for a metre! I would use the fabric from a broken umbrella.
Wow, that is a lot, any chance you can find it in a local market?
ohh this is just what I need! Thanks so much for the pattern!
I am possibly overthinking this thing? When I place the consruction of pieces 6-9 on top of piece 5, there is a difference in height of about 1/4″. This corresponds to the broken line on pattern piece 4/5, so I am assuming this is deliberate – but how should I be matching things up?
I sent you an email. Please send me a photo of your work so I know what you mean. Thank you in advance Elizabeth 🙂
HI Elizabeth, yes you are right, do not overthink it. The pieces will align better once you sew. The pattern has the seam allowance the (1/4″) included so stacking the pieces on top of another will throw you out a bit. There is a zipper on top of #5. Hope this helps!
Thank you for the free pattern I have read through the instructions and have the material I will be using. I just have to get the hardware and the elastic. I grew up with fanny packs, but the ones you can buy in the store now do not fit my very full figure, so making my own and having it be a thinner pack will be great for my travels this summer!!
Enjoy Patti! Enjoy your summer! Do take a picture using the belt no matter where you are, it is still at 13,000 miles from me, so for me will be a treat to see your country.
Myra,
Have you flossed your tension discs on your machine? There could be thread bits stuck in there. Just use a folded, kind of stiff piece of thinner fabric and run it up and down your tension discs. Or you could use unwaxed dental floss or a crisp dollar bill. Hopefully that will fix your tension issue.
Never thought of that! Trying it as we speak, thank you will let you know if that did the trick.
Oh yes, I remember fanny packs. Much bulkier. This looks perfect for travel and also for those outfits that don’t have pockets (I just hate that, too!) I know I should just add pockets, but sometimes there is no right spot for them. Thanks for this.
Hi Myra, I had that tension issue on my singer sewing machine too. got so frustrated with it that I actually quit sewing for a while. then I remembered the sewing machine shop in town and took it in for a tuneup. for about a third of the cost of the machine it is now running like new again. something I’ll have to do every 2-3 years but is much better than chucking it out and buying a new one.
Absolutely Margie, I hate to chuck it, so I will be sending it to get serviced:)
Thank you, this is wonderful. I did not get the instruction for the lining part. Do we cut a lining piece from each pattern piece?
HI Cheryl, there is no lining being used in this travel belt. would you be inquiring about the pleated skirt sewalong?
Thank you for the pattern and for all the great patterns and tutorials that you generously provide on a regular basis. I love ? your site!!
Chris
You are most welcome Chris!
This was perfect timing, my purse was stolen at a store this past week. I want to down load patern but do not see the next page button. (having hard time seeing)
thanks Vickie
Hi Vickie, it is on the second page, under the Pinterest button. Enjoy! Sorry about your purse.
Thanks for your help, I found the down load, but when I try to check out it says my password is invalid (note I’ve tried to reset it twice. Does it have to be something specific(ie: contain numbers or syllable)
Sorry to be a pest.
Thanks Vickie
Hi Vickie, are you talking about your password on Craftsy? There shouldn’t be any other passwords involved in this download, only Craftsy. You can get there by clicking the orange button in the box right at the top of this page: https://so-sew-easy.com/running-belt-money-belt-travel-belt/2/
I got the pattern by signing in with facebook. Thanks so much for all the help.
Vickie
About the Tension issue you had, my whole family has brother machines and all have that issue, apparently on brother machines the tension screw in the bottom slowly comes loose and can’t be fully re tightened
Hi Tesa, I am using a Juki, it is 1.5 years old, it shouldnt be happening so soon. I did not know about the that on Brother Machines, will investigate further.
I am starting a walking regimen, and I use my phone for music, to count my steps & my heart rate. I sweat so bad I hate having it on my arm, this will be sooo much better. I like thinner material – not see thru – I’m not there – never will be, but so wind can keep me cool as I do need full body coverage, this will work great to hold my phone a little money 7 maybe I can figure out a way to snap on a water to the band! Thank you!!
That sounds like a great addition to the belt, do let me know how you improved the belt, I am curious.
I think it is a good idea no matter what you call it!
Nice item to have! I can see many uses for something like this! Downloading the pattern and will try to make it. Thanks for giving us the free pattern! 🙂
You are welcome Gina, please send me a photo of your take on it. I love to see it 🙂
“This pouch could also be called a money belt, travel belt or sports belt”
That’s so funny, when I was growing up, they were called fanny packs!
Hi Victoria, I certainly grew up with fanny packs as well, but they were generally a bit thicker and not necessarily meant to go smoothly under your t-shirt or another outer garment. This money belt/travel belt/sports belt is much thinner and serves a different purpose than most fanny pack I think. Thanks in any case for the comment and kind regards.