


 Sewing gives me a lot of pleasure, but actually sometimes also quite a bit of pain. I get a pain in my back when I sew for a while, and when I took a good hard look at that recently, I realised that a lot of it may be due to the fact that my foot-pedal leg often starts off in a comfortable position, but the more I sew, the more it extends outwards as I chase my foot-pedal across the floor.
I have a tiled floor and the foot pedal seems to slip further and further away throughout my sewing session, until I have to fish it back again. It's this sitting with one leg extended, sitting at an angle that I'm convinced in a back-breaker for me. So I set out to solve this dilemma and sew a non-slip sewing machine foot pedal pad.
It's not pretty, but it works, and that's what matters. My foot pedal stays put now a lot more than it did before. I think this would work if you had a wooden floor or carpets too, not just for tile. Here's how you can make one – it's pretty cheap!
Materials to make a non-slip sewing machine foot pedal pad
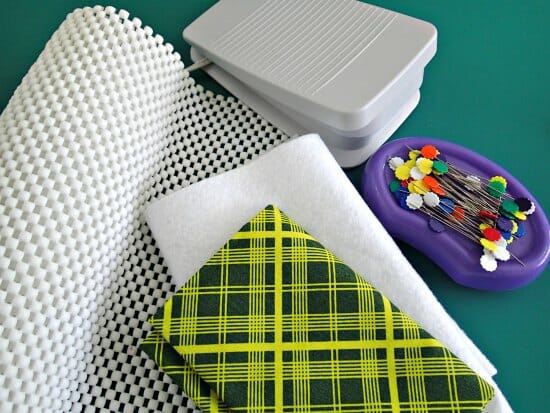
- Roll of non-slip spongy material, often sold as drawer or shelf liners (alternative UK Link)
- Some fleece, batting, felt or similar
- Quilting cotton, or other fabric, less than a Fat Quarter
- Straight cut or bias strips, 2.5 inches wide
Start out by measuring your foot pedal and decide on how big you want your mat to be. I'm guessing the bigger you make it, the more grip it will have. But bear in mind, this stuff is non-slip so it will also grip onto all your little pieces of thread too and could end up a big thread nest, so don't make it huge.
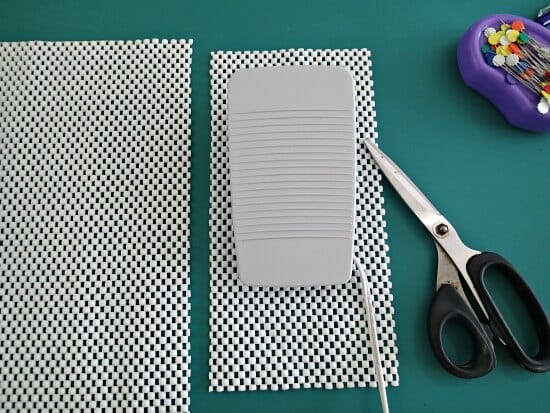
I drew a rough ‘pattern' from a sheet of paper and used it to cut 2 pieces of the non-slip liner. Make it round, oval, square – whatever you like. I made mine rectangular so that I had some padding under my heel too.
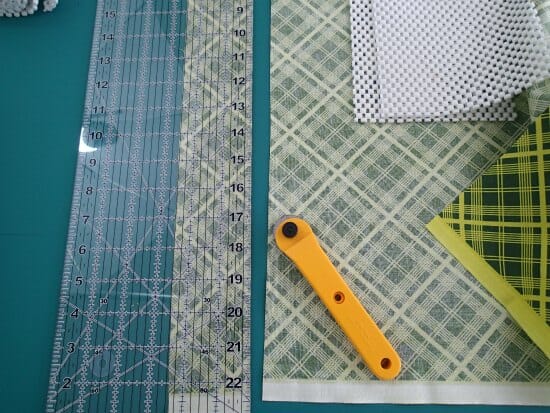
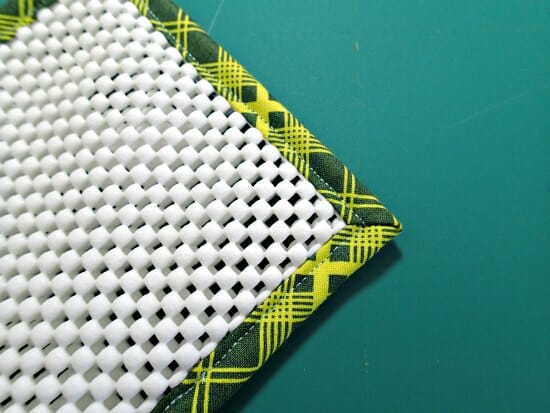
Now make or unwrap some binding tape. If your mat is square, you can use a straight cut binding. A jelly roll strip would be ideal for that. If you've made it round or oval, you'll want to use a bias binding tape. Check out these tutorials on how to estimate and make continuous bias binding, and how to get neat corners.
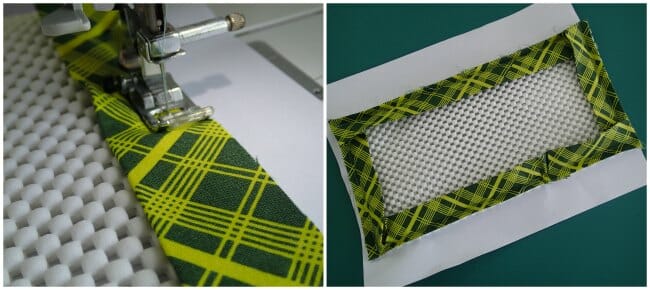 Apply the binding all around the outside of the two layers of non-slip grippy stuff. You might find because it's grippy, that it's going to grip the plastic of your sewing machine. If that's the case, slip some tissue or even some regular paper underneath to help it feed through. Here's mine sewn to the paper. It perforates as it sews so it just pulls off afterward.
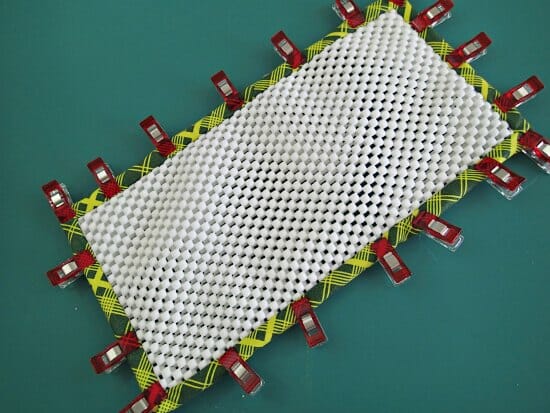
I folded my 2.5 inch binding in half and sewed it to the top, then folded it over to the back and stitched again. It's not the greatest of neat jobs, but hey, who's looking under my sewing table! Get out of there…
Because we are constantly applying pressure to the back of the pedal, it can still slip forward so I thought having something to prevent it slipping off the front of our mat would be a good idea. I created a roll of some scraps of felt that I had layered with some fabric.
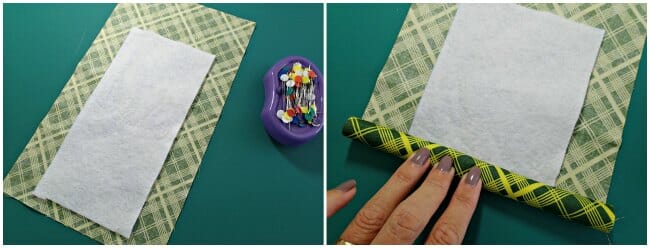
Cut a rectangle of fabric a couple of inches wider than the mat. Cut your inner padding piece an inch narrower than your mat.
On the wrong side of your fabric, place your piece or pieces of felt, fleece, or batting and start to roll it up. When you get it as thick as you want it, snip off any remaining filling. Leave your fabric an inch longer.
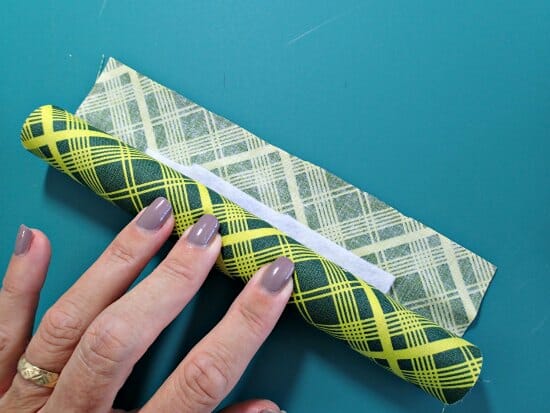
Turn under the raw edge on your fabric, roll it up and then hand stitch it down to complete your ‘sausage' to go at the front of the mat. The ends should be thin, without the filling so these will be easier to sew. You can even get your scissors in there and snip any fabric from the center of the roll that you don't need.
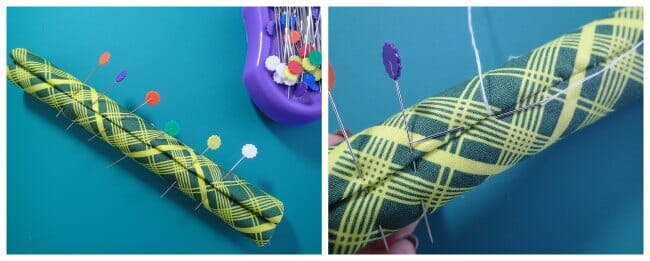
Now tuck in under the ends on your stopper roll, and tuck those ends underneath to the backside and stitch them in place.
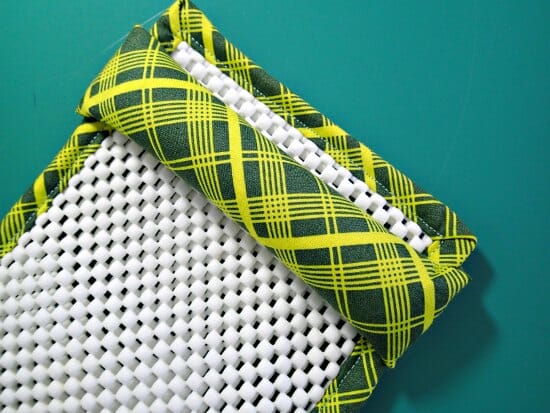
It's done. Place your foot pedal where you want it to go, more confident now that it's going to stay in place better than it did before. Your back will thank you.


Deby, was wondering if this works on a wood floor. I’m afraid that the fabric on the bottom side will just cause the whole pad and foot pedal to slide. Or perhaps put the spongy stuff on the bottom too. Really appreciate your patterns and the time you spend on them Hope you have time to answer this question.
Hi Noreen. The spongy stuff is also on the bottom, there isn’t any fabric except for the binding that keeps the layers together at the edges. It works well on my tiles and am sure it will grip to a wooden floor too.
Thank you for the great idea! I am always hunting for my foot pedal. I will be making one for myself, two friends and my daughter.
Great idea hope it works on my floating timber floor
Hi Debby, I had made something like this only missing the pad so the pedal kept slipping. Thank you for the missing link. I made 2 for machines yesterday, will try it today. Again thank you so much.
Thank you so much. I’m making one for me and my friends
This is super clever – thanks!
Great at idea can’t wait to make for sewing frends
I have been sewing for 50 years and tried several things to stop the slippery pedal. I have the non slip sheets in my kitchen draws but never thought to use one for the machine. Thank you so very much for sharing with all who needs this pattern. Gin
Thank you Debbie for your great tutorials and detailed patterns. Your generosity is appreciated and I have also bought some of your bag patterns as well. May your inspirations continue
Thank you very much Gillian for being generous enough to invest in some of my patterns. I really do appreciate it.
I really find this a useful tool for sewing. In fact, so good that I made 2 for each of my sewing buddies — one for the serger and one for the sewing machine. Needless to say they love them! Thanks for sharing.
Thanks for sharing. I chase both my pedals around and it is madding. Thanks again. : )
Bought a “back up ” machine today and the foot slides on my carpet. I use the stop start button on my main machine. I will be making one of these tomorrow. I even have the non slidey stuff in!
You could save time and glue the non slip material to the bottom of your foot pedal!
Great idea! Thanks for sharing!
Now I don’t have to keep searching for it while I trying to sew. Thanks for sharing.
Deby this is a great idea!! I’d love to make one!
Thanks so much been wanting something like this. It is really a neat pattern and needed by so many. My mother quilts a lot and has a birthday I need to take care of. Sherrie
Thank you for taking the time and energy to put this out for all of to use! You are wonderful and generous….
Thankx a million!!!
Great idea for catching those sliding foot pressers!!
Love this to tutorial. I’m wondering if I should also add the non slip material to the bottom side of the fabric to keep the whole thing from sliding on my wooden floor?
No need to make any changes, its already made up of the two layers, top and bottom and the binding is only around the outside, so most of the bottom layer grips to the floor.
Thank you for the quick response. I thought the bottom was the pretty material only. I’m making one or two for myself and can’t wait to share this with my sewing friends. Wonderful idea!
Thank you, i also thought the same thing. You just clarified it for me. 🙂
I can’t wait to make this. I have been sewing all day today and am sick of chasing the foot pedal. I also use a Dictaphone pedal and will make one for it too. Thank you so much for your generosity Deby.
Just came across this and I’m definitely going to have a go at making one of these. Thank you for sharing 🙂 now I’m here will also have a look around at your other stuff to.
I just put tub and tile siliconized acrylic caulk from ACE around the edge of my foot peddle let dry overnight does not move
I’ve been sewing for the last 50 years and this is one of the things that has run me nuts! I’m make it right now I sure hope it works.. Thank you so much.
Thanks so much for the tutorial! Just finished it and I love it!
Great!
Julia- Not all machines have rubber on the bottom of the petals. Deby is kind enough to share this with us. If the only remark you can offer is negative, you shouldn’t offer one at all.
When you give attention to negative people, it only makes them worse. Ignore them. Ugh … now I’ve just given negative Julia even more attention … drats!
Thank you Deby great idea nicer than my rough cut rubber liningxx
Fantastic! This could well be todays project! Thank you!!
This is so Clever! My machine has a start and stop button but I just love this!
I am sorry to hear that people are taking advantage of your generosity and stealing your tutorials and designs. Speaking for myself, I would be happy to purchase your patterns as I did the flirty skirt. Although I can purchase patterns from both JoAnn and Hancock Fabric stores when they are on sale for $1 or $2, it;s not worth all the adjustments I have to make. I still have not figured out why their measurements don’t work for me. The waist is 10 inches off and the hips are 4 inches off. Your 32 inch waist and 40 inch hip measurement pattern fits me spot almost spot on. Only have to adjust the waist by 1 inch.
To answer your question I can tell you that big commercial pattern companies use measurements that don’t really correlate to anyone’s real measurements.
As certified pattern fitter I can say that there has not been one person I’ve fitted that didn’t need serious adjustments to patterns.
It’s unfortunate that there are so many sewists who aren’t aware of how to make even simple adjustments to correct fit problems.
It’s no wonder so many people don’t find sewing an enjoyable or worthwhile hobby.
So sad the school system in America has eliminated the valuable domestic lessons of cooking, sewing and simple use of home repair tools from the curriculum. Now we have kids who can tell you how to figure a helix but can make a decent meal or sew on a button or hammer a straight nail.
Great idea, I’m teaching my granddaughters to sew & the foot keeps getting away from them! I’ll have to make each one so when come to sew!
Thank you so much i am going to make me one today. Love your patterns.
This is so useless! I nevrr had that problem because mine has rubber under it. I thought that would be normal. (Maybe only in Germany)
You are so lucky to have the non-slip built in, but for most, they don’t I think.
My machine is 20 years old and the foot pedal is plastic top and bottom. Maybe the newer machines have improved the pedal but I love this project. It works!!
Julia – It is very useful to many of us! I don’t think you need to make a negative comment when Deby has generously supplied us with this great idea. I will certainly be making one. Thank you Deby.
Mine has rubber underneath but it still slides around on my wooden floor. I know what my first job of the day is
No not useless. Actually this tutorial has helped many and people should be more appreciative of sewers sharing their tips in a well enjoyed craft.
Useless comments are for useless people.
My Bernina machine is Swiss, my Janome, Japanese, my Featherweight 221, English. NONE of these nor any machine I’ve owned have ever come with rubber under the foot control. I’ve added all kinds of products to keep the foot from crawling around, and nothing works. Im happy to see this tutorial because maybe all I need is the cushion attached to the pad. Hoping this will finally solve the issue.
Saying that a person’d tute is “useless” is rude. Reconsider what u type, as kindness is always best…
I use the non=slip material between my cutting mat and table–never a slip….and now a great solution for that annoying foot pedal.
Ohh that’s a GREAT idea!!!.. I’ve made the floor foot pedal stopper, because my floors are wood, and I’m constantly losing the pedal;(.. I think I have a heavy hand when it comes to using the rotary cutter, cause the mat always shifts on me, I’m going to try putting some of the liner I have left over under it.. Thank you!!
Do you use a whole big piece to fit your cutting mat or just a couple of smaller pieces?
That’s a nice idea but I would think the texture or the non slip material would transfer through the mat and interfere with cutting. I’ll have to try this. Presently I use 2 bulldog clamps on opposing diagonal corners of my mat. Works great! I can also add another mat to extend my cutting area for cutting out clothing patterns with my rotary cutter.
LOL! This is so much cuter than what I’m doing. I just folded the non-slick material in quarters and put it under the pedal. The non-slick drawer liner really does work. I’m going to use this pattern and make one for myself. I was looking for a more attractive solution. I use the non-stick under the cat tree too and it keeps it from sliding around and even falling over. My two cats are very active!
From the bottom of my spine, my back thanks you very much Deby! 🙂
I know just what you mean 🙂
Why did you use two layers of the non-slip? Just to add weight?
Thanks
Just for a little extra padding, to make it easier to sew on the binding and to stop it wearing out too soon. You could just do the one layer if you prefer.
This is brilliant, thank you for sharing! I just made a pad for my embroidery machine with pockets using the shelf liner & never thought of this! Love your ideas!!!
Thanks so much Tamara. I’ve been so delighted with mine – bye bye foot fishing and back-ache!
wow! Great! Could make this tutorial as a pdf download or printable page? it’s so hard to print a tutorial as a webpage. Thanks!
Sadly I’ve had to take the decision to limit some of my downloads after some people who are too lazy to do any work themselves have been selling my PDF files and patterns. I’m sorry this makes it inconvenient for all the honest people out there. I’ve made a PDF for you and will send it to your email address.
LOL … good for you Deby :).
thank you for sending to my Email. I’m not able to make this right now, and afraid I will forget by the time I get the time. You are very kind with very good ideas. JB
That is sad I recently saw kids for one if these for sale, I guess I know where they got the pattern fron now
I totally understand how you feel. I taught a slacks pattern fitting class a a local sewing store once. In the store’s next newsletter the list of classes offered included my class but was being taught by a store employee who used my handout!
The fee for the class was $5.00 less but, of course, the store owner didn’t have to split the fee with the teacher!
I quit teaching in stores after that experience!!!