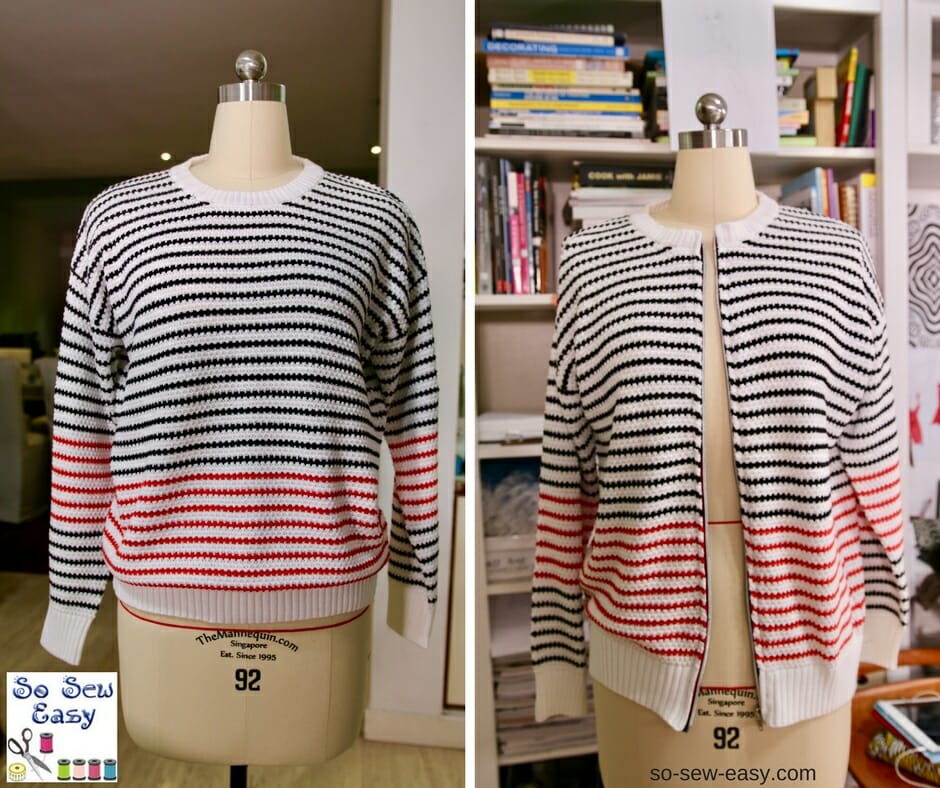
This is a tutorial on how to refashion and transform a sweater into a cardigan. Just in case you got a sweater stashed away in the closet that's been unused for many years or even decades. Or maybe someone close to you gave you one Christmas but you are not the sweater type and prefer cardigans –this simple procedure to transform a sweater into a cardigan will help you along.
We have been talking a lot about ways to save money and reuse or refashion clothing in many of our recent posts, so it's about time we start getting to work and using the things we have around the house instead of buying more fabric or, even worse, more clothes.
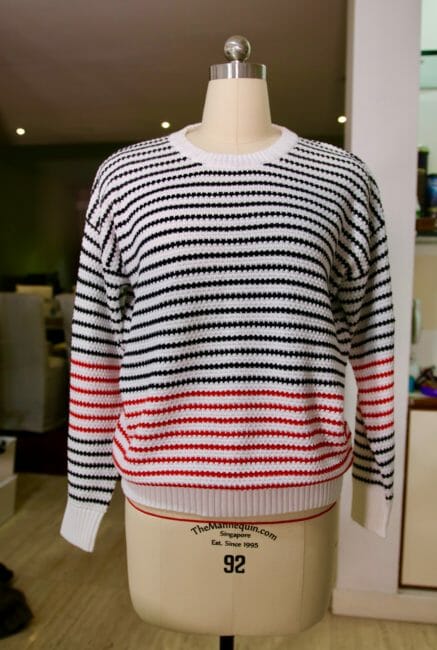
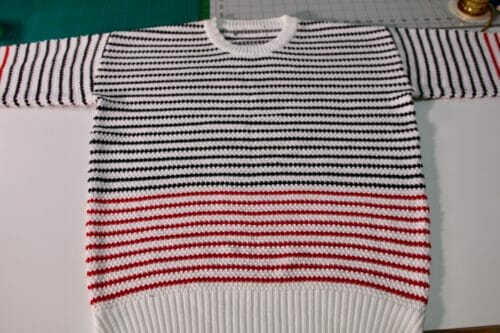
I will be using this sweater I was given for Christmas this year. While I love it, I also live in the tropics and even though it's cotton, unfortunately, I can't wear it –at least not as a sweater. It's just too warm here. But in a cardigan-style, I think this beautiful sweater would be much more functional. So let's get started with the transformation!
Materials
One sweater (of course..)
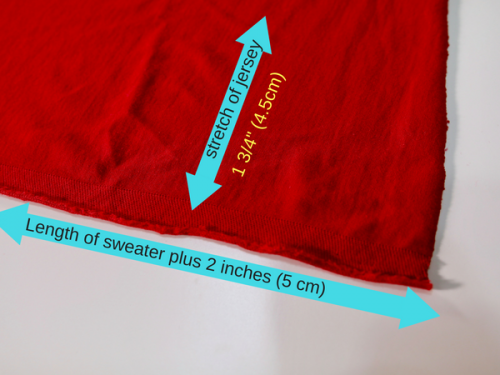
Two (2) strips of cotton jersey knit long enough to be sewn in the front of the sweater plus two inches by 1 3/4″ wide.
One (1) open end zipper the length of the front of the sweater. You'll certainly find what you need at ZipperStop on Amazon.
Ball point needle depending on the thickness of your sweater. I use Schmetz.
Transforming your sweater to a cardigan in very simple steps: Video Tutorial
Subscribe to the YouTube channel:
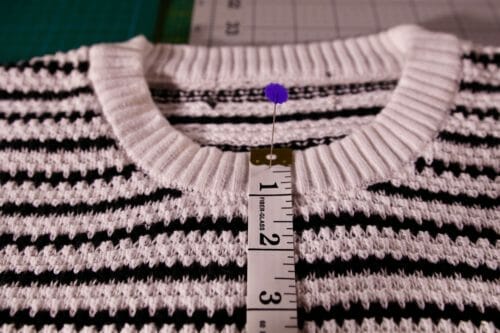
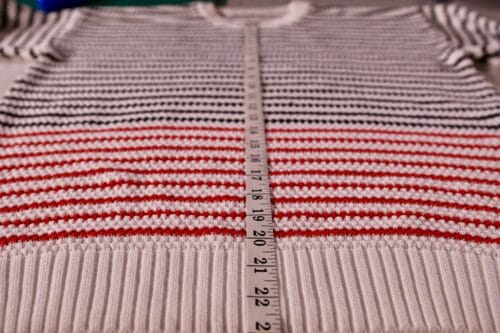
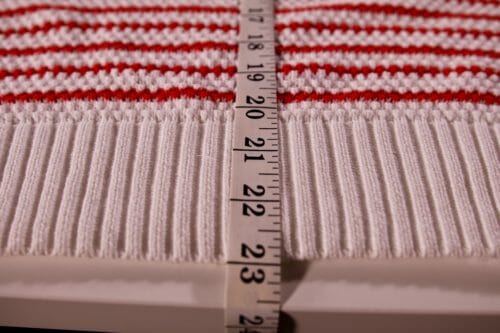
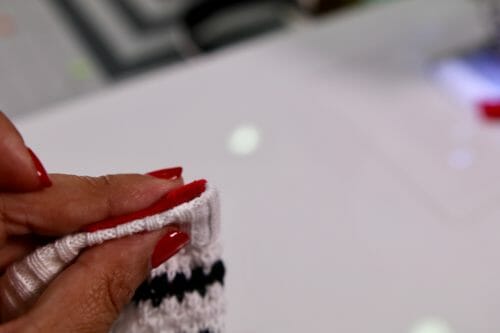
Step One: Measure the front of the sweater
You are measuring to find out how long the zipper should be and how long the strip of jersey knit needs to be that creates the edge of the cardigan and an attachment for the zipper. My cardigan is 23″ long, so I will use a 23″ long zipper.Next, I will cut two strips of cotton jersey knit 25″ long which is the length of the sweater plus two inches. Cut the two strips with the stretch going horizontally.
Mark a line down the middle of the cardigan with tailor's chalk or a washable fabric marker.
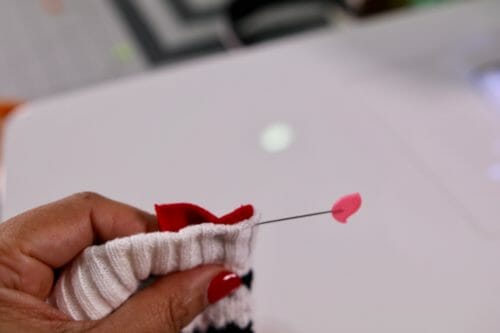
Step Two: Attach the strips
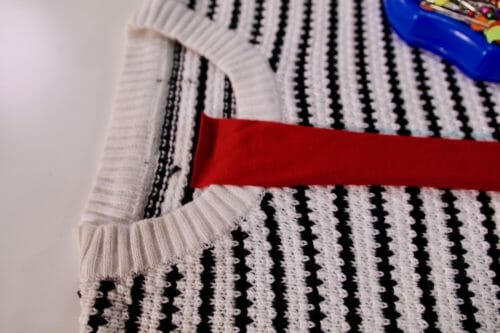
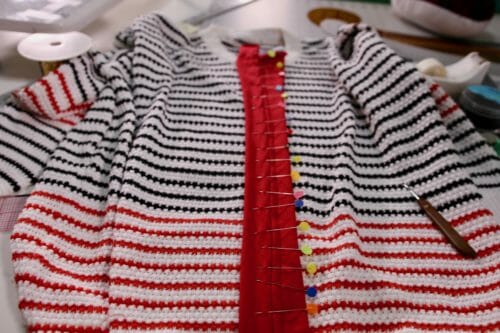
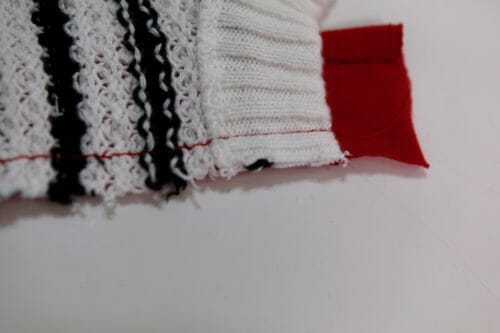
Place one strip of jersey right on top of the line and to the right you just made making sure one inch is beyond the collar and the hem.Sew the strip at 3/8″ from the mark you made or the centerline of the sweater.
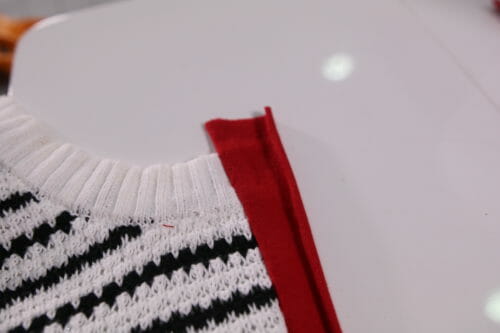
Pin the second strip next to the first one and to the left of the first strip. Sew the strips 3/8″ (1 cm).
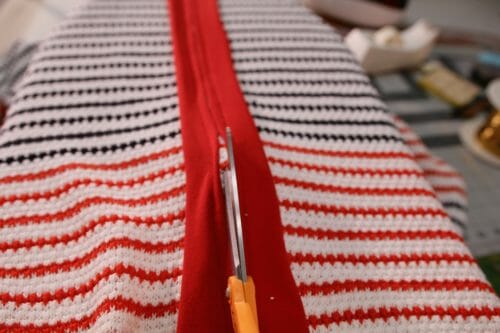
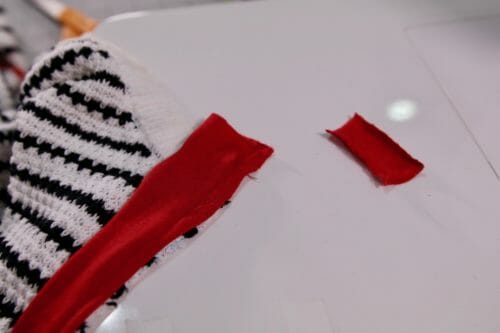
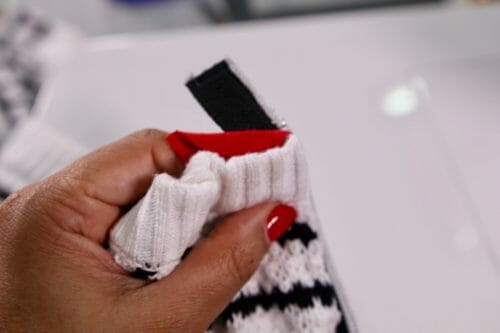
Cut the sweater right in the middle between the 2 strips.
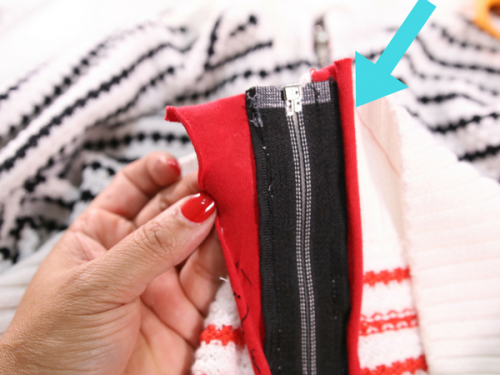
In case you are wondering why this method and not just sew the zipper straight into the sweater? Because it needs a fabric to stabilize the edges and make the zipper lay flat. Knit has a tendency to wave and look messy. Also, you will need to use more of the sweater to make a seam allowance, therefore, making the garment tighter around the waist, and that's probably where none of us want it to be tighter..
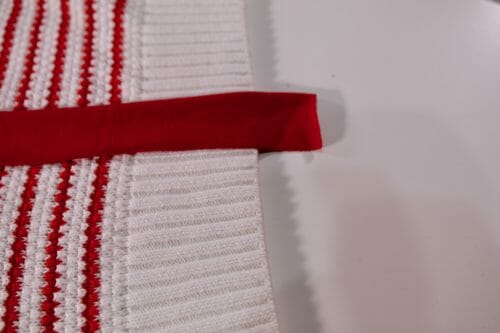
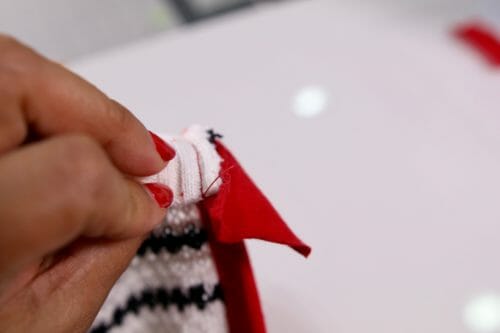
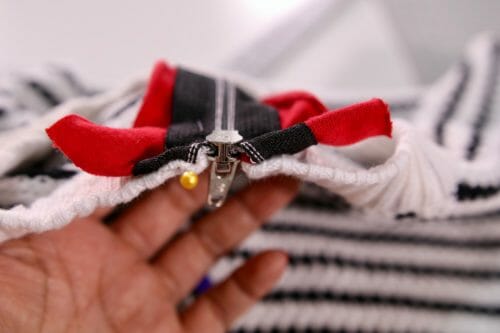
Inspect the seam and make sure they are straight. As you can see, mine is not so I will have to change that. The zipper needs to lay straight at both ends.Trim the strip by half.We need to turn the strip to the inside in order to pin the zipper. Pull the strip away from the sweater.Turn the end of the strip down.Then fold the strip in.
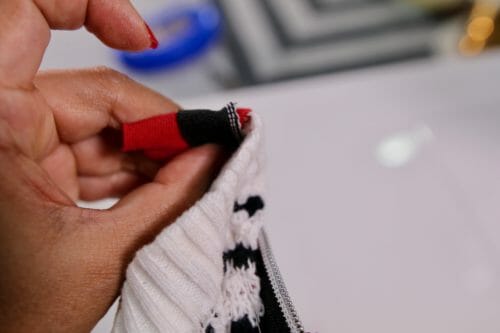
Step Three: Attach the zipper
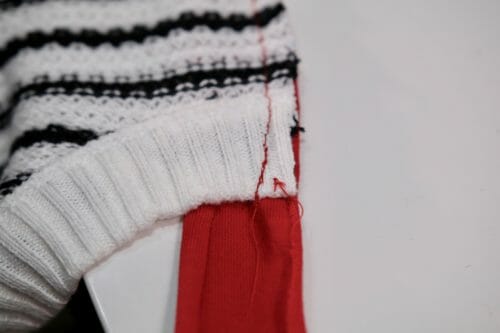
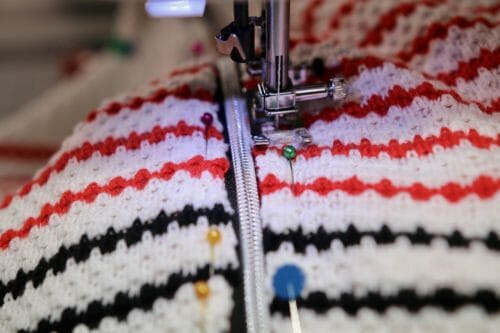
Place the cardigan front side up. Pin the zipper 1/8″ from the teeth. Pin the left side of the zipper to the right side of the cardigan and the right side of the zipper to the left side of the cardigan. Tuck the ends of the zippers between the strip of jersey and the sweater.Sew the zipper at 3/8″.Trim the jersey just 1/4″ from the zipper edge.
And there you have it! How easy was it to transform a sweater into a cardigan? Keep in mind that his technique works for men's and women's clothing. Join me next time when I will be transforming this cardigan into a vest with a hood. Given the temperature here, it's more likely that I'll wear that to the gym or walking. In the meantime, look around your hubby's wardrobe and find a sweater you can transform using this technique. He'll be glad you did.
As always, please leave us any comments or questions in the comments section below. Until next time!
PS: If you need more ideas on thrifty sewing check out these ideas.
If You'd Like To Support Our Site
If you want to help us continue to bring you a wide selection of free sewing patterns and projects, please consider buying us a coffee. We'd really, really appreciate it.
You will have to sew in a ribbon on both sides to be able to make buttonholes. Find a 3/4″ to 1″ wide ribbon. come to think of it it is a perfect tutorial, I will make it soon.
Mary B.
I was so happy to find this tutorial and video. I love zip up cardigans and hate pull over sweaters. Now I can “fix” them all. Genius !
Thanks very much, Mayra! I knit a vest for my husband, and after all of that work, I am afraid to cut it to install a zipper. I will definitely be following every step of your tutorial carefully. I hate the idea of it all unraveling!
Craftysue
Great tip/tutorial. Beautifully described. Thanks
Nancy Hurt
I have recycled several sweaters using grosgrain ribbon instead of the jersey and it works great. On one I used a fun polka dot grosgrain and added buttons and button holes which is my favorite as the fun color shows a bit!
Yes you are right Nancy! This is a really great choice.
Joan Wamsley
I’ve never used the knit to stabilize the front. I love that idea, very smart. I have a suggestion though. When sewing the zipper in, sew in the same direction on both sides, down from the top or up from the bottom, so both sides look the same. it’s awkward but looks better. And be careful to match the stripes by pinning perpendicular to the zipper while the zipper is closed. I sew one side then close the zipper and pin the other.
You can try and me know how you did. If you do not want the zipper showing you can match the zipper and the jersey to the cardigan or add buttons instead. I just think I would have a harder time trying to match the stripes.
Linda True Norman
Love it. Full sweaters are too hot for Texas – now I can make them useful with this perfect solution!
I have a couple of pullover hoodies I’ve been wanting to do this with, but I haven’t figured out what to do with the hoods. The hood on each is bulky, no matter how much I try to get it flat when wearing. (I don’t wear it up.) The hood is double layered. Any ideas how to change it so it’s not a hood without a lot of bother?
You could change the hood into a bomber jacket collar using a ribbing fabric if the hood fabric is too thick. However remember to match the ribbing with the cuffs and hem. This would make a great tutorial 🙂
Marty
Thanks: now I know how to make a vest from a sweater, too!
I am so thrilled to find this tutorial. I have quite a number of sweaters that I would like to transform. Some of them, the neck feels tight on me, but I love the sweater, and the blouse I wear with them never gets seen either…so now, converting them, my blouse will show, it won’t be two tight on my neck and I can zip it down and take it off completely without feeling like I’m undressing in front of others when I do. Thank you! Thank you! Thank you! Now, to get the needed supplies and get sewing. Blessings to you.
DaVerne Wood
What a great idea and thank you for the easy to understand directions and pictures! I am enjoying your site sew much!! 😉
M Gail Laub
Great idea! The only thing I would do differently is sew both sides of the sweater in the same direction from neck to hem. That way the stripes would not pull in opposite directions beside the zipper. Can’t wait to use this!
Judy Burrell
Love it. Going to try it
Lorraine M Glach
I really like this transformation! Thanks for the tutorial!!
anned
Great idea – but how do you manage to sew the jersey strips to the sweater without sewing through both layers (front and back) of the sweater?
I placed my hand underneath between the two layers and removed the detachable sewing table for the machine. Yes this is a point you need to remember even when you are cutting the sweater which I placed on the ironing board.
If you noticed I start sewing the zipper through the bottom I feed the zipper under the foot and as I am sewing I keep my hand under to avoid seeing the jersey and other parts of the sweater. Please pause the video when I start sewing and watch also at end of the zipper where my hand is. Hope is clearer now. Let me know if it is not 🙂
Kaz
Great and thanks for the clear instructions!
Sylvia
This is a great tutorial! I was a little confused as to placement of the jersey strips, over or on the center line, but overall a very clear tutorial. And a great looking cardigan! Thanks so much.
Diane Cullum
I love that sweater, turned cardigan!
karen
Mayra, that is a wonderful idea! Stitching the strips in centre front before cutting is brilliant! I intend to try it.
Quick question, the Cotton of the zip is enough to stabilize the entire front? The stitches won’t rip?
Thank you.
Karen
No they will not come undone, if you have a very easy to ravel sweater you can stitch two rows per side or use a zigzag to catch both the sweater and the jersey.
Clovis
Great idea. Thanks.
halina2017
Great idea, and instruction. Thank you !
Margaret
REALLY GREAT IDEA!! Couple questions: is it possible to use woven fabric as a stabilizer?
When sewing on the zipper, is it possible to sew it to the stabilizer from underneath to ensure a steady stitch?
Going to have to try this.
Thanks
Hi Margaret, I can see why you would want to try this. I am the worst person to ask because I am always willing to experiment. My only concern is that between the zipper and the woven fabric the front might look a bit stiff when you close the zipper. To preserve the drape of the fabric I would not try. Use a zipper jacket and it will be plenty stabilized by the zipper tape. Of course this is just my humble opinion, let me know what you ended up doing. Kind Regards, Mayra
Linda
Would it work if you sandwich the zipper between the jersey strip and the sweater and then fold it over?
Yes it would, as long as it does not interfere with the zipper reaching the top. I have seen a tap with a snap on french kids clothes. The detail is designed to protect the skin of the neck touching the cold metal. A very nice and elegant touch.
Wendy Mangrum
I would cut the knit fabric in one piece. Mark the ce ter on the strip and sew on each side of the ce ter Mark. Seems easier than using two strips of knit.
Judy G
Great tutorial! Putting the jersey facing on BEFORE you cut the sweater is fantastic. Thanks!
Pamela Joy
Thanks for the video Myra! Do you think this technique would work on a sweatshirt??
What a wonderful up-cycling project!! Thanks for the great tutorial! However, I believe there might be a step missing. We pin the second jersey strip to the left of the first strip and then the next step is to cut the sweater. Don’t we need to sew the second strip before cutting?
Yes, hope you try. Works on any type of sweater including turtle neck.
Kat
Thank You. I will be trying this.
Ana Sullivan
I had no idea that Zipperstop sold zippers in all sizes. I hunted for a zipper to repair a workout jacket I had and couldn’t find one. The closest match was 3″ off. I threw it out and bought a new jacket. Now I know I can shop for unique sizes here. Thank you.
We are delighted that you found your way to So Sew Easy! We are here to inspire you, guide you, and also learn with you.
If you can donate a few dollars to help us keep running the site, we would be very grateful!
Subscribe to Our Sunday Email and Never Miss a FREE Pattern!
To provide the best experiences, we use technologies like cookies to store and/or access device information. Consenting to these technologies will allow us to process data such as browsing behavior or unique IDs on this site. Not consenting or withdrawing consent, may adversely affect certain features and functions.
Functional
Always active
The technical storage or access is strictly necessary for the legitimate purpose of enabling the use of a specific service explicitly requested by the subscriber or user, or for the sole purpose of carrying out the transmission of a communication over an electronic communications network.
Preferences
The technical storage or access is necessary for the legitimate purpose of storing preferences that are not requested by the subscriber or user.
Statistics
The technical storage or access that is used exclusively for statistical purposes.The technical storage or access that is used exclusively for anonymous statistical purposes. Without a subpoena, voluntary compliance on the part of your Internet Service Provider, or additional records from a third party, information stored or retrieved for this purpose alone cannot usually be used to identify you.
Marketing
The technical storage or access is required to create user profiles to send advertising, or to track the user on a website or across several websites for similar marketing purposes.


Great idea, but how do you prevent the sewn in zipper from causing waves, or unevenness in the finished cardigan?
I think this is a wonderful idea and would probably work just as well with a sweatshirt.
What would you do differently if you prefer buttons or snaps ?
You will have to sew in a ribbon on both sides to be able to make buttonholes. Find a 3/4″ to 1″ wide ribbon. come to think of it it is a perfect tutorial, I will make it soon.
I was so happy to find this tutorial and video. I love zip up cardigans and hate pull over sweaters. Now I can “fix” them all. Genius !
You are welcome Mary!
Thanks very much, Mayra! I knit a vest for my husband, and after all of that work, I am afraid to cut it to install a zipper. I will definitely be following every step of your tutorial carefully. I hate the idea of it all unraveling!
Great tip/tutorial. Beautifully described. Thanks
I have recycled several sweaters using grosgrain ribbon instead of the jersey and it works great. On one I used a fun polka dot grosgrain and added buttons and button holes which is my favorite as the fun color shows a bit!
Yes you are right Nancy! This is a really great choice.
I’ve never used the knit to stabilize the front. I love that idea, very smart. I have a suggestion though. When sewing the zipper in, sew in the same direction on both sides, down from the top or up from the bottom, so both sides look the same. it’s awkward but looks better. And be careful to match the stripes by pinning perpendicular to the zipper while the zipper is closed. I sew one side then close the zipper and pin the other.
Great tip, Thank you Joan!
Could you even do an invisible zip?
You can try and me know how you did. If you do not want the zipper showing you can match the zipper and the jersey to the cardigan or add buttons instead. I just think I would have a harder time trying to match the stripes.
Love it. Full sweaters are too hot for Texas – now I can make them useful with this perfect solution!
Great idea and beautifully demonstrated. Congratulations Mayra!
I can’t wait to try this!!
Hope you do Maggie!
I have a couple of pullover hoodies I’ve been wanting to do this with, but I haven’t figured out what to do with the hoods. The hood on each is bulky, no matter how much I try to get it flat when wearing. (I don’t wear it up.) The hood is double layered. Any ideas how to change it so it’s not a hood without a lot of bother?
You could change the hood into a bomber jacket collar using a ribbing fabric if the hood fabric is too thick. However remember to match the ribbing with the cuffs and hem. This would make a great tutorial 🙂
Thanks: now I know how to make a vest from a sweater, too!
Great idea and excellent tutorial! Thanks a lot!
I am so thrilled to find this tutorial. I have quite a number of sweaters that I would like to transform. Some of them, the neck feels tight on me, but I love the sweater, and the blouse I wear with them never gets seen either…so now, converting them, my blouse will show, it won’t be two tight on my neck and I can zip it down and take it off completely without feeling like I’m undressing in front of others when I do. Thank you! Thank you! Thank you! Now, to get the needed supplies and get sewing. Blessings to you.
What a great idea and thank you for the easy to understand directions and pictures! I am enjoying your site sew much!! 😉
Great idea! The only thing I would do differently is sew both sides of the sweater in the same direction from neck to hem. That way the stripes would not pull in opposite directions beside the zipper. Can’t wait to use this!
Love it. Going to try it
I really like this transformation! Thanks for the tutorial!!
Great idea – but how do you manage to sew the jersey strips to the sweater without sewing through both layers (front and back) of the sweater?
I placed my hand underneath between the two layers and removed the detachable sewing table for the machine. Yes this is a point you need to remember even when you are cutting the sweater which I placed on the ironing board.
Still not following how putting your hand betweem the layers and removing the sewing table keeps the back from going under the needle.
If you noticed I start sewing the zipper through the bottom I feed the zipper under the foot and as I am sewing I keep my hand under to avoid seeing the jersey and other parts of the sweater. Please pause the video when I start sewing and watch also at end of the zipper where my hand is. Hope is clearer now. Let me know if it is not 🙂
Great and thanks for the clear instructions!
This is a great tutorial! I was a little confused as to placement of the jersey strips, over or on the center line, but overall a very clear tutorial. And a great looking cardigan! Thanks so much.
I love that sweater, turned cardigan!
Mayra, that is a wonderful idea! Stitching the strips in centre front before cutting is brilliant! I intend to try it.
Quick question, the Cotton of the zip is enough to stabilize the entire front? The stitches won’t rip?
Thank you.
Karen
No they will not come undone, if you have a very easy to ravel sweater you can stitch two rows per side or use a zigzag to catch both the sweater and the jersey.
Great idea. Thanks.
Great idea, and instruction. Thank you !
REALLY GREAT IDEA!! Couple questions: is it possible to use woven fabric as a stabilizer?
When sewing on the zipper, is it possible to sew it to the stabilizer from underneath to ensure a steady stitch?
Going to have to try this.
Thanks
Hi Margaret, I can see why you would want to try this. I am the worst person to ask because I am always willing to experiment. My only concern is that between the zipper and the woven fabric the front might look a bit stiff when you close the zipper. To preserve the drape of the fabric I would not try. Use a zipper jacket and it will be plenty stabilized by the zipper tape. Of course this is just my humble opinion, let me know what you ended up doing. Kind Regards, Mayra
Would it work if you sandwich the zipper between the jersey strip and the sweater and then fold it over?
Yes it would, as long as it does not interfere with the zipper reaching the top. I have seen a tap with a snap on french kids clothes. The detail is designed to protect the skin of the neck touching the cold metal. A very nice and elegant touch.
I would cut the knit fabric in one piece. Mark the ce ter on the strip and sew on each side of the ce ter Mark. Seems easier than using two strips of knit.
Great tutorial! Putting the jersey facing on BEFORE you cut the sweater is fantastic. Thanks!
Thanks for the video Myra! Do you think this technique would work on a sweatshirt??
Yes Absolutely, it will work as long as you cut the jersey strip parallel to the selvage. Let me know how you go. Kind Regards,
Mayra
I’la try this for sure…now, let’s go hunting in my closet!
Happy Hunting! 🙂
What a wonderful up-cycling project!! Thanks for the great tutorial! However, I believe there might be a step missing. We pin the second jersey strip to the left of the first strip and then the next step is to cut the sweater. Don’t we need to sew the second strip before cutting?
You are right! Yes you need to pin and sew both strips before cutting. Thanks for letting me know.
What a great idea, can’t wait to try it looks so sew easy. Thank you
You are most welcome!
Lovely, you can’t tell that it was ever a sweater
Yes, hope you try. Works on any type of sweater including turtle neck.
Thank You. I will be trying this.
I had no idea that Zipperstop sold zippers in all sizes. I hunted for a zipper to repair a workout jacket I had and couldn’t find one. The closest match was 3″ off. I threw it out and bought a new jacket. Now I know I can shop for unique sizes here. Thank you.
Liked this
You are welcome!
I like it! Great idea using the jersey fabric strips. Thank you.
It is a way to stabilize the knit and prevent raveling.
I would never of thought of that. It looks lovely as a cardigan and so easy to do.
Yes it is! hope you give a go.
It is! it works with buttons and snaps as well.