


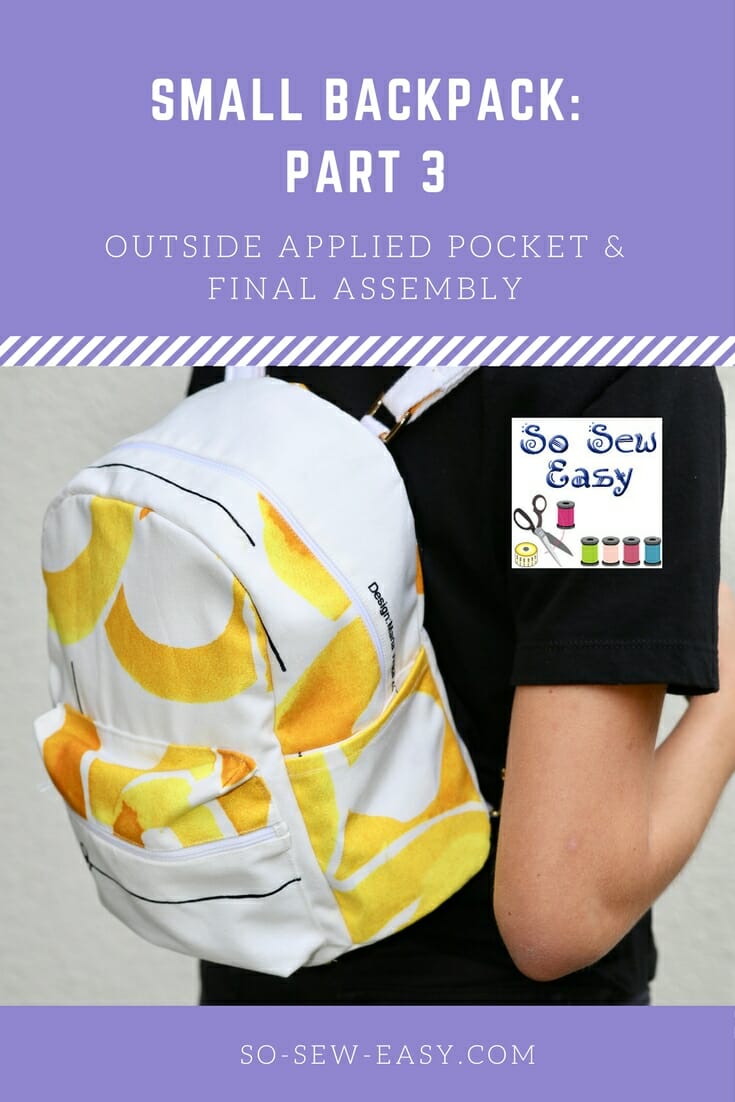
 In this third and final part of the Small Backpack Pattern sew along, we're going to be sewing the applied pocket and doing the final assembly of the bag. Hopefully, everyone has been following along from Part 1, where we cut the small backpack pattern, attached the outside zipper, added the lateral small pockets and made the small inner pocket. Then in Part 2, we sewed the outside zipper, sewed the backpack straps and attached the backpack strap hardware.
 Additional Materials for this Section:
 Additional Materials for this Section:
- Bias tape 1 3/4″ x 28″ (shorter side)
- Bias tape 1 3/4″ x 29″ (longer side)
- Bias tape 1 3/4″ x 30″ (bottom)
I would highly encourage you to try to make your own bias tape. You can find a great tutorial on just how to do this here: Making Continuous Bias Binding Tape.
Video Tutorial
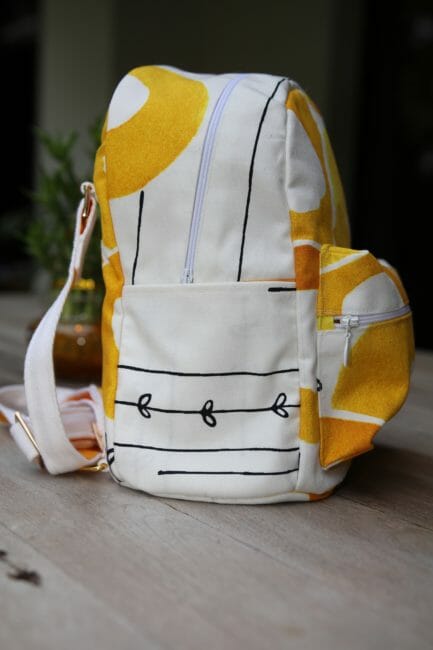
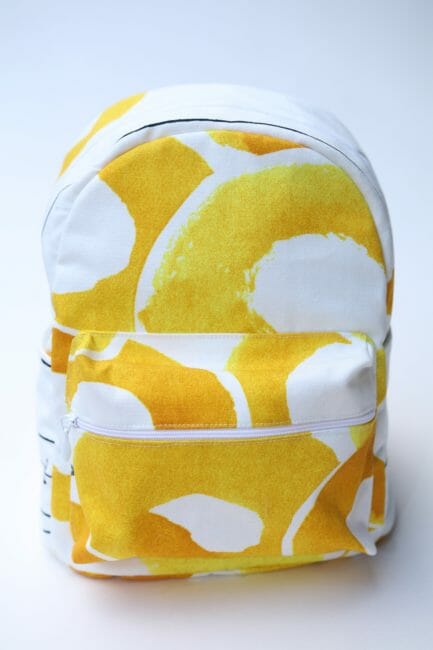
Step One: Attaching the front pocket
This pocket detail will make or break your small backpack. It requires a bit of patience and precise stitching. If you are a beginner, take your time doing this step and you will gain an enormous amount of self-confidence.
Below is how to prepare your zipper for the pocket provided on the small backpack pattern. The full video tutorial will be published next Tuesday. In the meantime, you can make the inner pockets and attach the outside zipper.
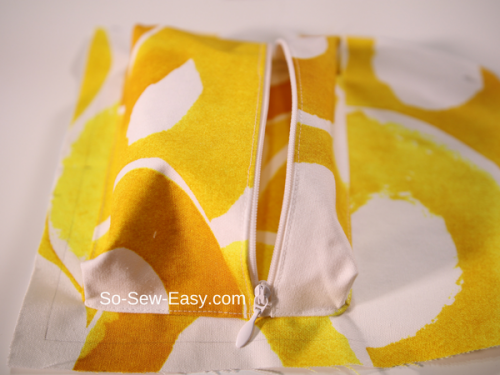
How to add the zipper to the applied pocket
Cut two tabs at 1″ by 1 1/2″.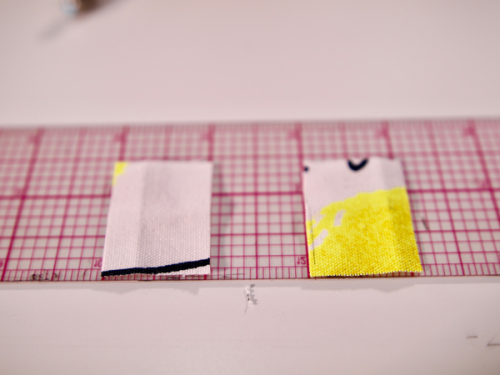
Fold the ends of the tab at 1/4″ and pin at both ends of the zipper.
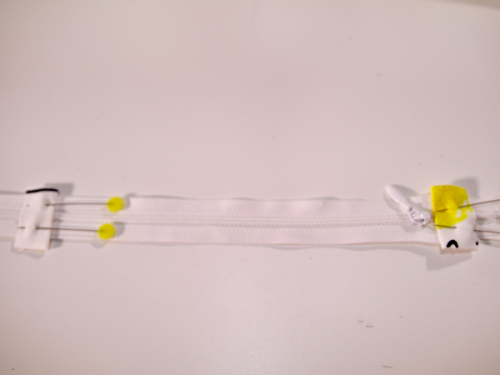
Sew at 1/8″. Pin the top part and lower part of the pocket. Sew at 1/8″ from the teeth of the zipper.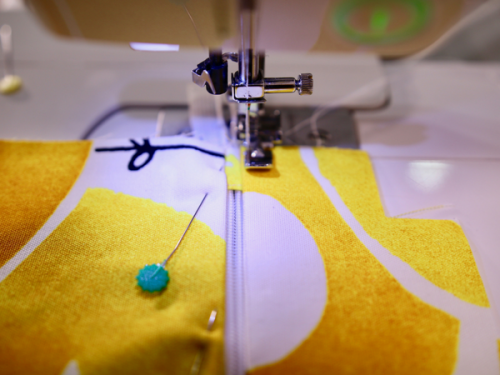 Basically, your zipper and tabs should finish with the measurements of the top and bottom of the pocket.
 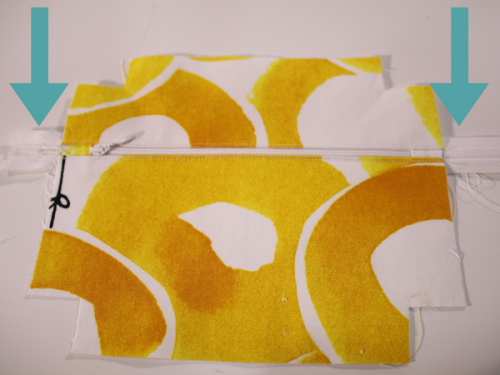 So trim the zipper and tabs to be within the edges of the rest of the pocket.
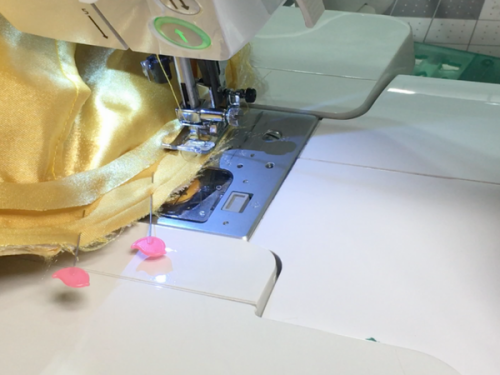
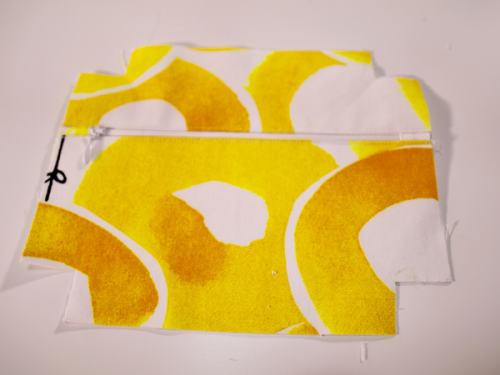 On the wrong side of the pocket, box the corners sewing at 1/4″.
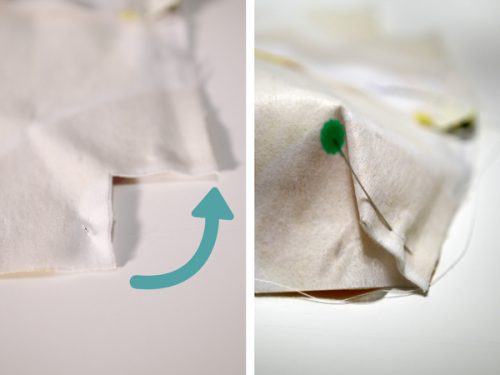
Fold 1/4″ around the pocket and pin 1″ from the sides and bottom edge.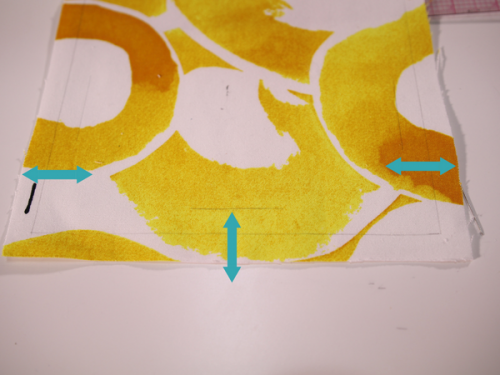
Sew the pocket down at 1/8″.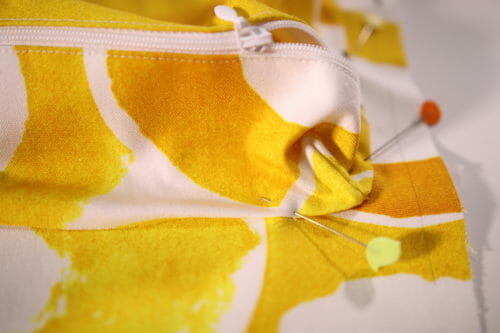
Step Two: Assembling your small backpack
Pin the back side to the gusset. Pin the center first then work on one side then the other. I have placed the straps inside the back pocket and pin the pocket so I do not sew it accidentally. 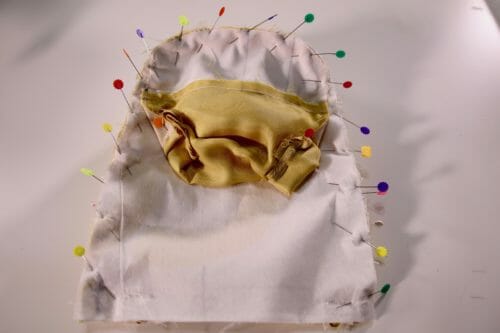
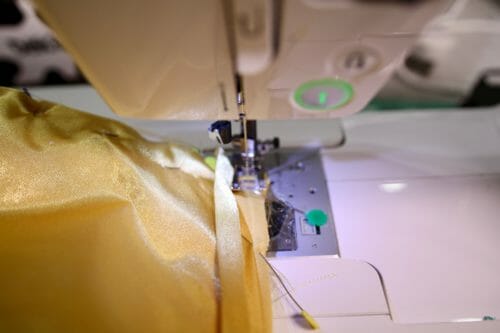
Sew at 1/4″. Yes, I do use that many pins because I like to simulate a stitch, and I hate to rip so if there is something wrong with the pattern I can change it immediately.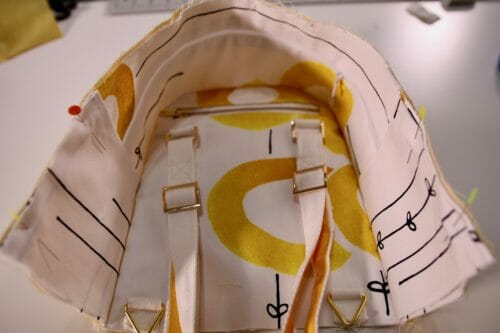
Pin the front to the front side of the small backpack. Work from the middle to the sides as previously mentioned. 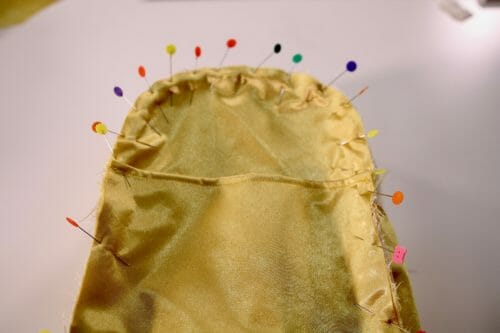 Note: The extra pocket in the lining shown above. This is optional and there's no pattern. If you want to make this as well, simply tracie the front of the backpack pattern (shown below in red) to the height of pocket you want and then add the hem allowance at the top.
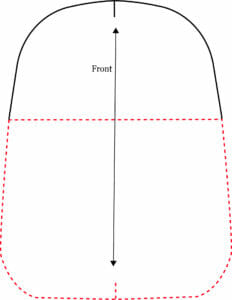
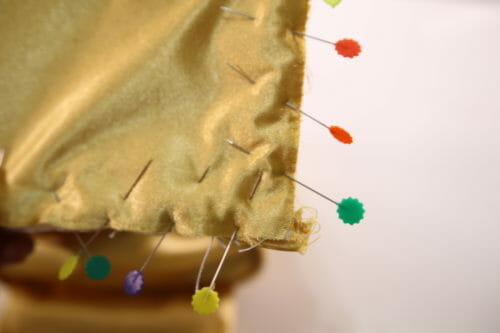
Add the small pocket you made in Part 1 of the sew along to the back and sew at 1/4″.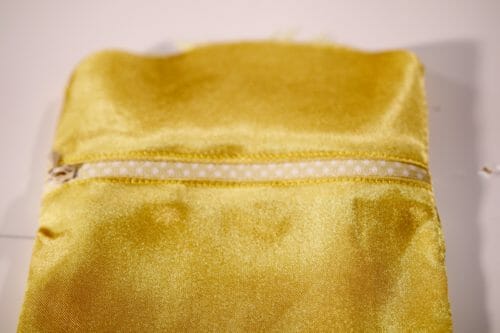
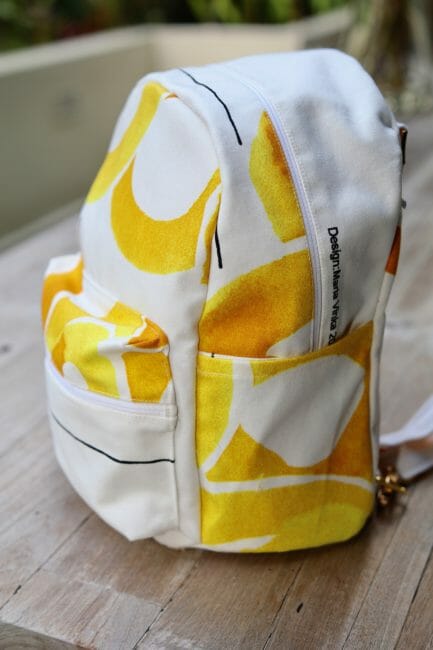
Step Three: Applying bias tape and closing the small backpack
For the next step on closing the small backpack, we need to make bias tape that is long enough to cover all the exposed seam allowances. Here is a tutorial on how to make your own bias tape. We need 3 strips of bias tape between 28, 29 and 30 inches by 1 3/4″.  Pin the bias tape to the raw edges of the backpack and sew at 1/4″.
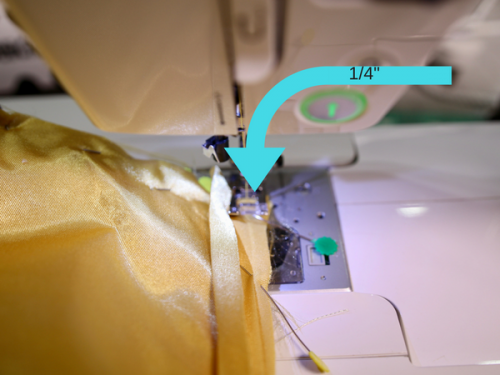
 Fold the tape over the seam allowance and sew very close to the edge.
 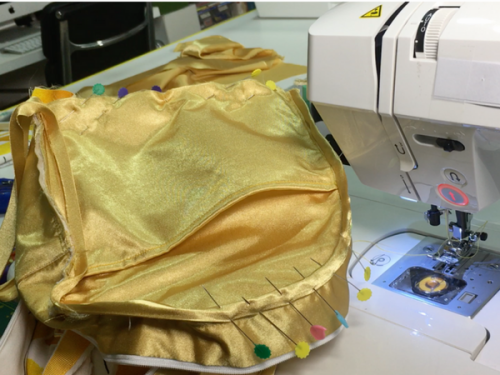 Pin the bottom, matching the curve and the corners. This step is the trickiest because we have two rounded corners and two pointed corners. Use as many pins necessary to ensure the bottom fits. If you have sewn all the seams the same size it should.
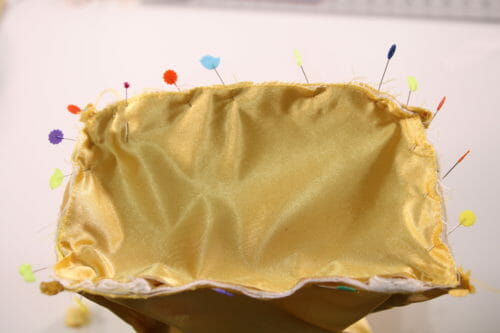
 Sew at 1/4″.
 Pin the tape at one of the sides, folding at the beginning about 1/2″ and ending one inch past the fold.
  Cut the tape past the fold. This will ensure you will not see a raw edge.
 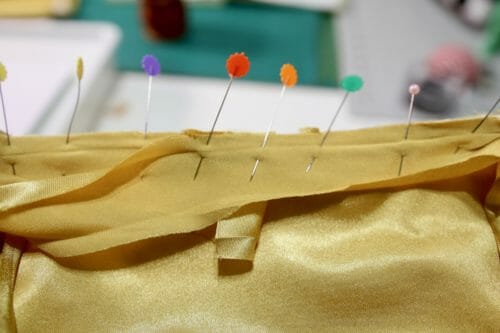 Sew at 3/8″.
 Fold the tape over the raw edge end pin. Sew very close to the edge. You should hardly be able to see where the tapes join.
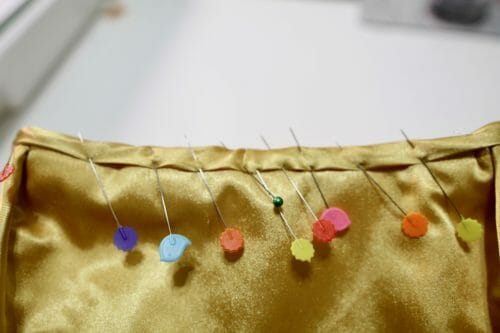


And you're done!
This is the end of the sew along, turn your backpack right side out and you are ready to apply a bit of steam here and there to make the seams lie flat. Ready to be worn and enjoyed!
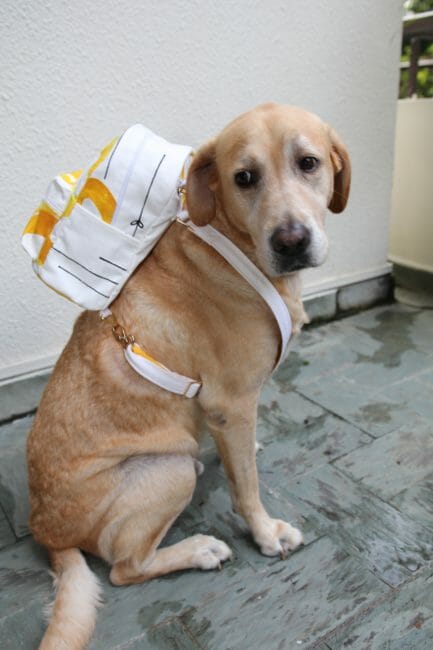
P.S. I think my George doesn't like it, so I will give it to my daughter. I will find something else for him very soon 🙂
Bonus Section: How to draft an easy applied pocket.
While it may look difficult, an applied pocket is actually very easy to draft and sew. This type of pockets is frequently found on leather bags, fashion saddle bags, backpacks, shooting vests, fishing vests, and cargo pants.
This style of applied pocket is one of the easiest of them all. It has an exposed zipper and boxed corner. I will show you how to draft your own pocket to apply it to any size bag, however, the one you need for the small backpack is already included in the pattern.
First, determine how big you want your pocket to be in relation to your backpack. Normally this pocket in a backpack covers the lower half of a backpack.
Tools:
- draft paper any kind
- pencil
- ruler
Trace a rectangle that is as wide (minus 2″) and as long as half of your backpack. Divide this rectangle horizontally into 3 equal parts. Separate the two parts by cutting the first part off. This will become the top of the pocket.

Trace the corners as shown in the picture below. The length of the lines is one inch, this is the industry standard, normally this pocket is not as deep as other applied pockets which I will cover in the future. 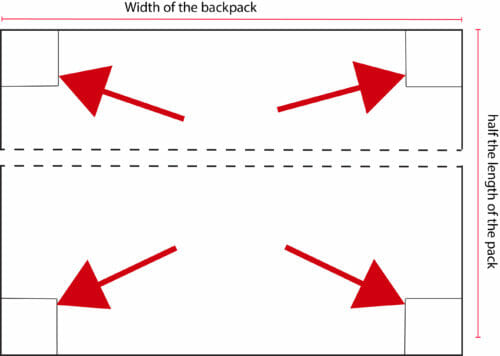
Erase the corners and add a 1/4″ seam allowance where the zipper will be sewn. 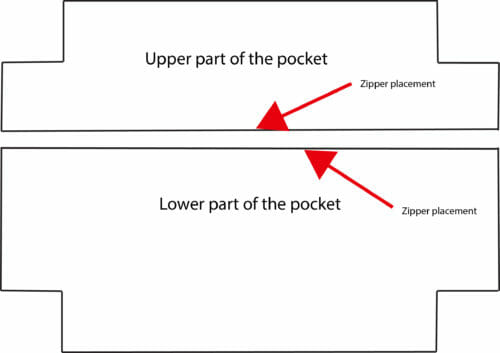


Is there a printable version of the instructions. I do better with printed version rather than video?
I will make this………….I will, I will, I will!!!! Very cute bag. I appreciate the challenge. Thanks so much for the detailed tutorial and wonderful illustrations. Can’t wait to view video and begin. 🙃 …
Hi Emma, love your enthusiasm!
I just made my second bag, and decided I should pay you for the pattern I have. Gotta give back to people like you who put things out there free for us to learn from. Thank you.
Hi Carolann, when I read comments like this my eyes filled up with tears, sometimes I feel I want to give up but then you happened and it is enough reminder to keep going. Thank you from the bottom of my heart!
Hi! I loved making this bag so much! I started sewing a few months ago and this really helped me learn different things about sewing! i added a few extra details like buttons on the side and a border going around the back. Thank you so much for making this free and easy to use
Love your patterns but you say this is not for beginner yet others say this is really easy 🙂 who to believe ?
Hi Janet, it is an easy project if you are willing to work through all the details of the backpack, not for beginners since there are a few details that you need to have prior knowledge such as sewing a zipper, sewing an applied pocket and have a general idea on how bags are constructed by having made a few before hand. This is not an instant gratification project since it needs following instructions and watching the videos that accompany this project. IF you are someone who likes a challenge,and loves learning this project will be easy but it will take you a couple od days to finish.
What are the final measurements for the backpack (LxWxH)?
I LOVE this pattern and such detailed instructions! I have been wanting to make a backpack to take hiking that isn’t too big and I can add padding to the part that rests on the back!! I have titanium rods in my back so if it’s not padded it will really irritate my back, this is so perfect! And thank you for making it free!
Wow Karen, you must have quite a story for those titanium rods koodos for keep hitting the trail. Hiking is my very favorite thing to do outside the house. Love a picture of you with the backpack if you could share one that would be so fantastic. I would add it to the tutorial with your permission. Kind regards,
how would I make a live size version of that bag
Hi Natalie, I am working on it so if you could wait a bit you will have a pattern to work with.
hi…is there a link where i can print the instructions on how to make this bag please…rather than having to come back and forth to my pc…thank you
You can watch the video https://www.youtube.com/watch?v=Uy0_zMvB-ig&t=838s
Nice tutorial Mayra but pls I av a problem with the gusset can u tell d measurement used for the front and back gusset and also d measurement for the bottom of the bag. Its really a very nice bag and I really want to get it am a beginner by the way. Thank you very much for the free tutorial
Hi Abisola, why not print the pattern? It is free.
Hey Mayra I downloaded the bag pattern but measurements was not included so I was hoping u could help me with the measurements thanks a million
I lanre, the backpack measurements are Height 10″ X Width 8″ and Depth 5″. Enjoy the project!
Just finished the bag, had some issues with lengths not matching up but other wise it’s nice. Used an old pair of jeans for the outside and it worked well, though my poor sewing Machine! Suggestion though to anyone making this add a small loop or handle at the top before finishing the bag, I thought of it but didn’t follow through and I regret that
The pattern does not have any length issues. I agree the loop is a must if you want to carry it that way.
yo igual lo realice con unos jeans viejos pero tambien tuve problemas con las medidas que no coinciden pero ahora que lo pienso debe ser por no respetar las medidas de costura.. la tira de los costados me quedo larga.. soy muy principiante pero me encantan los retos asi que ya lo termine en 2 dias! me quedo horrible ? pero volvere a hacerlo cuando este mas entrenada jaj muchas gracias por el patron me encanto?
I also did it with old jeans but I also had problems with the measurements that do not match but now that I think about it it must be for not respecting the sewing measures .. the strip on the sides is too long .. I am very beginner but I love them the challenges so i finished it in 2 days! I stay horrible ? but I will do it again when I am more trained haha thank you very much for the pattern I loved it?
Hola Yoha, es muy cierto hay que ser casi cientifico y respetar con mucha disciplina los margenes de costura. Para ser principiante y tomar este patron tengo que decirte que tienes agallas de Juana de Arco, y si tienes razon la proxima vez te sera mucha mas facil. asi que animo linda!
Hi! you mention that it can be worn cross body but I don’t see how
Hi Tesa, it is on the video tutorial. Simple hook the two lobster claws together.
Thank you!
Thanks for your tutorial and pattern, Mayra. I noticed in your illustrations that you changed the front of your pattern from rounded bottom corners to square. Would you please tell me how to attach the rounded sides, front and bottom? I’m having a bit of trouble with it. Thanks a million
Hi Gail, the front is rounded and the back are squared.
I had the same issue, I wish I’d have looked closer at the photographs before sewing the bag together. I did lots of fiddling trying to make the curved front bottom work, but in the end I couldn’t. I ended up making it as straight as I could. Next time I’ll be using two back pieces.
Otherwise it’s a good pattern and makes a really cute bag.
The key is to flatten the fabric and pin at the end is it not exactly curved as you can see in the picture. It also takes a big effort for your machine to negotiate the thickness of the many layers which is why you should use a walking foot. I hope that helps but you are right this is not an easy pocket to sew.
Thank you very much for such a detailed tute. Looking forward to making it. George doesn’t look at all impressed, but I must say, it does fit him well. 🙂
Thanks Mayra for this backpack tutorial. The work you and Deby put into these free tutorials is very much appreciated.
You are welcome Sarah. It has been hard work I have to admit 12 to 16 hours a day 7 days a week since late 2015. Can not complain I love doing it. If I was not doing this I would be….sewing anyways 🙂
Thank! Great tutorial. I appreciate it, even if George isn’t crazy about the product, lol. He’s so handsome!
Thank you, I will let him know 🙂
Thanks for the great tutorial and George is a wonderful model!
Indeed he is, the only model that looooves food, works for treats and has no attitude.
I think George likes it, it is just NOT his color. THNK YOU for a great TUT!
Hugs
Maggie
Most welcome Maggie!