


Babies will soon be popping out everywhere so my sewing for all the new babies continues. There's one thing I know, when they aren't sleeping / feeding / screaming, babies are pooping. One of my expecting friends showed me the changing mat she used first time round and just told me – it's just so big. I don't need all these pockets and things, all these bells and whistles. Just make it simple and small enough to carry about, but big enough at the same time. And it needs a wipe clean inner surface.
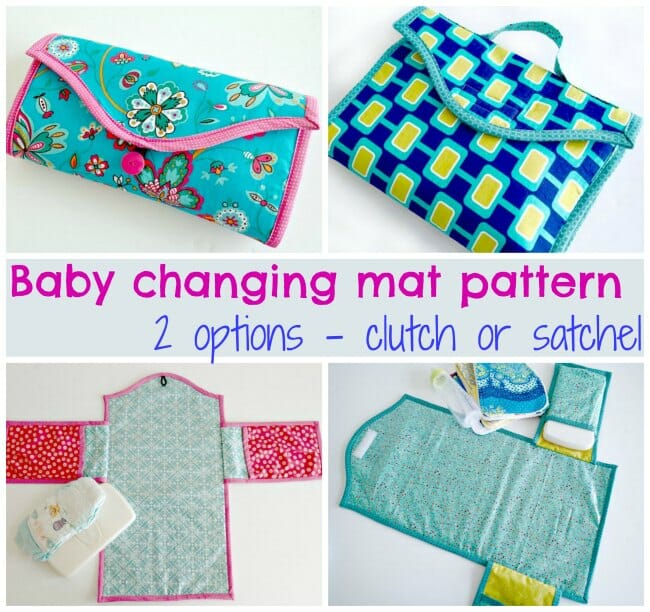
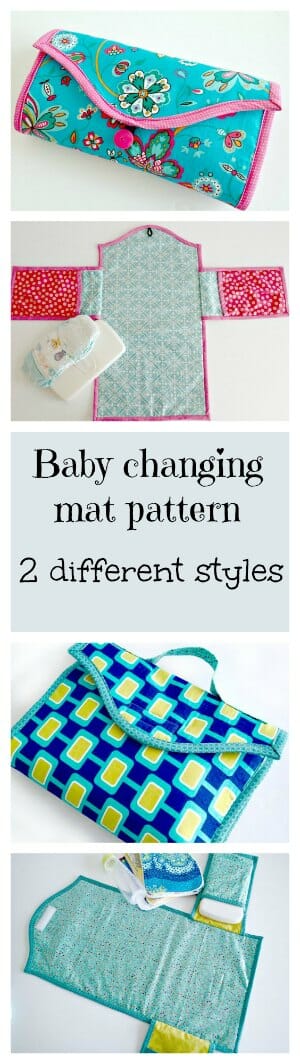
So I made one, and although it's great and is already on its way to a new home, I wanted to make one that closed up even smaller so I made a second version too. Here is the pattern and brief instructions for both.
Making up the baby changing mat pattern
You will need:
- 1 yard of fabric total – all the same or mix and match prints
- Piece of vinyl – 12 x 24 inches (optional)
- Low loft batting or fusible fleece – 12 x 24 inches
- Ready made bias tape or make your own from 1 fat quarter
- The pattern – download below
- Closures – sew on velcro or button and elastic loop
Download your Baby Changing Mat pattern pieces and instructions here. The pattern can be downloaded from my design account at Payhip.
If you have any trouble downloading, opening or printing the pattern, please see this post - How to download PDF sewing patterns.
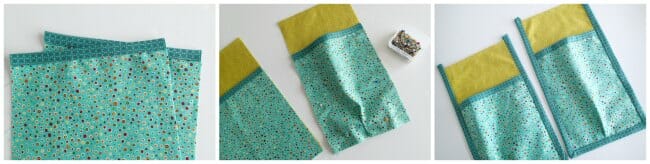
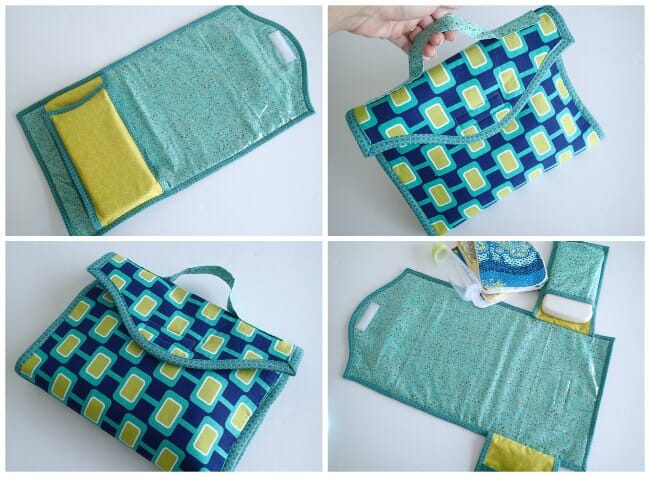
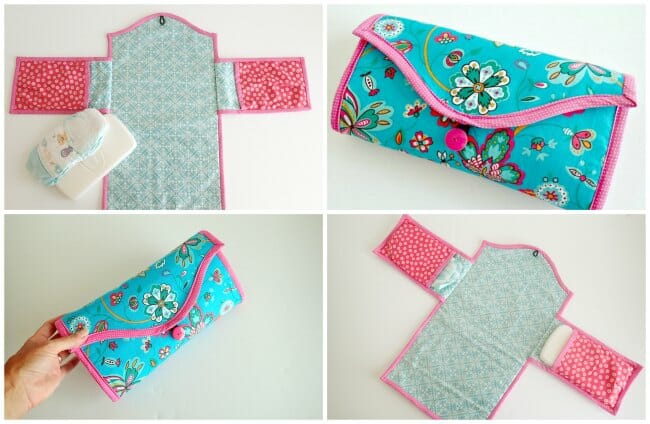
Option 1 – satchel style with handle
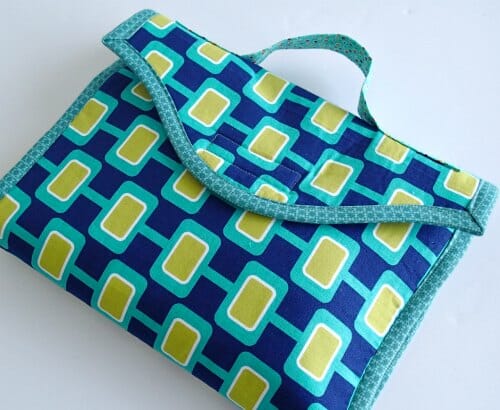
This bag is a little more open and loose in style than the second. It has a carrying handle and the pockets are placed at the bottom of the bag for easier access when you have a wriggling baby on there. But because of the lower pocket placement it doesn't wrap up as tightly as option 2 below. Pick which one you like best – both are made from the same pattern, and instructions for both are included in the download.
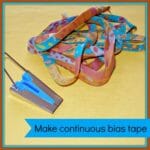
Download the pattern and check out the fabric sizes needed. Assemble the pattern piece for the top shaping. If you are making your own bias binding tape – start with this. You will need approx 4 yards if you use it efficiently. A little more is better. You can find tutorials on how to estimate, make and use bias tape on the tutorials page.
 |
 |
 |
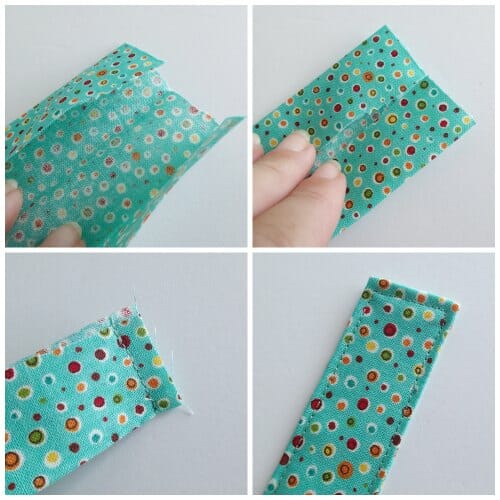
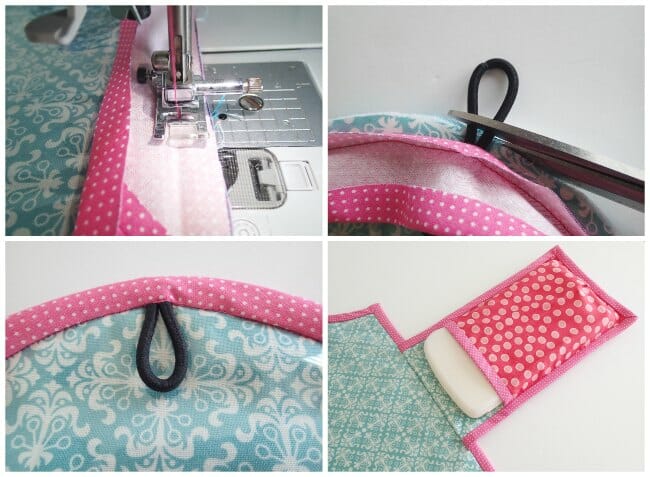
Start by assembling the pockets. Fold the fabric in half press. On the smaller pieces, trim the folded edge with your bias tape.
Match the raw edges of the smaller piece with the larger piece, at the sides and bottom. The pocket front is slightly wider so at the center bottom, create and pin a small pleat. Keep your pins away from the edge so you can sew past them, and then add your binding along the bottom and the two long sides. Repeat for the other pocket and set them aside for now.
Make your handle. Fold the fabric in half length-ways and press, then fold each side into the center and press, and fold again through the middle to get 4 layers. Once pressed, open out at the ends and fold the center fold back the other way so the raw edges are on the outside. Stitch with a 1/4 inch seam at each end, then turn right sides out again and turn out the corners neatly. Stitch all around the outside of the strap close to the edge.
Use your pattern piece to place the strap on your outer fabric. Leave a 1 inch gap from each side seam, and place the strap butting up to the bottom of the pattern piece. Pin in place and then stitch a 2.5 inch long rectangular box over your previous lines of stitching to hold it in place. (If you are using a fusible fleece, apply this to the outer fabric before sewing on the handle.)

Press the fabrics for the main body of the mat. All the fabrics are cut unshaped to start with and layered before cutting. Place the outside fabric face down. You can either use a fusible fleece on this fabric for a little padding, or a layer of low loft batting. Then add your inner fabric face up. If you are using a vinyl for a wipe clean finish, add this as the top layer. Match up all the edges and either pin in place (within the seam allowances so you don't pierce the vinyl), or use your Wonder Clips.
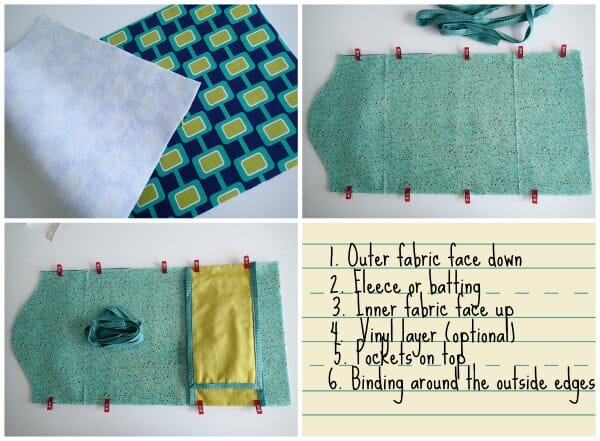
Use your pattern piece to shape the sandwich at one end. Place the pockets now so they'll be sewn in with the binding. For option 1 – the pockets were placed at 2 inches up from the bottom edge. Place them so the pocket front (the short side) is face down on the mat when folded.
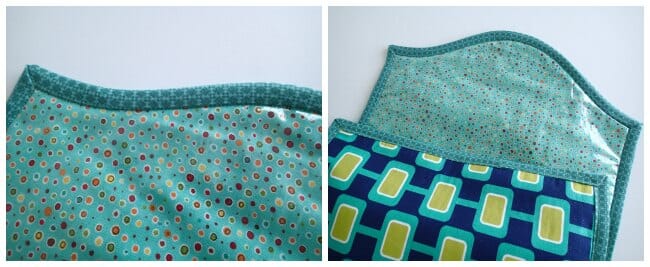
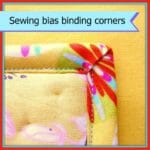
Apply your bias tape all around the edge of the mat, catching and enclosing all raw edges and securing the pockets in place.
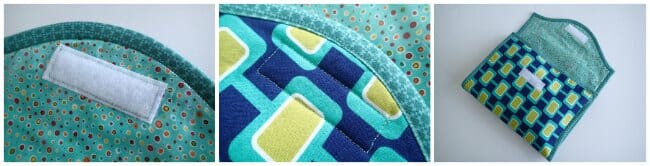
Once everything is sewn, its time to add your wipes and diapers and fold up the mat. Once you are happy with how you have it folded and made sure the handle is at the top, mark the placement of your velcro. Match up the pattern in the fabric if you can for a cool look. Stitch it in place making sure the soft fuzzy part is by baby's head and the rough scratchy side is on the outside. Completed!
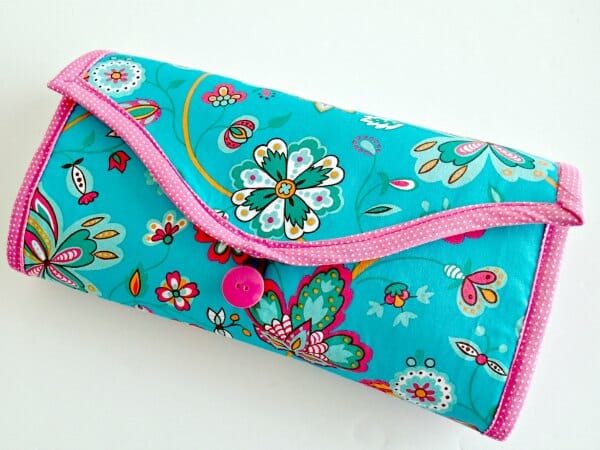
Option 2 – the clutch style
Option 2 is almost the same, uses the same pattern etc, but has some small variations. See which one you prefer.
- Make the pockets the same.
- Don't add the handle to the outside
- Pin the pockets at 3 inches down from the top corners
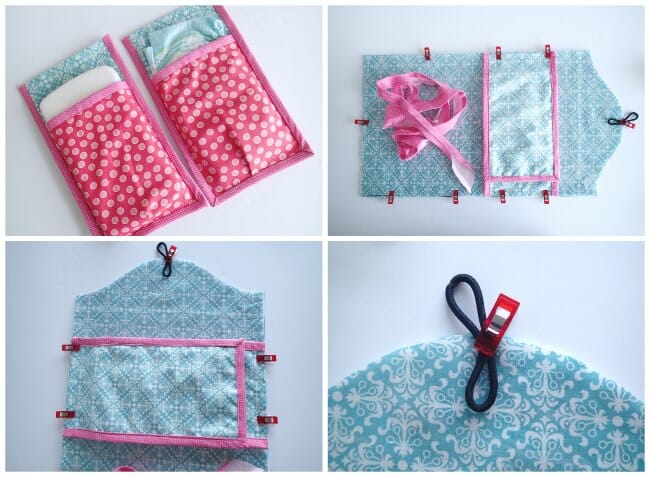
When adding in the bias tape around the outside, make sure to slip a short piece of elastic or a hair elastic at the center top underneath the binding. Or, you can still close this one with Velcro – it's up to you.
Add your wipes and diapers to the pockets and fold up the bag. With the pockets in the upper position, it folds up much tighter and creates more of a clutch. If using Velcro, mark where to sew on both pieces. If using the elastic and button, mark where your button will go.
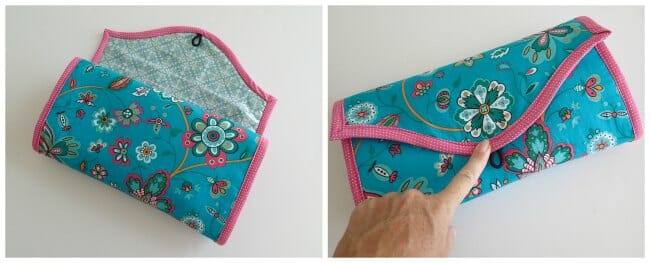
Sew on your velcro, or your button, close up your clutch and go. Oh, and don't forget the baby.
I'm already working on a third one of these and am thinking of adding some kind of wrist strap or hanging strap. What do you think? And which option do you prefer – 1 or 2?
Download your Baby Changing Mat pattern pieces and instructions here. The pattern can be downloaded from my design account at Payhip.
If you have any trouble downloading, opening or printing the pattern, please see this post - How to download PDF sewing patterns.
PIN ME FOR LATER –>


[…] I ended up getting fabric for a diaper changing station I hope to turn all that in to this:https://so-sew-easy.com/baby-changing-mat-pattern/#_a5y_p=2597443 […]
What kind of fabric would you recommend for the outside part of the clutch? I was thinking of using a snuggle flannel type fabric, would this work as well as just a basic cotton for quilting?
Yes, I think it will work just fine, Happy Sewing Kelsee!
[…] Best DIY Baby Gift ~ This baby changing mat pattern has two different size options for you to make. It’s a […]
Hi! First time visitor to your site! I stumbled upon this pattern on pinterest and I will make it for a friend who is expecting. Just wondering how much bias binding it requires, as I’ll be using ready-made and I want to make sure I have enough before starting. Thanks 🙂
Hi Phoebe and welcome to the team! Be sure to sign up for the weekly email update if you want to stay in touch. https://so-sew-easy.com/contact/
[…] Previous Previous post: Get Rid of Foot Ache in Minutes With These 6 Efficient Stretches after exerc… Search for: […]
I made this for my sister-in-laws new-born. I’m a pretty novice sewer and it took quite long for me to get everything right, but it turned out great! She loves it and uses it all the time (especially in public). Only the pockets should be a bid wider for the diapers and the wipes (she said), maybe they have different sizes in US & Europe…
Anyway, THANK YOU for the tutorial, you can’t go wrong, if you follow it step by step and I think this is really something that new mothers need! 🙂
I’ve made three of these already as gifts to close friends and I can’t describe the joy it is to gift them as well as the sheer delight of the recipients. 🙂 None of my friends sew so they’re really amazed by hand made presents, especially one so beautifully designed.
Just had to come back here to say a huge THANK YOU for a perfect tutorial. I really wish I could send you pictures of my mats but I can’t find an email address anywhere. Can anyone help out with that? 🙂
You are awesome!
Merav Did you make it with vinyl on the one part?
Thank you so much for this lovely pattern! I hope mine will turn out as nice as yours!
Fantastic…could you tell me – if I wanted to make more , could I legally sell them on – I wouldn’t want to break copyright rules and would need your authorisation.Please reply to my email address and I will understand if you do not wish to post my comments….
Hi Anne, absolutely do sell them, the pattern however you can not sell. Good Luck!
This may be a silly question but Where are the mesurments for the pockets? Am I missing something:)
What a nifty design, love to make it. But somehow when I click ‘ Pattern’ it opens Facebook? What am I doing wrong? (excuse me for my English, but I’m from the Netherlands). Thanks for your reply!
Hi Brigitte, not sure what’s going on there, but please look for the orange button in the big pink box and click where is says “Pattern Download.” There’s a box near the top of the post and one at the bottom. Please let me know if you’re still having problem.
It worked! Thanks for your quick reply!
I am hoping I can make this for a shower gift. I am glad I read the comments first. I think in will use the PUL instead. I think it would be much softer than the vinyl. Sew pleased that you posted this. I just want to make a gift and a quilt would be too much.
I made this and really love it – thank you!!
I used two layers of nappy plastic instead of vinyl and it came up a treat
I have used a similar commercial item, and while it has been very serviceable, my main complaint is that the hook side of the Velcro closure which is under the pad when it is in use tends to stick to fabric surfaces like some carpets or sofas. (possibly raising the fibers, which is not what you want to happen, especially at someone else’s house!) I like your button closure idea quite well as a solution to this inconvenience. It would also be handy to have a place for a little roll of diaper disposal bags… might be able to tuck it in with the diapers or wipes. Thanks for instructions; this would make a great gift!
Hi Vivian, thanks for your comments. We’re delighted you found the article useful.
Wow! I have made two mats, one using my serger, and one using the instructions as normal. What a difference the serger has made. I used a three thread stitch, and loosened the foot pressure slightly. I must add that LAMINATED the “changing” side of my mat, to avoid using vinyl and serged with the LAMINATED side uppermost. It has made the application of the bias trim much easier and therefore neater, as I am not wresting all those layers together AND trying to sew the trim on all at the same time. Once serged together firmly, it truly is a decorative tri. Delighted! Can’t post piccies yet, as they are Xmas pressies, and I may get found out!
I’m trying two – one for my daughter and another for the DIL as they are both expecting at the same time. My question is….re the pockets – I have a Serger (overlocker) could I sew them together with this and turn them inside out to avoid the dreaded bias tape?
What is your advice?
Absolutely. If you prefer to do it that way, it will work fine. In this case the binding is decorative as well as functional so you can skip it. Congratulations on your soon to be arrivals.
Love this pattern, it’s the perfect size to slot in the back of my buggy, no need to take anything other than a small handbag out with me now! Fantastic pattern and easy to read tutorial. Ive posted my finished mat on my blog with a link to your amazing site. Thank-you!
Hi Jenny, I’ve looked at your site but am not able to find the article about the finished mat. Can you help me out.
Oops!!! Forgot to publish it! Ha! It’s all there now 🙂 Thanks for replying! X
Got it now. Thanks for the link back to the site. I left you a comment and shared it on my Pinterest boards.
I love this tutorial! so clear, and easy to follow. Thank you so much!
I was just wondering what size bias tape you used- 12mm or 25mm?
I cut mine at 2 inches so that the finished width is 1/2 inch. I hope it turns out nicely for you. Are you a member of our sewing chat group yet? Come and join us and share your finished project 🙂 https://www.facebook.com/groups/soseweasychat/
Thank you so much! I followed your tutorial and the changing mat came out beautifully.
I’d love to email you pictures if you’d like to see!
Can you share them in our sewing chat group here – https://www.facebook.com/groups/soseweasychat/
Then everyone can see and admire your handiwork! That would be great. So happy you got a good result.
How big is it after you have folded it together? Seems like it would be pretty big?
I can’t tell you exactly because I don’t have them any more. But the mat is 12 inches wide, so both versions will be 12 inches wide. The clutch style wraps up smaller than the other one, and it folds up around the small box of wipes. It can’t be any smaller or you wouldn’t be able to get the wipes and diapers inside. I’m guessing its probably about 6 inches wide. If you don’t want to keep anything inside, you could just roll it up instead of folding it.
i like the idea a lot. the only thing is the pattern won’t download. it does show the instructions, but would also like the template. can you please email me for the solution.
thanks so much,
shirley
Please check the document again Shirley. Everything you need is in the one PDf document so if you have downloaded the instructions, everything should be there. The cutting instructions are on page 2 and the shaping template is the final 2 pages. Does that help?
Hello Deby,
I assume that the vinyl is the same as the inner fabric that is place up on the ‘sandwiching’ part of this cute changing pad? Thank you!
In mine, I had an outer fabric, then an inner fabric which was a cotton, then I added the clear vinyl layer on top. If you are using a waterproof fabric, such as a laminate then you don’t need to necessarily add the vinyl layer.
I loved it. I will make one for my sister’s grandson. I’m from Brazil,
Love this tutorial, however, I am a bit confused on the pockets. They seem way too long, almost 10 inches too long. The pockets are 22 inches while the width of the whole mat is only 12 inches. What am I missing?
The pockets have to be folded to be a double layer of fabric. It should all be explained in the instructions. Let me know if there is a part you don’t understand and I’ll try to clarify.
Thank you so much! I finally figured it out. I read the instructions 50 times and somehow kept missing that (pregnancy brain)! Will be finishing it today!
Loved the tutorial, and I am so very excited to use it in a few weeks! I really loved how small the clutch closed up, but also wanted to include the handle, so I ended up combining the two options. It was my first time using bias tape, and although very intimidating at first, it ended up not being as bad as I had originally anticipated, especially with the links you included to use it (so thank you). Here is a link to my finished product if you are interested in seeing it:
https://apixiesorenda.wordpress.com/2015/02/03/diy-mama-changing-pad/
Once again, great tutorial, and very easy to follow!
You’ve done a great job. The binding gets easier the more you do it. Try making up some quick potholders or table mats and practicing your binding skills. Practice makes perfect they say. But a lot of pins can help too…
Thank you, thank you ! Everything is pretty, sorry for my english…Love from France
Love this pattern!! Thank you!
How do you place the curved pattern piece at the top of the fabric?
Do you match up the corners (overlap the pattern onto the 12″ x 24″ piece)?
Thank you! 🙂
Once you have the curved pattern piece, just match the top of the curve to the short edge of the fabric, match up the flat edges with the sides and draw around to get the amount to cut off the corners. It doesn’t change the length, just gives the end some shape.
obrigada pela explicação, lindo!!! vou fazer!!!!!
Eu espero que você gosta de fazer isso. Obrigado por deixar um comentário .
I am a little confused with the layering of fabrics. If you are using vinyl would you have an inner layer fabric also? I copied the portion of your Tutorial that I am not sure about- love this idea and am looking forward to making a few for friends as soon as I am clear on the instructions!
Place the outside fabric face down. You can either use a fusible fleece on this fabric for a little padding, or a layer of low loft batting. Then add your inner fabric face up. If you are using a vinyl for a wipe clean finish, add this as the top layer. Match up all the edges and either pin in place (within the seam allowances so you don’t pierce the vinyl), or use your Wonder Clips.
Yes those directions are correct. Your outer fabric faces down so this is on the outside, then add any padding you want, then add the inner fabric face up, so that the good side of the fabric is on the top and bottom. Then if using the vinyl layer, add this on top of the inner fabric. Once these are all layered together, you add the binding to hold all the layers in place.
Love this idea thanks for sharing
Two great designs, Deby, especially the one with the pockets.
Thank-you for such a lovely and practical pattern. I love making baby gifts and this is such a great idea. I am going to start making several and have them on hand to give when I find a friend or family member has a baby.
I have made some similar to this pattern! Love them. I just use 2 pieces of cotton fabric with batting between. I also sew them right sides together and turn. This way they can be machine washed. I also do my pockets a bit different but do love your idea as well!! Thanks so much
My question is this…how do you clean the whole item? Is it machine washable? I wouldn’t put it in the dryer because of the vinyl but because of surfaces this would be laying on…well, you get the picture.
You could ‘spot clean’ with a wet sponge, but when it needs a full wash, carefully handwash and then hang to dry so the water all drips out of the bottom and isn’t stuck behind the vinyl.
Oh Deby,
Thanks for the great baby patterns. My to do list for my biggest wish (my own baby) is getting longer and longer 😉 This changing mat is very practical. I also think that the ones in the stores are much too bulky, but your pattern looks great. I will keep it in mind for later or maybe I will try it for one of my friends as I make the same experience that all couples around are getting babies…
Thanks for sharing.
Cheers,
Jessica
Thanks for the tutorial, I will try it out tomorrow, I am not too good with the binding though.
If you aren’t that confident with the binding then you can always sew it to the inside first by machine and then just take your time to hand stitch it to the outside just to be sure to get a nice finish. It’s worth taking the extra time on it instead of finding you missed one or two spots and having to unpick sections to resew – its quicker to do it right the first time. And I’m no good at binding too – did you see my Turning Japanese bag – so embarrassing!
Lovely idea but from what I’ve read about vinyl, it’s no longer recommended for baby/ children’s products because it offgasses and has endocrine-interrupting properties. From what I understand, PUL is much safer.
Love it! I would definitely want a wrist strap on the clutch. Easy to add. I love how you have such beautiful complimentary prints.
I love these! I’m making baby items for an upcoming baby shower and will try to get this done too. I was wondering do you think PUL fabric would work instead of adding vinyl? Not quite as wipeable, but little softer. Thanks for the pattern!
I’ve never seen or felt the PUL because we can’t get it here, but from the description it sounds like it would be a perfect option for this pattern. Definitely softer and a little bit less tacky than vinyl can be.
Love it!