


 If you have already visited my previous posts then you are all ready and set to start sewing your own underwear. Not got the free panties pattern yet?
Download the pattern from this post – Free Multi-size pattern to make your own undies
And take a look here for how to put your pattern together (important) – Making up the pattern
UPDATE - Oct 2014. The pattern has now been updated from hand-drawn to digital and is available with the pattern and instructions as a single PDF file to make downloading and printing easy, especially from mobile devices. Please refer to the downloaded instructions for how to assemble the new digital pattern.
Once you are all set, you will need the following materials:
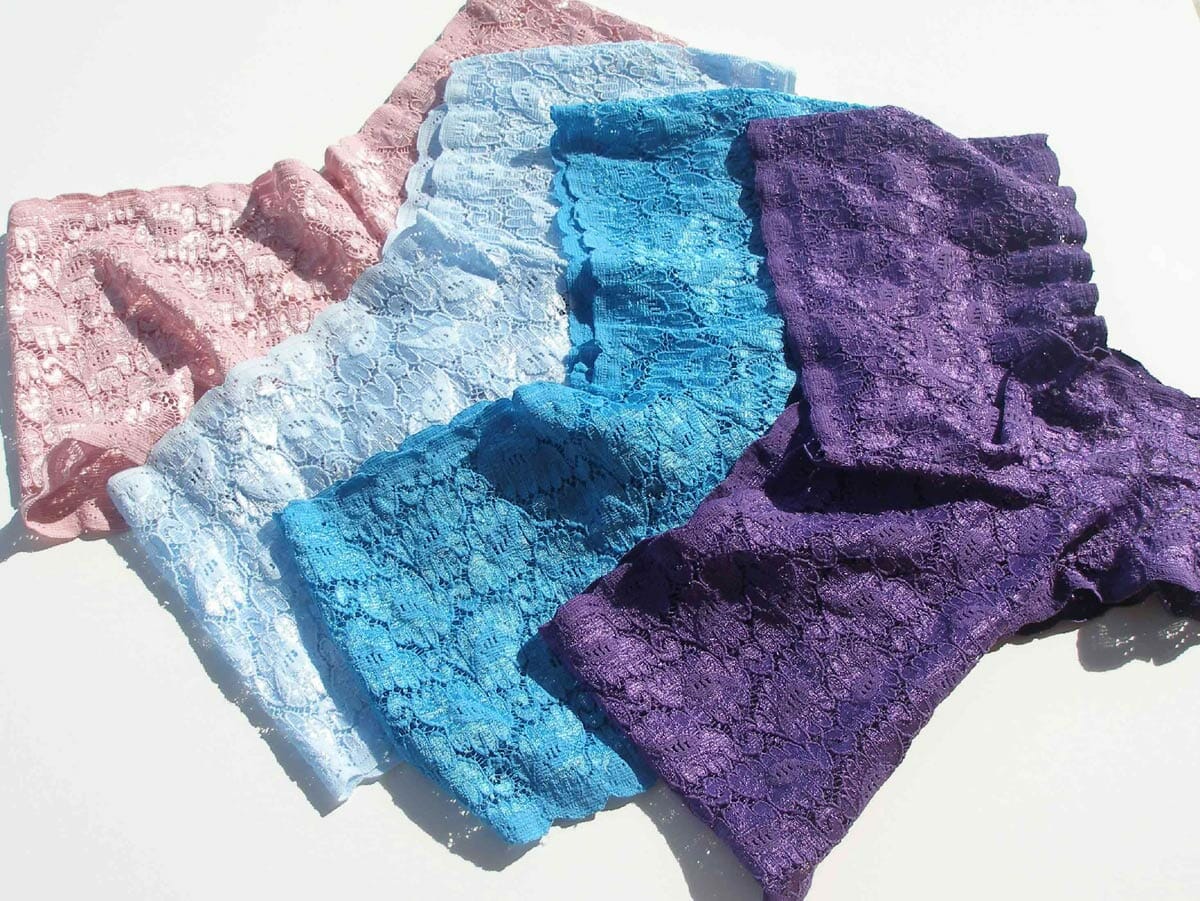
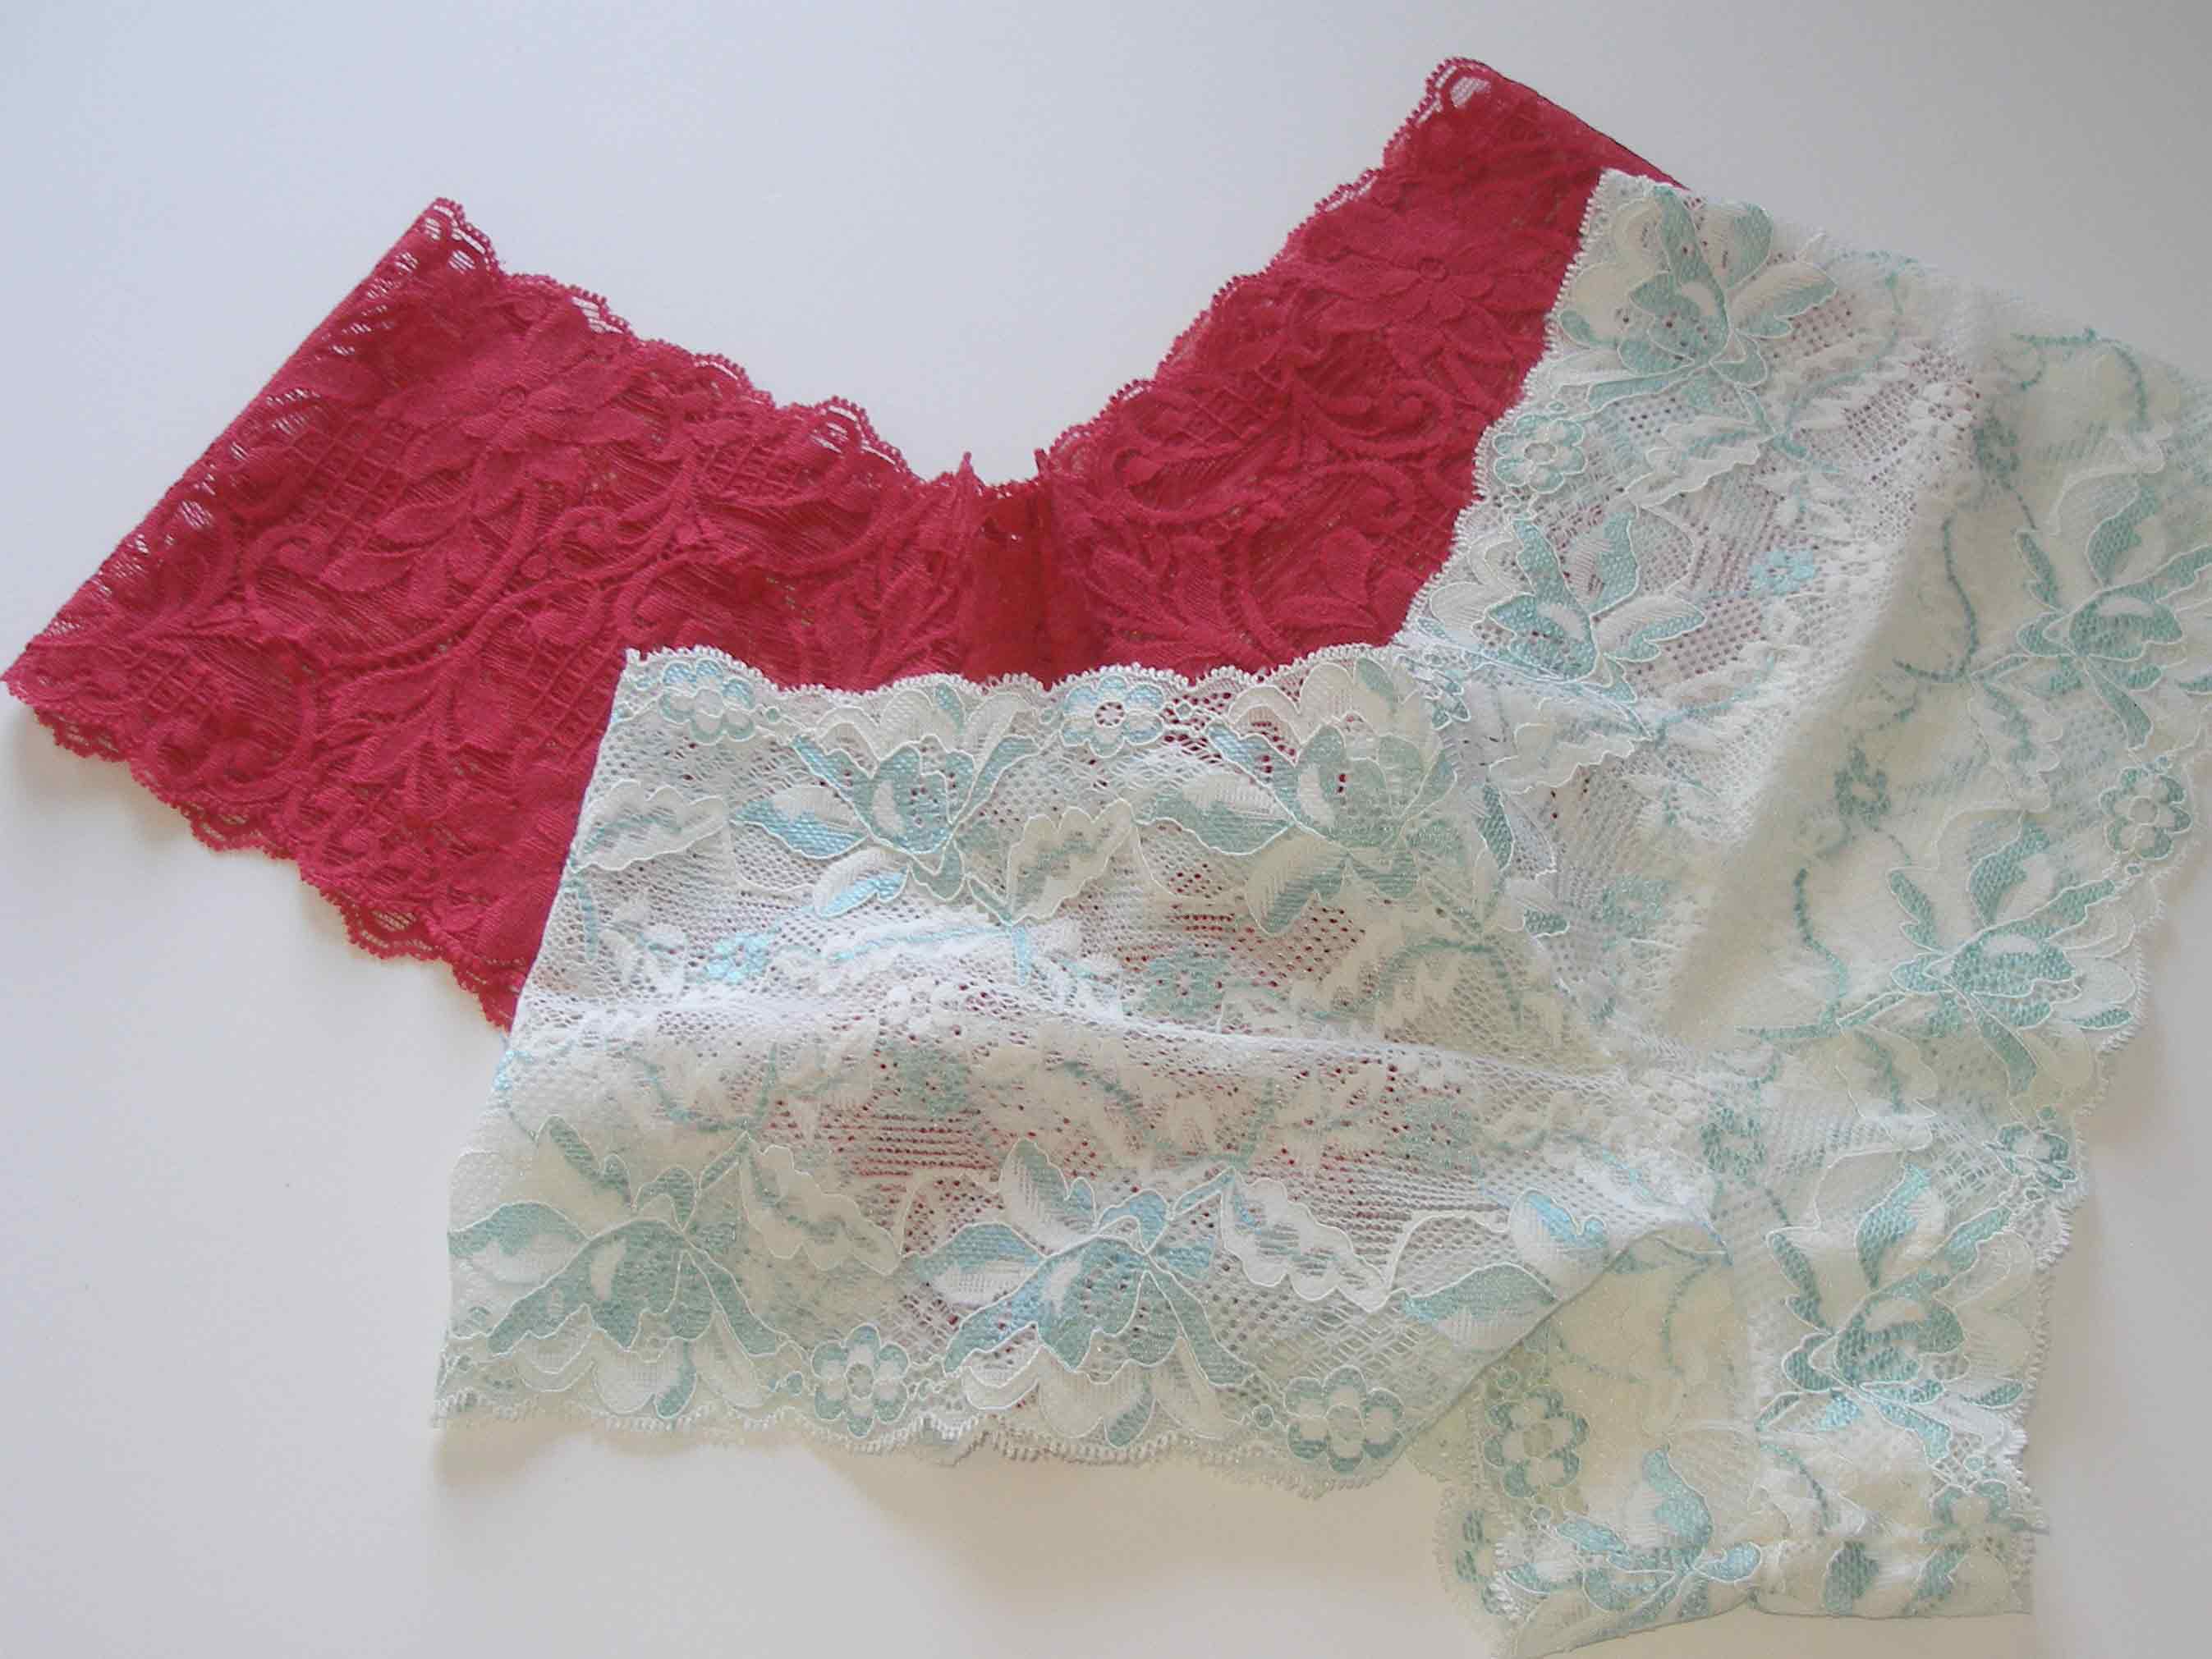
- Stretch lace with a finished edge on both sides – recommended 4 to 6.5 inches wide with a good amount of stretch (recommended suppliers Deb's Lace and Trims and Sew Sassy)
- Matching regular thread
- Piece of cotton jersey – new or recycled
- Sewing machine
- Recommended – Overcasting foot
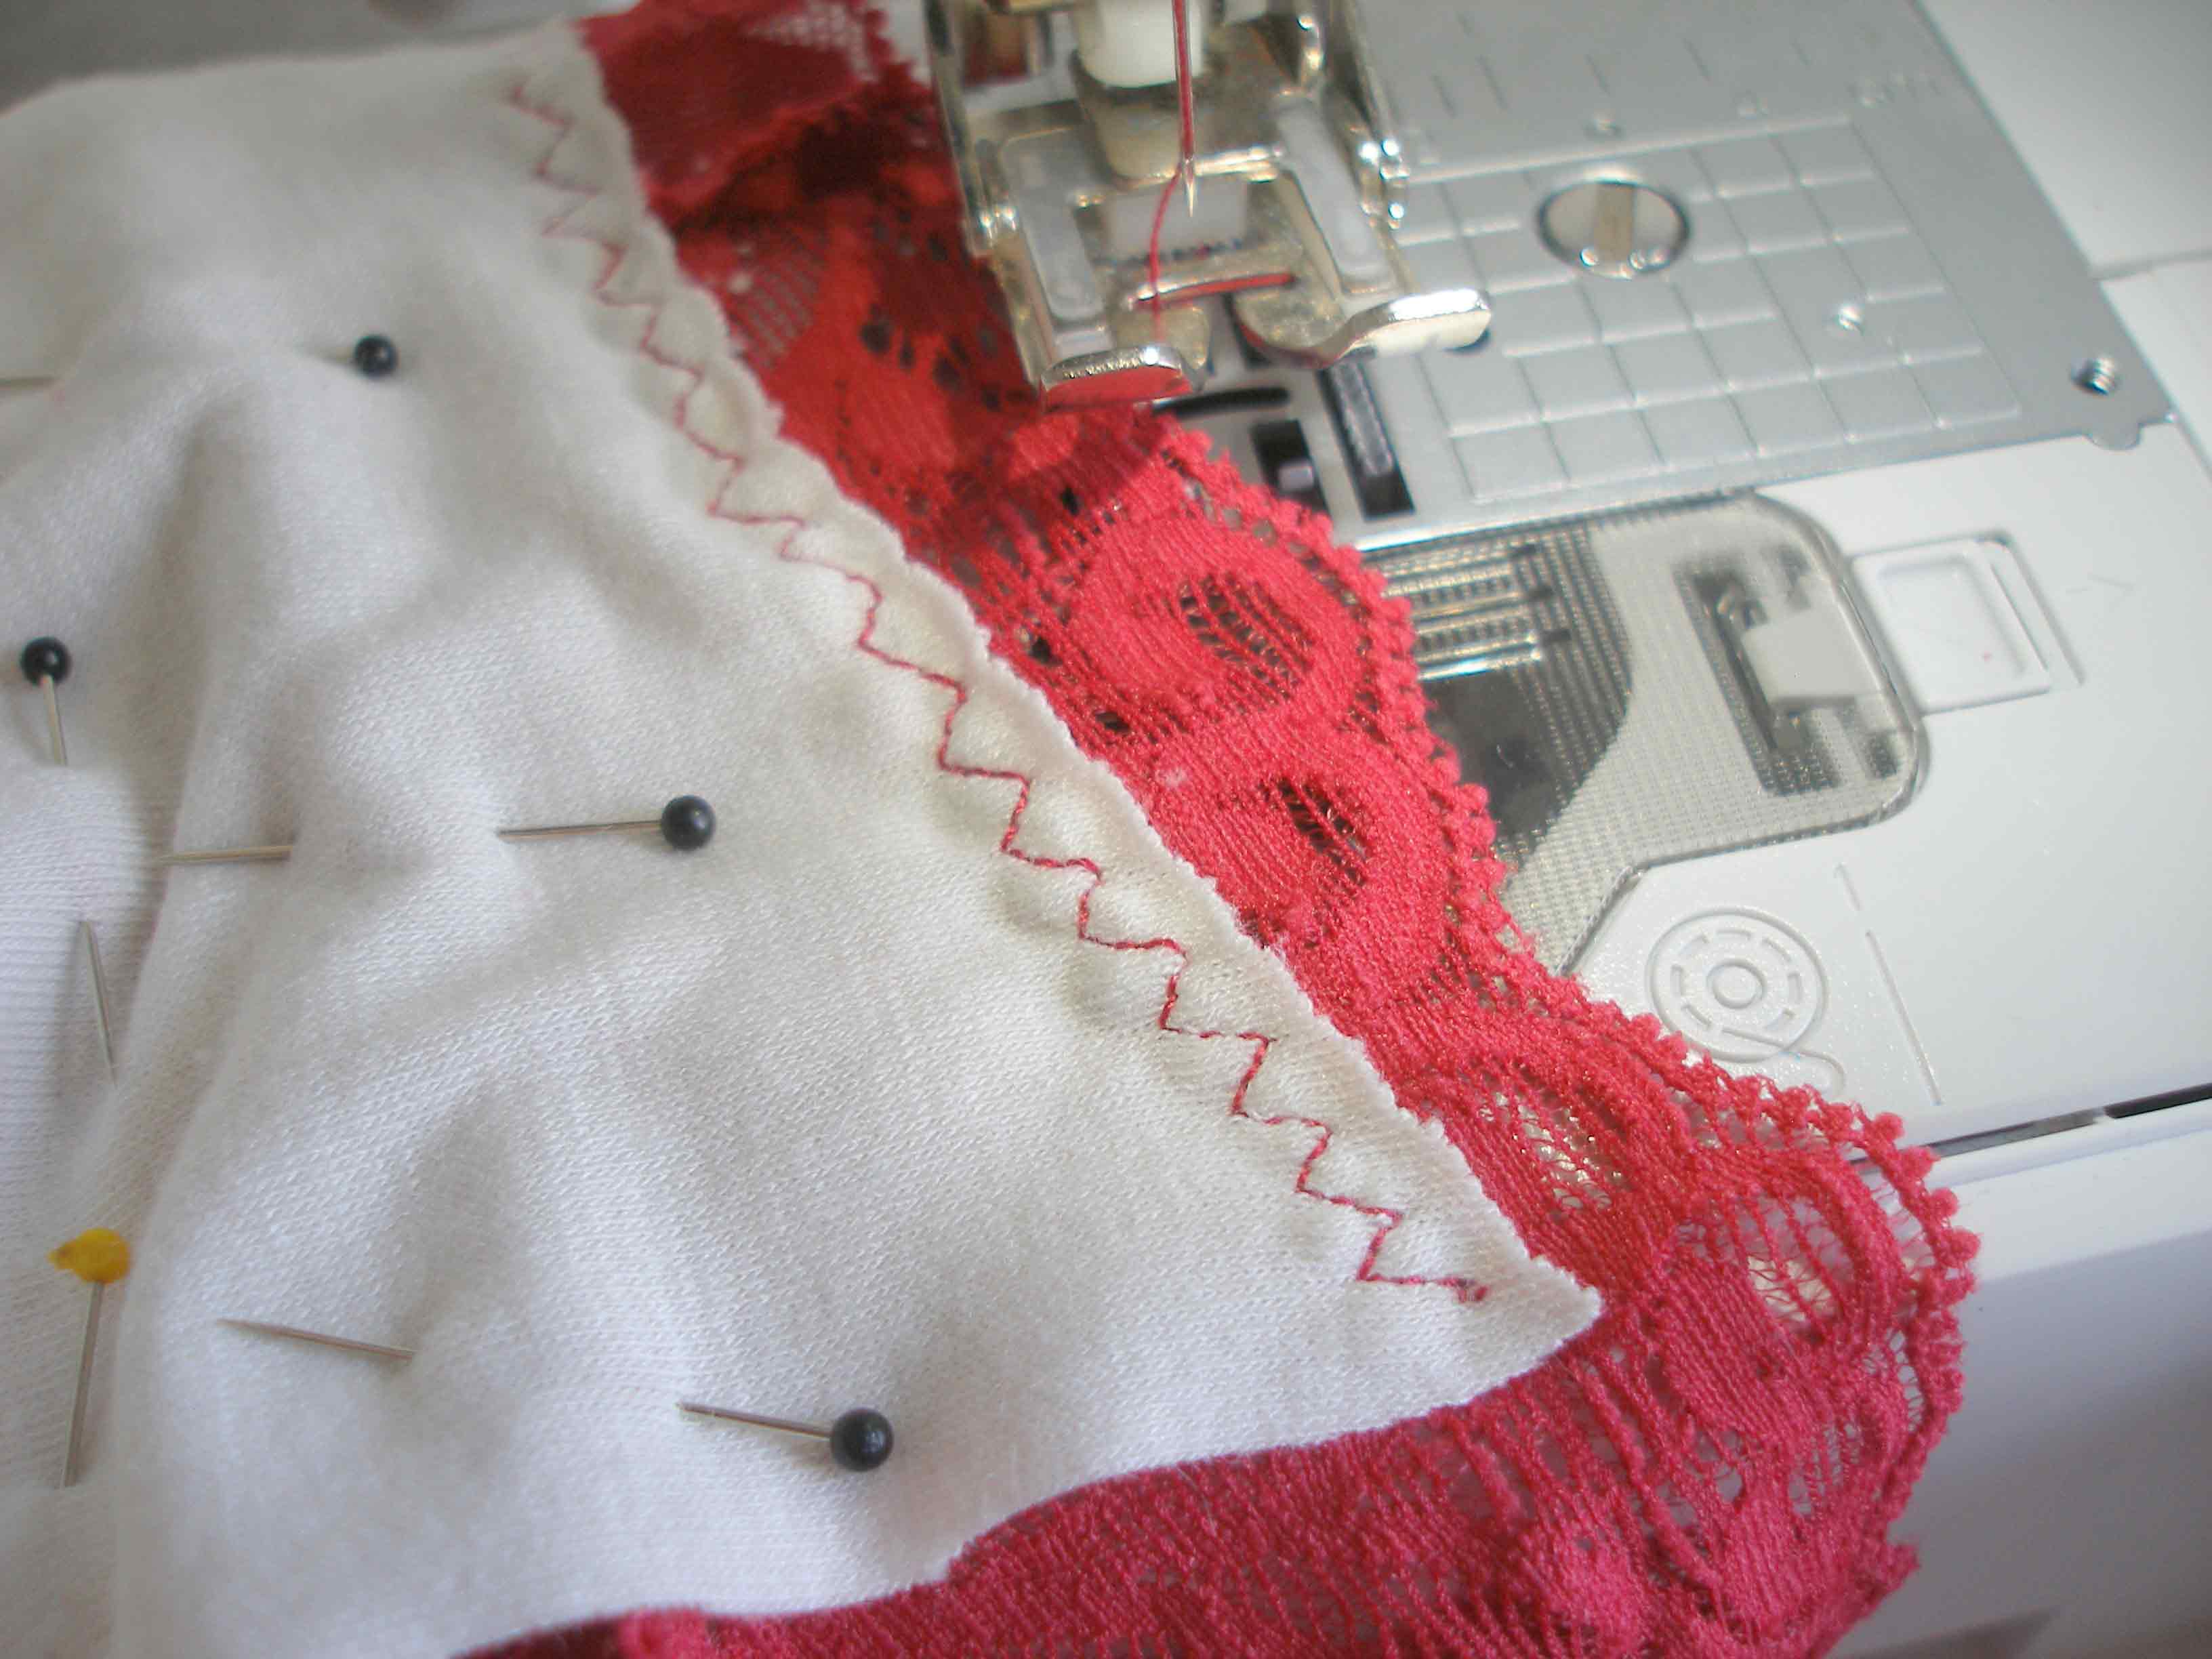
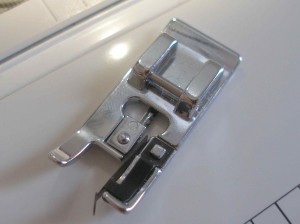 An overcasting foot is recommended for sewing with stretch lace to get a really nice narrow finished seam and edge inside. Along with the special stitch on your sewing machine, you will get an all-in-one stitch, which sews the seam, allows for stretch and neatens the raw edges all in one go. If you don't have the overcasting stitch or the overcasting foot, you can just use a regular foot and a zig-zag stitch sewing close to the edge, or a triple stretch stitch if your machine has one.
Let's get started…
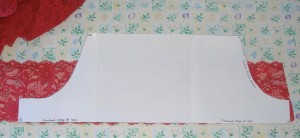
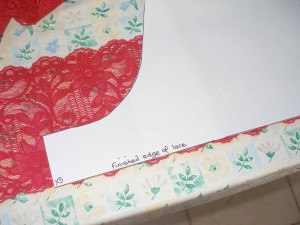
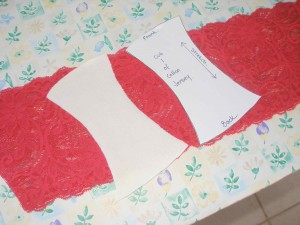
1. Lay your lace out flat with the right side facing up. Place your pattern on the top, lining up the long bottom edge of the pattern with one edge of your lace. You might just peak the edge of the lace a fraction out from under the pattern so you can see it is flat and straight. Cut one piece.
2. Take your cut piece and lay it face down on the remaining lace so that both right sides are together. If you have a large pattern repeat or a distinctive pattern in your lace, you might try to mirror the pattern so the finished undies look symmetrical Use the first lace piece you have cut as a pattern to cut the piece for the other side. By placing the fabric right sides together, you make sure that you have two mirror pieces.
3. Use the small liner pattern piece to cut a piece of cotton jersey.
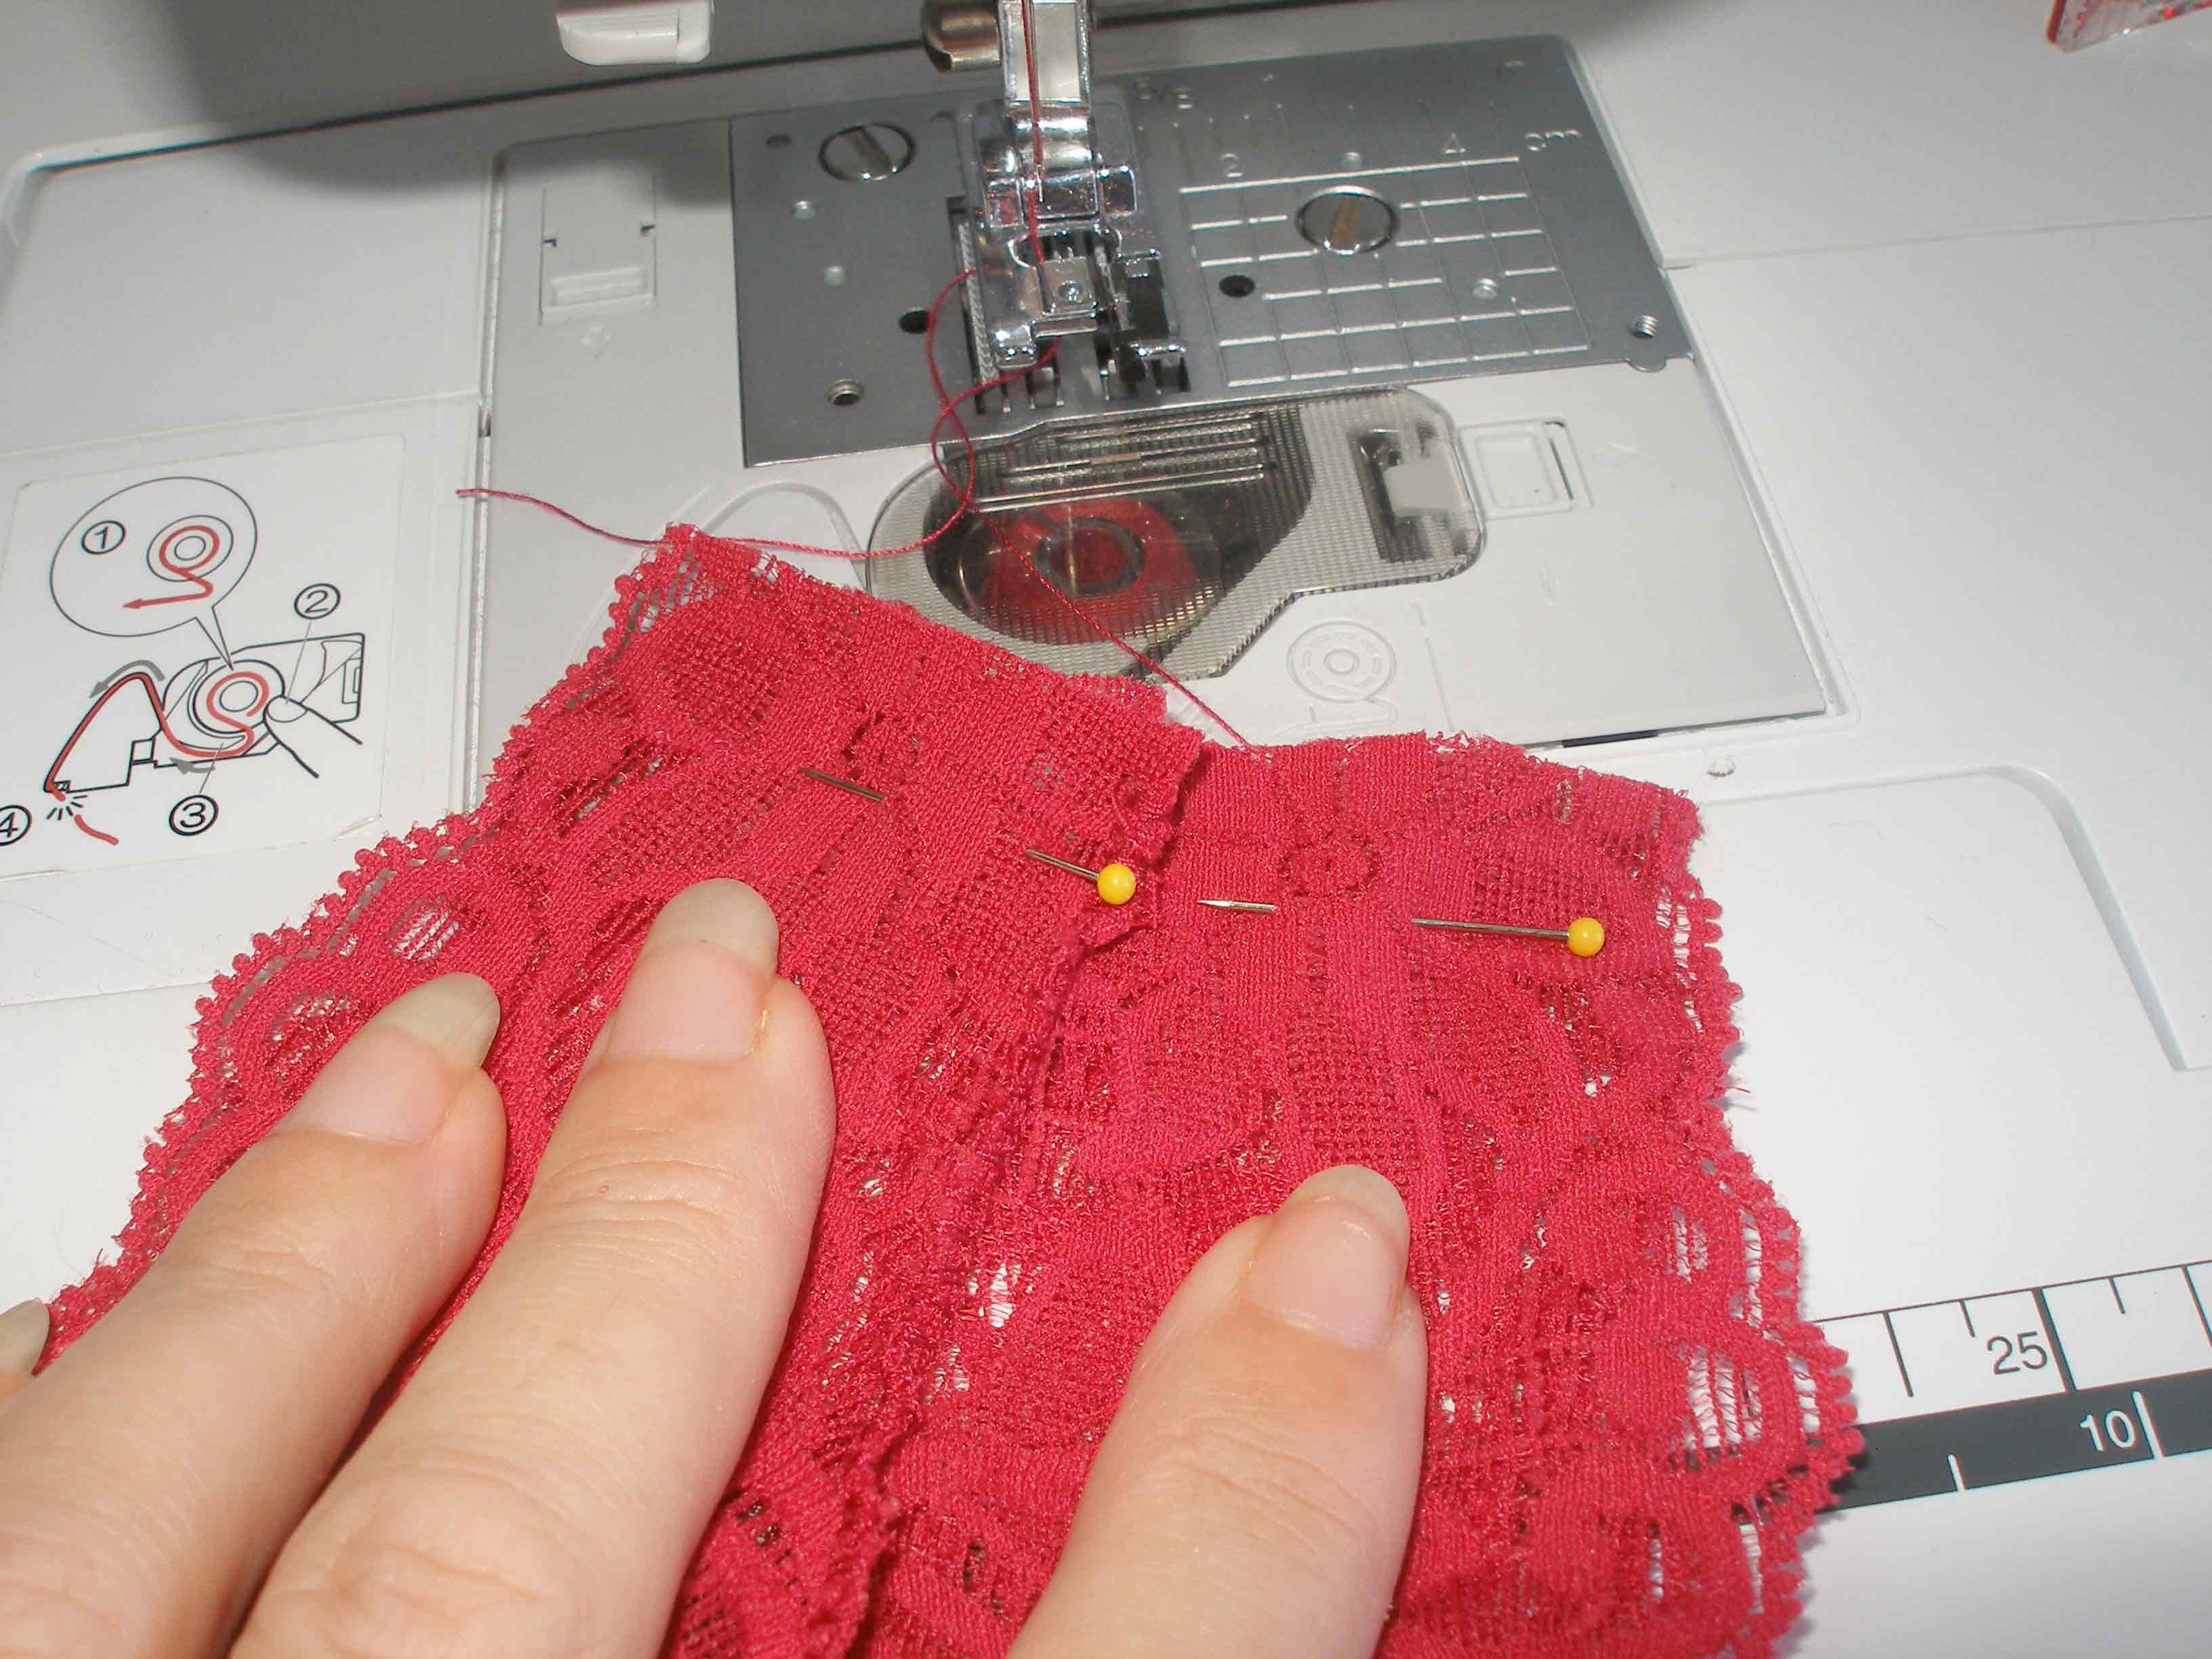
4. Match your lace piece right sides together and pin the two pieces along the curved seams. Match the edge of the lace carefully and then sew, overcast or serge along the two curved seams using a stitch that will stretch. (Stretch overcasting, triple stretch or zig-zag stitch.) Do this for both sides.

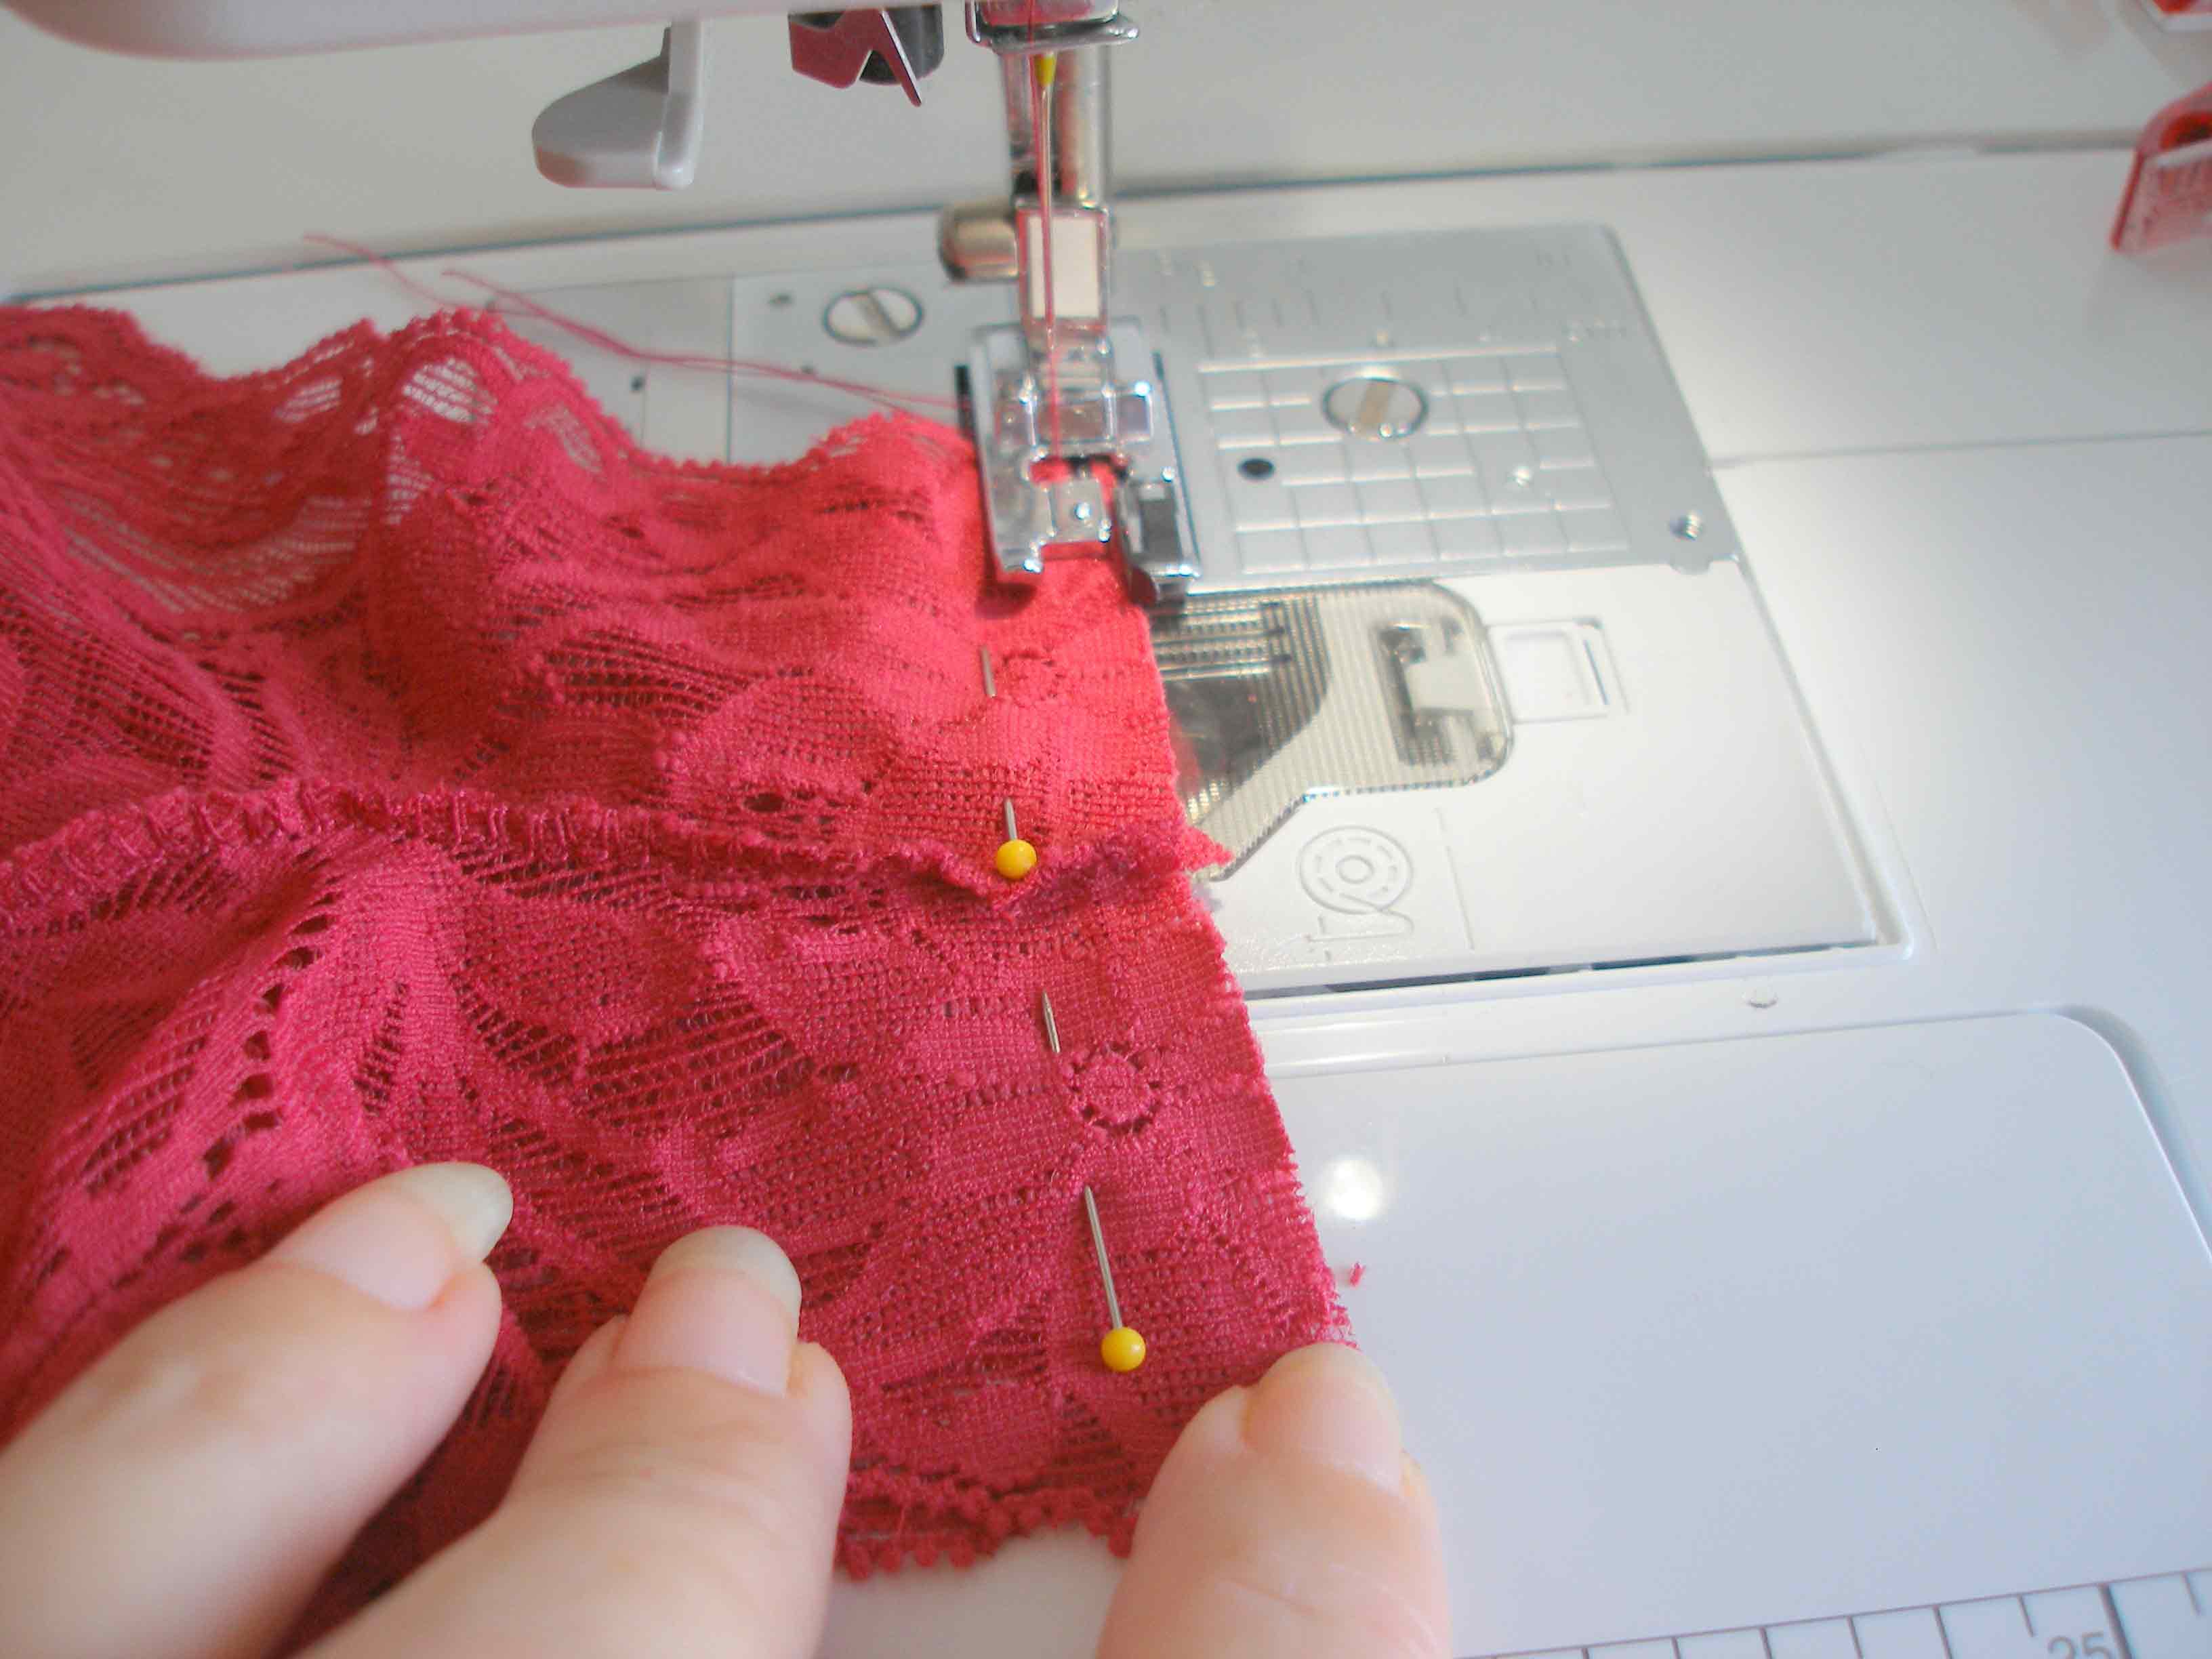
5. Keep your fabric right sides together and match up the two squared ends, matching the center seams and lace edges carefully. Sew along this seam.
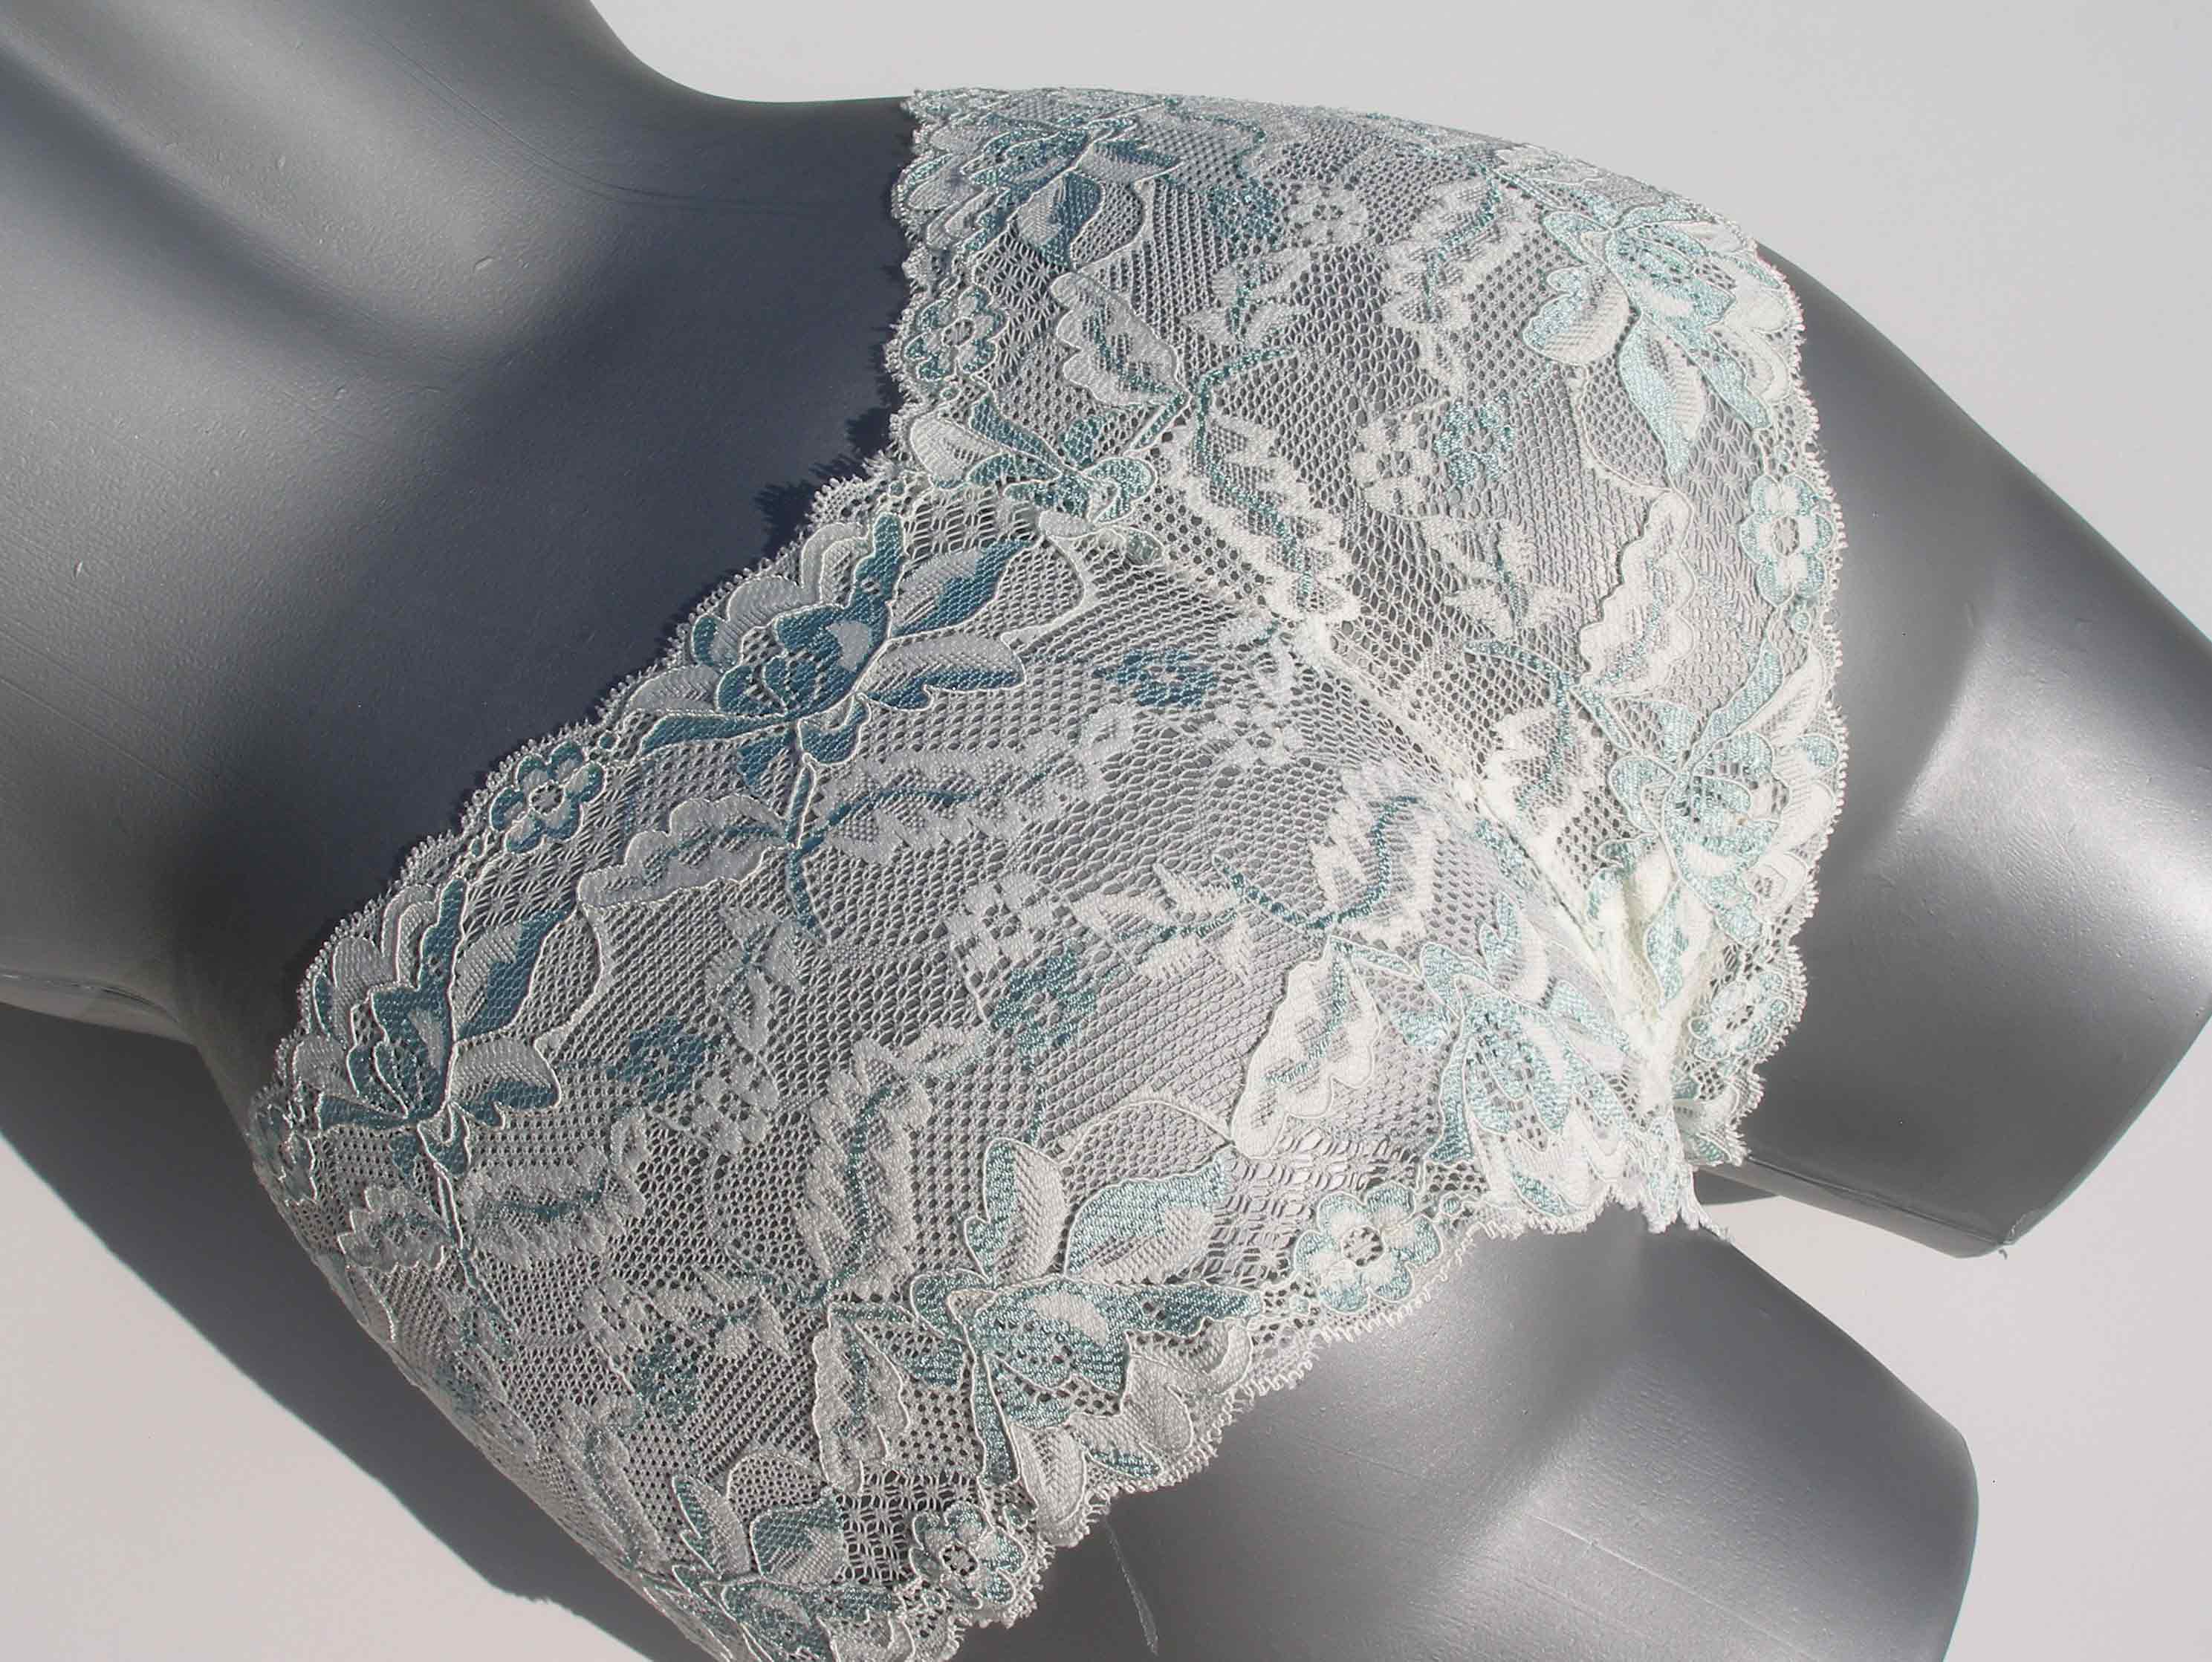
6. You can now turn your undies the right side out and try them on for fit. If you find them a little loose, you can sew again just inside the existing seams and then trim away any excess.
7. Now pin the cotton liner over the center of the 4-way seam in the crotch. The lining piece is slightly more curved at the front edge, flatter at the back. In case you can't recognise the front and back of your undies, the back will have a longer seam from the center because it has to go over your rounder part (your bum) at the back. I like to use plenty of pins to hold it in place.

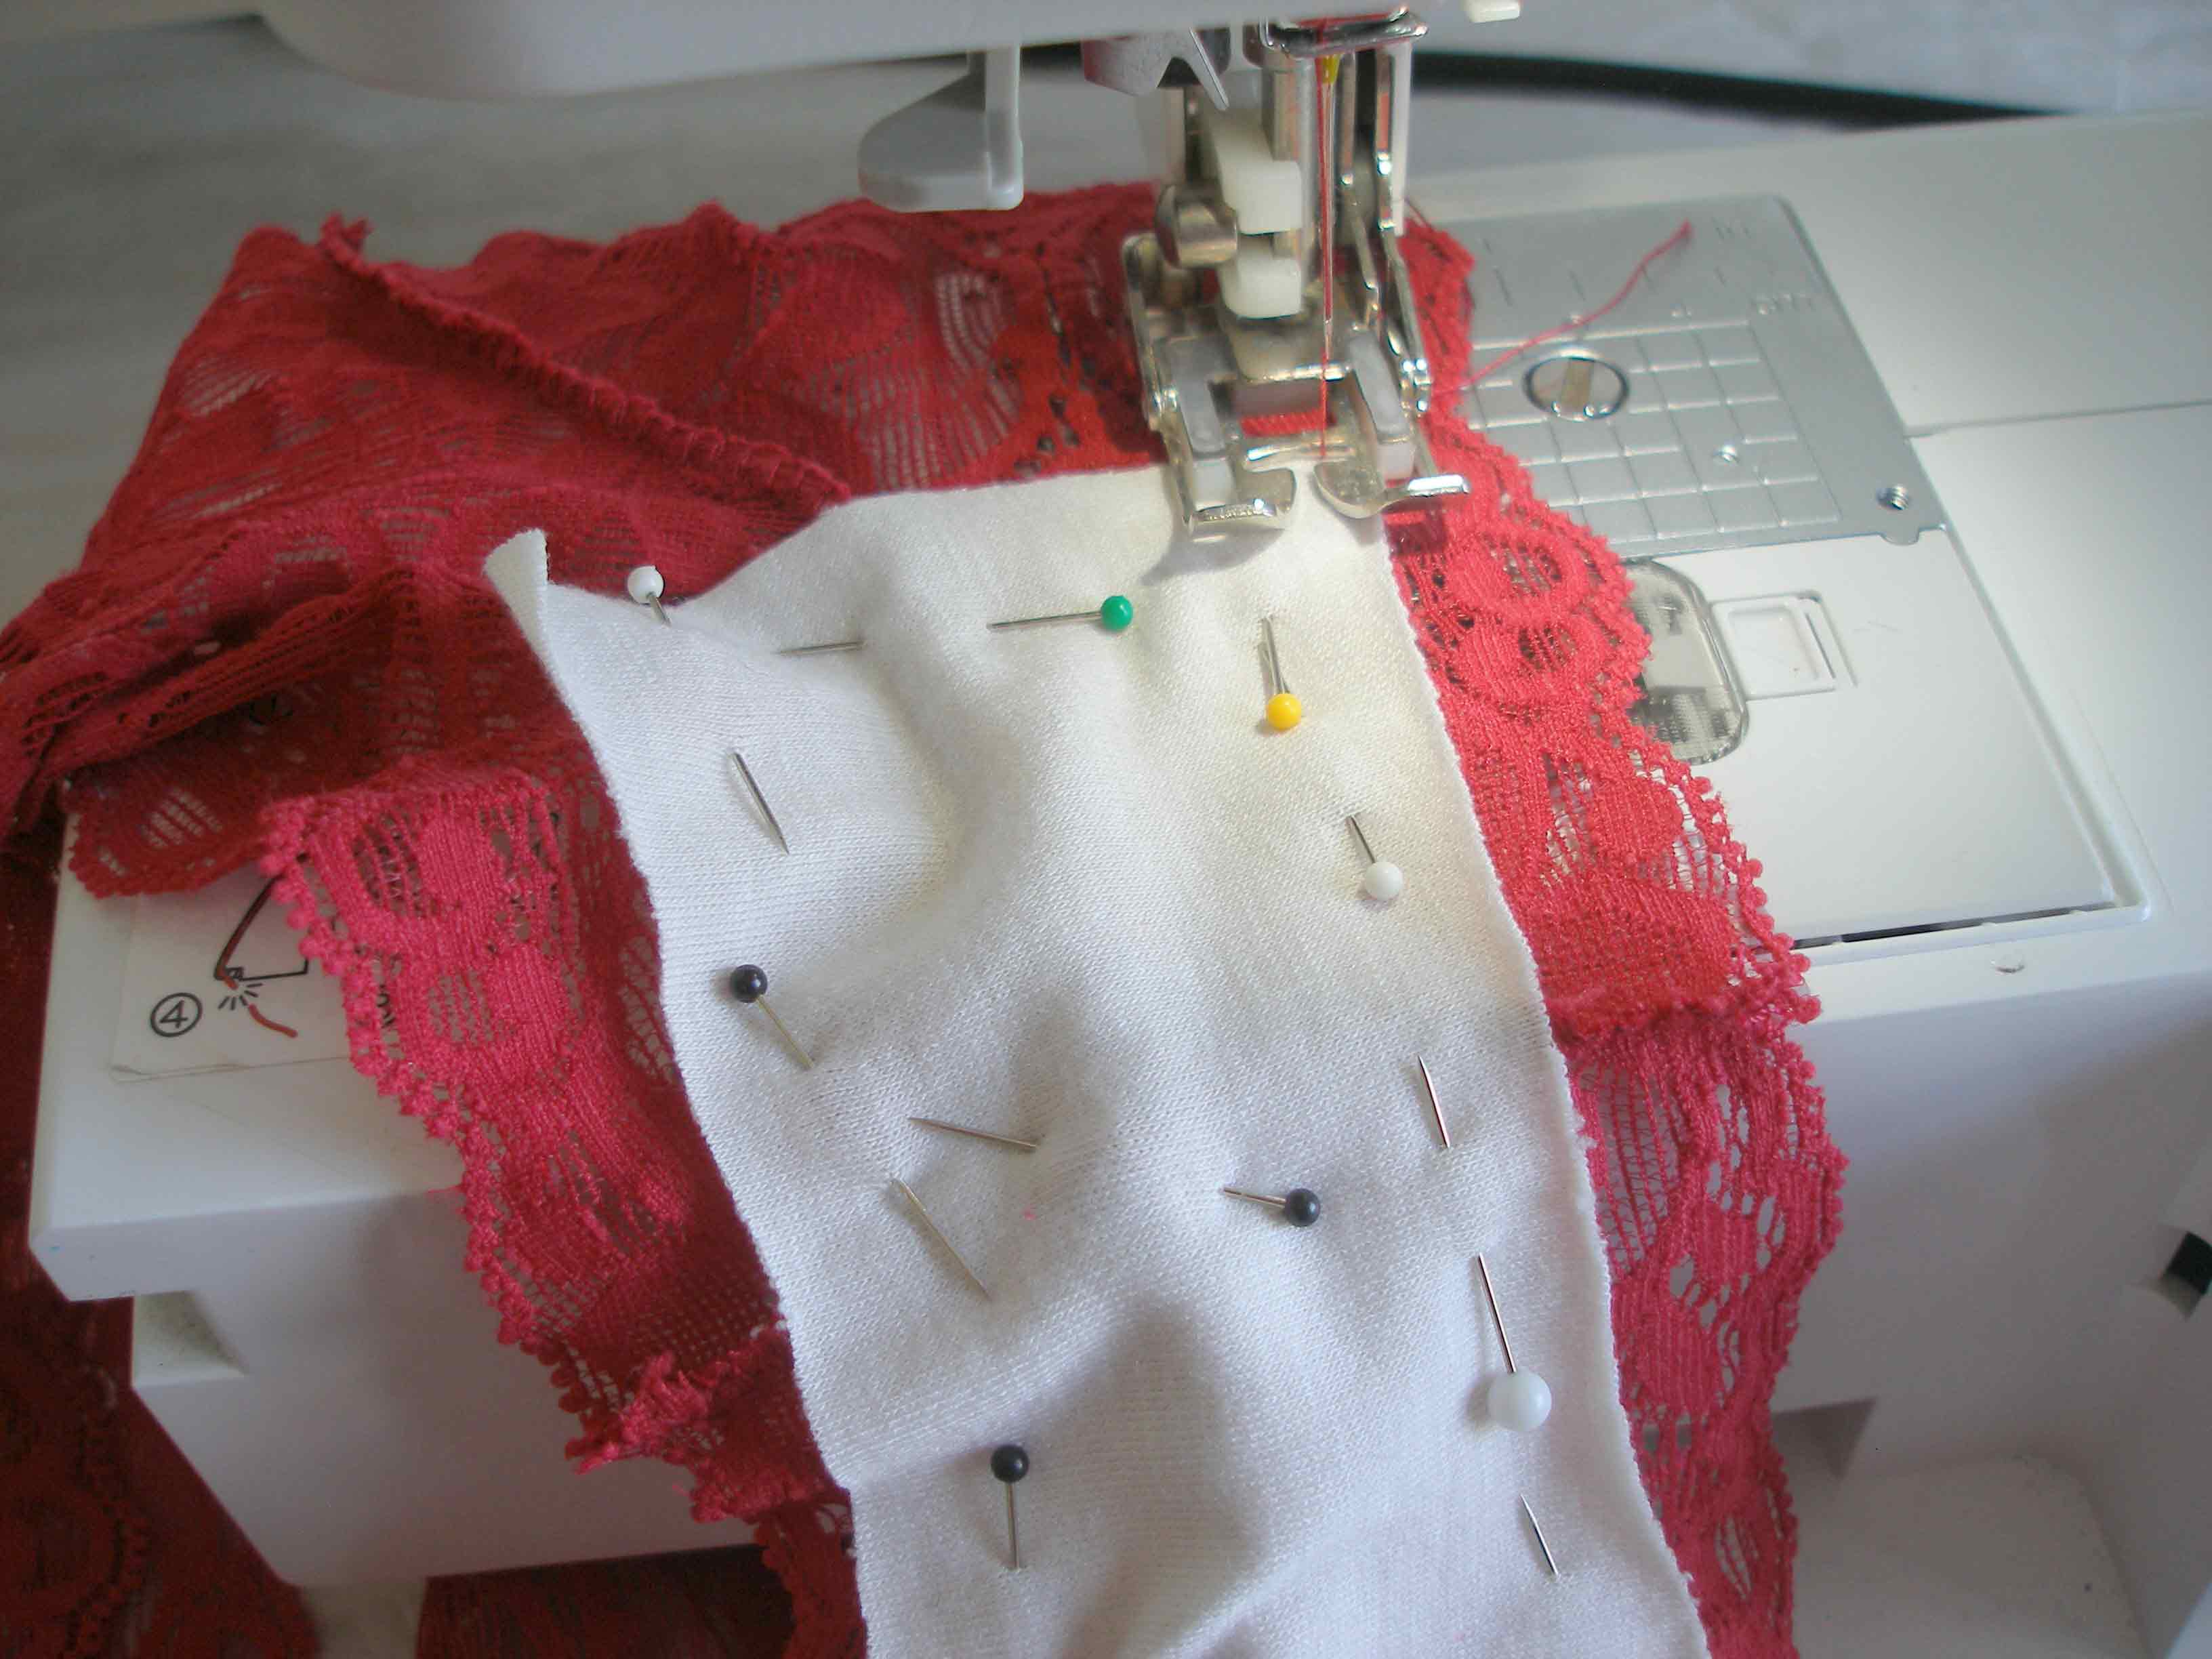
8. Sewing along each long edge with a zig-zag or a triple zig zag stitch. Sewing the front and back seams are optional.
9. Trim any threads and your are done. Parade around the house in your new undies with pride!
I got all over excited and made several pairs. Here are a few photos of my undies.
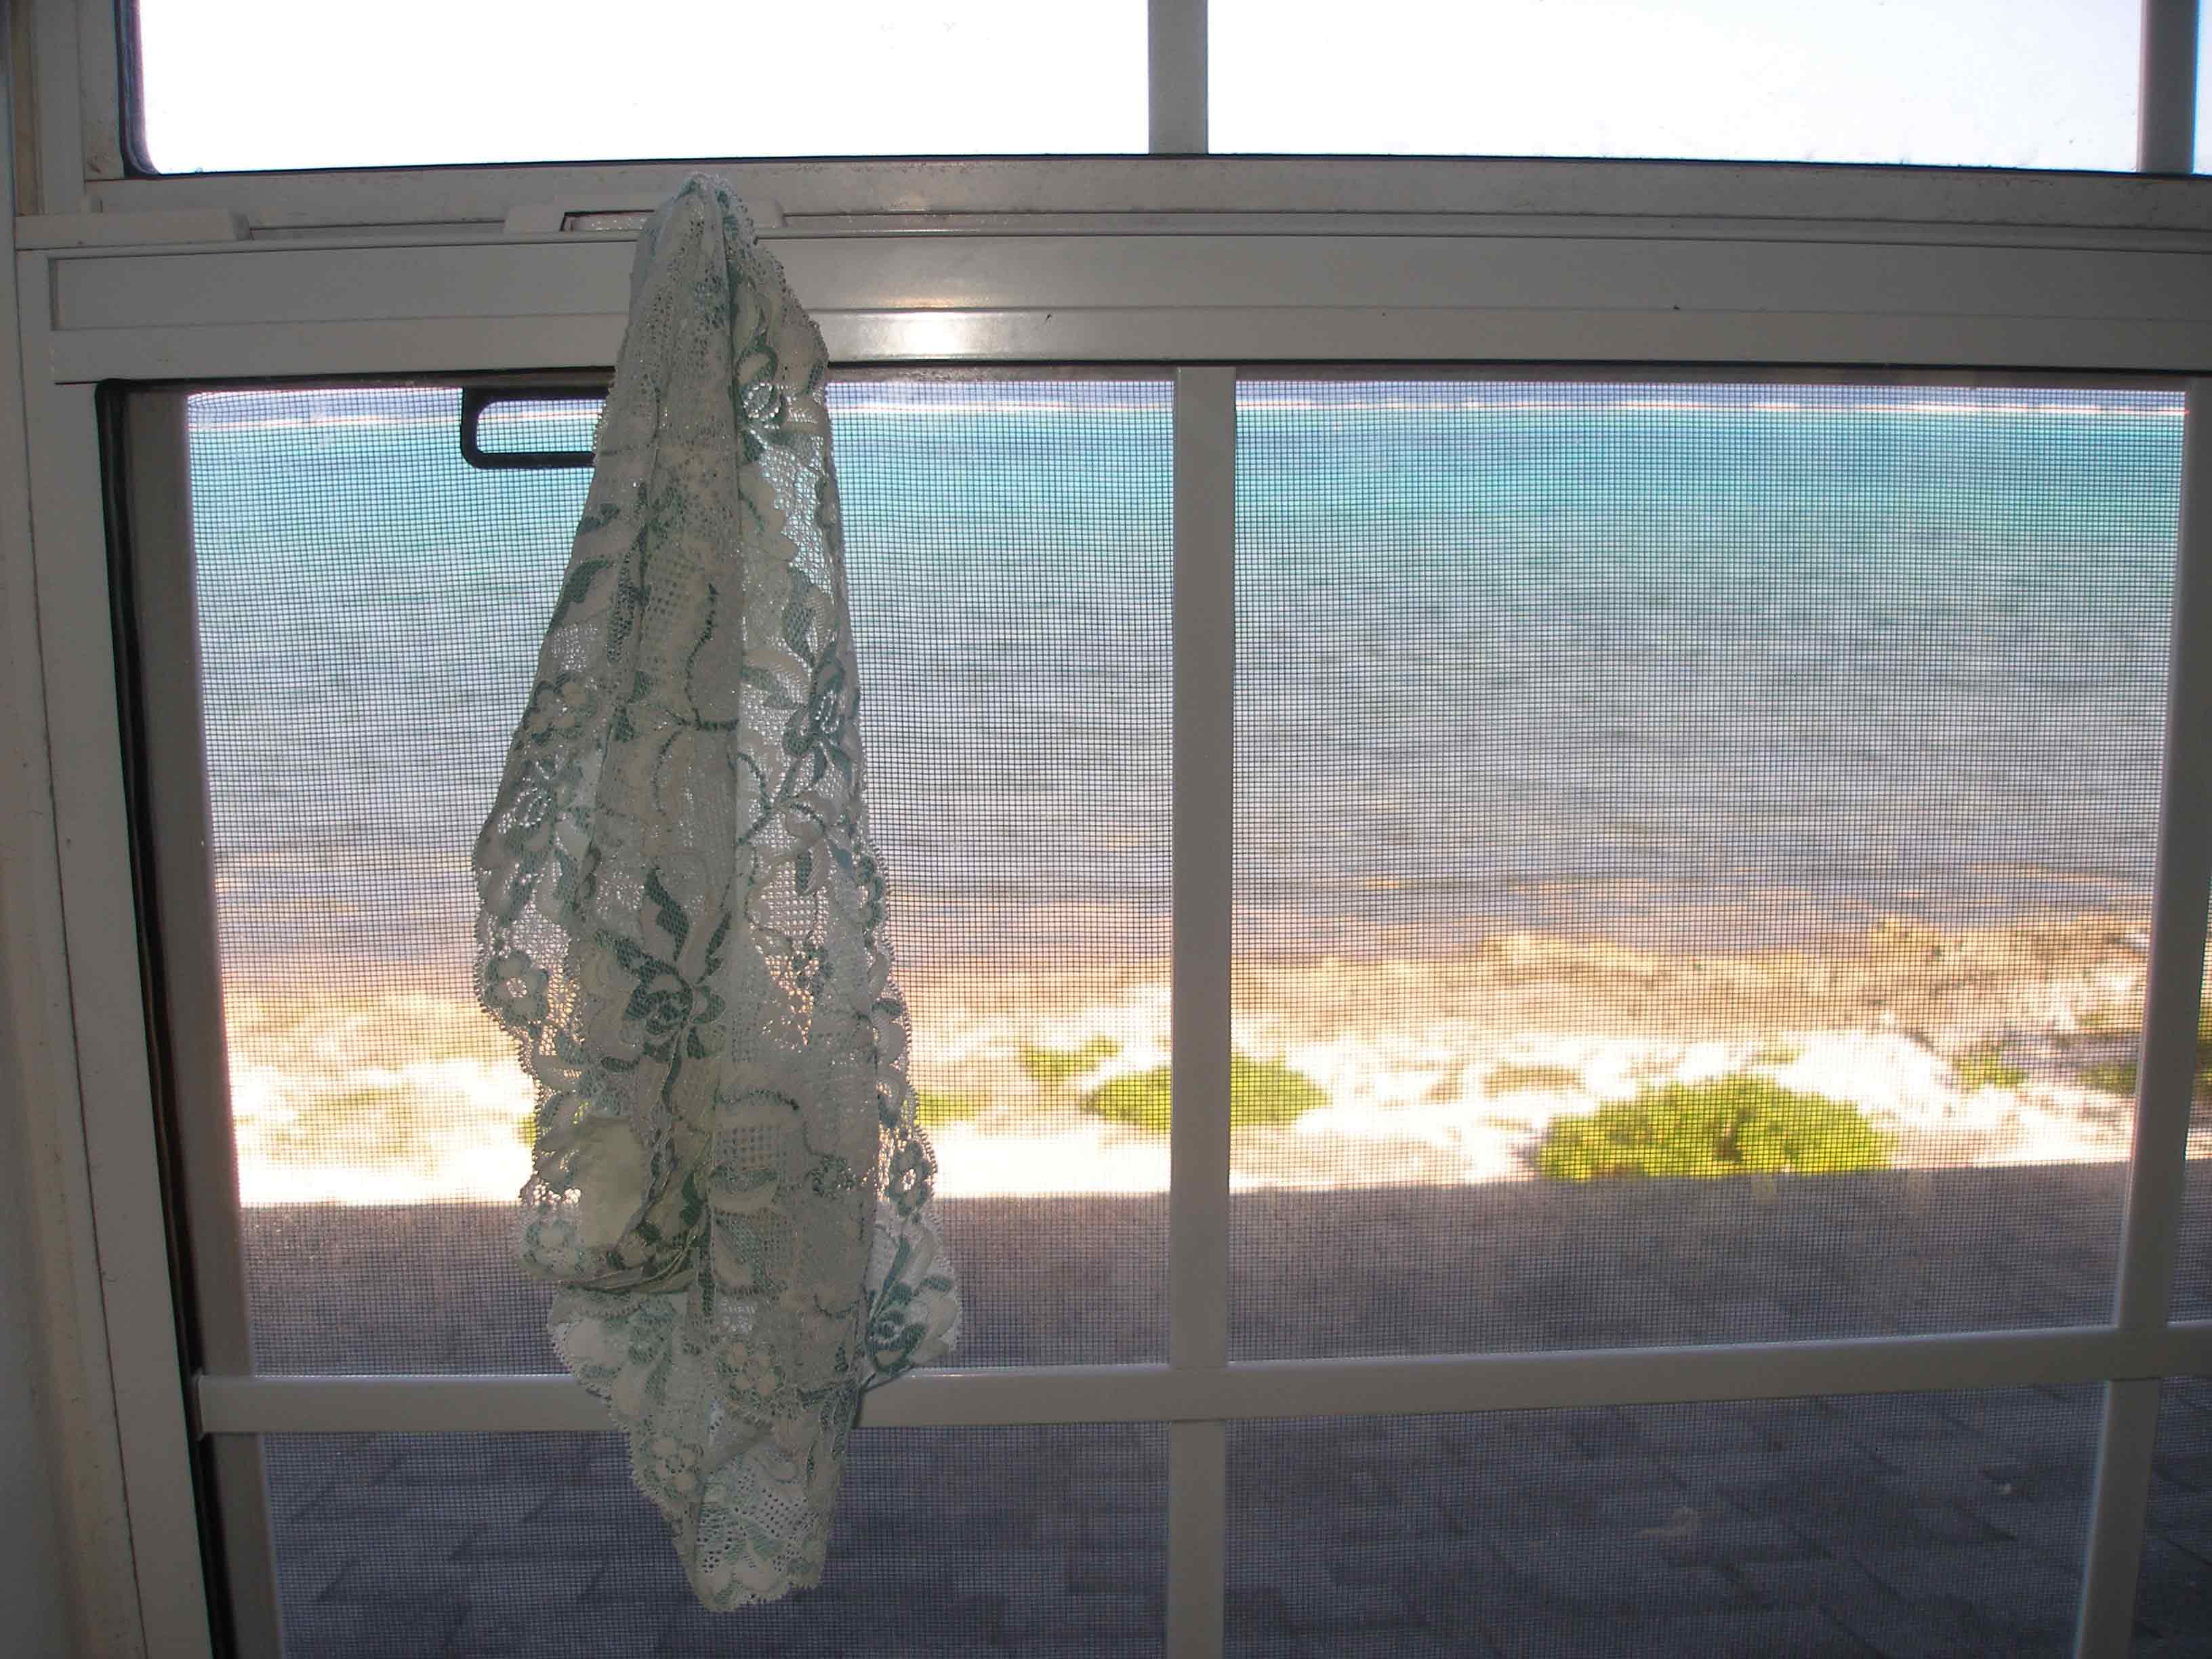
And to finish – a view of my new undies and the view from my sewing room window. What else does a person need to be inspired every day.
Enjoyed this tutorial and found it useful ? – please Share and Pin using the Social buttons at the bottom of the post. I want everyone to see my undies – er, you know what I mean !
Authored by: Deby at So Sew Easy


Thank you for your amazing patterns!
Where to get a bra and panty set I need some but I don’t have any money how to win some
I am delighted that you provided a pattern and didn’t go to the usual “Tear apart your favorite pair of underwear and use it for your pattern” instructions.
I am somewhat unhappy that these are made of lace. I wear only cotton bikini underwear, so the style and the fabric wouldn’t work for me. Also, the pattern only goes up to a Large, and I’m way too big for that.
Hi, first of all, thanks for the pattern and the instruction. I’d like to sew this but with my serger instead of the overcast foot, should I add 6mm allowances on the pieces?
Thanks.
No just do not use the knife at all.
Hi there,
I was given some stretch lace and would like to sew those panties : is the sewing margin included in your pattern and if so, what’s the size of it ?
Thank for your answer and for all the patterns you share !!!
Hello Fabianne, please use the overcast foot and you will see that you do not need to worry about the seam allowance. Do read the instructions thoroughly before starting.
thank you I finally found this tutorial again and I am making some. So much fun and great way to use up scraps of fabric.
Indeed!
I have bipolar and this design is easy and not frustrating! I am making a ton of them to keep me busy (a good outlet for my manic episodes). Too many for me to wear. Is it okay if I sell what I make?
yes, Cathy! By all means, sell the surplus panties they are adorable!
Those are cute and perfect! Cathy
Stephanie, if you are still following this thread. I am now an older woman and have been wearing this style through weight gain and loss. They can’t ride up, because they follow the shape of your body.
As an older woman with a surgery scar above and along the pubis, I find they do tend to take a v shape from the hips under the belly.
I had my measurements done by a pro and after my hip measurements I insisted on a ‘belly’ measurement. 4 inches more!
Ladies: at last a pattern to replace the last panties that I have been hand-washing and babying for decades. French cut was fashionable so I bought out the stores in three sizes. Now I can sew my own.
I will be experimenting with a wider crotch and longer liner as I find that store-bought aren’t generous enough. I have also bought some stretch fabric to experiment making non-sexy versions, and lined versions. Is that ok with your pattern license?
gostaria de saber os tamanhos em portugues seria p-m-g-xg rsrsrs obrigada pelo molde
Thanks for the pattern. I would love to sew them, could you please tell me how much material would I need for the large size?
Thanks
For best results please print the pattern and lay it on a fabric the same width than the one you are planning to buy. That would give you the best yardage for your money.
[…] SO SEW EASY – lace undies SO ZO WHAT DO YOU KNOWN – darmowy wykrój MAKE BRA – hipster undies RED HEELS – budapest high waist panty FEHRTRADE – lacet thong panty […]
Thank you so much for such a fantastic and easy pattern! I have already made several pair! It’s so satisfying to be able to make something that is quick, easy, practical, comfortable, cheap, AND sexy! One question…if I have some stretch lace that is 3″, is there a way I should modify the XS pattern so that the “v” in the front doesn’t dip quite so low? (I don’t mind the back being more thong-ish, but would like the front to be a little higher.) Thanks!
Hi Sara, the answer to your question requires a different pattern altogether. I will publish one with a super sexi triangle in the front, I am just waiting for the mannequin to arrive to be able to drape it properly. Stay tuned.
Lovely! Thanks for responding…I will absolutely keep an eye out for that new pattern! Love the work you gals do here…thanks for sharing your passion w/ the rest of the world!
[…] to try out the Seamwork Geneva pattern, and if I find time I’ll also be having a go at the Lace V undies from So Sew Easy as this is a style I find really comfy. One thing […]
Thank you for the pattern! I’ve already made one in a lovely rust colored stretch lace. If i wanted to alter the pattern to make it less “cheeky”, would I decrease the curviness of the butt-end curve? Thanks again!
Yes that would be the way to do it if your lace is wide enough.
Thank so much for sharing this pattern. I went out & bought 3 different laces yesterday & I made one up. They are so so cute, I even put a little bow at the front with 2 different colour ribbons. I have 2 more to make today & I am going to teach my neighbour how to make them, she said that it looked so cute. My future daughter in law is going to love these tomorrow for her birthday. I have made knickers in the past but these are so easy & sexy. I also found a tutorial on line on how to make little bows buy using a fork. So that might help your viewers to add that little extra touch.
[…] Spitzen-Pants von SoSewEasy […]
[…] être franche, le patron du Cheeky panties de So Sew easy m’a intéressé car j’ai en ma possession exactement ce qu’il faut pour le réaliser : du […]
[…] Sew Easy‘s article Sew your own lace underwear – Free pattern and tutorial for making panties out of stretch lace trim. She recommends […]
[…] color stretch lace, so I have also made some lace hipsters following a free pattern from sew so easy which I graded to suit me (worked really […]
The pattern looks nice, but the printing itself is problem. With no scalling, it prints way too big for me, so it’s hard to get it right. Maybe you could add some line into the pattern with exact measurements? Like: “This line should be 5 cm long”, so it would be easier to check, if it is printed alright?
Hi REV, are you using Adobe Reader and printing on actual size?
Same problem here. I’m using acrobat reader and printing at 100% Could the issue be the paper size? I’m printing at A4, is that pattern designed for US letter size or A2 perhaps?
Think I got it, you’re suposed to print those pages landscape! 😀
It is for A4, needs to be printed on actual size.
I want to love these very much. My bestie and I agree that they are the sexiest and most uncomfortable underwear we own. 🙁
I’m an older woman and would love to introduce the panties into my wardrobe. W h at I would like to know is do they ride up very much? I have a rather full rear lol
I find with shorts and pants that are tighter fitting like jeans, they stay right where I put them. I still wear full panties with dresses if I’m not wearing tights or hose. All I can say is try a pair and see what you think! Everyone I make them for loves them!
Stephanie, if you are still following this thread. I am now an older woman and have been wearing this style through weight gain and loss. They can’t ride up, because they follow the shape of your body.
As an older woman with a surgery scar above and along the pubis, I find they do tend to take a v shape from the hips under the belly.
I had my measurements done by a pro and after my hip measurements I insisted on a ‘belly’ measurement. 4 inches more!
Step 4- what do you mean by curved seams? I can’t tell what edge of the pattern you are calling curved- if it is the left and right sides then won’t you end up with no leg holes? Yes I looked at the pdf version of this and it still makes no sense
Hello Sarah,
The pattern pieces are curved, so when you are sewing this two peaces together you should see the curve and keep within this the curve, there would be a tendency to try to pull the fabric to make it straight, it should not happen. The photo in the article explains this step.
Hope that helps!
Sarah, the curved seams are the front and back seams that curve to make the crotch seam. If you look at the photos of the pattern piece, you’ll see the curved edge.
As a woman myself, it amazes me women are able to wear these things! Yikes!!!!!!
These don’t fit like a g-string or thong. You might be surprised by how comfortable they are!
Stephanie, if you are still following this thread. I am now an older woman and have been wearing this style through weight gain and loss. They can’t ride up, because they follow the shape of your body.
As an older woman with a surgery scar above and along the pubis, I find they do tend to take a v shape from the hips under the belly.
I had my measurements done by a pro and after my hip measurements I insisted on a ‘belly’ measurement. 4 inches more!
Deby you are just the best!! Thank you for sharing
Thanks so much for sharing. My daughter is a teen & it’s hard to find panties that fit her & as others have said Victoria Secret are pretty pricey. I always thought they would probably be easy to sew. Just didn’t know how.
Very glad to hear this is useful for you Jennifer. Yes these are quick and easy to sew. Once you have the first couple out of the way, you’ll be sewing them in super-quick time.