


Why design your own pencil skirt sloper pattern?
Have you EVER owned a pencil skirt that fit you properly? I find the ready to wear either gape in the waist, or are too tight across the hip or thigh or the darts aren't right. I guess perhaps my waist to hip ratio does not match the ideal hourglass figure. Neither is my widest point in the regular hip – I am a true pear with my thighs wider than my hips but with a very square waist to hips too.

Does your skirt fit like this? You need a custom pattern.
Now that I can sew (a little) I thought it was about time I tried to rectify this with my own pencil skirt. But buying a pattern would not solve the problems and would require so many alterations and it's so difficult to fit on myself without any help. So drafting my own pattern from scratch seemed to be the way to go. I know you all love free sewing patterns as much as I do, so let's give this a go.
I'm going to show you how you can make your own custom pattern too.
Want to make your own perfectly fitting skirt pattern – read on!
How to make a pencil skirt sloper
There are a number of tutorials online and I took inspiration from several to eventually come up with a system that worked for me and I drafted my pattern as follows:
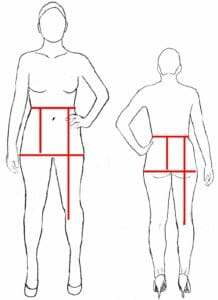
- Take measurements at the natural waistline and at the widest part of the body (hips, bottom or thighs if needed).
- If you have a tape measure that uses centimeters, I recommend using that for this pattern drafting as it will give a more accurate measurement than using inches. If you cannot use centimeters, then try to be as accurate as possible with your measurements in inches for the best finished result. Do not round to the nearest inch.
- Mark on the body where the measurements were taken, or tie around a piece of string or loose elastic and then measure the vertical distance between your measurements from waist to widest part of the body.

- Measure how long you want your standard skirt length from waist to hemline.
- Use large sheets of paper or tape together enough smaller pieces until you make up a piece of paper big enough to draw your pattern. Many sewists like to use Sewable Swedish Tracing Paper
or Medical Pattern Paper
for pattern making – it's strong enough to use again and again and can even be pinned to the body to check for fit.
- Make the paper the length of your skirt plus 4 inches, and the width of your widest measurement, divided by two and add back 4 inches. This will give you some working area and allow for you to write down your measurements and calculations.
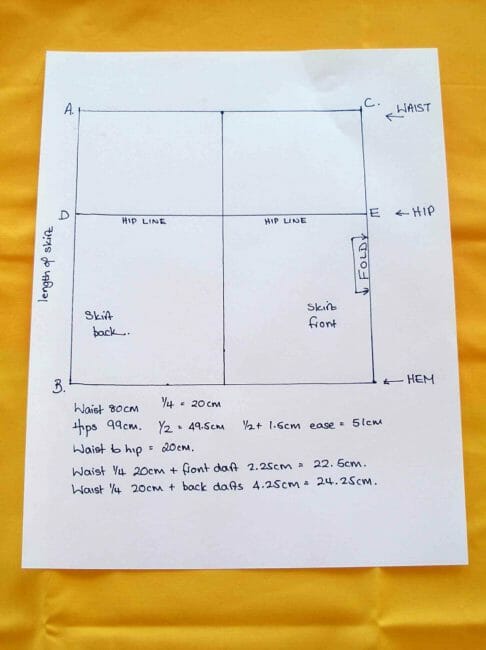
- Now draw a rectangle in the center of your paper which is the length of your finished skirt measurement from waist to hem, and the 1/2 width of your widest measurement plus sitting ease. We will need some ‘ease' in our skirt if it is not to be skin tight and then split when we sit down and our bottom and thighs expand. So add some ease to your hip measurement – for slimmer bodies allow 1.5cm, for softer bodies allow 2.5cm. Example – my hip measurement is 99 centimeters, so I divide by two to get 49.5 cm, add on 1.5 cm for ease and make my rectangle 51 cm wide.
- Length A to B is the length of the skirt from waist to hemline excluding the width of any waistband.
- Length A to C is the hip measurement divided by two, plus your ease of 1.5 or 2.5cm.
- Now find the center of the line at the top and bottom and draw a vertical line down the center to make two pattern pieces. On the right hand side, make this the skirt front and mark that it is to be cut on the fold. The left hand piece is the skirt back.
- Add a hip line D to E across the full width and down from the waistline according to your measurement from waist to hip. Length A to D is the waist down to hip measurement.
- Your basic pattern should look like this so far. I'm working in miniature so it is easier to photograph!
The basic rectangle of length and hips plus sitting ease.
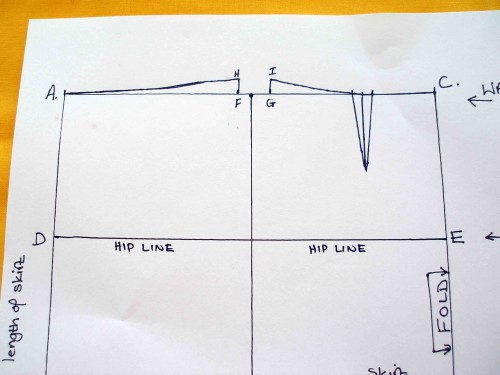
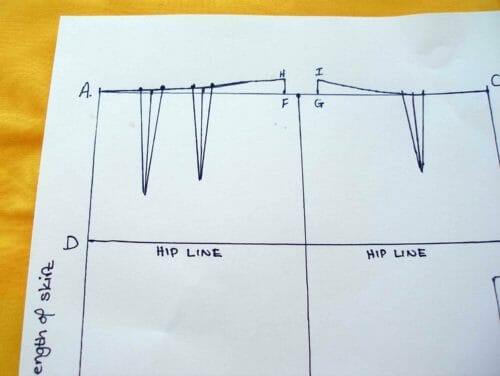
- Our bodies are curved at the waist so we need to curve our pattern. First mark across on each side for a quarter of the waist measurement plus 4.25cm for the two darts on the back, and quarter waist plus 2.25 cm for the one dart on the front. Make these points F and G.
- Now measure up 1.5cm from F and G and make these points H and I. Draw lines from H to A and from I to C. Make these lines slightly curved.
- Now to add the darts – let's do the front first. The dart should be centered 4 inches from the fold, so measure in 4 inches and make a mark on the waistline. This is the center of the dart. Now measure out 1cm on each side of your mark and these are the outsides of your dark. Mark. The length of your front dart is 10cm and it should run parallel to the skirt front. Draw up the dart, joining up the points you just marked.
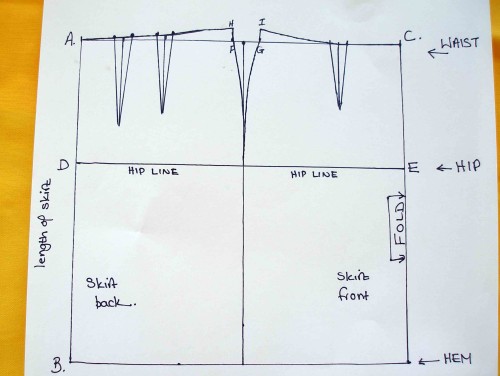
- It should look like this.
Showing the curve of the waist at the top of each piece.
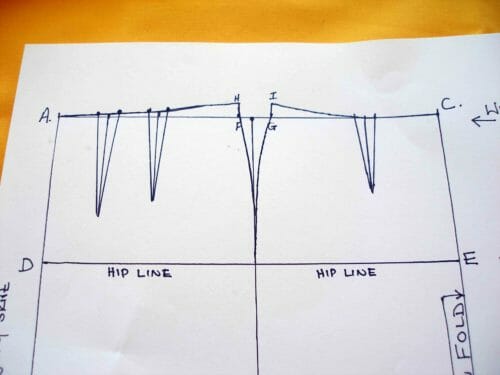
- Procedures are the same for the two back darts. We will space them evenly so divide your quarter waist measurement into 3 for the spacing. My quarter waist is 20cm, so the first dart is at 6.7cm and the second at 13.3cm. Dart lengths are 14cm for the one on the far left, and 12.5cm for the one on the right. Each will be 2cm wide and run parallel to the side. It should look something like this when finished, although yours may be neater because I am working in miniature.
Showing the front and back darts added
Your pattern so far
- Now marks F and G need to be smoothly curved from the waist to the hip line. Yours may be more exaggerated than mine because I am rather square. Your body is curved so draw a smooth curve rather than a straight line between waist and hip. A drafting curve
can help and will come in useful if you plan to draft or alter patterns yourself.
Curve from waist to hip
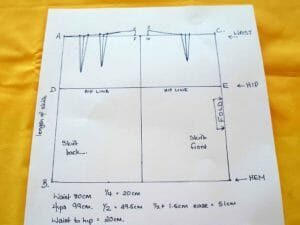
- Now your basic sloper is ready. However you do need to add seam allowances.
The finished pattern – now add seam allowances
- Cut out your pattern pieces separately and then stick them down on a large sheet of paper and draw in your seam allowances around the outside. 5/8th of an inch is standard, you may want to add 2 inches for the bottom hemline. Do not add a seam allowance to the front center as this is cut on the fold.

Testing your sloper pattern
Now, not all bodies are the same, and some of us like a skirt to fit differently to others. So before you go cutting into any special or expensive fabric, do try out your new pattern on some muslin, cheapy remnant or old sheet to check the fit. Then if any adjustment is needed, do remember to alter your sloper for next time.
Making a waistband for your skirt sloper
You can sew the skirt without an added waistband, just with facings and a zipper right up to the top. Or you can add a simple straight waistband. For the waistband:
- Draw a rectangle 6cm wide by the length of your waist measurement plus 4cm. This extra is for the center back overlap for any button or closure.
- Add a 5/8th inch seam allowance around the entire outside and once folded in half, this will form a simple one piece waistband for the skirt.
Making a skirt from your sloper pattern
Well, all this looks good in theory but will it actually work out in practice? Let's see. I had a piece of quite thick shiny satin in a navy blue from the remnant bin this week that was perfect for a trial piece.
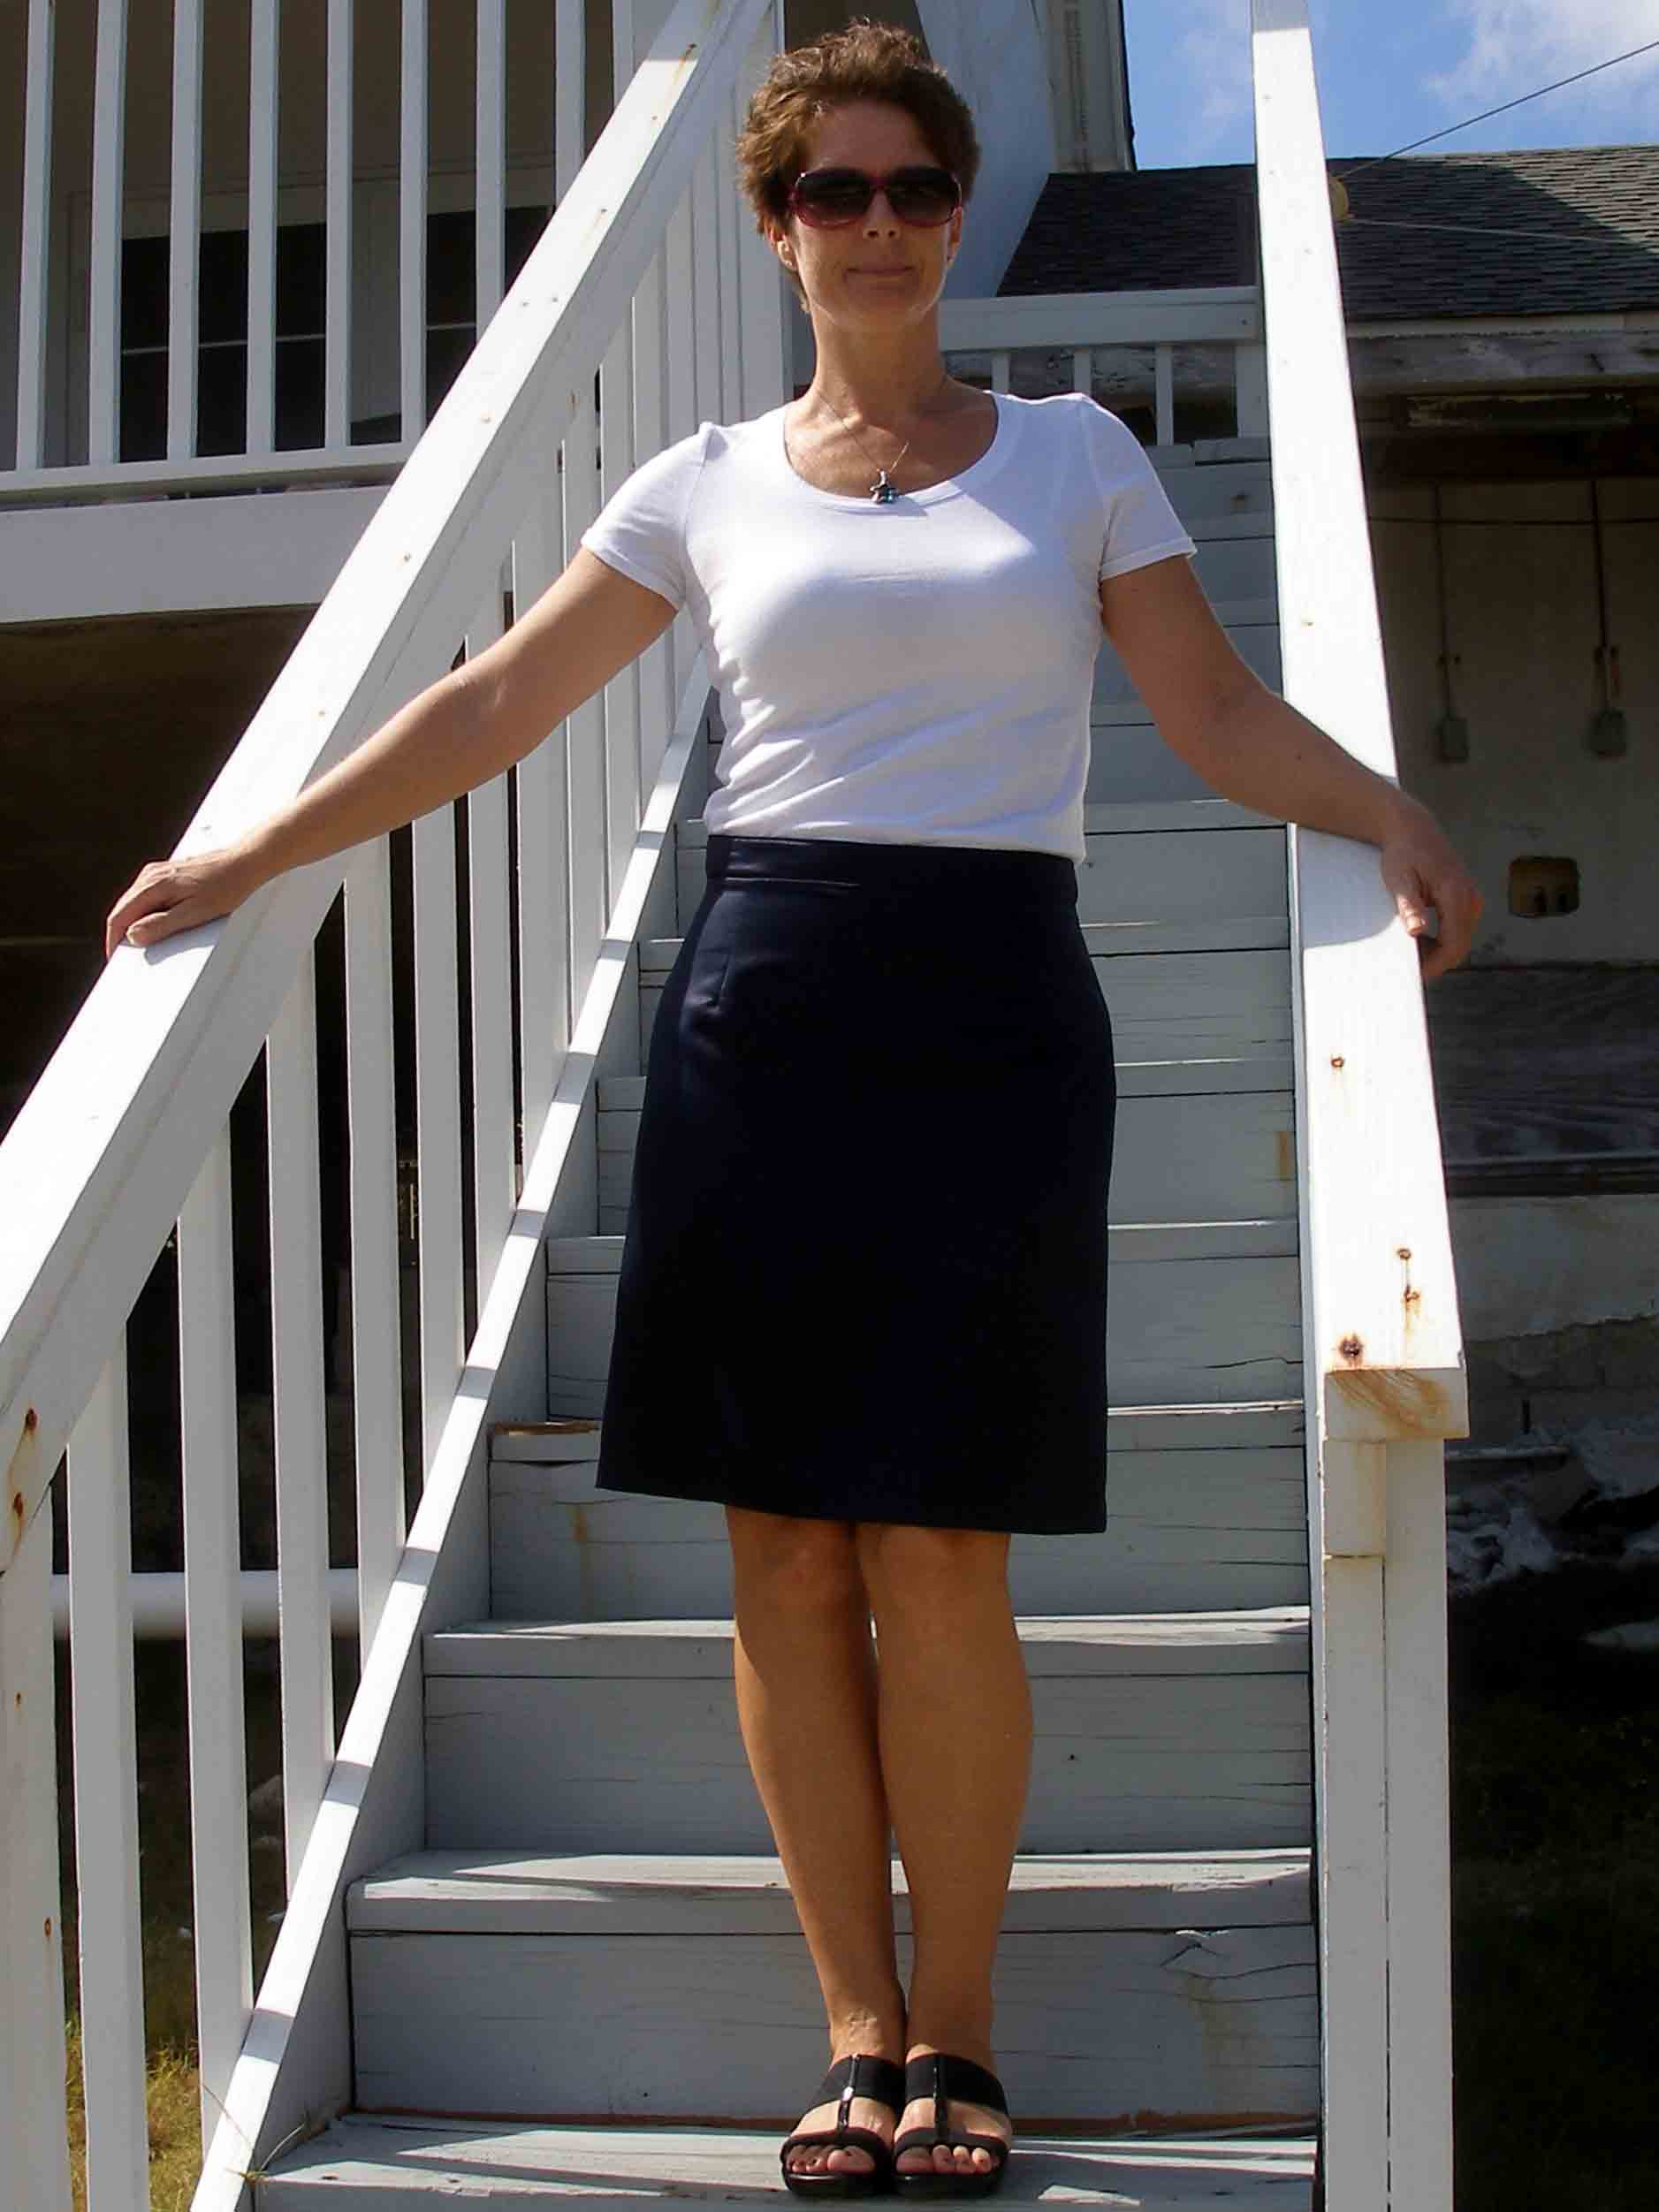
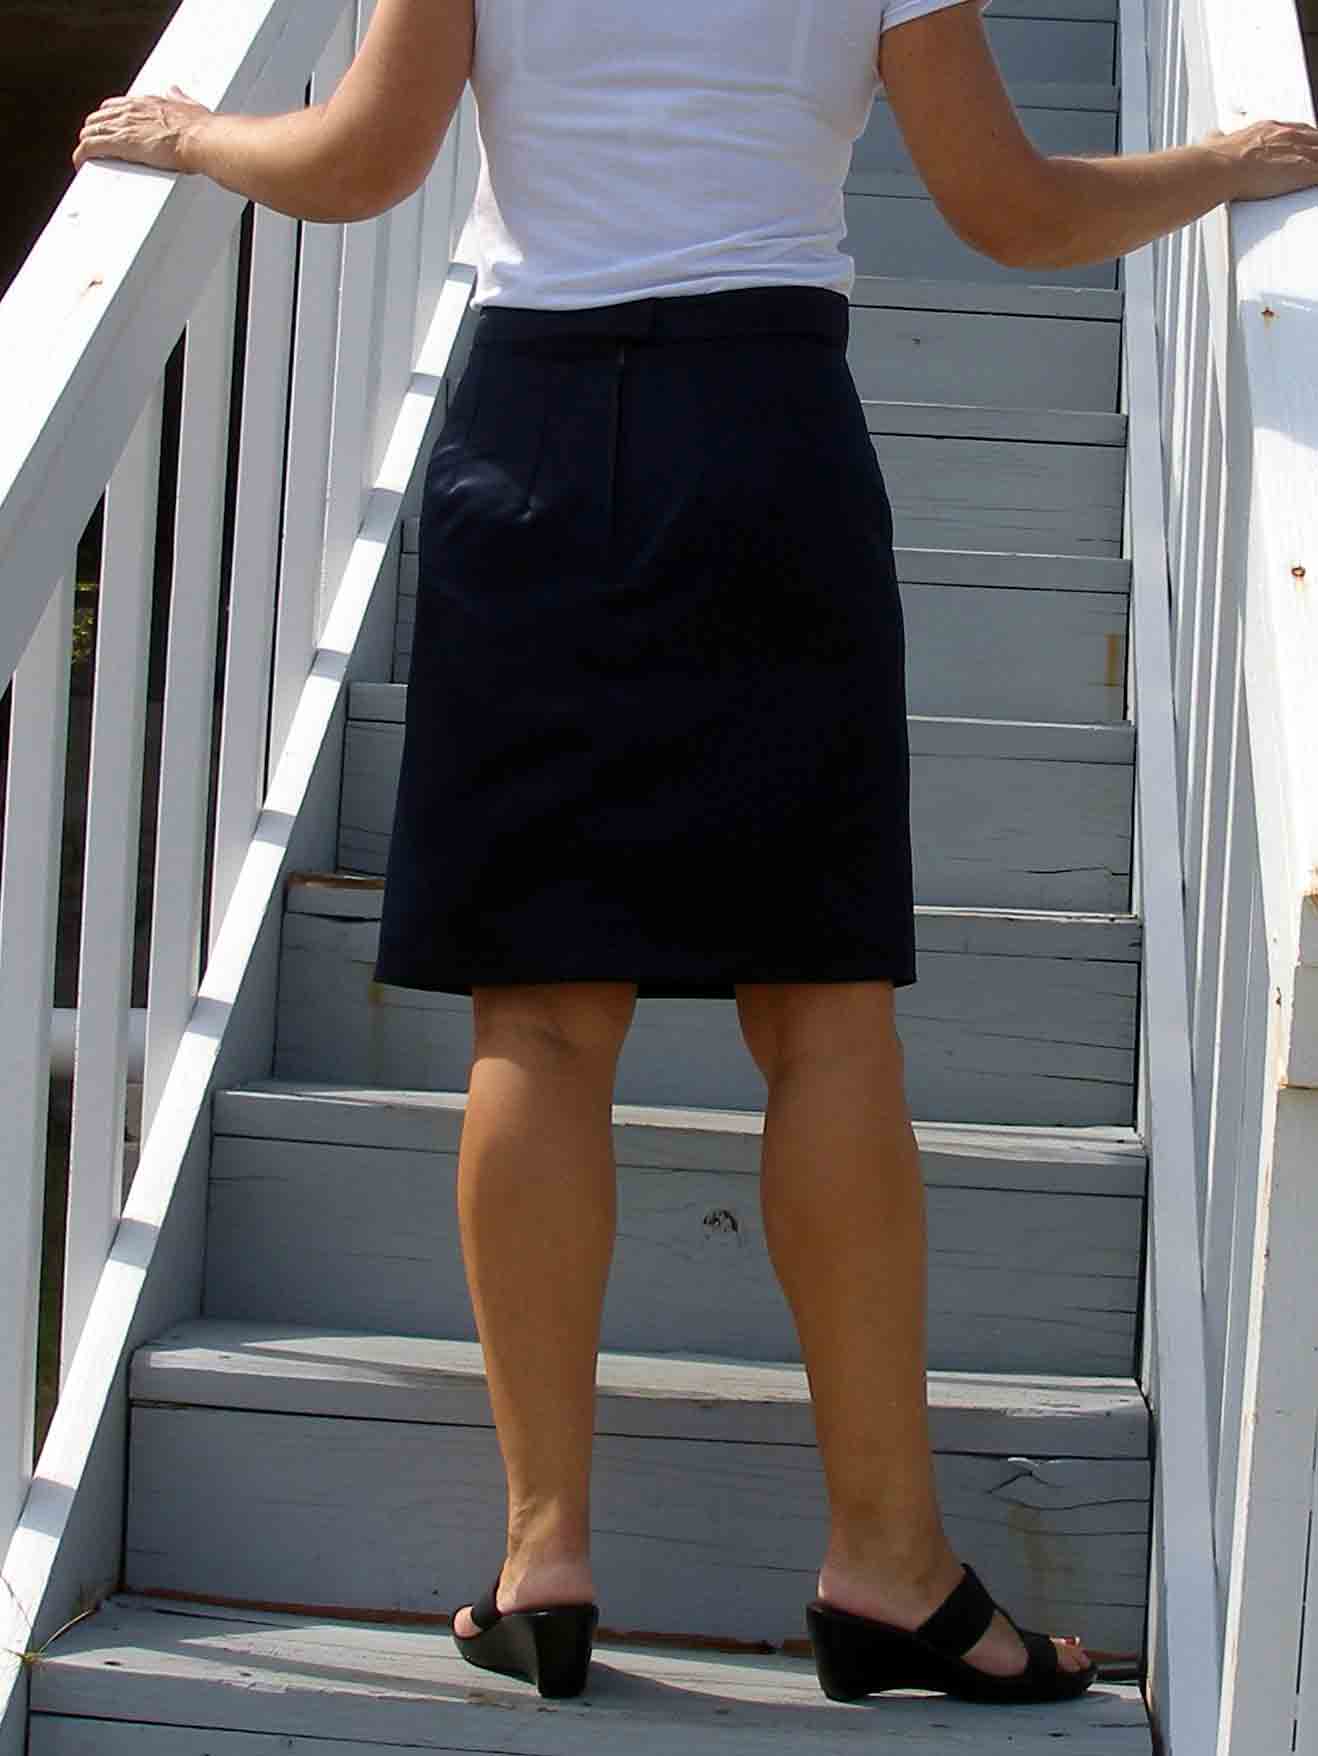
YAY – it works! I made up this skirt directly from my sloper without any adjustment or fitting needed at all. I sewed it, I put it on, it fitted! And I have to say this is the best fitting pencil skirt I have EVER owned. You can see from the following pictures how I am so square that its no wonder I've never got a RTW skirt that fits me properly.
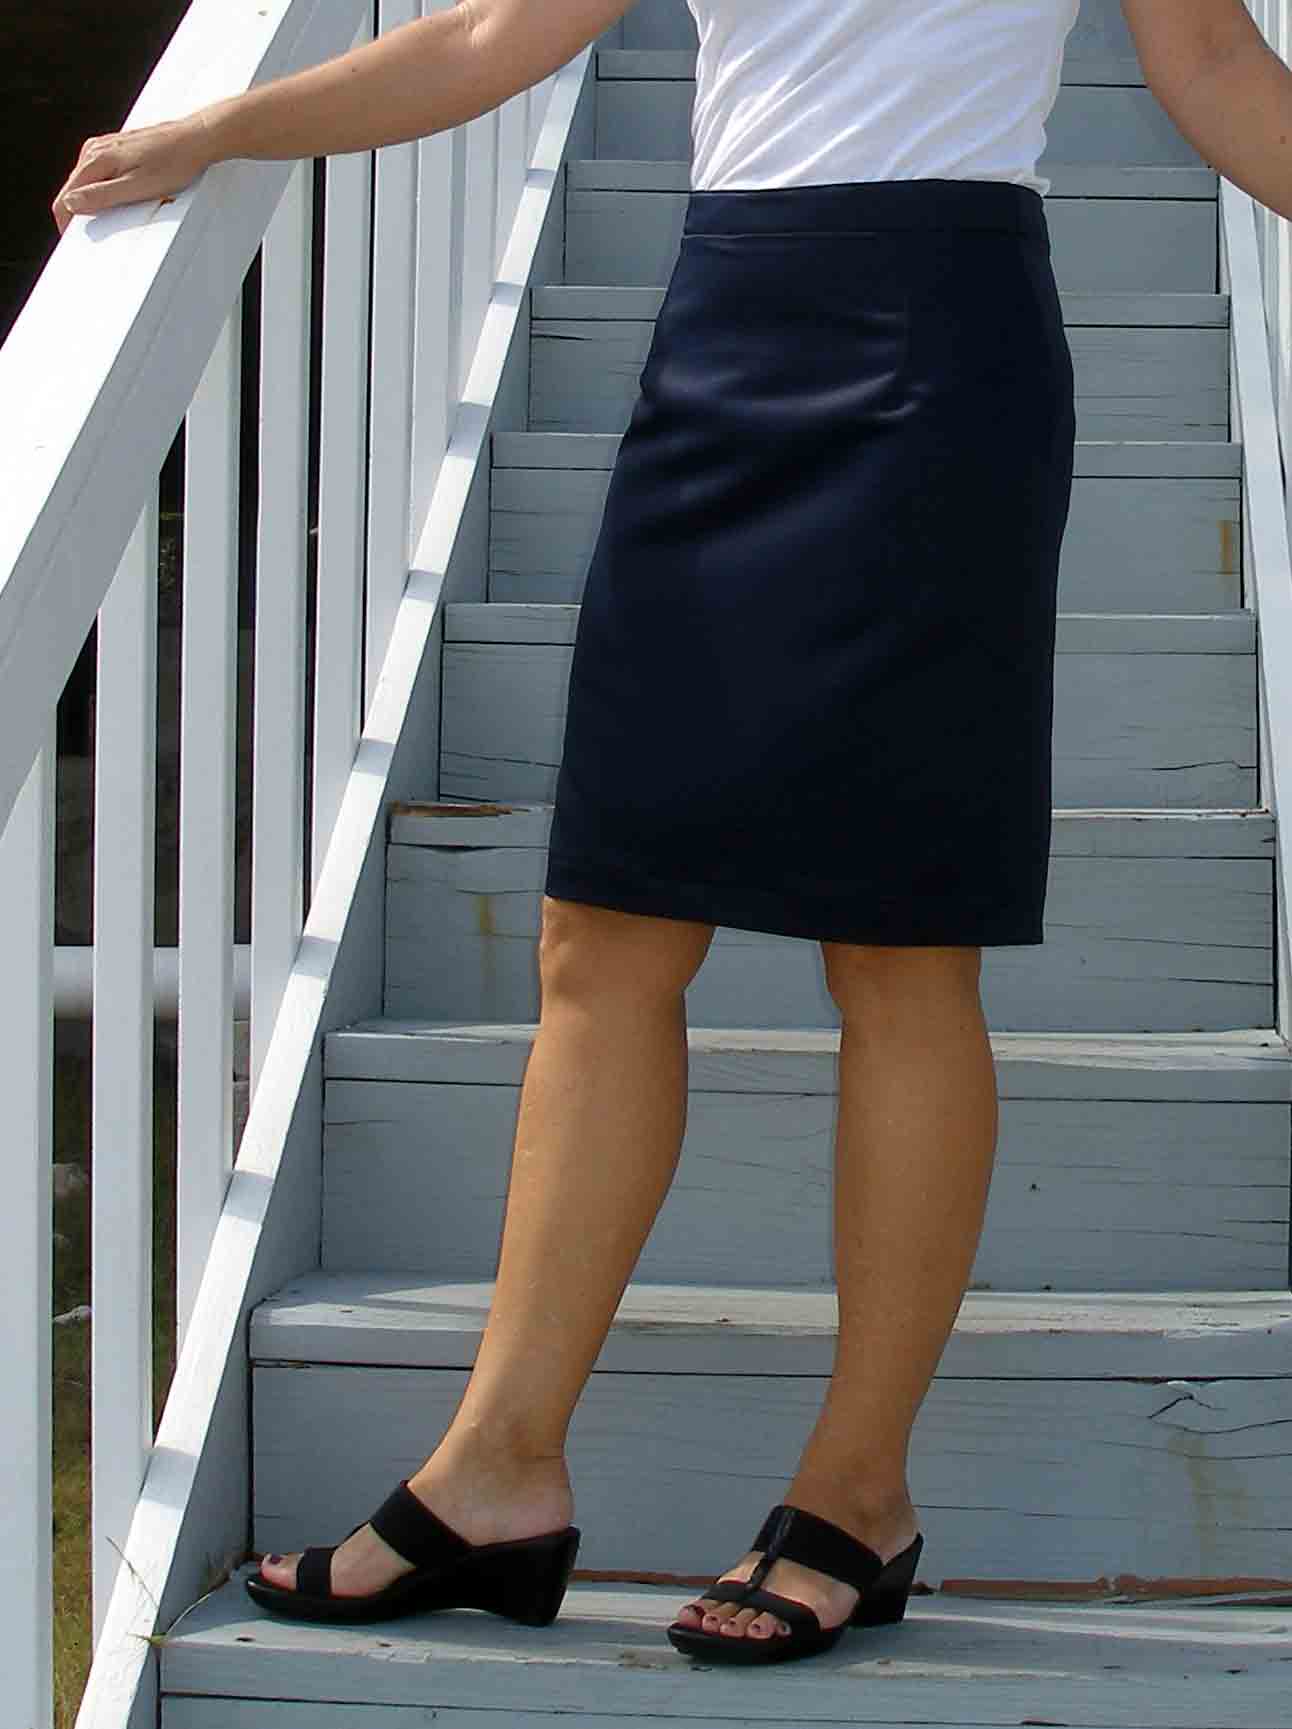 I am really surprised how the skirt actually appears to make me look slimmer. I think this must just be down to the fact that it fits my body properly so there are no lumps and bumps showing, no places where the fabric is stretched making horizontal lines across my hips and no gaping waist. Sadly the dark color doesn't show up the fit in these photos as well as I would like – should have gone for a lighter color.
 I am DELIGHTED with the results of this sloper. Now that I have this basic pattern I can quickly run it up in any fabric knowing that it is going to fit me perfectly. And it's a great basis for starting to think about some kind of styling to the skirt – a yoke perhaps? Pockets? Color blocking, vertical seaming, or a contrast band at the bottom? Or I could reduce the width at the bottom and make it longer and narrower for a retro fit. The possibilities are now endless.
Do give this a try – its not too difficult and I'll be happy to give any further explanation or help below. Get stuck anywhere – drop me a note in the comments and I'll do my best to help you out.
Enjoy – and if you make a skirt I'd love to see it. Do post a link below.
UPDATE JUNE 2013 – this skirt is now the basis for our Sew A Skirt beginners tutorial series. You can following along and draft and sew this skirt over the course of 13 different tutorial posts. Covering choosing and preparing fabric, more about the drafting and seam allowances, marking and sewing darts, matching patterns, inserting a zipper, lining the skirt, hem finishes and more. Join us for the Sew A Skirt series – click the button below to go to the first post.
Authored by: Deby at So Sew Easy
If You'd Like To Support Our Site
If you want to help us continue to bring you a wide selection of free sewing patterns and projects, please consider buying us a coffee. We'd really, really appreciate it.Never miss a post, and follow along with the Sew A Skirt tutorial series. I'll send all updates to your mailbox twice a week for you to keep and follow along at your own pace.
I'm really looking forward to seeing your skirt and featuring it on Sew So Easy!
I promise, no spam. Just an email once or twice a week with the new posts.


This was a great lesson for me. I just got finished making the pattern but I have one problem. When drawing the back darts they go below my hip line unlike your drawing. Should they be like that?
I these were great instructions. Thank you!
For pattern drawing or extensions, I use a roll of dollar store or unused wrapping paper on the back/white side, and then keep pattern wrapped on roll to avoid fold creases.
can’t wait till my sewing machine is working.
Thank you so much!! Your instructions were great!!
Is the calculation spreadsheet available still? I tried the link from multiple posts and it doesn’t work for me. Do you have information on drafting a knit sloper for a skirt?
Hi Stephanie, it is not, I have to re-write this post.