


Here's a fun and easy little project that is perfect for beginners. It will help you learn some techniques like sewing zippers and boxing corners. It would also make a great gift to show off your sewing skills.
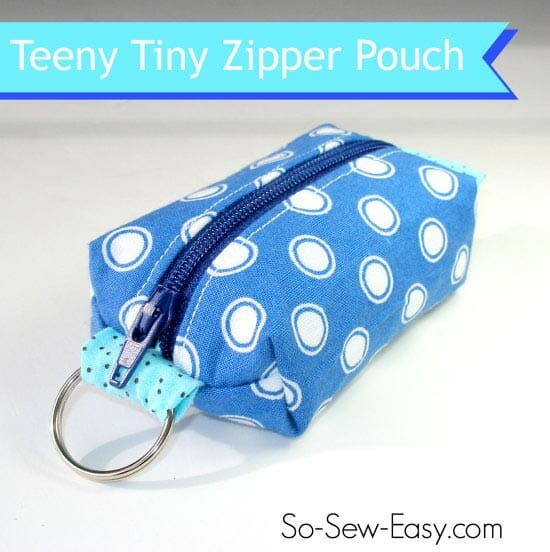
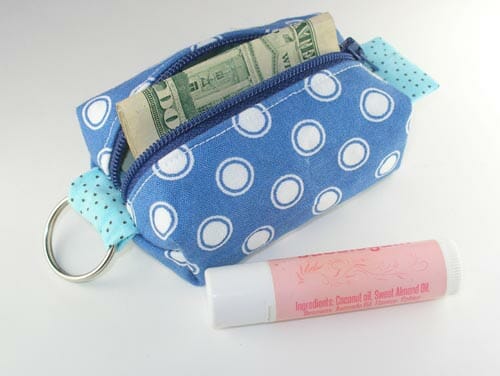
Sometimes you don't need a big bag. Just something small enough to take a lip balm and a few notes and coins. I made this tiny bag to keep on my key ring and thought you might like one too. Uses just a tiny amount of fabric, so its a great scrap buster project.
Features:
- Finished size – about 3.5 long, 1.25 inches tall and 2.25 inches wide
- Easy to scale pattern if you want a larger size
- Super cute!
- Great scrap buster – uses small pieces
- Attach it to your keys, or use it for your kid's lunch money and attach to their school bag
- Use it to hold a few essential inside your main purse, hygiene supplies, lipstick, tissues/wipes.
- Makes great gifts and stocking stuffers
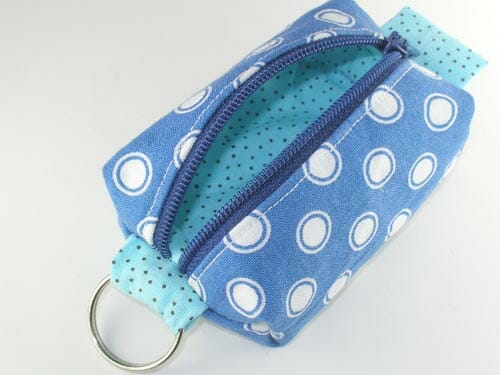
Sew the Teeny Tiny Mini Zipper Pouch
Firstly, I apologize. My camera packed in after just the first two photos. There I was happily snapping away and had no idea the pictures weren't saving properly.
So for this tutorial, there is just a video. But that's good anyway because everything is teeny tiny so its better for me to explain by showing you. It's quick and easy to sew, so it's not going to take you long to watch.
Subscribe to the YouTube channel:
Download the full PDF for the pattern and instructions.
[Need help downloading the pattern? Read this post – How to download and print PDF sewing patterns]


This is adorable but I have tried to buy the pattern and it keeps telling me that my card is declined. This happened for another pattern and I just gave up. I checked everything about numbers and dates on my card and do not use PayPal but the direct card option. Can you explain what I am doing wrong? I do not see anywhere else to contact you on your site except this area.
Hi Wendy, I do not take any credit cards for security reasons; Paypal and Stripe are the only way to pay or donate. Kind Regards,
Hiya, these look great for a fundraising project but cant seem to find the sizes of fabric required?
All the information required is on the pattern document!
im looking for same and found this on another sewing site 2 pieces of exterior fabric, 5″ x 3″
– 2 pieces of lining fabric, 5″ x 3″
– 2 pieces of medium weight interfacing, 5″ x 2.5″
– 2 pieces of coordinating fabric for the tabs, 2″ x 1.5″
– 9″ zip
– swivel lobster clasp
its the same thing would have been nice if she said the measurements in the video
So cute! Is it possible to make this by hand (not sewing machine)? Would you do anything differently?
Yes you can, and no you do not need to do anything different.
Could some one tell me which weight interfacing is best, heavy medium or light? Thanks
My daughter needed a coin purse and with all the extra fabrics and zippers I had, this was a great scrap buster! She loved it! Thank you for the tutorial and video, it came out perfect for her.
So happy for her!
Tutorial is great!!! I am making these for my daughter’s and roommates for a little stocking gift for Christmas.
thank good tutorial and a very good idea for little presents
I really like the grommet idea. Why do you think it fell out?
Just made this for my daughter to take to school for her fruit money. Very clear instructions and video. Thank you!
[…] Free pouch pattern […]
Thank you Deby so much for such a clear tutorial. I’m experimenting with sewing aged 68 and my 14 year old grand-daughter doesn’t care for much that I make. However this lovely little purse with the metal bits has really made her happy. I’ve made two flat purses so far and one boxed. Just need to learn to mix and match a bit better. Thank you again.
Fantastic idea! Thanks for sharing.
Thank you! I’m making some for my grand-daughters.
Thanks for a great pattern. I have enclosed pictures of my four finished zipper pouches. The lower two in the first photo are sized as the pattern directs. I found, however, that I could not fit a card in them. Then I made the top one, adding 1/2″ on both sides of the pattern pieces. I forgot to use the inside fabric for the tabs, but not too bad. This one will hold my cards.
I also made a fourth one, measuring the pieces at 7″ x 12″ and using a 14″ zipper. I also added a longer handle on one end. This is like a bag I bought several years ago. Much less expensive to make my own.
Thanks for a great pattern and the video. That made it easier to follow the instructions.
Sincerely, Judy Walker
Bozeman, Montana, USA
FullSizeRender.jpg
FullSizeRender.jpg
IMG_2699.JPG
Thanks Judith for posting this comment. Glad the pattern worked well for you.
Grommet idea – the plastic ones that snap together wouldn’t work well here (at least I don’t think so). But I did learn that when you are using a very small piece to make the bag and you only have a slender strip or the tabs, you only make one – I folded my strip in half and ended up with a tab for both ends, but no loops (and I didn’t think it through before finishing) so I either just use them in my purse (fine with me) or take it apart and make loops! LOL Live and learn!
I love these and have made four of them for personal use – I am going to make one for each of my friends who have dogs for their leashes.
Literally JUST did this. I left that little hole in the lining (used to flip right side out) and used a seam ripper to undo a few stitches of the main fabric to match it after I finished boxing the corners. Got out my hammer and grommet stuff, and presto! Dog waste bag holder!
Just finished making my first one, though made it a little bigger. Excellent tutorial, nice to hear an English voice.
I made my first one today, hoping to use it to hold bags on my dog leash. My first one won’t work (will use it for something else). I am thinking of using a longer tab, sewing just one end into the seam with a little piece of Velcro up next to the bag, then fold under the other end and put Velcro on it so it can be attached easily to the handle of a leash. Something new to try – I hate the bag holders that don’t stay closed (hate to rewind those bags). I wish I could figure out how to put a grommet type of opening on the bottom of the bag so I wouldn’t have to unzip for each new bag.
Hi Sue, congrats and thanks for sharing. Let us know if you figure out a modification with the grommet.
You can add a grommet by creating a hole and reinforcing it. There are also grommet kits and tools sold in craft stores like Joanns, that use metal grommets. It would look like the holes in a shower curtain, with a different size.
Check out the Easy Phone Charger Station project.
I searched for ‘how to put zipper in top of handbag’ and WOW! What a wonderful tute! You ONLY showed the necessary info and we didn’t have to watch the presser foot raise and lower or the needle go up and down! That saved much time on the viewer’s part and decluttered the video! I have never seen a video done like that …I love it! I am going to make a bag with a zip top very soon (have to buy headliner!) then I spied the mini pouch key holder… fantastic! I quickly wrote down 14 names of recipients and pulled out that stack of useless (until now! I’m not a quilter) tiny fabric scraps. : D. I’m off to buy rings, swivels, and headliner. Thank you hugely for so lovingly sharing your creativity with others.
Just made this today. So cute and what a great video tutorial! Thank you very much!!!
What are the measurements for the fabric for this project. I am new to sewing and cannot eyeball things just yet.
All of the info you need is in the pattern download Christy so that you can save this to your computer, or save it in your pattern library until you are ready to sew. You don’t have to eyeball anything here – I’ll set it all out for you. Hop on over and download the PDF and that has everything you need.
I too cannot find the sizes used for the teeny tiny pouch. What are the sizes?
They are on the pattern please download it.
Good morning. I found your tutorial while searching for easy, fat quarter projects. My girls and I how to okay with the new sewing machine today. When you sewed across the zipper to install the tabs, was the zipper closed or open? Thank you.
You would need to have the zipper open at the point where you sew across the ends of the bag or you may find it difficult to open it afterwards once you end up with the bag right sides in and can only access the underside of the zipper.
Brilliant – thank you so much for sharing your wonderful ideas.
Pam
That’s genius! Thank you for sharing!
I just finished making this pouch…it’s sooooo cute! Thanks for the tutorial.
Thank you, Deby, very much for giving your pattern free.
It’s my pleasure Zuzana, I hope you enjoy making these.
I’m just getting into sewing, and your tutorials are WONDERFUL!! I’m a weaver looking to finally make things other than scarves or table runners. I’ve been making little envelope-style purses, but I like the tiny box purse of yours. I have a question or two though: With my woven fabric being quite stiff, may I ignore the lining and interfacing? Also, since I sew by hand, may I use one piece of fabric that’s twice the length instead of two that would be sewn on the bottom?
Thanks for allowing us to learn from you. Please keep up the great work!
Amanda
Hi Amanda and welcome. Yes, if you already are using a fabric which is fairly stiff, and you would be happy with the result, then the interfacing is optional. And yes, you can omit that extra bottom seam if you’ll be sewing by hand and can get your needle in there without it. Hope they turn out nicely for you. Thanks for following along.
Thank you, thank you, thank you. I so enjoyed making this little purse and I’m sure my granddaughter will love it too.
Thank you for this great pattern. I have just made my first one. Made it a little larger but going to try the smaller one next.
Oh Deby, I had loads of fun with your tutorial and video. The instructions are excellent! Thank you so much!
Thank you for this video tutorial. This little bag is so cute. I have a sewn today and I will show the next few days on my blog. Creative Greetings from Germany
Regina
This is just plain adorable! Love the video and the free pattern….THANK YOU SO MUCH for sharing it! Gonna get started on a couple of these today for money holder gifts to teenage girls. (and one for me too!)
I have had this on my list to make for quite some time, but hadn’t squeezed it in. As I have now made numerous ones, I wanted to let you know how terrific and fast these are. Thank you for the tutorial!
Thanks Colleen. They are fun and fast too.
Beautiful tutorial, only thing, what size do you cut the peices?
Everything you need for the pattern pieces and sizes is in the download, so you can keep it on your computer and access it offline at any time. Or print if you would like.
I cannot find the part which tells me what size to cut the pieces.
After the video is the link to the pattern.
oh Deby, awesome tutorial, so do-able! Love your fabric choices.
I loved this pattern. Thanks for sharing it with us.
I wish there was a way to sew the closure by machine than by hand.
Its all just so teeny tiny! Hard to get your machine into such tight spaces and still get a neat finish.
To Deby: I’ve made a couple of dozen of these following directions to a T and they come out perfectly with absolutely no trouble with machine. I have an Elna 720 Excellence which is quite large so just wondering if it could be your machine? Good luck…they’re so fun and cute!
Thank you! I made two today– bigger, though. I’m going to use mine for putting chargers for various electronic devices in. The second one is for my daughter and I made hers of a vintage linen wall calendar. Love these– planning on making them for co-workers for Christmas. A girl can never have too many zippy bags!