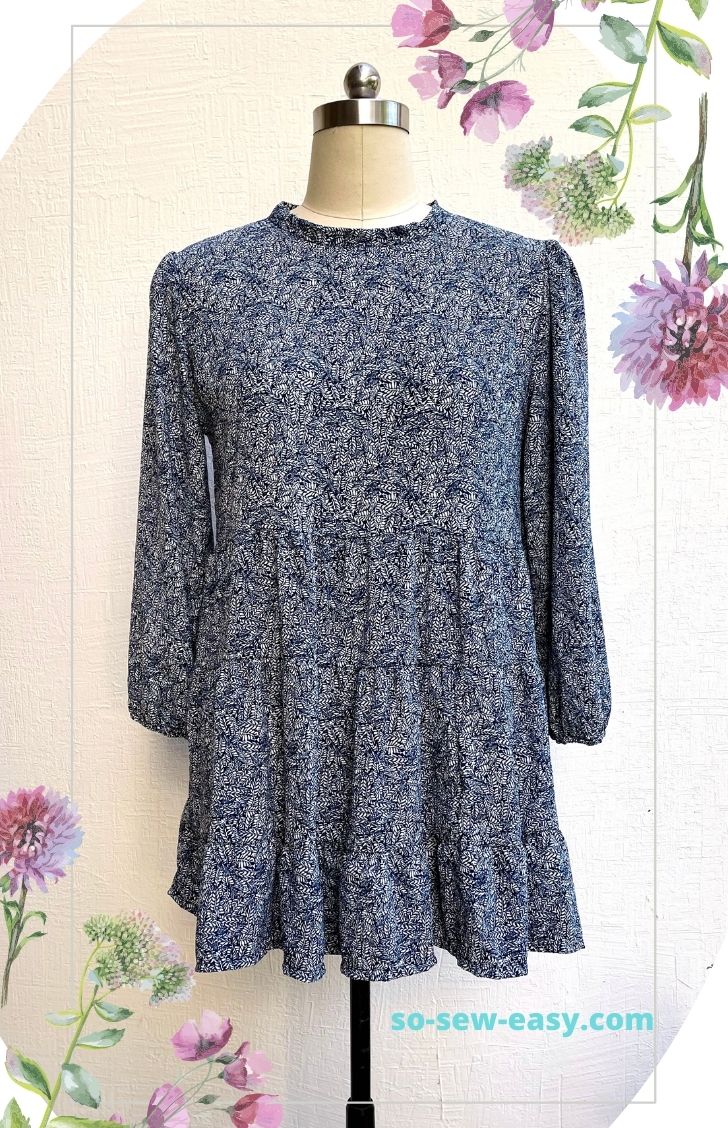
The Tiered Spring Mini Dress, named “Camila”, is the project for this week. It can be made in only two hours and is of a very popular style from the late '60s and early '70s. It's best worn with cowboy boots or something like that.
This minidress has no buttons or zippers and if you use a fabric with print you will not need to use lining so it is SUPER easy to make.
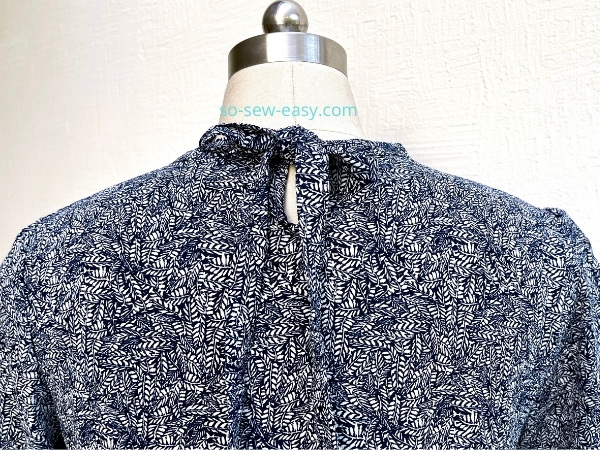
It has a tie at the back as a closer.

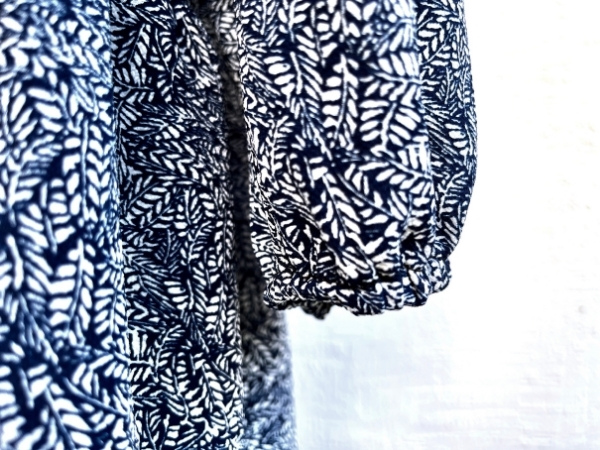
Elastic at the sleeves for easy hemming.

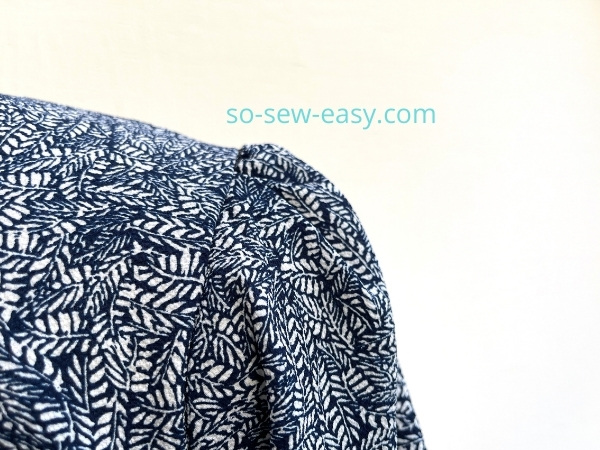
And puff sleeves for a romantic and chic look.

Materials
- 2 yards of 54″ Crepe, rayon, or silk (See recommendations below.)
- thread to match
- 1 yard of 3/8″ elastic
- 1 1/2″ yards of 1″ bias tape (Learn how to make your own HERE.)
Tools
- sewing machine or hand needle
- rotary cutter
Fabric Recommendations from Fabric.com
Sewing Level: Beginner
This is the perfect first dress project, where you will have the opportunity to gather fabric, hem, and attach an elastic. All the extra tutorials and the instructions before you cut the fabric.
How To Print And Download The Tiered Spring Mini Dress Pattern
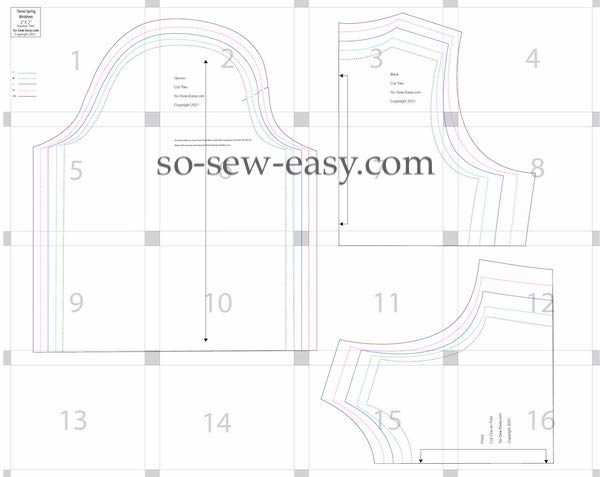
Please use Adobe Reader, print in Landscape Mode and do not scale.
Pattern Download
We continue to host our pattern downloads on our Payhip webstore.
Like most of our patterns, this pattern is free. But now you have the option of making a small contribution if you like our work! We'd really appreciate it and it will help us keep going with new and fun designs like this. Even a dollar or two really goes a long way.
Thanks so much in advance for helping us out. You can use any credit card and you don't need a Paypal account, although you can use one if you have one.
Pattern Layout

Sizes
This dress is a loose-fitting garment, the following are the finished measurements per size. Please Allow 4 to 6 inches at the bust for ease.
| S | M | L | XL | 2XL | |
| Length | 30 | 31 | 32 | 33 | 34 |
| Bust | 38 1/2 | 42 | 45 1/2 | 49 1/2 | 53 1/2 |
Cutting Measurements For The Skirt
The following cutting diagram has the seam allowance included of 5/8″.
Measurements are given in inches. If you need to convert them here is a great resource. https://www.inches-to-cm.com/
| S | M | L | XL | 2XL | |
| Tier 1 | 60″ | 64″ | 68″ | 72″ | 76″ |
| Length | 5 1/2″ | 5 1/2″ | 5 1/2″ | 5 1/2″ | 5 1/2″ |
| S | M | L | XL | 2XL | |
| Tier 2 | 78″ | 82″ | 86″ | 90″ | 92″ |
| Length | 7 1/2″ | 7 1/2″ | 7 1/2″ | 7 1/2″ | 7 1/2″ |
| S | M | L | XL | 2XL | |
| Tier 3 | 96″ | 100″ | 104″ | 108″ | 112″ |
| Length | 5 1/2″ | 5 1/2″ | 5 1/2″ | 5 1/2″ | 5 1/2″ |
Sewing Instructions
The seam allowance is not included in the pattern. I suggest a 5/8″ as a seam allowance.
You will need the following instructions to finish this dress. Click on the list one by one so the instructions open in another window.
Turn Under Seam Finish Technique
Step One: Sewing the top of the dress
We will work on the back of the top first.
Sew the back of the top starting from the bottom stopping 3 1/2″ from the neckline.
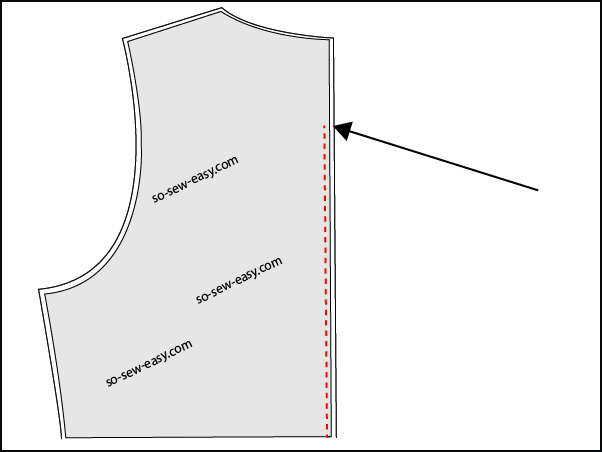

Iron the seam allowance open. Use the turn under technique to finish the seam.
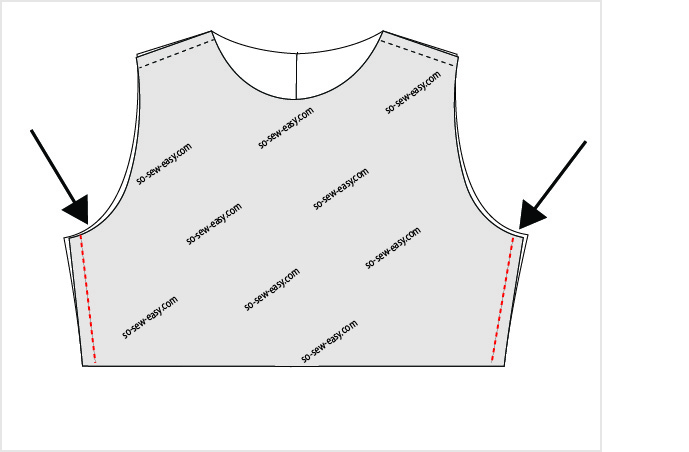
Sew the front and back at the shoulders. Serge the seam allowance, reducing to 3/8″.


Sew the sides and serge or use the turn under technique to finish the seam allowance.

Step Two: Attaching the sleeves
This dress has puff sleeves, the sleeves and the fluid fabric tend to help accommodate a larger arm width in an elegant way.
Fold the sleeve and mark the centre of the sleeve at the top of the cap (black mark on the picture below).
- Pin the sleeve wrong side of the fabric out or print side in, sew the sleeves along the arm. Serge or use the turn understitching technique.
- Serge or zigzag the hem of the sleeve.
- Gather the sleeve cap, and pin the sleeve to the top.
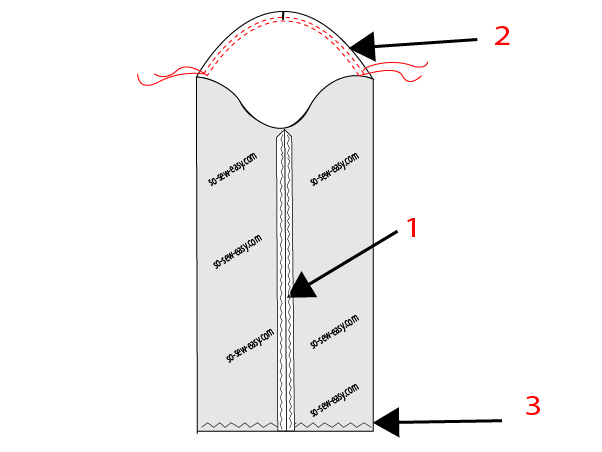

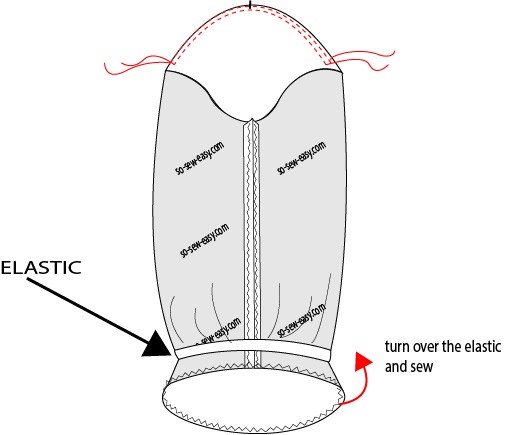
Measure your forearm and add 1″ to the amount. Cut a strip of elastic with the measurement you have acquired make a band and insert a band on the sleeves. Turn the hem 1/2″ and sew.

Gather the cap of the sleeves. Use the proper way to gather fabric.
Pin the sleeve to the top, matching the cap center to the shoulder seam and the seam of the sleeve to the side seam of the top.
Step Three: Making the skirt
There are two techniques to gather fabric, it will depend on your time and your skill level. I will always recommend making ruffles the proper way to achieve a look of higher quality clothing. Ruffles are the key in this tiered spring mini dress so I suggest taking your time.
Please use this article to guide you on how.
Instructions For Making The Ruffles For This Tiered Spring Mini Dress Depending on Size
Cut the fabric according to the sizes given above, use the french seam to attach the fabric to achieve the length required. Sew tier one to the top and then attach tier 2 to the dress and finally the third tier.
Step Four: Finishing the neckline
Cut a bias tape 1 1/2″ wide by (S 50″), (M 52″), (L 54″), (XL 56), (2XL58)in length.
Print sides together, attach the center of the bias tape to the center front of the blouse, and pin all around the neckline. Sew at 5/8″. Fold the tape in half, and using the stitch on the ditch or topstitching technique, make the neckline. This way gives the tiered spring mini dress a very easy and attractive neckline.
That's All
After making this dress, I will say that this looks like a perfect dress for a woman who just wants an attractive, relaxing dress the move around in. It would also even work for someone who is expecting a child.
I think some fun stockings or sandals would make a nice pairing, but my favorite accessory would have to be a pair of cool-looking cowboy boots.
Let me know what you think in the comments below. Is the tiered spring mini dress too short? Could you wear it as a top?
Until next week when I'll be showing you an exciting modern corset top. Happy Sewing!


Hi Mayra, I love this pattern, but I am wondering if you think it can be done well with sequin fabric?
Thank you
hello, I usually see your blog and I love it, I have already saved several patterns to give them a try
I would like to propose that we have a hashtag # and promote it on the blog so that we can all share the results of the pieces on Instagram and see how they fit
hello, I usually see your blog and I love it, I have already saved several patterns to give them a try
I would like to propose that we have a hashtag # and promote it on the blog so that we can all share the results of the pieces on Instagram and see how they fit
if you already have a hashtag, it’s perfect, I’d like you to share it and remember it so we can all use it
Hi Mayra, I love this pattern and probably make it longer. Has anyone downloaded and printed the pattern? I’m having difficulty 🙁
Maybe do as a midi dress-just widen the gathered skirt bands. Yes, that would require more yardage and I’m thinking that would be a neat dress. Add a sash at the waist, too!
Do let me know how it turns out, please I am always curious about the fabric and all the alterations done to the patterns I share. Kind Regards,
I was thinking it would be great over leggings!
Indeed!
Thankyou! So on trend right now, one simple pattern with so many options. tiered or not, maybe one tier…. collars, long or short bodice, long or midi length, this one is fun! <3
Could you lengthen the tiers to make this a little longer dress for us older gals? I was thinking of adding 2” to each tier, ultimately adding 6” to the overall length.
Yes, you can as long as you keep the proportions. I mean each tier longer than the first.
Could one more row of ruffles be added to make it a bit longer? What would the cut measurement be? I’m heading to Joanns today and want to pick up enough fabric.
Depends on your size, it is best to cut the pattern out first then buy the fabric that way you have enough for the project but not so much leftover.
I agree. This would make a cute top for pants.
I want to make this dress!! One question, are the 4 to 6 inches in the bust included the pattern pieces?
Yes, so the size you choose you need to measure yourself and then measure the pattern and make sure you have at least 4 inches of ease so the dress hangs well.
It’s a pretty dress though as Sincerely Thine is in her early 70s I might be too old for a minidress (though I did wear them in the 1960s/70s as I was of an appropriate age to do so then). It might suit as a tunic I suppose – over leggings or pants.
That’s what I was thinking.
I would attach another 4th tier on the last (third) and the dress become as long as you want…i suppose -))
Add a third or fourth tier.
I was also thinking that….