


Need a new bag? Silly question – of course, we all need more bags and this one is practical and versatile. You're probably already familiar with this bag design as it featured in the recent post ‘How a Sewing Pattern is Born‘. A lot of work and testing went into this pattern and I think you'll love all the versions made by the pattern testing group.
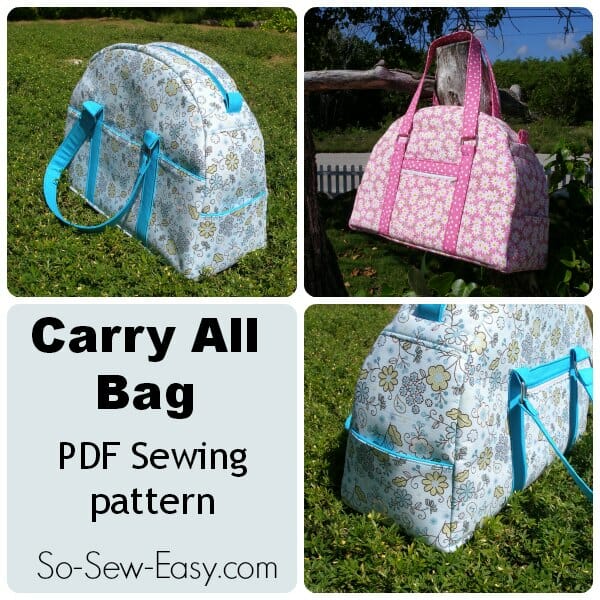
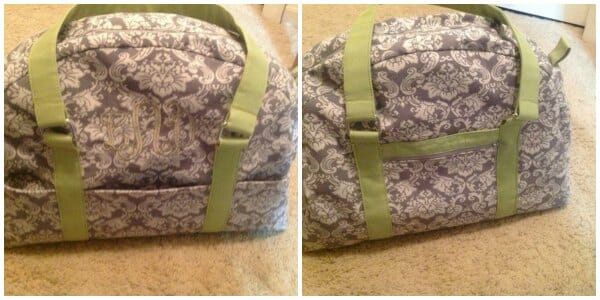
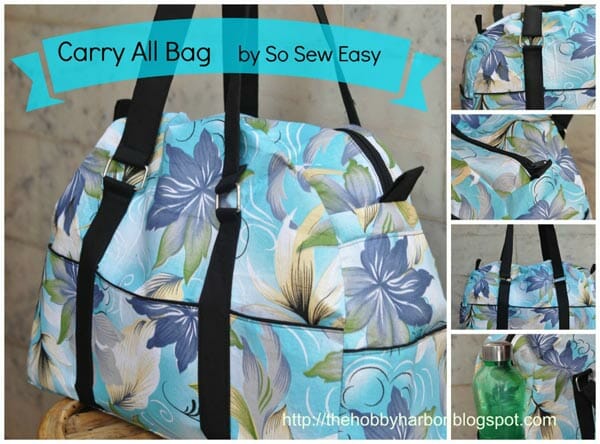
Not too big, not too small – just right! This Carry-All Bag might be just right to carry everything you need to the gym, as a carry-on bag for traveling or even for an overnight stay. There are lots of pockets both inside and out so you can quickly and easily keep everything organised and to hand without having to rummage about.
A wide zipper top makes loading and unloading the bag a breeze and zipper pockets inside and out also keep things secure. All pockets are optional and can be placed either inside, outside or both.
Features:
- Finished bag measures approx 12 inches tall, by 17 inches wide and about 6 inches deep
- Lots of pocket options
- Opens wide with the long top zipper
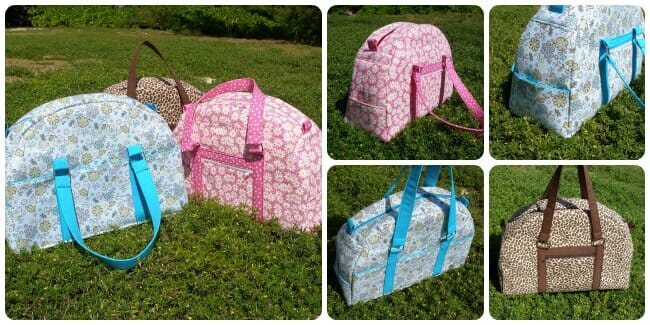
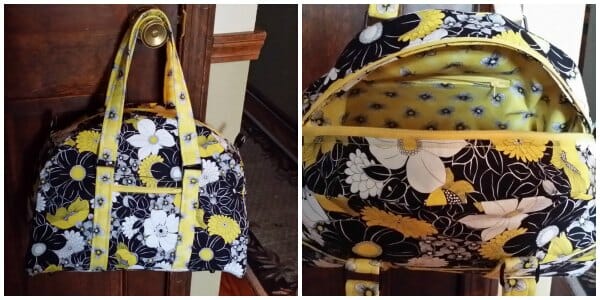
- Full length outside pocket, two outside end pockets, one outside zipper pocket
- Full length inside pocket, inside zipper pocket
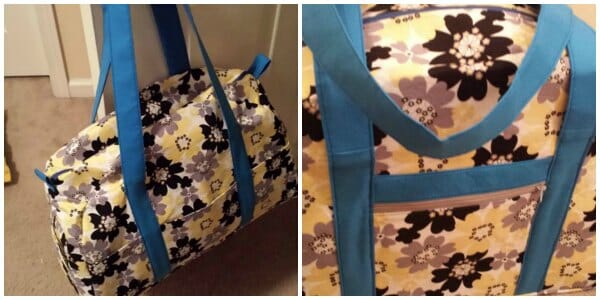
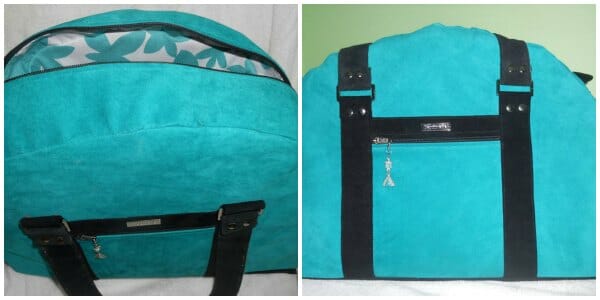
- Optional rectangle rings for the handles or make them in one piece
- Optional faux piping on the pocket edges
- Instructions for an optional firm base
- Full photo PDF instructions – 27 pages
- 6 part step by step video tutorial
- Choice of patterns, full pattern pieces or abbreviated with shaped pieces only and dimensions for the rest
Full 6-Part Video Tutorial
Here's Part 1 of the full, 6-part video tutorial that comes with this pattern. Links are in the pattern but you can also link to the following lesson from the description in the video. Don't forget to Like, Subscribe and Click Notifications while you're there!
Subscribe to the YouTube channel:
The Testing Team Feedback
Ratings on this pattern – Intermediate, not for the beginner. If you've not sewn a bag before, this probably shouldn't be used for your first time. Nothing is unusual or difficult, but it's quite a long process and some of the layers can be quite thick.
Feedback on the pattern – in common with a lot of bag designs, some of the pieces for this pattern are rectangles. A full pattern is included in the download, but some of the pattern testers felt confident in drawing the dimensions directly onto the fabric itself, so at their request, an abbreviated pattern is also included. This abbreviated version includes pattern pieces for the shaped elements and a list of dimensions to use for the rectangular pieces, saving you printer ink and paper.
How to stabilize the bag – each tester tried different methods with interfacing and stabilizers depending on what was available to them. You might find is useful to see what their feedback was on each method.
 Emma – I love this bag and will be using it for my holiday. I only printed the instructions in B/W and struggled to follow them. Watching the YouTube tutorials helped me much more, and breaking it down was great – as I watched each one and then completed the stages before watching the next one. Helpful hint – I notched the centre top edges of the zip side pieces and the sides of the bag when joining to help line everything up. Interfacing – I used fusible fleece for the outer, and heavy iron-on interfacing for the lining and straps and external pockets.
 Louise – I would like the end pockets taller, it would be better even if they came higher than the side pockets. For the purse itself, I used fusible fleece, For the pockets and lining, I used fusible non-woven interfacing (Pellon), For the purse bottom I used plastic needlepoint canvas.
 Francine – I thought it looked like the perfect choice. I want to make a weekend luggage set. This is now my first piece. I would have been lost if you didn't have the awesome videos with it. I just used the iron-on fleece as my stabiliser. I wish I would have used something stiffer.
 Stephanie – I really love the size and ease of changing the looks of it. I probably would have been better off with the video, but the directions were a little unclear in the zipper top attachment (now revised). I used featherweight, fusible interfacing. It was exactly what I needed. Not too thick (for sewing through so many layers) and the bag stands up on its own.
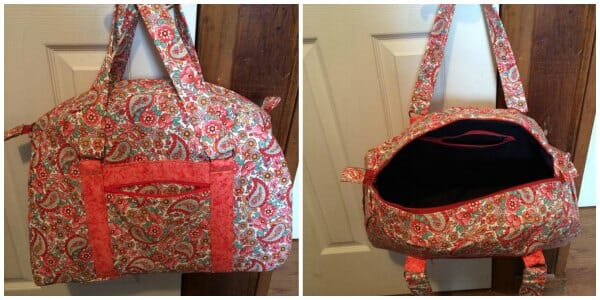
 Linda – I was really pleased when I first saw the pattern. It looked like a nice size bag perfect for overnight, week-end getaway or a day at the spa! I can also see myself using it to go to work during the winter as we have a lot to carry around like shoes, lunch, make-up pouch, wallet, warm clothes. I like all the pocket options we have as well. Because of the choice of fabric I made I did not use interfacing on the outside pieces. I used a kascha lining in between the outside and inside layers to give it somebody. On the inside, I used soft interfacing from Pellon SF101. I really like this interfacing, it fuses very nicely and would recommend it for the inside of the bag.
 Sarah – I was excited to get started and immediately printed the pattern, assembled it and picked out what fabrics I was going to use for it. I used Pellon interfacing and fabric stabilizer. I like it and it is a great choice for bags/purses. Flexible but stable.
 Judy @ (Stoney Lonesome Sew Works) – Really liked the bag design from the get-go. I have to confess that I haven't really read the directions as I watched the videos instead which were very clear and easy to follow. For interfacing, I used three different types to experiment: Soft and Stable, yes I would use it again and yes definitely recommend for this bag. Fusible fleece might use it again, probably would just use one layer of soft and stable for the entire bag instead of interfacing on both main pieces and lining pieces. Less cutting and firm enough with just soft and stable. Can beef it up with a garment type midweight fusible if need be. Stiff heavy fusible craft-type interfacing. No, I would not use it again on this bag. Created a big pain in the keester for me.
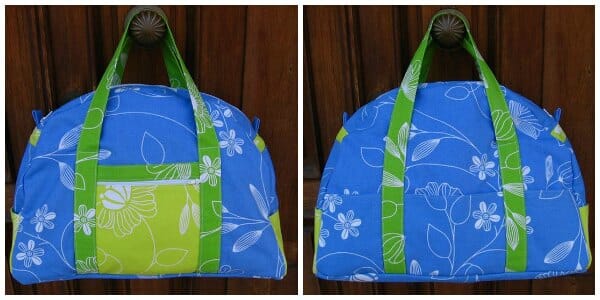
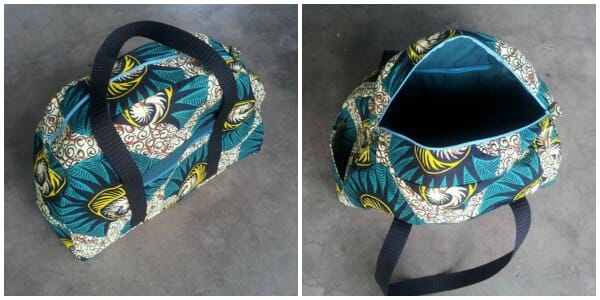 Jemma – I thought it was an amazingly stylish bag with LOTS of pieces!! It required me to be very organised which is not my normal style. I really liked the dome shape and the choice of so many pockets and different ways of styling it with contrasts, linings, and handles. There wasn't anything I didn't like – I love sewing bags! I only had medium weight and lightweight fusible interfacing. It was not ideal – the bag does not hold its shape well on its own with what I used, but I have no other choices and it is still a fine-looking bag.
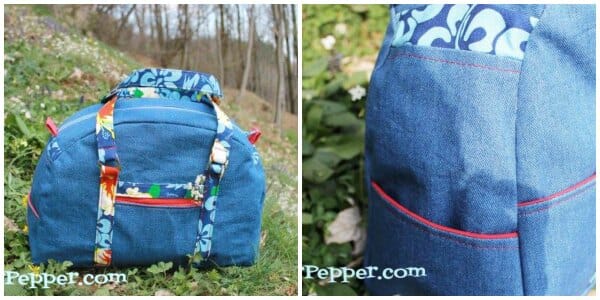 Irene @ Serger Pepper – I like this kind of bag, roomy and full of pockets. Really impressed! I love details and all of this bag is cute but really practical! I think that with this project, written instructions aren't enough on their own, but the videos are awesome. To complete this bag following the right steps, a beginner needs to have a pc and a good connection or will end up with a hiccupping Deby loading forever, as I did…. I used non-woven stiff interfacing: too much bulk in seams and a cardboard sensation (it sounds like it's made of cardboad… don't like this!), plus: on lining it has created weaves (not nicely stuck everywhere…) I'm sure with fusible fleece would be much better but I can't find any that don't cost me an arm and a leg…
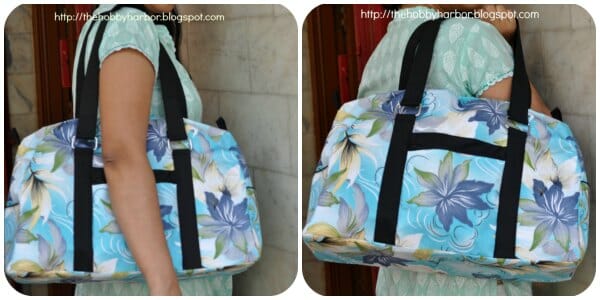
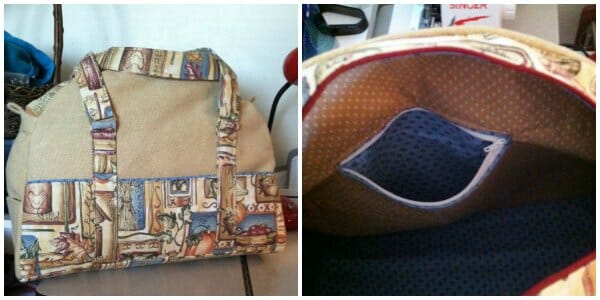
 Diya @ the Hobby Harbor – I loved the way your bag looks and stands. The contrast straps and the faux piping effect for the pockets are my favorite. Instructions are simply marvelous. Love it !! Thanks a ton, Deby for the amazing videos. I think the end pockets look good taller. I made them a little deeper. No clue what type of interfacing it is. I only get pre-cut outer facing fusible in stores. No fusible fleece was available. So only interfacing. The bag slouches inwards near the zipper at the top. But that is ok with me. The bottom I shall add a sturdy base. If it stands it is enough for me.
Mariana at Maryall Made – I didn't use any kind of interfacing: my outer fabric is medium-weight upholstery cotton. I used a polyester fabric I bought in a remnants shop, (not sure of the content, but probably used for outerwear) as an interlining. It provides a bit of structure, but probably not enough. Next time, I'd use more stiff interfacing, but excluding the seam allowance, so I wouldn't have problems sewing it. It can get pretty thick at the bottom corners of the bag.
Where to Get Your Carry All Bag Pattern
As usual, to make downloading easy and reliable, the pattern is hosted in my design account with Payhip. If you don’t already have an account, you will need to sign up to download, but don’t worry, it’s quick and easy.
Download this pattern and instructions from my design account at Payhip...
If you have trouble downloading this pattern, please take a look at this post – How to download, open and print PDF sewing patterns.


Awesome bag! But I’m going to modify it. Will separate the top from the bottom with a ‘floor’ and a zipper. The top will be the lunch bag part, lined with PUL. Unzip the lunch bag part to flip back to access the ‘basement’ of the bag where I can put my cane and joint braces.
I started this bag several years ago. I was going to use it as an overnight bag, but friend I was going to visit died before it was done. I got it back out now. I looked for a Tutorial and found it. Wonderful. I know where I stopped and am finishing it up easily. I used decorator fabric for outside and iron on foam interfacing. I sewed around all of the big flowers and leaves so that it looks quilted, just regular iron on interfacing where needed. It is soft and quilted yet stands well and is very useful. Thank you for the pattern and tutorial.
How cool is that!
I think this would look aweseome in leather. Going to look for a leather jacket or pants that I can upcycle. Thanks for the great pattern and instructions.
Thank you for your generosity with this pattern. The samples look awesome.
Thank you so much
Thank you
Thank you so much! It really is a lovely bag, I cant wait to make one 🙂
Thank you so much!
I love this bag and have been wanting to make one forever. I have the fabric but can’t seem to find the time! Thanks for the pattern.
Thank you!
I would love to make this bag but every time I go to mybluprint.com nothing happens. I l sign in and nothing. I try adding it to cart more nothing. Please help.
I can’t figure out where to get the alternate pattern with only the shaped pieces. At what point in the process do I get to choose this option?
I also couldn’t find how to print only the shaped pattern pieces.
Thanks so much, looks like a great travel bag!
How lovely of you to share. The bags look functional and stylist.
thank you for your generosity
Looks like a great bag- I will be creating a sleeve to put on a suitcase dolly handle- wish me luck
I would be very interested in how you added the sleeve- I have yet to make this pattern and definitely will want a luggage sleeve!
Hi, I really like this bag, but I’m going to use it as a gym bag and I need a separate compartment for shoes underneath. I saw a few people asked about adding this compartment for toiletries and wonder if this is an alternative option I get when buying the pattern?
No it is not but it will not be hard to add it. I will have to do it on a video since it would take too long for me to add it here as a comment.
I enjoyed making this bag. I gave it to a friend for her birthday. She loves it! Thanks for this great design, pattern and super instructions.
Now my brother’s partner says she would like one.h
I LOVE this bag..it’s perfect for overnite, and I have made 3 already. Just looking for excuse to make more. Followed instructions and materials and had no problems.
Hi Sadie, thanks for the feedback and for sharing the pic! It looks great. Hope you make some more!
Is the only way to pay for pattern through Paypal?
Yes of course Here is the Etsy shop:
where do you get the pattern download, ie looked everywhere and cant find it. thanks
Hi Glynis, on the bottom of the page there is a large yellow rectangle, inside this yellow rectangle there is a large orange button click on that.
I have been trying to download this pattern but my password does not work and they do not email me a rest why not
Hi Stella, where have you bought the pattern?
Hello ma’am. I just purchased this pattern yesterday. I went and bought my supplies and ugh. I bought fleece that can be fused, BUT accidentally bought sew on interfacing. Can this still be used or do I have to take it back? I was thinking I could attach it with temporary adhesive but wasn’t sure 🙁
Hi Katie. Best to follow the product instructions. If you can take it back go ahead and do that. Otherwise, spraying glue will work, but to avoid it coming off really need to sew it.
Reminder to all
Use a light colored lining. It helps to find items in the bag. Good tip for all purses and totes.
I hear you Leslie! great tip.
Hey, I was just getting started on this bag and I’ve already run into a hurdle: It says that seam allowances are (mainly) 1/2 inches, but does this mean that the seam allowance is already ‘included’ in the pattern pieces or do I have to add them when I cut my fabric?
Sorry if this is really obvious to everybody but me, this is my first time using a pattern not in my own language.
Thanks! 🙂
Anita
Hi Anita. Yes, it means that the seam allowance is already included in the pattern pieces. No need to add them. Good luck with the bag.
Confused in Tx asked about pattern with zipper,compartment on the,bottom. I have,a purchased bag that has a compartment on the bottom of the bag which unzips from side to side. It is sort of like a lined eveope or lined pocket across the bottom, which unzips to hold tolitries or other small items,convenient . It is a part of the bag.
Just an outside pocket on bottom that zips shut on the front from side to side.
Does this make sense
Hi Pat, not exactly sure what you mean. Can you explain again?
How do I pay for this bag pattern? I cannot find a link for payment.
Hi Nancy, down at the bottom of the page there is an orange box with a button that says “click here to download”. The button will take you through to our page at Craftsy where you can pay for and download the pattern. If you have any issues, just click on this link to take you there: http://www.craftsy.com/pattern/sewing/accessory/carry-all-bag/91430?SSAID=1217208&sasClickId=11k0_ca31z
Did anyone mention “Soft and Stable” as the stabilizer?
Yes, I’m sure it would work. When designing this pattern I couldn’t get any of the foam stabilisers that are much more common now, but I think it would be ideal for this bag.
To the lady that wanted to make a smaller bag for her daughter: couldn’t she just shrink down the pattern pieces to a smaller size on a copier? I believe everything would be proportional? I haven’t made the bag yet, but I have all the pieces cut, interfaced and ready to go.
Do you have this bag in a smaller size , I want to use it for a younger child..age 4 as a ballet bag,,I want this style but smaller please.
I’m sorry Gayle, I don’t. I only designed it in the one regular size. Small bags for girls I’ve seen tend to be more cute and decorative rather than useful for the most part. Check out my Pinterest board for bags in case there is something there that might work. https://www.pinterest.com/soseweasy/bags-purses-and-totes-patterns/
Hi Deby. Your video tutorial is fantastic! I would like to purchase this pattern but I need the finished size of the bag to 15″W x 13″H x 11″D. If I buy it would you be able to help me do that? Thanks!
I wish I could, but it would take me a very long time to make a custom pattern in your exact size you wanted. Many hours of work and I can’t do that kind of custom pattern design for the price of the regular pattern. Sorry 🙁 I feel bad to say no, but my sewing time is so limited I have to use it to work on new patterns and designs.
it will be helpful when making the videos that mention the measurements
What measurements do you need Noah? All the measurements are given in the pattern, so you don’t need to guess at any of them.
The bag is wonderful! Could you make another bag pattern with a separate compartment that unzips at the bottom to hold toiletries? Thank you!
Can you send me some pictures or examples of the sort of bag you are looking for? I’m not sure what you mean about a bag that unzips at the bottom – I’m thinking everything will fall out when you unzip!
Deby, just wanted to let you know my daughter is loving her carry all in Italy! It’s working out really well for her. She carries her sketch pad and the day’s supply of water and essentials as they go to the ancient ruins for her arch. classes. I also made another one for me. I posted it on my fb page and onto the groups “sewing inspiration and tutorials” and “Sewing, Crafts and DIY projects” with a link back to you. Love all your work
So glad to hear it. I’m envious of your daughters trip to Italy, I LOVE it there. I’ll check out your new bag when I can track down these groups, thanks for sharing it Kathy.
Web page is not that easy to navigate. Had trouble getting to the “check-out” page.
I’m afraid I can’t do anything about that, its an external website and I don’t have any control over it. But it is a very reliable way to sell and download the patterns and you get to keep them safely in your pattern library until you need them. Hopefully you were successful, but if you have any problem, do let me know.
I enjoyed making your pattern for my daughter’s study abroad semester in Italy. It was very easy to follow and your accompanying tutorials were helpful. it went together quickly ( I only started on Monday and she is leaving Thursday). I posted a picture on Craftsy and my personal blog. I know she’ll love it!
I’ve shared your photo and pinned it to Pinterest Kathy. Love the color choice. Thank you so much for sharing what you made, and for linking back.
Hi Deby , I just blogged about it right here on my blog. I also shared it on craftsy and other link parties. Thanks for the testing opportunity.
I dropped in to read and leave a comment. Thanks for saying such nice things about the pattern and the videos. We all put a lot of work into this pattern to make it such a great bag.
These look wonderful! Perfect for short trips!
Great to see all the testers’ bags and to read their thoughts on interfacing, etc. Love the shape and style of the bag, Deby.