


I was working on a bag design and wanted to create a particular type of handle. Not the usual bag handle where you simply fold the fabric into 4 and topstitch. I wanted a ‘nicer' handle, one with two different fabrics so it would be reversible and feature both of the fabrics from my bag.
What was stopping me?
Turning the darned thing the right side out again once I had stitched the tube! It's bad enough on a tube of regular fabric, but both of these pieces were interfaced making them thick and stiff too. It just all bunches up and gets too thick to turn.
I don't mind telling you I flung it across the room and cursed loudly. My cat hid under the bed! Until I tried the straw and chopstick trick. Or rather, in this case, the plastic hose and wooden dowel trick. At last! Success.
Here's how it works.
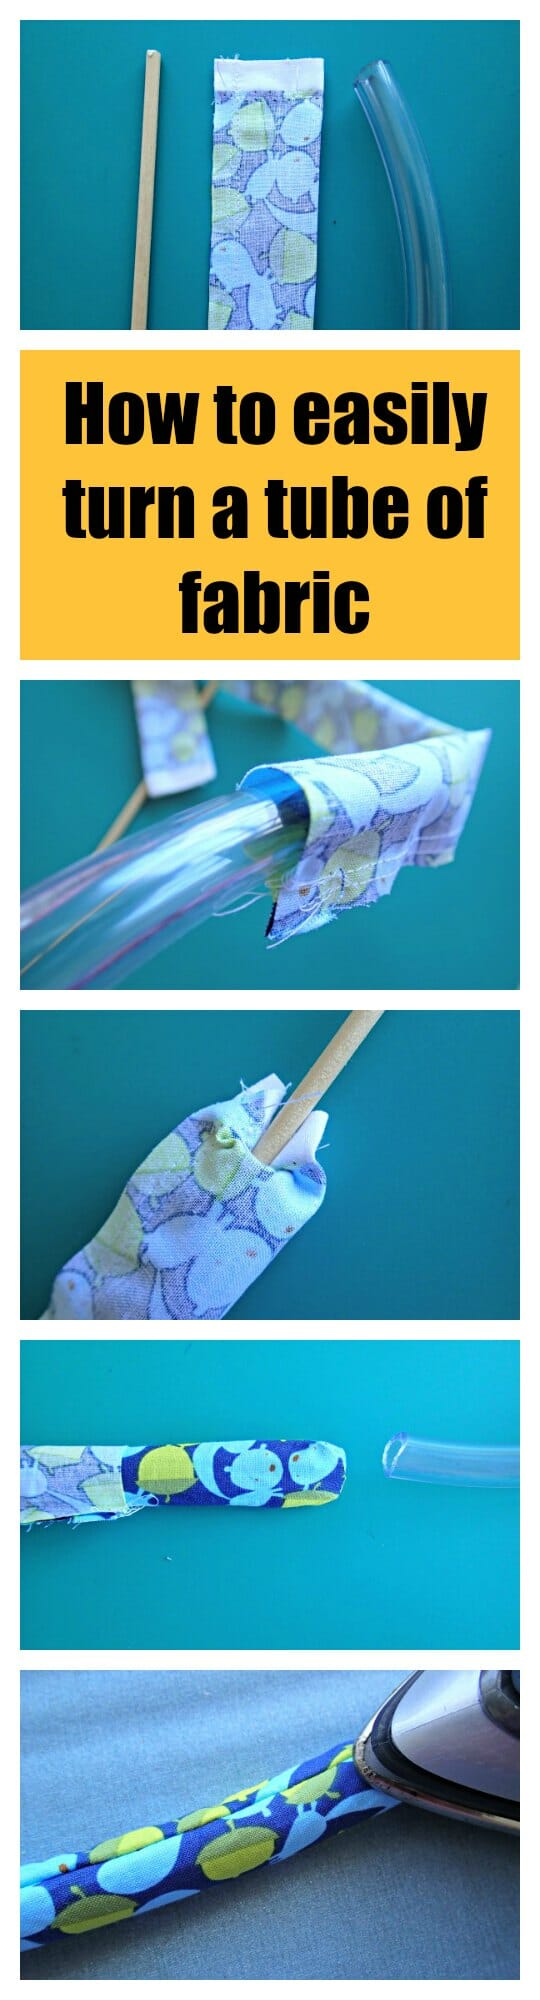
How to turn a tube of fabric right side out
You will need:
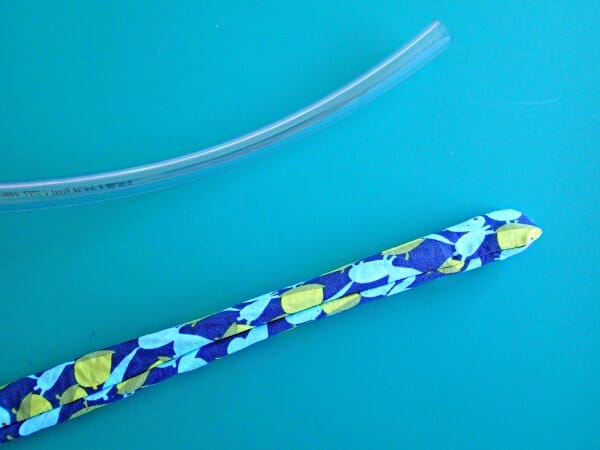
1 – a hollow cylindrical object, which is fairly stiff and will slide inside your tube of fabric. For a small tube, use a sturdy straw. For a bag handle, I used a piece of plastic tubing intended for aquariums I think.
2 – a pokey thing. Something rigid and not hollow, that just fits inside the hollow tube from point 1. For a small tube, a chopstick or similar. In my case, a thin piece of wooden dowel we had hanging around for reasons unknown.

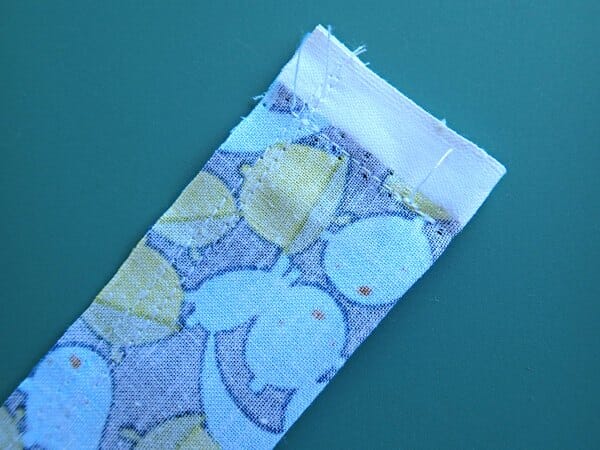
Step 1
Sew across one end of your tube to close it. This may be temporary and unpicked or snipped off later or can be a finished end on your tube.
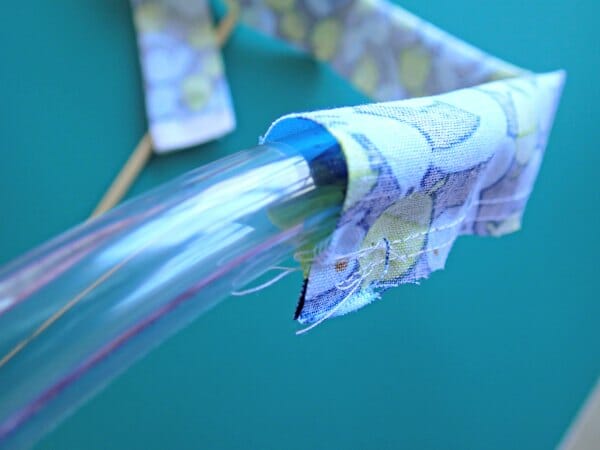
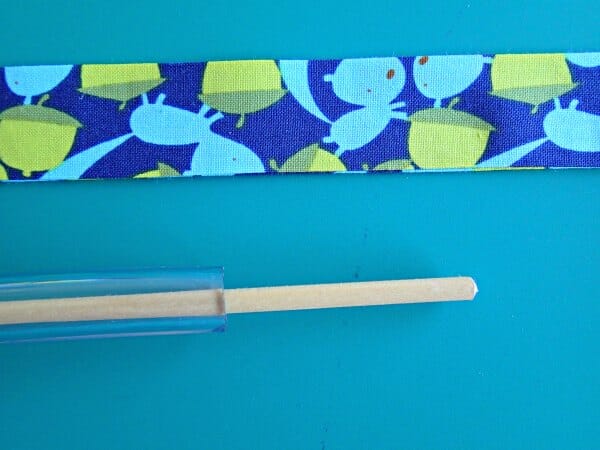
Step 2
Slide your hollow tube down inside the fabric tube all the way to the closed off end. It doesn't really matter if your fabric is longer than the tube.
Step 3
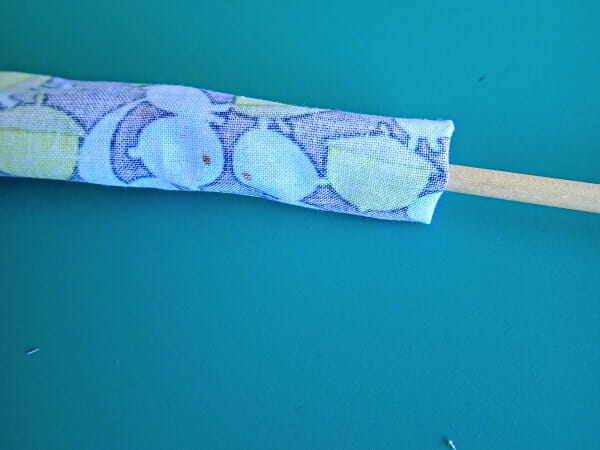
Stick the end of your pokey tool into the hollow end of the tube inside your fabric.
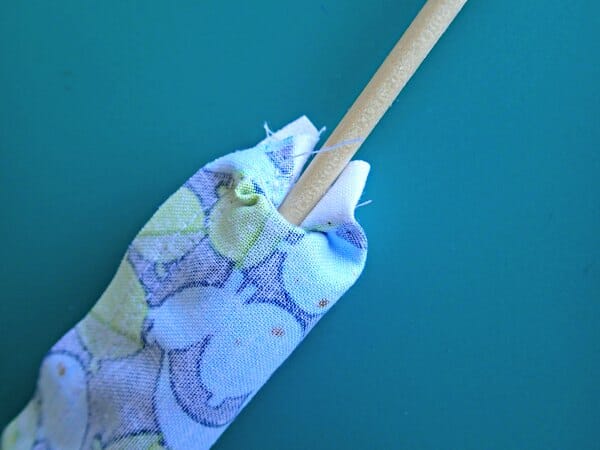
Step 4
Now slide the fabric off the tube and onto the pokey stick. Somehow it now seems to slide easily without all bunching up, and you can transfer the fabric off the tube and onto the stick.
Step 5
Once you get it started, it goes quickly and you can then simply pull the end through. Eventually, your fabric gets turned all the way down and the plastic tube becomes free.
Your right side will start to show on the end of your pokey stick.

Step 6
Keep pushing the fabric down the stick until the whole tube is turned the right side out.
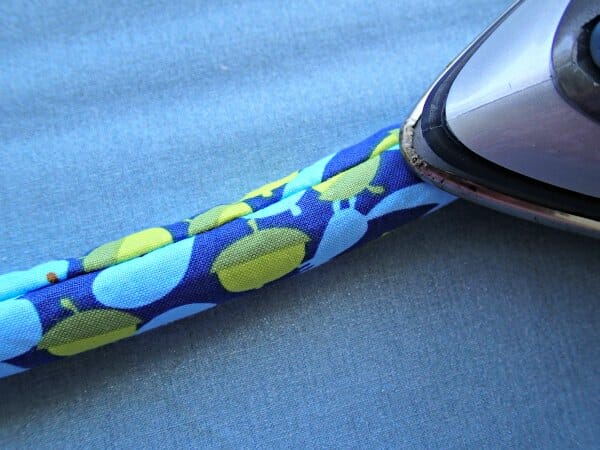
Step 7
You can then use the tube or the pokey stick to press your tube of fabric if you don't want to press it flat.
Step 8
Store your stick and tube together. You'll be wanting to use them again next time for sure.
Give your tube a press and admire your new strap/belt/whatever it is you are making.
Here's the handle I was working on. I love the faux piped look I can get from using the two different fabrics.

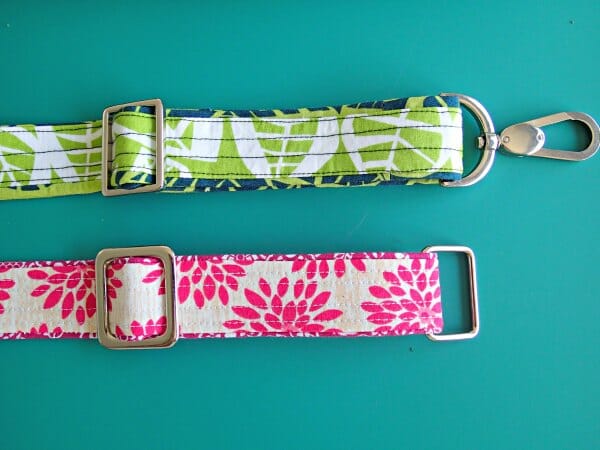
More coming soon about this handle and the bag it's going on.

In the meantime, PIN THIS to share with your sewing buddies. They'll thank you for it!


I’m off to find a tube and a pokey stick right now ????????
1) Why did you double stitch the seam of the ‘strap’?
2) To clarify: the stick pushes the fabric through while the tube just sits there waiting to become free?? The tube has done its job of helping to start the turning and the fabric does not go through the tube??
3) Use a length of half-inch size half round wooden dowel to press the seams open before turning it makes the strap easy to press afterward. Sometimes a hardware store or lumber yard has an extra scrap piece or it’s cheap enough to purchase whatever length they require you to buy. Cut it into various lengths.
Very useful trick. Thank you!
That’s freakin’ brilliant.
Brilliant!!! Thank you so much
What a great tip, thank you for sharing!
What size are the tubes?
Depends on the size of the fabric you want to turn.
That’s a neat trick. I have a tube turning ser, but frequently misplace it. Out of curiousity, why did you need to see them into tubes? Why nor just press them in half and then stitch down the sides? That’s how I do my contrasting straps.
Wow what a great tip! Thank´s a lot for all your things you share with us.
This has already been my preferred method of turning, but will now try plastic tubing for larger tubes or difficult fabrics. What I absolutely loved was your idea of using 2 complementary fabrics creating faux piping; that I can’t wait to experiment with. As always you are clever and creative, thank you.
I did the same thing with a piece of leftover PVC pipe and a dowel. I have two different sizes of pipe for different size projects. When in a pinch, I start looking around for something I can use from stuff I have on hand.
I love reading your suggestions!
Thank you what a neat trick – no more torn fabric and you have nice tube
This is fantastic. I wish I would have seem it last night before I had to turn that long skinny fabric belt.l.. I was going to buy one of those turning tubing kits. This looks so much more efficient and is less expensive!
C’est génial, j’adore. Merci
Terrific!! You have nailed it again!! Thanks. My arm gets sore after I have thrown the D— thing across the room several times!
Great tip, thank you,
That is so cool! Been sewing for 70 years and never saw this neat trick! I know what you mean when you said you threw it against the wall LOL
I have struggled many times with turning a tube of material. Wonderful trick that I will use many times. Thanks
Yes, I want to know more about the handle. Looks amazing. (strap)
That’s a great tube trick! I’ve made a lot of bags and have found that if I run the iron over parts with a stiff interfacing just before turning them (and working quickly before they cool off), they turn a lot easier – just be careful not to burn your fingers.
Thanks for sharing, not only this wonderful idea, but all the things you share with everyone. Much appreciated.
What a great idea. I’m making shopping bags and this is perfect. Thanks
What a fantastic idea! Thank you!
One of my favorite tools in the sewing studio is my tube turner. I was able to pick up a packet of multiple sizes at a store and I find myself reaching for these with my students all the time.
It is certainly a very clever, and less stressful, was of turning out tubes. I have used conduit tubing and the head end of a long metal knitting needle. It’s a case of ‘why didn’t someone show me this sooner?’
Thank you for posting your great tips, Jess
Love it! Thanks so much for sharing!!
A wonderful idea! Thank you for sharing.
This was awesome!! I was so excited when it worked — twice 🙂 To find the flexible plastic tubing, and a pokey thing, I went to my local hardware store. (It’s a *real* one where they are able to be helpful and creative without snickering. I wouldn’t try this at a Home Depot box store.
They had really inexpensive flexible tubing, and when the dowel broke the woman helping me grabbed a brass rod to be my pokey thing.
I will definitely keep this page bookmarked!
Brilliant. This would have been the answer for the loop of PUL I just could NOT turn. I did the cursing and hurling routine and finally left it off.
Thank you so much for this – I struggle with tubes – your method looks so simple.
Thank you! I’ll try this.
AHA! I’ve done it with the pokey stick alone, but never tried a hollow thingy with the pokey stick.
Wow! I necer ever thought od this idea! How clever! Thank you for sharing! And i really live the 2 different fabrics.. like you said.. it gives it that “piped” look! I am definetly going to try that! Thank you
Seriously, even without the benefit of the masters degree or any schooling for our sewing craft, all of us have earned the working title “Sewing Engineer”.
What a great idea this is! Thank you so much for making my future sewing projects easier!!
I have turned some difficult straps and handles over the years, with much mumbling and grumbling. The last item I turned were tiny doll arms. My husband ended up doing them, as I just could not maintain my cool long enough to finish! This tip is a dream come true. I have tubes and straws of all sizes, and enough “pokey things” to get the job done. Thank you, thank you, thank you!
I was really interested in the scissor sharpening tips as our scissor sharpener is no longer doing scissors.
Nothing about sharpening a scissors?? Bad link I guess.
Hi Katie, please see our email with the correct link.
I couldn’t find any tubing in the house, and I really looked. So, I put my thinking hat on and this is what I did. I’m making aprons with tubes for the strings and neck. I had an empty Metrosene thread spool (the kind that’s long and slender)…this was my hollow tube. I used the wooden dowel from a linen calendar towel…this was my pokey thing. It worked like a charm. I had already turned one apron string, before finding this tip, and it took 45 minutes!! It only took me about 10 seconds to turn the second apron string tube!!! This is a fabulous tip and saved my sanity!!!
I have not tried this method. The method I use is to make the tube a bit longer than I will need it and sew it exactly as shown here, with the exception of folding the fabric strip around a sturdy piece of heavy string, sew one end into the seam and leaving the other hanging out the opening at the other end. To turn, just carefully pull the string. The end that is sewn to the string will be pulled through the tube resulting in a turned tube. I snip off the end with the string attached and save the string for next time.
Noela, thanks for your tip?