


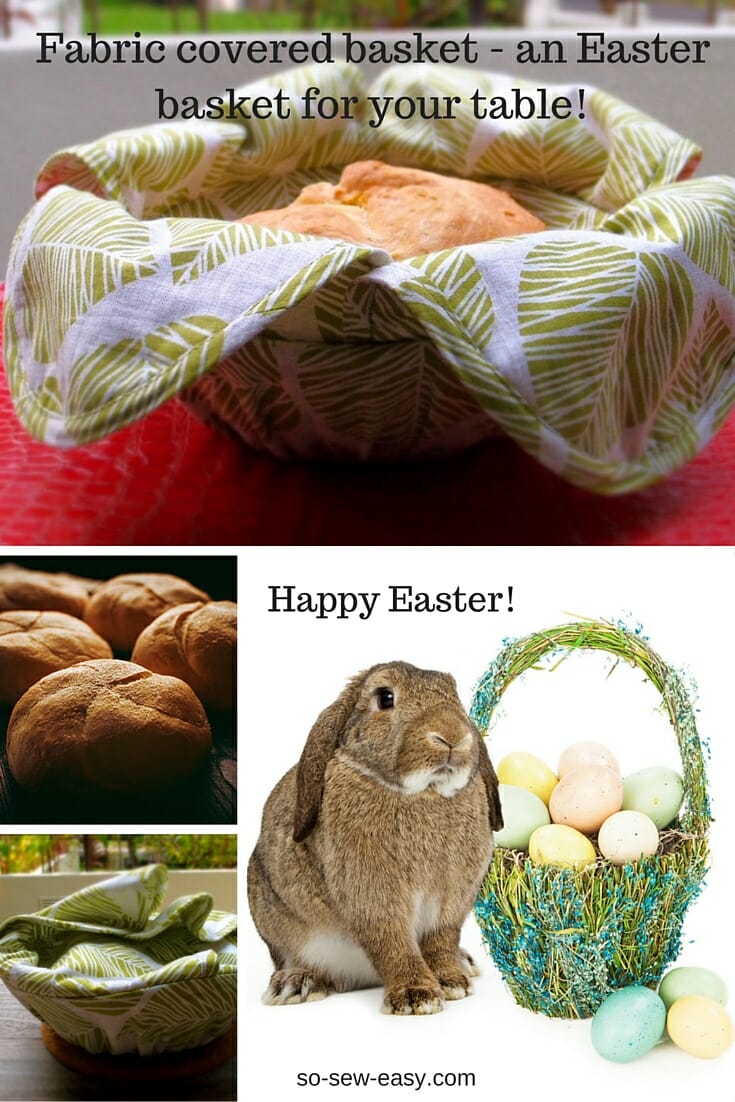
 The excitement of Easter Break is fast approaching and with it comes the welcome sight of kids collecting Easter eggs in the garden, grandchildren coming to visit and families and friends gathering around the table to share a meal or as they used to say, “break bread” together.
The tradition of breaking bread dates way back to at least Roman times when the sole notion of sitting together assumed that all disputes were forgotten and friendships were renewed. Today sharing a meal is still pretty much the most important act that can be performed in any culture as a seal of friendship, unity, enjoyment. And within that meal, bread is one of the most essential and omnipresent dishes on the table.

Roman Era Bread Oven, Pompeii, Italy
We owe it to the Romans who have handed down recipes for the bread we still eat today. I don't know about you, but for me, nothing is more enticing and inviting than a warm basket of fresh bread.
So here is a quick tutorial to help you keep the bread warm on the table or free of flies when we are having a meal outside in the spring weather. The pattern is designed for the super common 8″ breadbasket that most people seem to have around the kitchen. If you don't have one they're available quite cheap HERE on Amazon.
You can download the pattern and instructions for the Fabric Covered Basket directly from Payhip.
Save the pattern your computer or pattern library and sew at your leisure.
For help downloading and printing PDF patterns, please CLICK HERE.
Materials You Require:
- 1 Yard of cotton fabric
- 1/4″ Elastic, 12″ long
- Batting or Insul fleece (optional, but makes it really nice!)
- Bias tape of 3/4″ to 1″ depending on your taste 2 1/2 yards
- Breadbasket 8″ to 81/2″
Tools You'll Use
- Sewing machine
- Serger (optional)
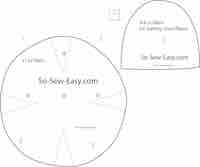
Step 1: Cut your pattern pieces
- 1 circle
- 8 flaps
- 1 rectangle (no pattern, see size below)
- 12″ of elastic and bias tape
Gather all the materials before starting, this pattern will fit an 8″ to 8.5″ breadbasket.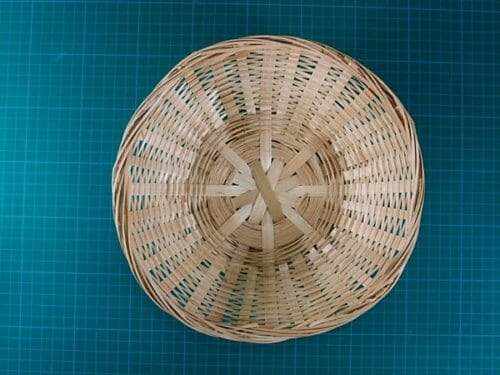
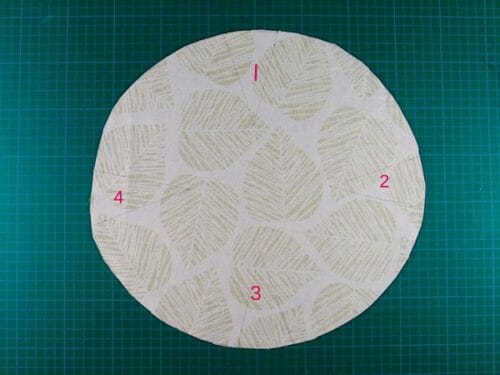
Step 2: Sew the four darts
Step 3: Make the flaps
Place one flap of the main fabric print side down.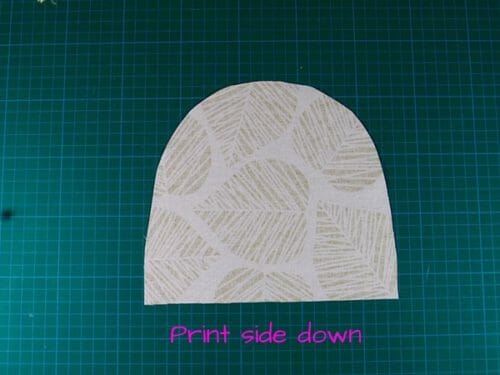 Then place a flap of the batting or Insul fleece.
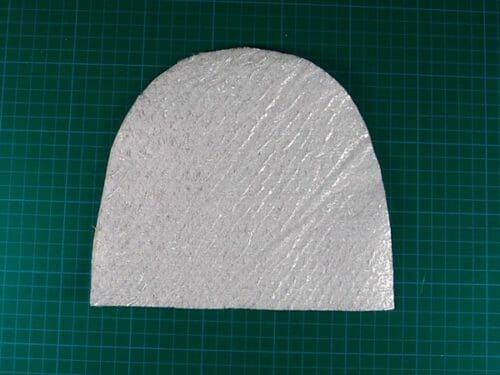 Then another flap of the main fabric on top with the print side up.
 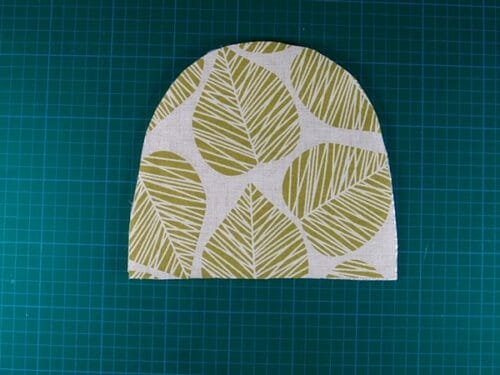 Pin all layers together and sew the bias tape around the edges, but not at the bottom.
 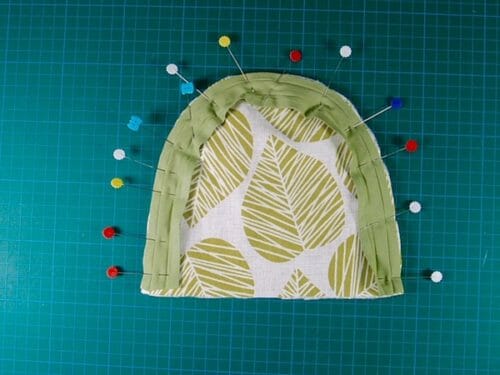 Repeat this step with the four flaps.
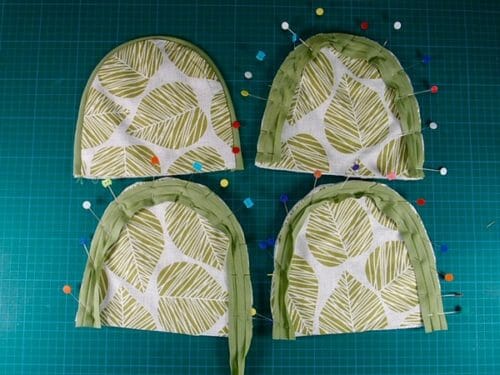
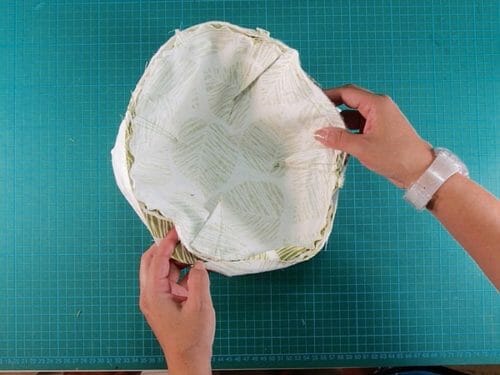
Step 4: Attach the flaps to the circle
Start anywhere on the circle and pin the flaps overlapping them at the corners. 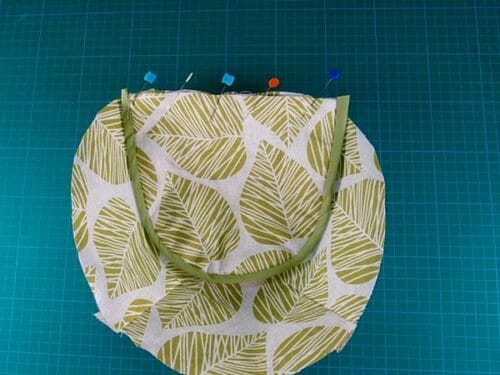
 Make sure the flaps are well distributed around the circle.
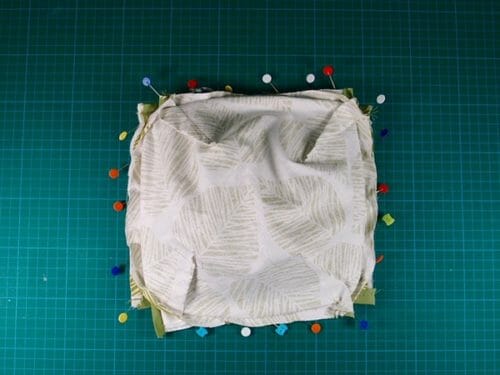
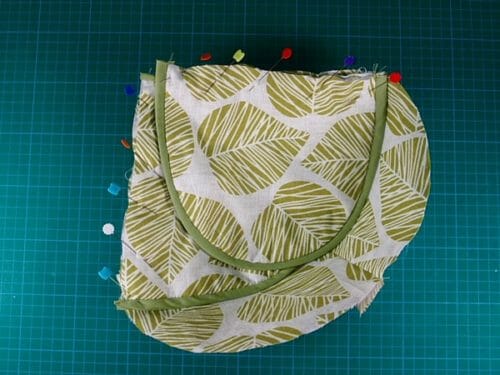
Step 5: Attach the basket underlining
Make a rectangle that will measure 31″ in length and 7″ in height. Sew the side edges together to form a band. 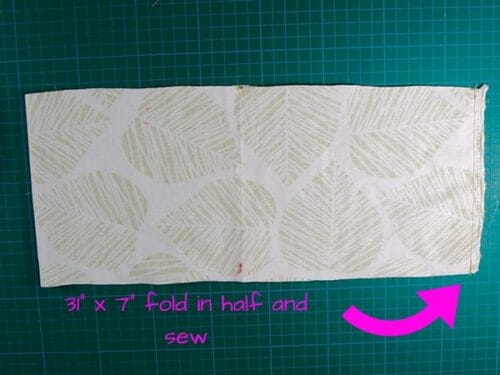 Use your serger or just zigzag the edges. It is optional to use the serger because the stitch won't be visible at all.
 Feed the basket lining into the band.
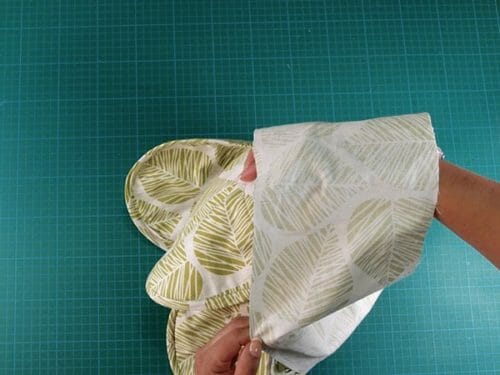 Make sure the right sides of the print are facing each other.
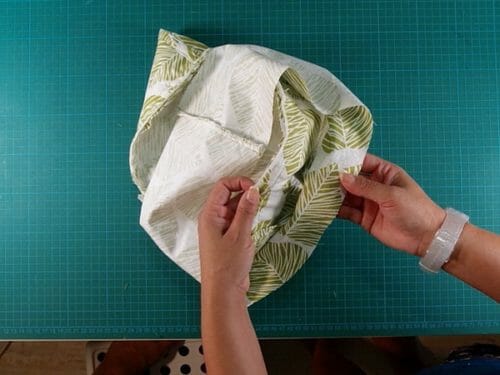 Pin all around and sew. Finish the edges with the serger or with a zigzag stitch.
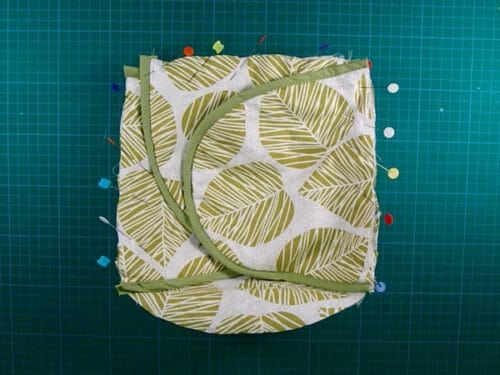
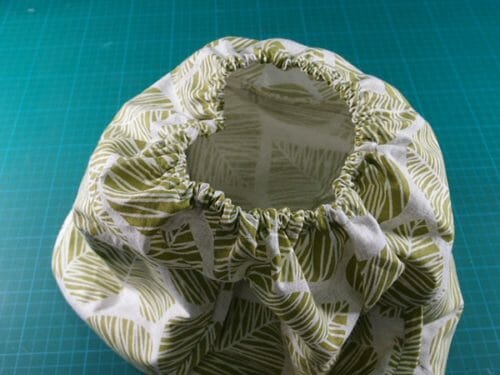
Step 6: Attach the elastic
Cut a 12″ elastic strip and sew the ends together.
Iron 1/4″ seam allowance around the hem of the basket lining, this step is very important because it will help you attach the elastic in very little time.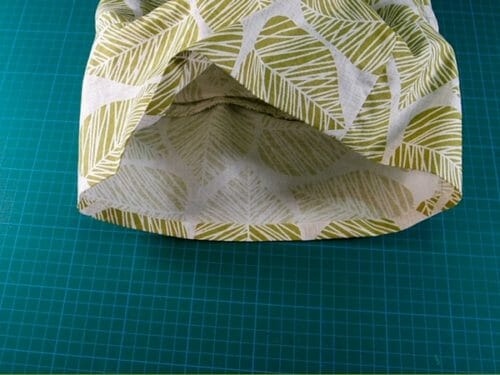
Pin the elastic right under the seam allowance you just ironed or at the edge of the raw fabric.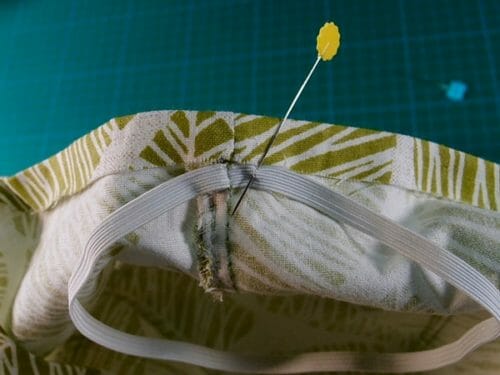 Fold the fabric 1/4″ again over the elastic, making sure the elastic is at the top of the casing.
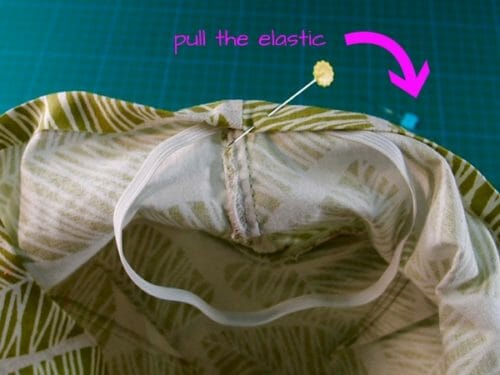 Pull the elastic and flatten the fabric as you sew.
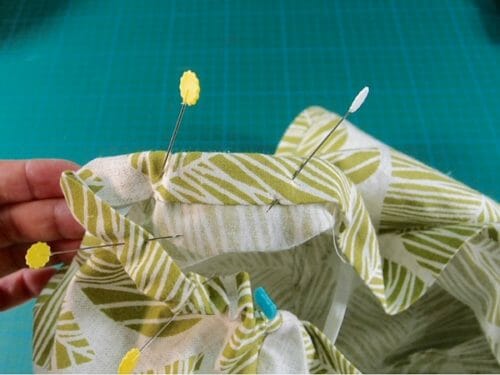
Step 7: Bake your bread!
You're ready to keep your dinner bread rolls or your wraps warm and enjoy. Please let me know your thoughts about this project. Feel free to share some pics of your finished work in the comments below. I'd really love to see them.
If you liked this article, you may enjoy a recent post I wrote from Bandung, Indonesia where I was in search of Batik fabric. Until then Happy Sewing!
You can download the pattern and instructions for the Fabric Covered Basket directly from Payhip.
Save the pattern your computer or pattern library and sew at your leisure.
For help downloading and printing PDF patterns, please CLICK HERE.


I am wondering where I can the pattern for the fabric covered basket? It says craftsy but I tried and could not find the pattern.
I assume the basket measures 8-81/2″ at the top of the rim, not across the base?
I always enjoy your patterns and tutorials. I’ve been wanting to make something to keep my bread warm on a plate or bowl. I’m going to try this one. It looks perfect! Thank you!
Looking for a pattern for women’s military tie for formal occassions
I have been making these for years and they make great gifts. This is an excellent tutorial.
I love it! Looks easy enough and just time to make a couple for Easter. Fantastic idea. Thanks so much for sharing.
Diameter of the circle ? It doesn’t mention ?
This is such a cute basket cover!! Thank you!
You are welcome:)
Am I missing something? Step 2 says to “sew the darts” but I didn’t see anything about darts prior to that. Why? What size? I can tell the placement in the pic. Please straighten me out. 😉
Just call me confused…not the first time
If you have a look at the pattern, you will find the darts that give shape to the basket. Let me know if that helped you, Cheers! Mayra
Bonjour, je n’arrive pas à imprimer le modèle
LILOU