


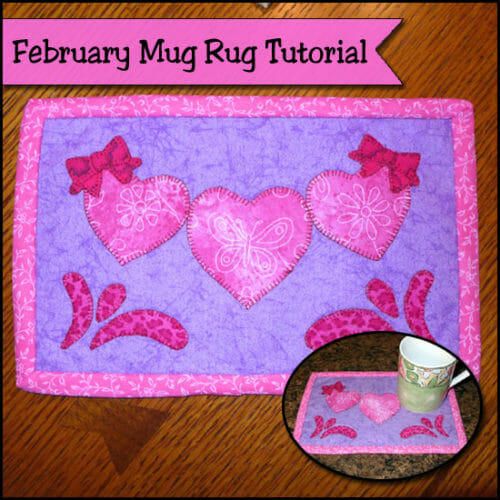
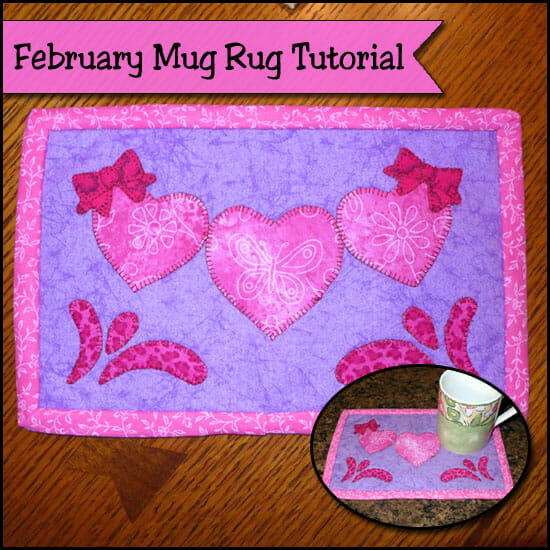
Mug rugs have become so popular lately! For the past couple years they are by far my biggest pattern sellers. This is probably for many reasons. They are super easy to make, they can be made using your favorite techniques (hand or machine), they make great gifts, and they can be decorative as well as functional. Most of all, they are so much fun! I hope you will follow us along here on our Mug Rug of the Month Tutorial. For more holiday mug rug patterns, as well as everyday patterns, stop by my Craftsy Shop or Etsy Shop.
Lets get started!
- What you will need for one mug rug:
- Small scraps of fabric for appliqués
- 1/8 yard of light weight paper backed fusible webbing
- 6 1/2 x 10 inch piece of fabric for the background
- 6 1/2 x 10 inch piece of fusible fleece
- 7 1/2 x 11 inch piece of fabric for back
- 2 3/4” x 44” strip of fabric for binding
- Fray-check (optional: to seal the stitches on the back)
- Thread to match background fabric and appliqué fabrics
- Embellishment supplies of your choice.
General supplies:
Scissors, pins, sewing needles, fabric marking pen or pencil, paper or cardstock (for printing pattern pieces), iron & ironing board, sewing machine, cutting mat with ruler & rotary cutter (optional)
Important tips & general instructions:
**Read tips and instructions thoroughly before beginning.
**Iron your fabrics before starting. If you will be pre-washing your fabrics, do not use a fabric softener. It can prevent your adhesive from sticking when fusing. 100% cotton fabrics work best.
**When printing out your pattern, make sure you do not shrink the document. You will want to print it out at the actual size for your pattern pieces to fit your project. You will find this setting in the window that appears when you choose print. Make sure your little square measures one inch. If it doesn’t they will not fit properly on your mug rug.
Free pattern download:
You can download the template from Payhip. Add it to your cart and check out - it's free. The pattern will be saved in your Pattern Library safely until you are ready to sew, then you can download and print it at any time.
Your pattern page(s) will have a list of the embellishments that were used in the sample, such as wiggle eyes, beads, buttons, fabric paint, ribbon, etc. But remember to use your creative license! Use what you already have laying around or try something new and exciting! Put your own personal touch on it.
If you will be using glue for attaching embellishments be sure to use a good quality and washable fabric glue. I like to use Fabri-tac by Beacon. This is the same for paint unless the mug rug is used for decoration only, you will need to use a washable fabric paint.
Instructions:
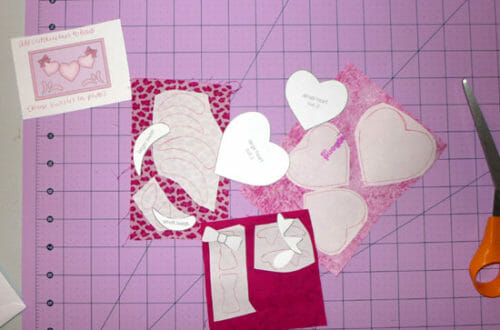
1. Download the pattern page to your computer. Print out the pattern pieces and cut them out. If you use cardstock, it will be so much easier to trace around them.
2. Turn your pattern pieces upside down (unless otherwise stated on the pattern) so that the ink side is facing down, and trace them onto the paper side of your paperbacked fusible webbing. Do a rough cut just outside the traced line. You’ll cut on the line in the next step.
3. Fuse (iron) these to the wrong side of the fabric scraps you have chosen for your appliqué pieces. Follow the manufacturer’s instructions for the paperbacked fusible webbing you are using. Cut your applique pieces out by cutting on your traced lines. Remove your paper backing and set aside.
4. Fuse the piece of the fusible fleece to the backside of the background fabric, following the manufacturer’s directions for the fleece you are using. Make sure that your adhesive side is facing the backside of your background fabric before letting it touch the iron. I find that when I spray this fleece with purified or distilled water, I get a nice hold.
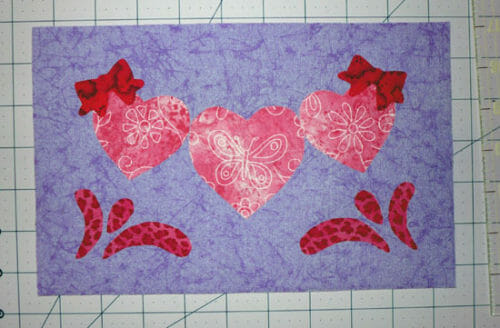
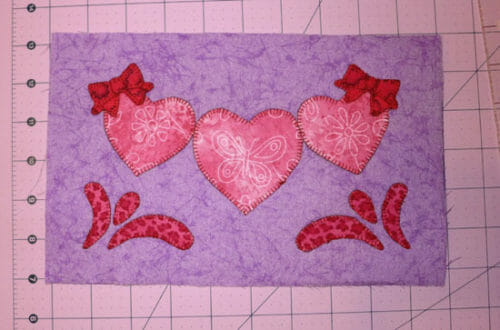
5. Flip over so that the right side of the background fabric is facing up on your ironing surface. Arrange your appliques on the fabric (glue side down) making sure to keep them at least 3/4 inch away from each edge. Your binding will take up about 3/8” of the edges. Once you are happy with the arrangement, fuse in place following the manufacturer’s instructions for your fusible webbing. You can refer to the photo or illustration for correct placement of the appliques.
6. Transfer any markings for the placement of embellishments or additional stitching at this time. I love my water soluble marker for this step. Since I use a disappearing marker (that disappears fast) I like to make my markings at the sewing machine right before I do any accent stitching. If you have no markings to transfer, it’s time to stitch!
7. Embroider around your applique pieces as desired. Use any stitch you like best. Sometimes I use a tight zig-zag stitch and sometimes I like to use the decorative buttonhole stitch that is on my machine. When I have a lot of small pieces, I like to stitch close to the edge of the appliqué pieces using a straight stitch. It’s whatever you want to do for the look you are trying to achieve.
 8. Once all your machine stitching is complete, it is time to stitch on any embellishments that require stitching such as buttons, beads, etc. Any glued or painted embellishments will be done at the very end.
Pre-binding preparation:
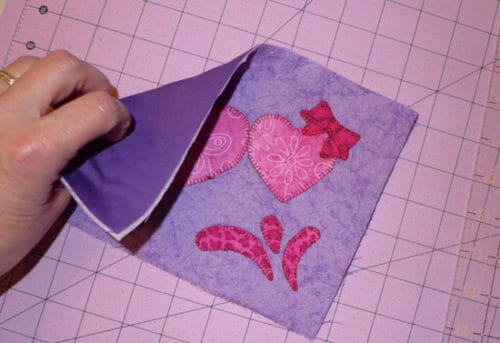
1. Place the ironed backing piece with the wrong side facing up on your work surface. Center your applique and fleece piece on top. Hand baste, pin, or spray baste to secure. I prefer to use the basting spray because it’s super quick and the spray lasts a long time for small projects. Using a rotary cutter or scissors, cut your backing piece to the same size as the top/fleece combination. Machine baste all the way around this piece, 1/4 inch from each edge. I do find that when using the basting spray I can omit the machine basting.
If you want to machine quilt these layers together, you can do that. I always get best results when using free motion machine quilting, but most of the time, I don’t do any quilting. This is such a small piece and fusible fleece was used for the inside. I use mine for decoration so they don’t get washed a lot. If that were the case, you might want to machine or hand quilt around your appliqués.
Applying the binding:
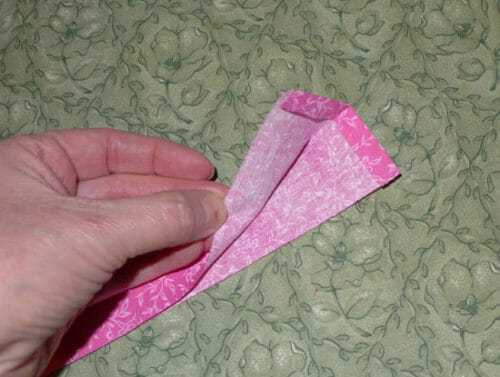
1. Fold one of the short ends of the 2 3/4” x 44” strip of fabric 1/4” to the wrong side and iron in place. Fold the entire length of fabric in half lengthwise, with wrong sides together, and iron.
2. Beginning at the center front, along the bottom edge of the mug rug, and using the edge that you ironed in at 1/4″, pin the binding to the mug rug with the raw edges of the binding even with the raw edges of the mug rug.
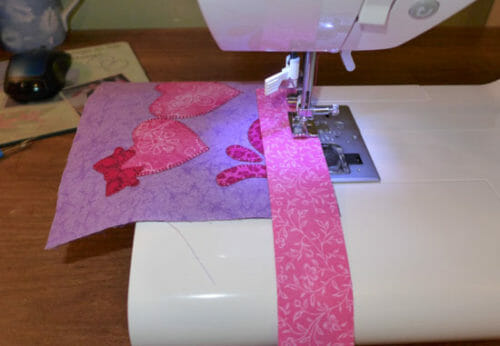
3. Before you do the remaining edges, you will stitch this section in place using a 3/8” seam allowance. Begin your stitching at the folded end of your binding, and stop your stitching 3/8″ from the corner. I like to run a couple of back stitches at the beginning and end of my stitching to secure seam in place. Remove project from the machine.
4. Flip your binding piece up forming a fold at a 45-degree angle. Then bring the binding back down so that the fold in your binding will be even with the raw edge at the top. Your raw edges of the binding will be even with the raw edges of the mug rug.
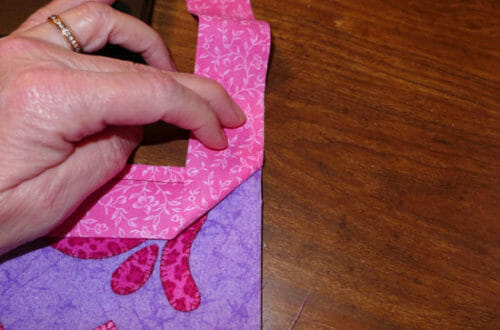
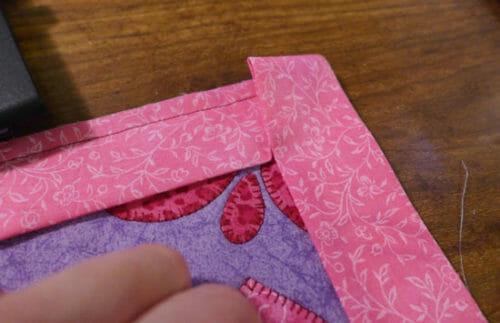
5. Secure with pins and stitch in place just as you did with the first edge stopping 3/8″ from the end. Repeat these steps with remaining corners. With the remaining corners, you will also be starting your stitching 3/8” from the corner too. When you get to the end, leave an overlap of at least an inch and trim off the excess binding before stitching that final section down.
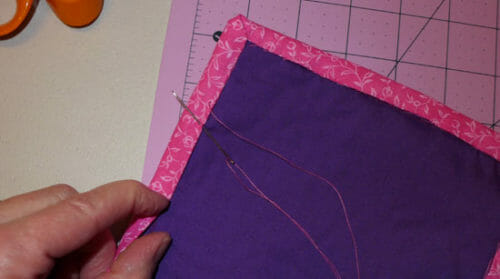
 6. Trim off excess threads and remove basting stitches that might have been left behind or exposed. Flip the folded edges of the binding to the back and pin in place. Hand stitch binding to backing.
 Finishing you mug rug tutorial:
 Finishing you mug rug tutorial:
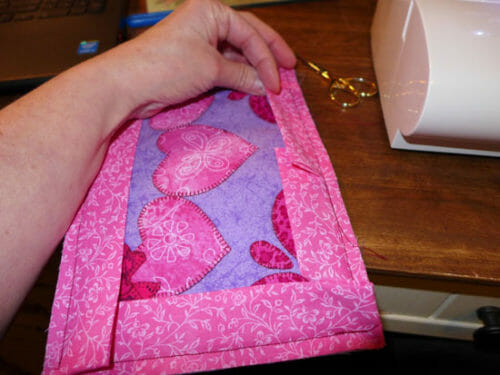
If you are using fabric paint or glue for any embellishments, do that now and let dry.


These are adorable. I know more than one person who will cherish them. Thank you. Also, on the pajama pattern what is the best way to downsize the pattern? My daughter wears a women’s size 4, but I know she will also wear a size 6, and she will love them. Have a great day.
Cheryl
HI Cheryl, You try the smallest size and take out the seam allowance. Allow 4 to 6″ for ease and you should have a smaller pair of pajamas.
I have just downloaded all 3 mug rugs they are as cute can be and I look forward to making them. Thank you.
Thanks for another great pattern. I love mug rugs.
Thanks for another great tutorial
Very cute and I love it, so making one for my precious daughter!