


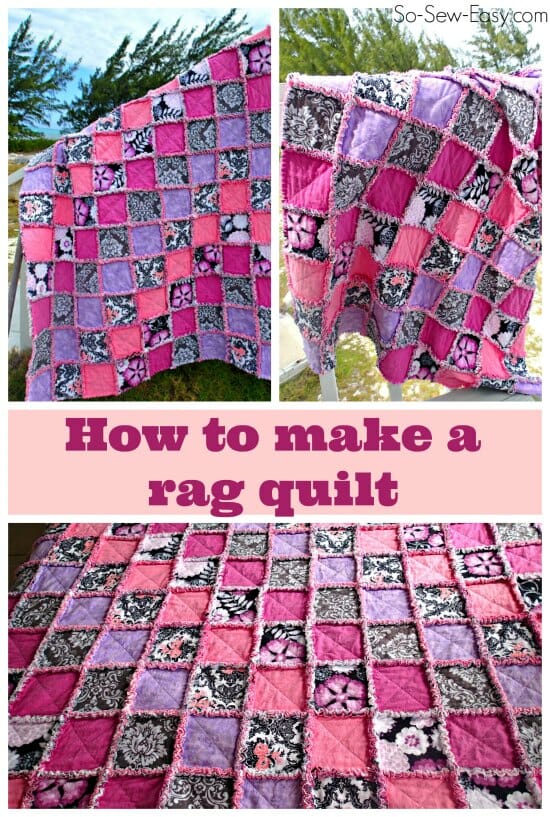
I'm sure you've seen these before. I've been drooling over all the lovely soft and snuggly rag quilts I see on my Pinterest feed and have been longing to find out how to make one. So I gave it a try, took some photos and a video along the way to share the process with you, in case you'd like to give it a go too.
Materials to make a rag quilt
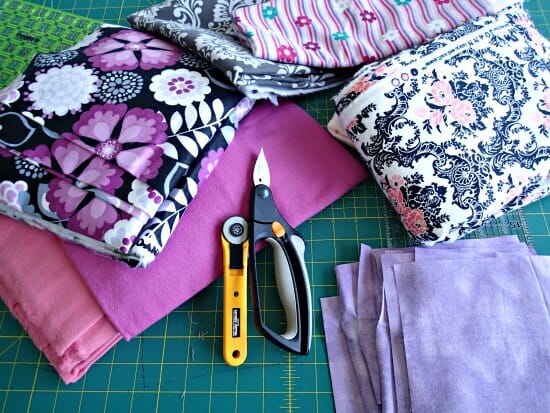
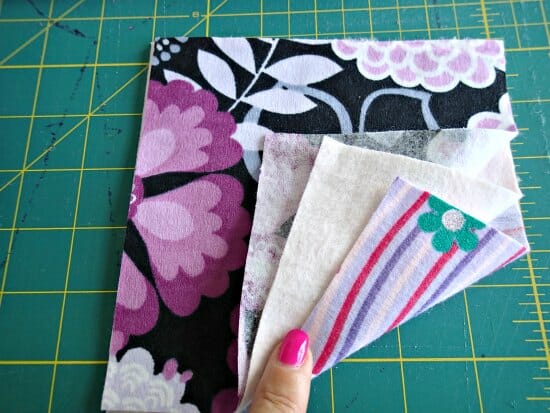
- Flannel fabric in prints, solids or both
- Matching or contrasting thread
- Ideally but optional – ragging shears
- Ideally but optional – rotary cutter and a long ruler
- Ideally but optional – walking foot
- Time and patience 🙂
How much flannel you need will obviously depend on how big you want your quilt to be and how many layers you want to add. My finished quilt is 9 squares by 13, each square started out at 6 inches and I used 3 layers in each square. So I used a total of 351 squares. Assuming you can get 36 x six-inch squares from a yard of flannel (you might get more depending on your fabric width) then I needed 10 yards of flannel to make my quilt in total. That's a lot! You can obviously make a smaller quilt and use less fabric. Making bigger squares would also mean a bigger quilt or less fabric because of less seam allowances.
Watch me make my flannel rag quilt
Subscribe to the YouTube channel:
How to make a rag quilt
Decide on what size to cut your squares. Ideally a larger finished quilt size can support a larger square. Keep in mind that this can be a time consuming project, and I recommend not making your squares any smaller than 6 inches.
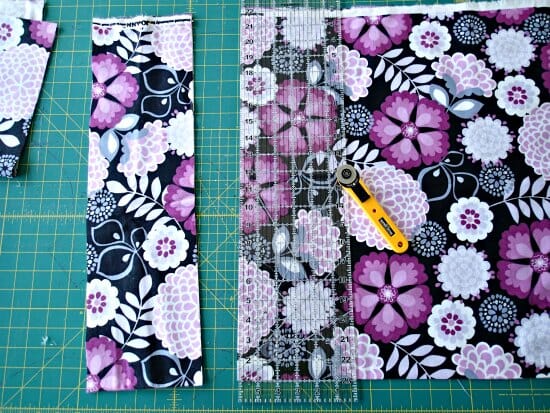
Use a rotary cutter and long 24 inch ruler if you have them. If not, mark your fabric and cut with scissors (but that will take you much longer). Cut out rows of fabric and then cut the rows into squares until you have all of your squares.
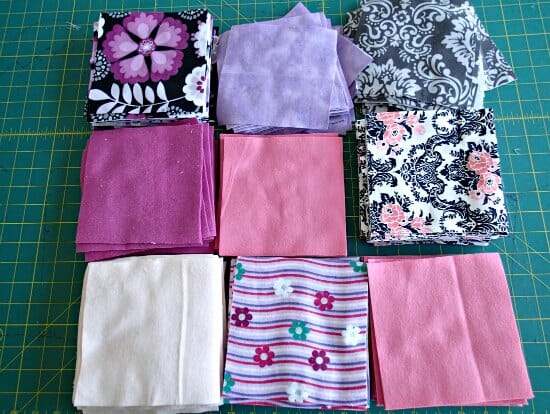
Now have fun designing your quilt. Will you use the same fabric top and bottom? Will you go for a regular placement, something entirely random? I went for a regular placement, offsetting by one in each row. More on that later 😉
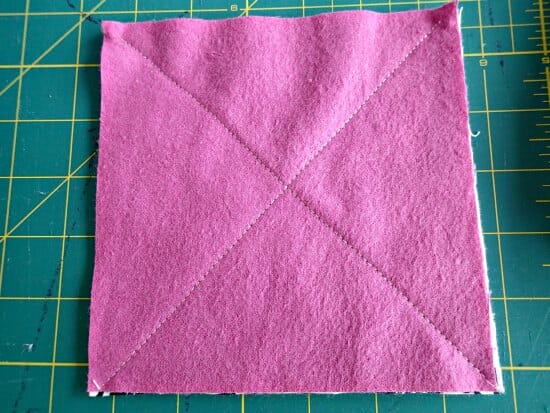
Set out all of your sets of 3.

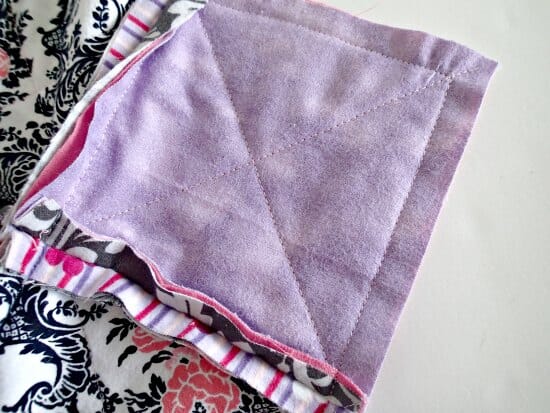
Place the backing piece face down, then your middle layer face up then your top layer face up.
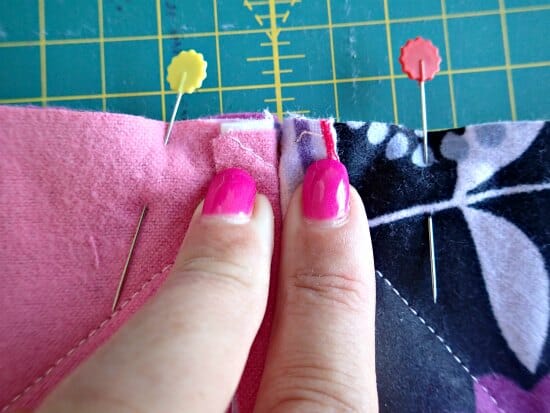
Stitch a large X through the center of your 3 layers from corner to corner. A walking foot is going to be useful here in keeping all the layers neatly together as you sew, but its not essential. The flannel clings to itself so you won't really need any pins.
Repeat, repeat, repeat until you have all of your squares sewn with crosses. This is an excellent time to do a bit of mindless sewing. Sew a few squares here and there when you get 10 minutes. This is an easy pick up and put down project.
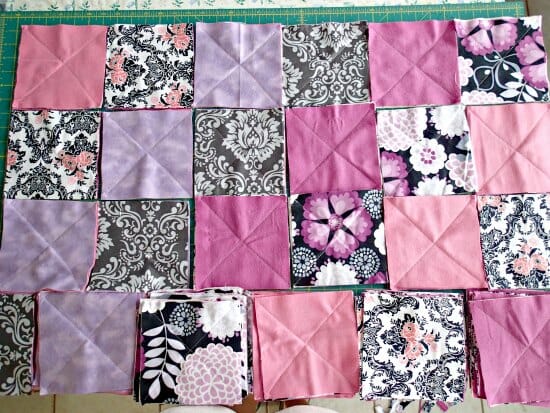
Now start to sew your rows. Decide on a seam allowance – for my 6 inch squares I used 1/2 inch. For a larger square you could use a larger seam allowance to get more of a balanced look.
Opposite to usual sewing, you'll be sewing with the WRONG sides together – whatever you want on the back needs to be sewn facing and then the fabrics on the front and the seam allowance will appear on top. Repeat, repeat, repeat until you have all of your rows sewn.
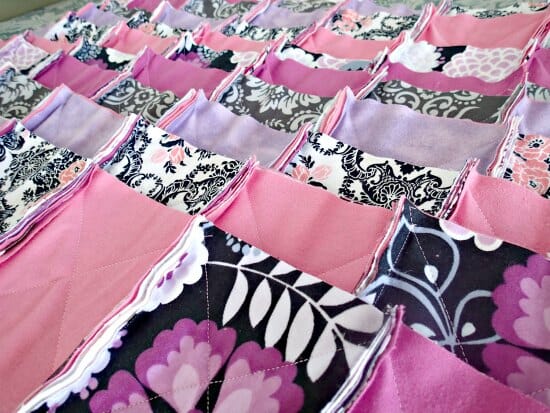
You're starting to see the big picture now. Time to sew together your rows. Remember to sew them WRONG side or back sides together. Open up the seam allowance front and back as you sew and try to match the seam allowances on your squares.
Phew, its been a sewing marathon and we're not quite finished yet. We need to take care of the outside edges, so now sew a line of stitching all the way around the perimeter using your same seam allowance. Now you are done. Put your sewing machine away and put your feet up. But not too long….
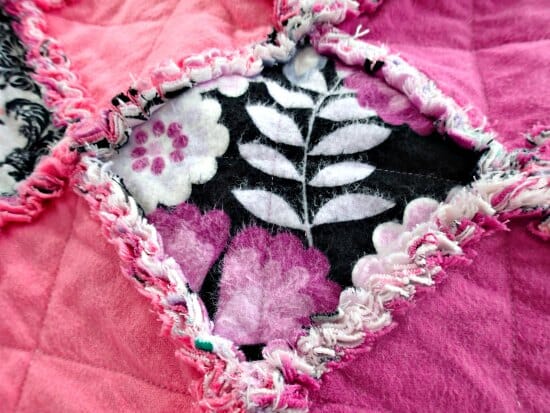
Now it's time to snip. Use your spring loaded ragging shears if you have them, or your regular sewing scissors if not. Depending on the size of your quilt and the number of seam allowances you could be snipping for some time! Put on your favorite movie or an audio book and snip away. I snipped about every 3/8 to 1/2 of an inch. Of course be careful not to snip into your stitching or you'll have to sew that seam again.
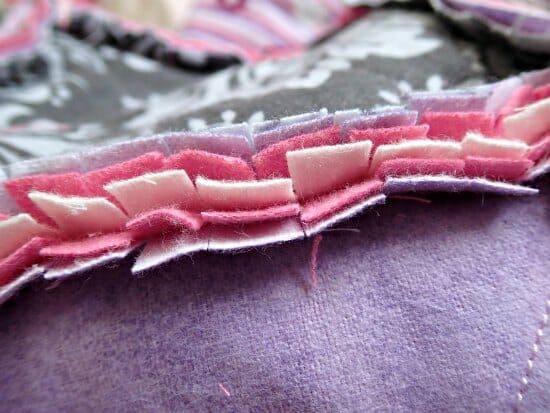
Snip all around the edges too. I created quite a blister on one knuckle where it was rubbing on the scissors – who knew this could be so dangerous!

OK, nearly done. It looks good but here is where we make it look awesome. Toss it in the washing machine with a couple of towels. I read its best not to use a liquid fabric softener. You'll get quite a bit of fluff in your washer, but it should almost all end up stuck onto the damp towels after spinning so should be easy to just wipe around and pick up any last little bits. Then throw it in the dryer or line dry. Repeat the washing and drying if you like to get a more frayed effect.
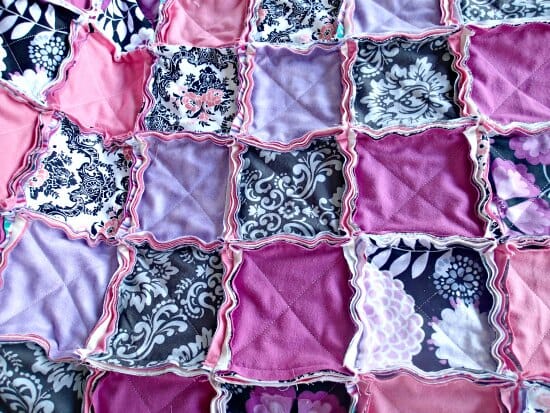
And you are done. Isn't it lovely. All soft and snuggly and so pretty.
I held it up proudly and showed it to hubby after all my hours of work. What do you think I asked? Erm he said, what's wrong with the pattern?
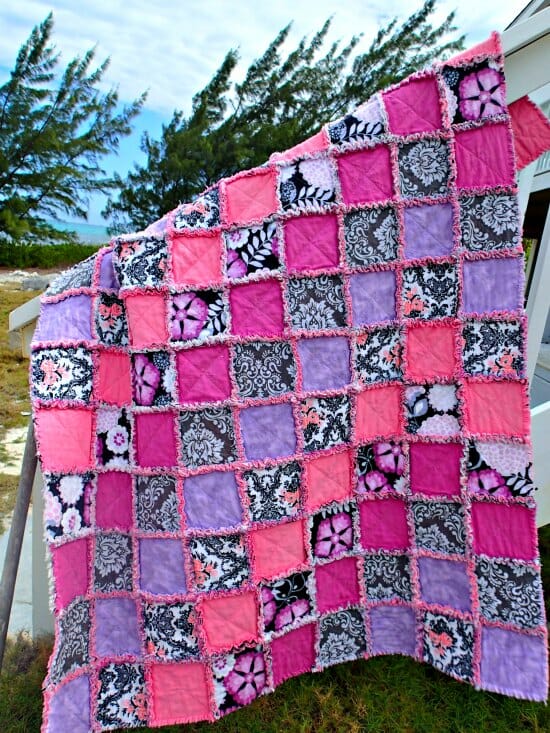
Arrghghh. I don't believe it! After all that hard work, I sewed the very last row on wrong – look, it goes the wrong way. Not sure yet if I'll remove that last row or just leave it as a design feature. I never even noticed until he pointed it out! Sigh.


Wow, that turned out amazing! Did you use “ALL” flannel squares? I’m having a problem finding cute flannel that’s not just plain or plaid.
Could I do this with a regular cotton- (*not flannel) fat quarter bundle? I’m concerned the regular cotton fabric will just gray a shed threads around the ragging-sheared edges?
Thanks!😊
Continued from previous question regarding a baby tummy time quilt: how big would you recommend?
If I were to make one for a baby (but bit a “baby” blanket, more like a tummy time blanket) what kind of material would you recommend?
Hi I’m just curious on how many yards I’ll need to make a California king rag blanket with 2 different materials?
I have a bunch of cotton fat quarters, can i still do this with those or does it have to be flannel? sorry I’m new to sewing in general and I don’t know what fabrics are interchangeable
Jeans fabric would be better. The rag bit needs a thicker fabric than quilting.
This is so beautiful. And your tutorial was practically perfect in every way! I hope you make a blue jeans rag quilt sometime. I will watch for that.
I think your quilt is delightful. Traditional quilt makers deliberately included a mistake in their quilts owing to their religious belief that only the almighty could be perfect. Enjoy the subtle touch of tradition in your beautiful quilt.
Lovely! I wanted to do a little bigger quilt not just tablerunners but with arthrose it had to be a dream. Until now! Think I can manage to do this with lots of breaks. Thank you for this inspirational and easy to follow tutorial.
This is so beautiful. I wouldn’t worry at all about the pattern. To be completely honest, I seriously don’t see where you may have misaligned it? I think the fact that it has so many different patterned fabrics hides it. It’s absolutely beautiful!
Beautiful!!!!!
Absolutely lovely! I have a lot of strips of jeans from old pants. What do you think about those incorporated into a rag quilt? And would you eliminate the middle layer if you would use jeans?
I can totally sympathize.. my Dear Hubby always spots the one mistake.. re: denim for this.. working on it.. I did 8″ squares with black & blue plaid backing.. no interlining.. obviously taking longer than I thought.. doesn’t it always?? Good luck with you project…
I did one with old jeans fabric, just eliminated the batting (or wadding) and used flannel squares for the back. Worked beautifully!
Love it and your husband sounds like mine, always finding the one thing that went wrong. Leave it the way it is, and tell him you meant to have a talking point.
I think it is beautiful! I would leave it, others won’t even notice. I made a baby blanket with 1 inch lines on the diagonal then used a chenille cutter that has this same fluffy look. Boy, was it a lot of work, but came out beautifully. I vowed never to make one again, but now looking at your quilt, I just might make something again with less “chenille “ . Thank you for your inspiration and easily accessible information.
Oh no! That pattern! I know the feeling. I just finished a large quilt project and found I had made the same mistake. So frustrating. But, after setting it aside for a little while, I was able to pick out the seams and fix it. I could never live with it messed up. I do love this project and am looking forward to trying it out!