


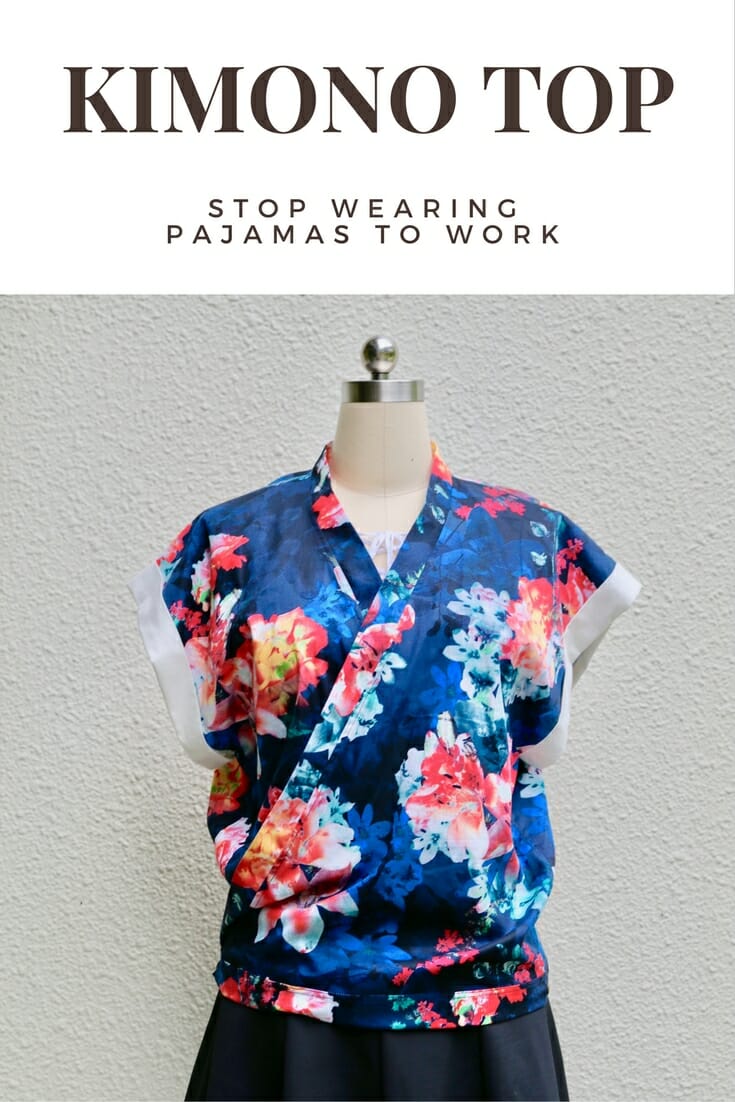
About a year ago I began to see a disturbing trend on the streets. Some of the young ladies were walking around in what to me resembled pajamas. Now, I think when it comes to clothing, I am pretty opened minded. If I see anyone at the 7/11 buying milk wearing pajamas, I think he or she really hates coffee without milk which is totally understandable. However, walking under a scorching sun in the middle of a busy city street in what appears to be pajamas is a little odd, don't you agree? I thought one of the “kids” I saw like this probably felt they were young and cool and were trying to be noticed. But, for the rest of the mortals like me, well, pajamas just won't cut it to go anywhere other than to bed.
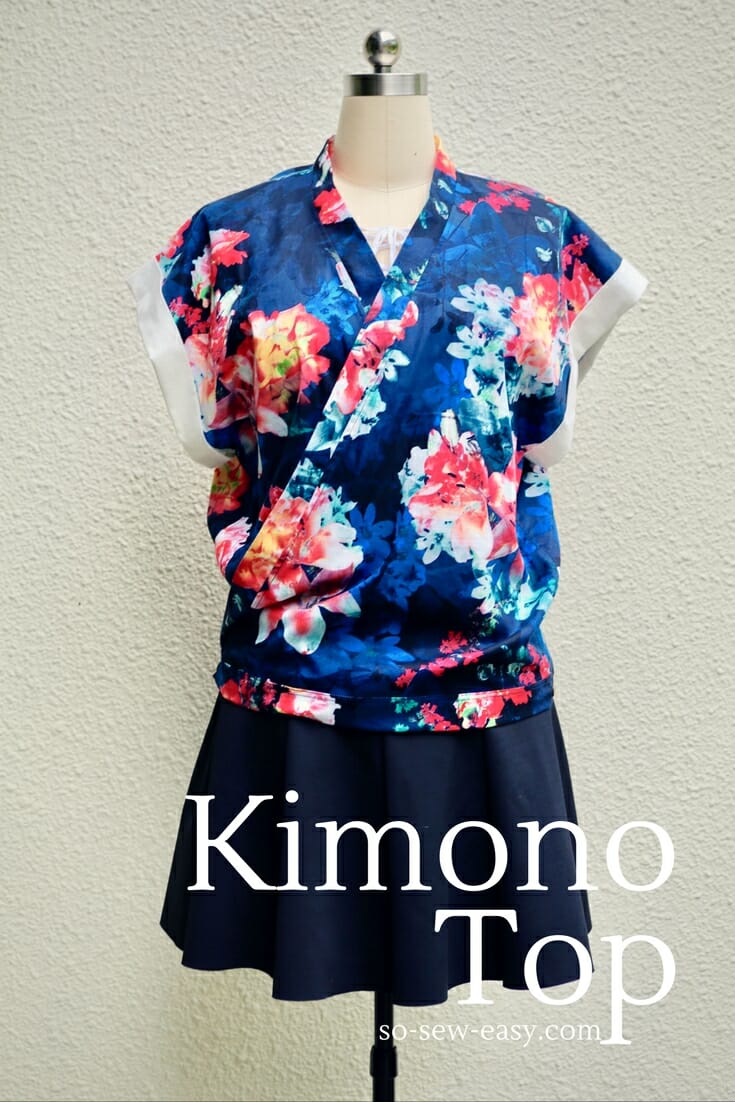
So I set about to come up with something much, much better. I do love comfortable wearing clothing and I am happy to share an easy kimono top project for many occasions that won't even require a serger. A kimono design is functional and stylish. It has all the comfortable and loose-fitting features of pajamas while looking elegant and professional enough for business or pleasure.

The kimono top is the perfect alternative for a casual Friday at the office. It is super easy to make and a great holiday gift. You can also wear it over a swimsuit, a turtleneck, or a pretty tank top to add a layer to your outfit. Also makes a good breastfeeding or maternity top.
Key Features:
- Versatile uses, both professional and casual
- Perfect beginner to intermediate project
- Can be made in many different fabrics
Materials:
- Main fabric (1 1/2 yards to 2 yards depending on size, 60″ wide)
- Contrasting fabric for sleeves and optional belt (1/2 yard)
- Thread
- Thinnest fusible interfacing
- Pattern tracing paper
- Two snaps
Tools
- Sewing machine
- Scissors
- FriXion pen or pencil
Pattern Download
You can find the complete pattern for this kimono top on our Payhip webstore where we distribute our patterns.
Our patterns are still free, but now you now have the option of making a small contribution if you like our work! We'd really appreciate it and it will help is keep going with new and fun designs like this. Even a dollar or two really goes a long way.
Thanks so much in advance for helping us out. You can use any credit card and you don't need a Paypal account, although you can use one if you have one.
Download the FREE Pattern HERE
Recommended Fabrics
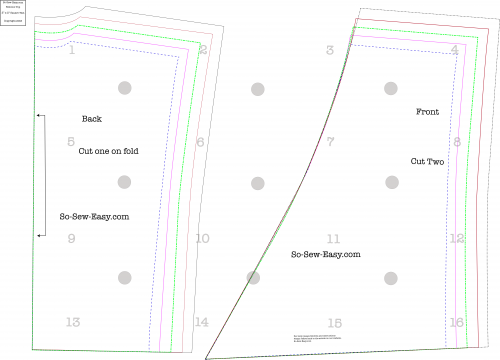
Pattern layout
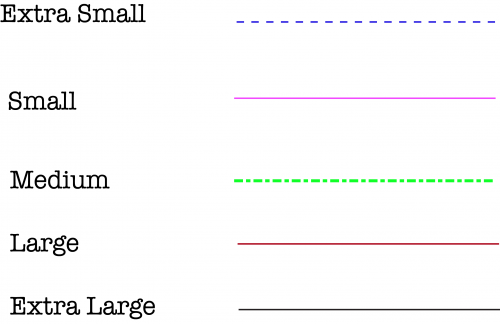
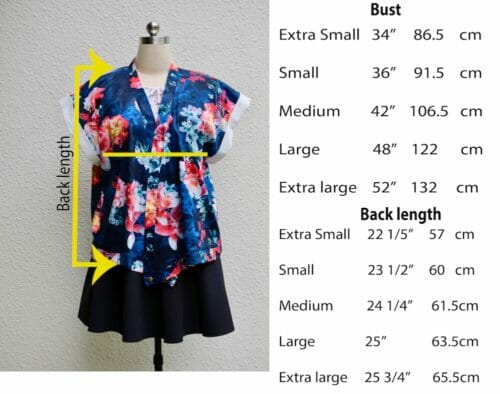
Pattern Sizes
Finished Garment Measurements
Step One: Preparing the material and supplies
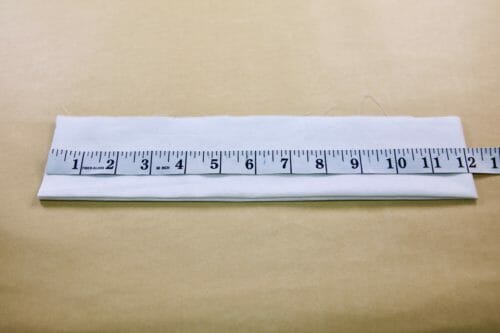
There is not much to prepare other than cutting the pattern to the size you require. Seam allowance is included and it is 5/8″.
Step Two: Sewing the shoulders
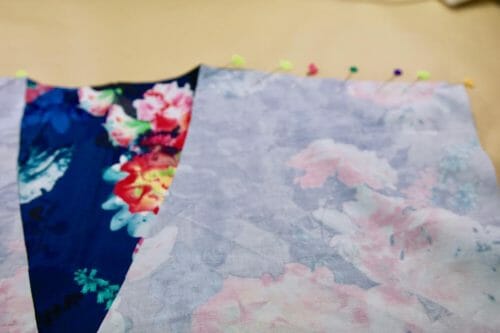
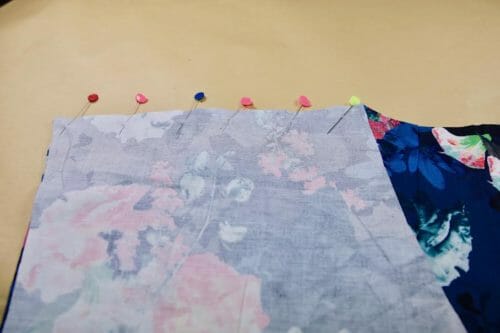
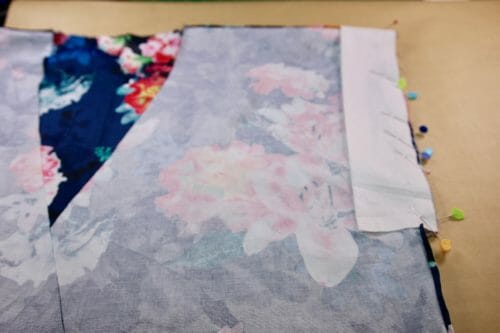
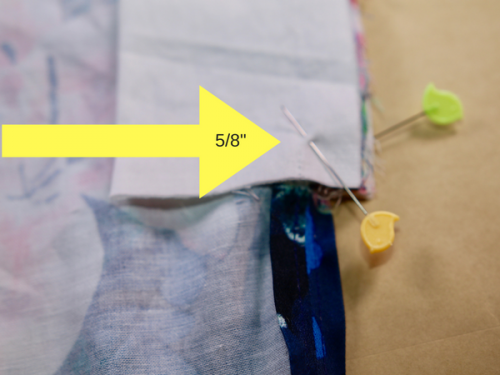
Pin the shoulders and sew the shoulder at 5/8″.
Pin into place.
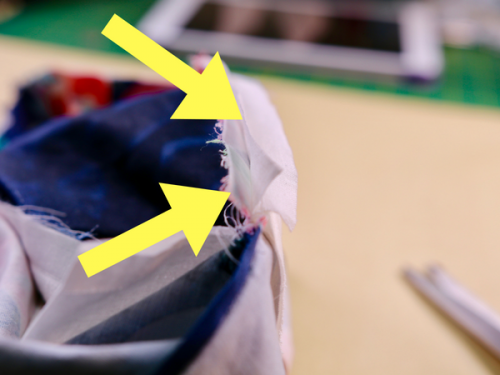
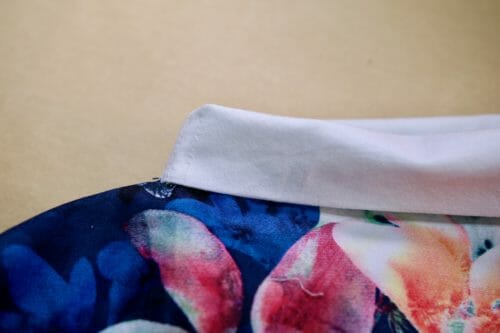
Iron the seam allowance open. Fold each side of the seam allowance under and iron.
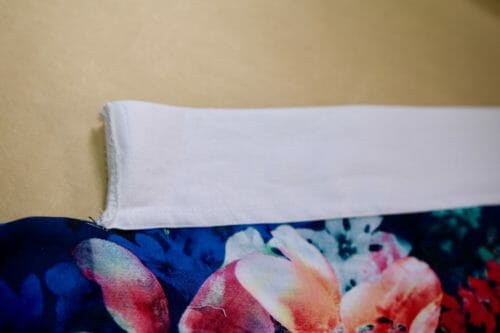
This is how the kimono top side stitches will look.
Step Three: tips for fitting your kimono top and sewing the sides.
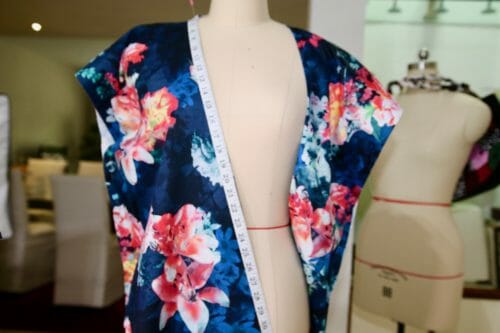
Find a full-length mirror and place the kimono top over your shoulders. Find the smallest part of your torso. This is where the belt would go if you chose to use one.
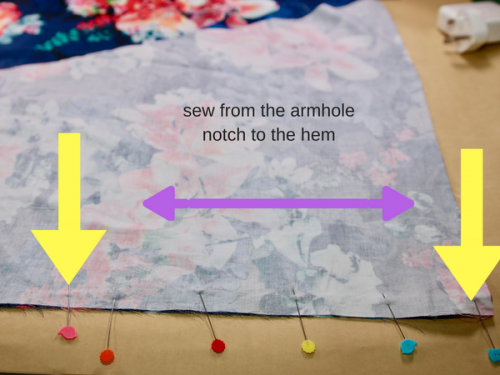
We are not all built the same way. I have a short torso and you are probably tall. So my waist is not where yours is. The best way to make sure the top is going to fit you well is to create a waistline even if you think you do not have one. Find where you would normally wear a belt and mark it with a pin. Take the top to the sewing machine and sew from that pin to the hem at 5/8″.
If you are a true hourglass figure, meaning your chest and hips are about the same and your waist is considerably smaller than those measurements, then sew from notch provided on the pattern to the hem.
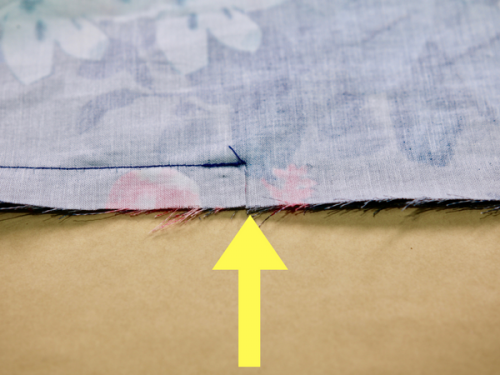
Cut the seam allowance straight to the stitching line but not through it.
Fold each seam allowance just like you did on the shoulder seam.

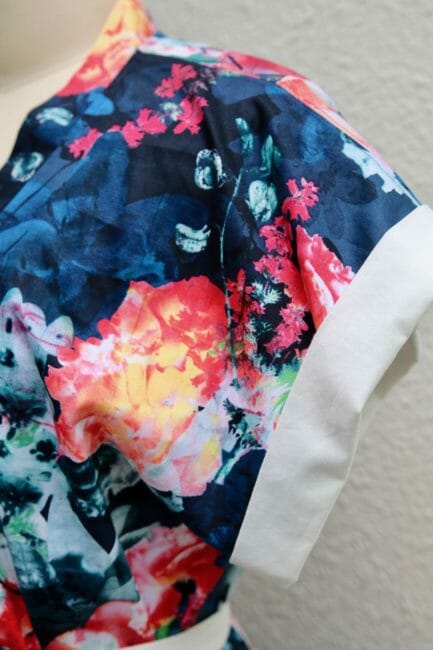
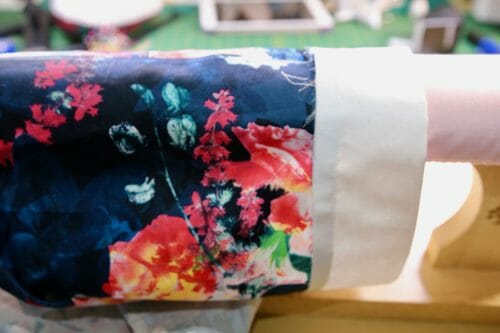
Step Four: sewing the armbands
Measure where the side stitching ends and the armhole begins to the shoulder.
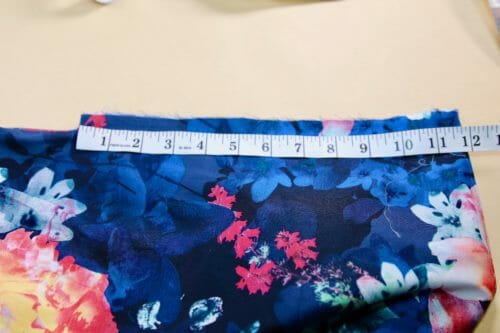
Cut a rectangle the same size as the measurement above plus 1/4″ by 5 1/4″ wide.
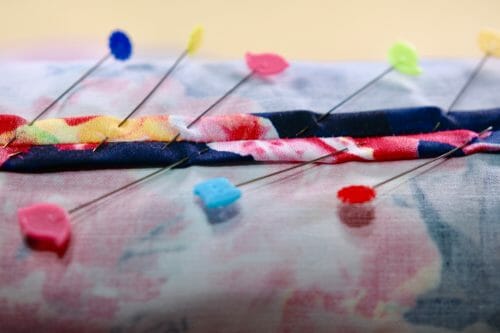
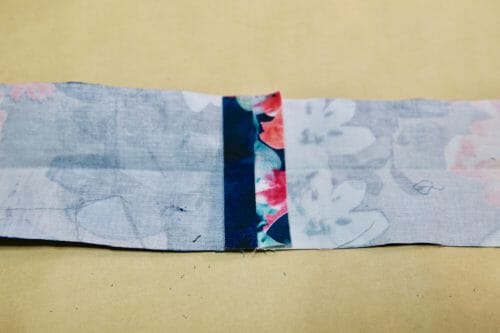
Fold this rectangle right side out and pin to the wrong side of the top.
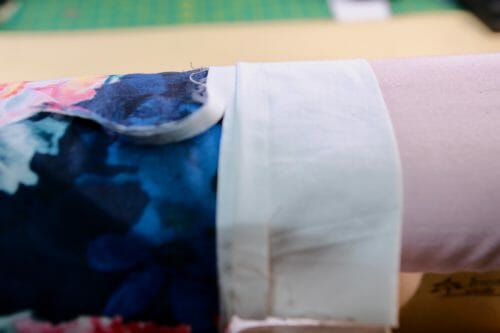
Repeat the process with the other side of the top. Sew at 5/8″.
Sew the armhole binding at 5/8″.
Cut the first two layers of the seam allowance closest to the main fabric.
Fold back the first layer of fabric and cut the other two.
Stitch close to the edge.
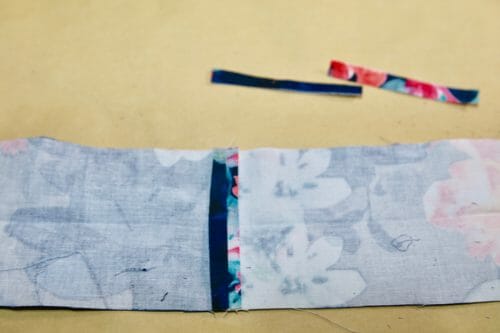
This is what your offcuts should look like.
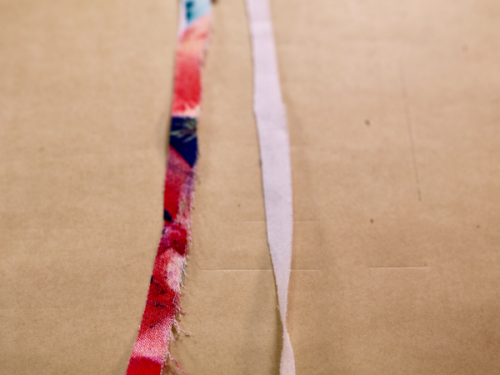
Fold and iron the other side of the seam allowance.
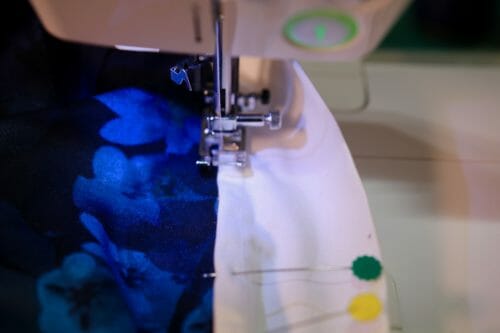
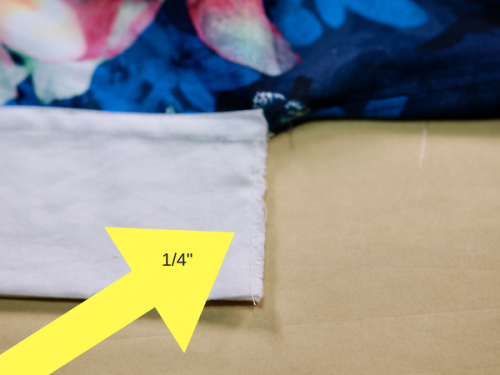
Sew the bottom of the sleeve at 1/4″ and iron the seam open.
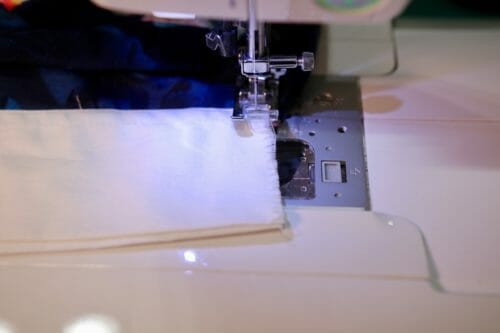
Stitch each side to keep the seam flat.
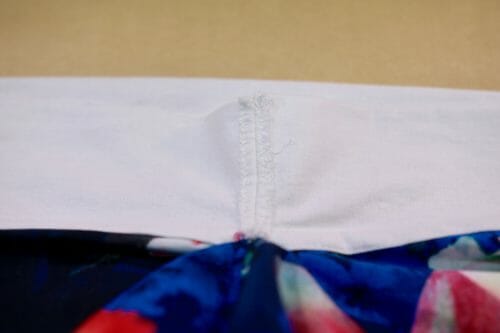
Fold the sleeve up and repeat on the other side.
Step Five: making the kimono top neckline

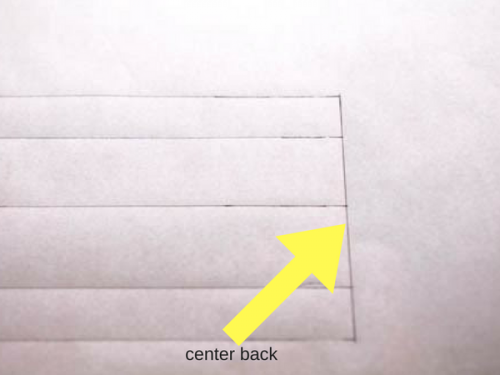
Measure from the center back at the neckline, to the end of the front side.
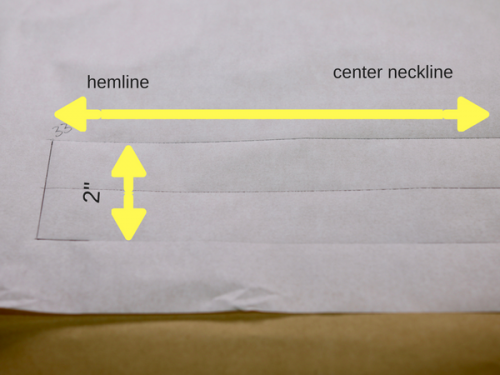
Use your pattern tracing paper and trace a rectangle that is the length of the measurement you just took by 2″ wide, in my case is 33″ in length and 2″ wide.
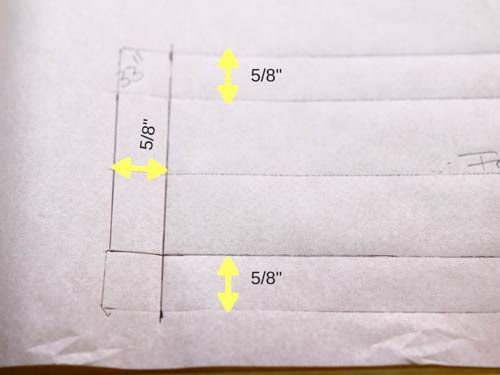
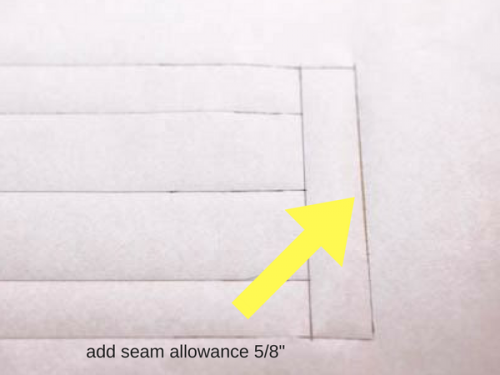
Add the 5/8″ seam allowance on each side. Draw the seam allowance at the end of the binding as well shown here as a vertical line.
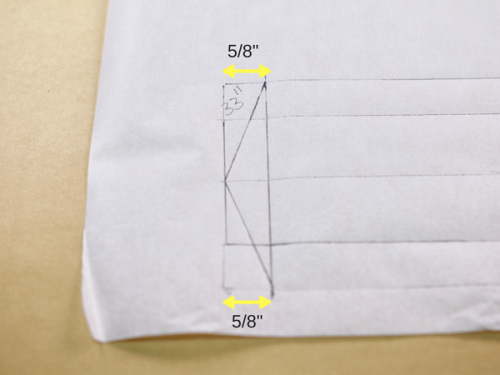
Trace the cutting line from the center of the binding to the edge as shown in the photo creating a triangle at the end of the neck binding.
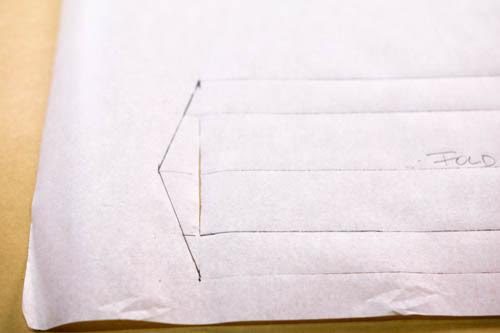
Erase the unnecessary lines and you are left with a triangle at the end that will match the shape of the front of the kimono top. Mark the fold line, which is the middle of the neck binding. This line will also act as the grain line. Cut on a bias.
At the end of this neck binding add 5/8″ for the seam allowance. Label your pattern “Cut two” and remember to cut two of this neck binding.
Congratulations you have drafted your first collar, well at least on this site!
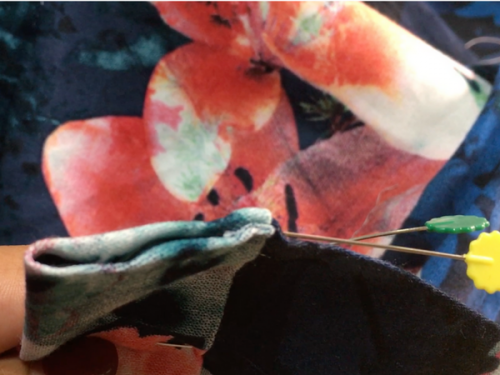
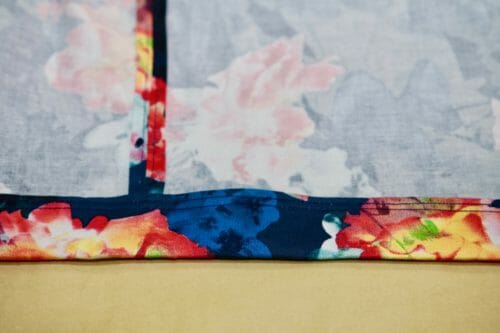
Step six: hemming the kimono top with a binding
Measure the bottom of the top. Make a band of that length plus 1″ by 3 1/2″ wide. Mine is 62″ so I am going to have to cut two strips and join them at the back.
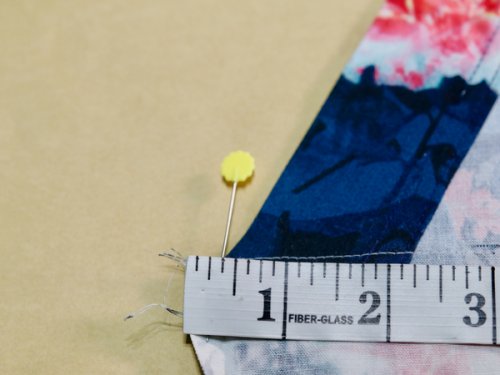
Iron the seams open and cut half of the seam allowance. Align the center of the band with the center back of the top. Fold what is now a band in half. This is basically just a big bias tape. Pin the band 3/8″ from the corner of the top. If your band is longer than 3/8″ this is fine. Just do not let it go beyond 5/8″ as it will be hard to fold.
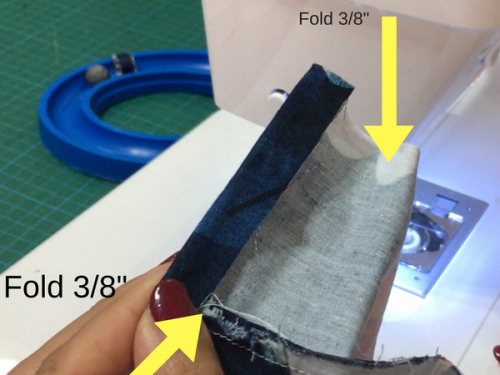
Fold the end of neckband 3/8′. Fold the neck binding in half.
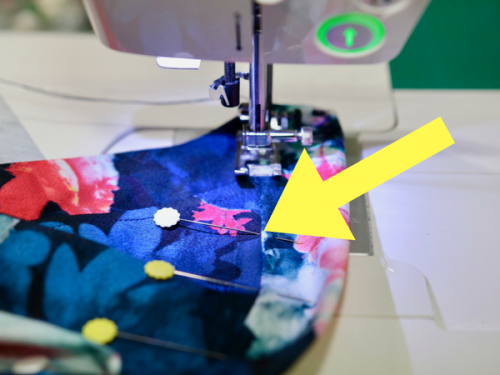
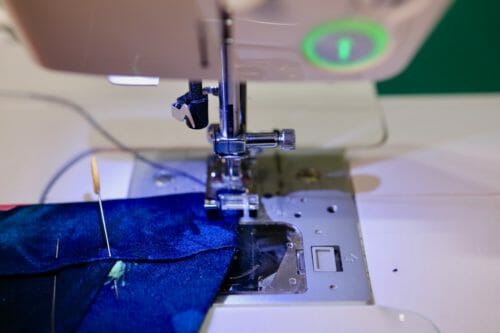
Topstitch all around the neck binding, starting on one end of the collar and finishing on the other end of the collar.
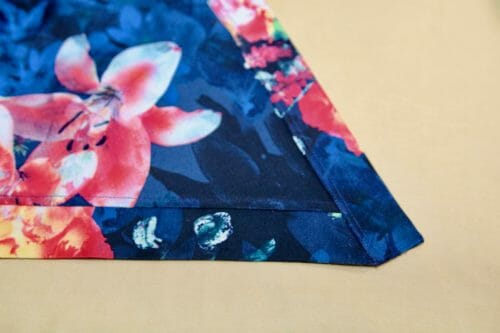
I have added a double stitching line as a decorative detail. You can either use a double needle or just repeat the step. Starting at the corner of the hem, sew to the next corner and pivot your work. Inside view. I have added another stitching line to simulate a decorative detail.
If you want to have exactly the exact look in the feature image, I recommend that you add snaps to the sides of the top so that the garment stays closed without a belt. You can measure yourself where you want to put these snaps depending on how tight you want the fit.
Alternatively, you can just use a belt to keep the kimono top closed. In the picture below, cut a strap of fabric the color of the armbands the length of your waist plus 28 to 30″ by 5″. Sew at 5/8″ leaving one end open to turn the belt inside out. Close the belt using a double stitch to match the rest of the blouse finish.
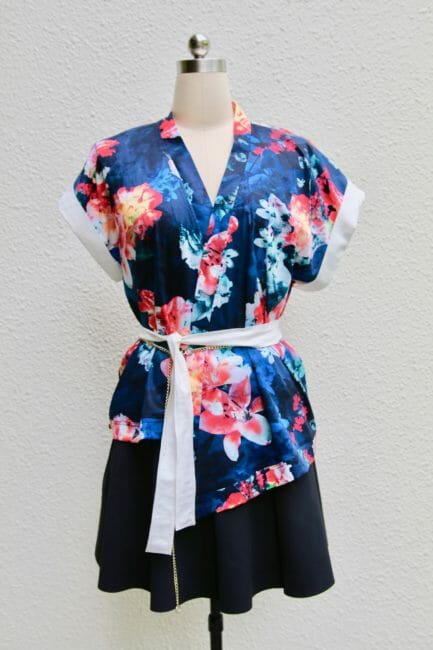
I hope you found this project easy to make. I really love the print since it's youthful and makes me feel young.
This top is a great overlayer. You can wear it with a pencil skirt or skinny jeans, to the movies, a picnic or over your swimsuit. This also makes a great breastfeeding or maternity top!
Leave your comments below. I'd love to hear what you think. Until next time!


how do i print just the instructions?
Use the print-friendly button on the left of your screen, please.
Hi! I added $ but it just took me to the download your patter page. Did i donated? Otherwise I will download again and try again! 😉
I’m really confused about the arm bands too. Is there a video or some other instructions on how to sew it?
I get that it’s folded in half and sewn on. But I get really confused at the point after it’s trimmed.
Is the seam allowance covered by folding the arm bands back on itself?
The instructions seem to be saying trim twice ie first one layer, then two layers of fabric. And somewhere along the line the cuffs are joined at the shoulder, I think.
Also, would it work in chiffon?
Saving the world one pattern at a time!
Is there a way to make this with sleeves?
I love this, looks so comfortable and pretty at same time.
Love the pattern andI have already downloaded it and am looking forward to raiding my stash for a nice fabric. Thank you Cherie for the printer friendly directions.
Also, I see the top with two different finished hems. Are there directions for the longer asymmetrical hemline?
To all those that want the instructions – as Myra mentioned, on the far right of the page are several small circles. The green one has a picture of the printer in it. Click on that green button. It opens up a printer friendly window (this takes a few seconds to load.) This offers an opportunity to download (click on PDF on upper right) or print the page of instructions including the pictures. Click on PDF and it pops up another window that also has a download button. Click that one as well and click “Save”. Once you’ve downloaded the instructions, you can print them from your computer. Very easy to do.
Myra, you may use these instructions in your future posts if you would like.
Hi Cherie, thanks for that. Those instructions are very helpful. Many readers don’t know about that function to print our the instructions.
I am in the U.S.A. and unfortunately “casual wear” has taken over to the point whereas they not only wear pajamas to the stores everywhere but feel “dressing up” is a bother. It used to be nice clothing was worn to work, church, court and funerals but not anymore. Nowadays it is blue jean shorts, t-shirts, sweat pants and it doesn’t matter if there are holes or not! When I dress up I am badgered with “where you going dressed so fancy?”! Funnily enough, some people think I’m dressed up when simply wearing matching clothes with no holes!
I wish it were only a fad but, sadly, it seems it is here to stay plus getting worse.
I feel exactly the same. No one cares about looking nice anymore. Wearing pajamas, boys wearing sagging pants with the waist at the knees, dresses and skirts without hoisery, torn dirty jeans is not “hip” it is slovenly and shows lack of respect for one’s self, especially in the business world.
All these kids strutting about with “pajamas” or ripped up clothing on! How many of them have perfectly coiffed hair and make-up? I doubt many of them spend as much time on their clothes as they do on their heads!!!
Dear Mayra, I bought the pattern but can’t find the instructions.
Hi Beata, the instructions are on the website. If you go over to the left side of the screen, you can click on the green button that looks like a printer. This will generate a printer-friendly version of the tutorial for you to print if you prefer to work off paper. Many people prefer to work off a computer or iPad screen so we don’t include the instructions in the printed pattern. Hope that helps.
I really like your finished project but can’t finish mine. I call myself an intermediate sewer however never sewed a kimono. Should be easy. I just don’t understand the steps of adding the sleeve binding and the instruction shows only the half length of the bindigs. 🙁
Perfect base for my Monster Hunter Rise Palico cosplay. Need to modify it a bit to have a hood, no sleeves, and a belly sash, but that’s not hard at all! Thank you so much for this pattern. I’m very excited to work with it!
Ohhh boy! this I go to see, please show me your Instagram or at least send me a Picture…pls!
Is there a video for this kimono top.
Also how many pieces of the back and front should be cut?
https://so-sew-easy.com/kimono-top-alternative/2/
I found these instructions to be super confusing. Sorry
Hi! I’m loving the pattern sofat but I have a question regarding the amrs/sleeves piece (the one of a different color): Do I cut 2 pieces (one for the front and once for the back) for each arm ? or do I cut 2 rectangles, once for each arm with twice the meassure we got at the beginning of the 4th step?
Thank you in advance
This is my next project. Pattern on paper finished as we speak. This is my favorite sewing site. ???? you guys .Paula
Thank you, Paula, it means the world to me your support. It is only I for the last 5 years sadly, I could use a sewing friend so I can concentrate on making patterns and other fun projects.
Hello, I was wondering if the seam allowances are already included in the pattern, or do they need to be added?
Hi Suzanne, it is 5/8″
the sleeve edging is needlessly complicated and super-prone to error. It’s also missing several steps. It cost me my project.
Always read the instructions before starting a project, an if you do not agree with the construction since you seem to know more than most can share your pictures. I am always welcome to a different point of view and grateful if someone teaches me something new. Perhaps you would like to share your way.
I know what you mean about people running around in pajamas. As you suggest, it might be some sort of “fad” for a while – who knows, but it’s not attractive. Years ago, women used to go out in hair curlers with a scarf wrapped around their heads – you never see that anymore so hopefully the pajamas thing will go away too.
Your kimono style top is lovely! It looks great over the skirt you show and I think it would exceptionally nice over a pencil skirt too.
Thank you for sharing the pattern!
It is my pleasure, I agree it is only a fad that will die out soon.
I think the thing about this being a “fad” and dying sooner depends on what region/county you live in. I am on the East Coast, Mid-Atlantic area of the US. I noticed this back around in 2004 when I worked in a gym part time.
There was an elderly member that use to work out in PJ bottoms. Then around 2012-2013, (I live in a MAJOR city), I started seeing younger (mainly guys back then) wearing them IN THE STREETS, in broad daylight.
Over the past 3-4 years, now both male AND females wear these PJs out in public with NO SHAME. Age wise-at least in my area-they are teens to 20’s.
I personally think it is DISGUSTING!
As a young teacher in the 70s a lot of mothers would bring their kids to school in the scarf covering rollers. When they picked up the kids later in the afternoon the rollers were still in place. I have always wondered when the great unveiling took place.
Luckily the trend died out with the introduction of curling irons and hair dryers but I sometimes still wonder.
Wow… very useful information you have shared.
Hi! I am a total beginner with sewing and I urgently need help with the bottom of the top. I just do not understand how you sew the binding ?. Are there any more pictures or videos which could help?
Not at the moment Nikol.
I love the pattern and want to make it but when you’re a new sewer, it isn’t always easy to understand without a youtube video. But looks great
Is there a pdf for the instructions? I found the download for the pattern, but would like to d/l the pages up above.
Hi Sandra, the instructions are free on the site.
Hello! Was wondering–could you please put the sewing level? (beg/interm/advanced) in the posts. It’s tough to tell especially when it’s not in a you tube video. Thanks so much for considering and you all do a wonderful job!
I’m more of a visual so unless a written pattern has very detailed pics and detailed instructions, it’s tough sometimes. :-).
This is so cute! I love wrap dresses and skirts. I’m sure I will love this kimono top.
Is there a link to print out the instructions?
No Erin, in order for me to be able to make this free I need the traffic to go to my site, so BIG companies pay for my time while you can enjoy a free pattern and instructions. Hope you find this fair.
I can’t wait to try it
Is this made with knit fabric as opposed to woven? If so,any recommendations for the types of fabric?
I would use a knit with body and no more than 30 percent stretch otherwise it will just hang like a wet lettuce, but hey… I am always happy to be proven wrong and encourage you to explore so please let me know…
I would love to have a summer top that crosses in the back (slips over the head) like the baby sundresses McCall’s put out in the 80’s.
Hey Sarah! You need to look for a pattern for a Japanese style apron, I am pretty sure that is exactly what you are talking about. They cross over in the back, you just pop it over your head. The pattern will be open in the back but I have made one and stitched up the bottom so it is more like a little dress.
beautiful! thanks
The instruction pages are not downloading. Regardless of the page clicked, only the first four pages show up for printing.
Instructions are not included.
Glad I read these comments…I’ll be looking for the longer sleeved one in the future.
thank you
I’m from Russia. I was looking for long sleeved kimono. And I’ve found a great idea how to sew it. Thank you very much for you master-class
It is a nice style and anyone can wear it. I love it, now to get my tablet connected to the printer.