


 If you have already visited my previous posts then you are all ready and set to start sewing your own underwear. Not got the free panties pattern yet?
Download the pattern from this post – Free Multi-size pattern to make your own undies
And take a look here for how to put your pattern together (important) – Making up the pattern
UPDATE - Oct 2014. The pattern has now been updated from hand-drawn to digital and is available with the pattern and instructions as a single PDF file to make downloading and printing easy, especially from mobile devices. Please refer to the downloaded instructions for how to assemble the new digital pattern.
Once you are all set, you will need the following materials:
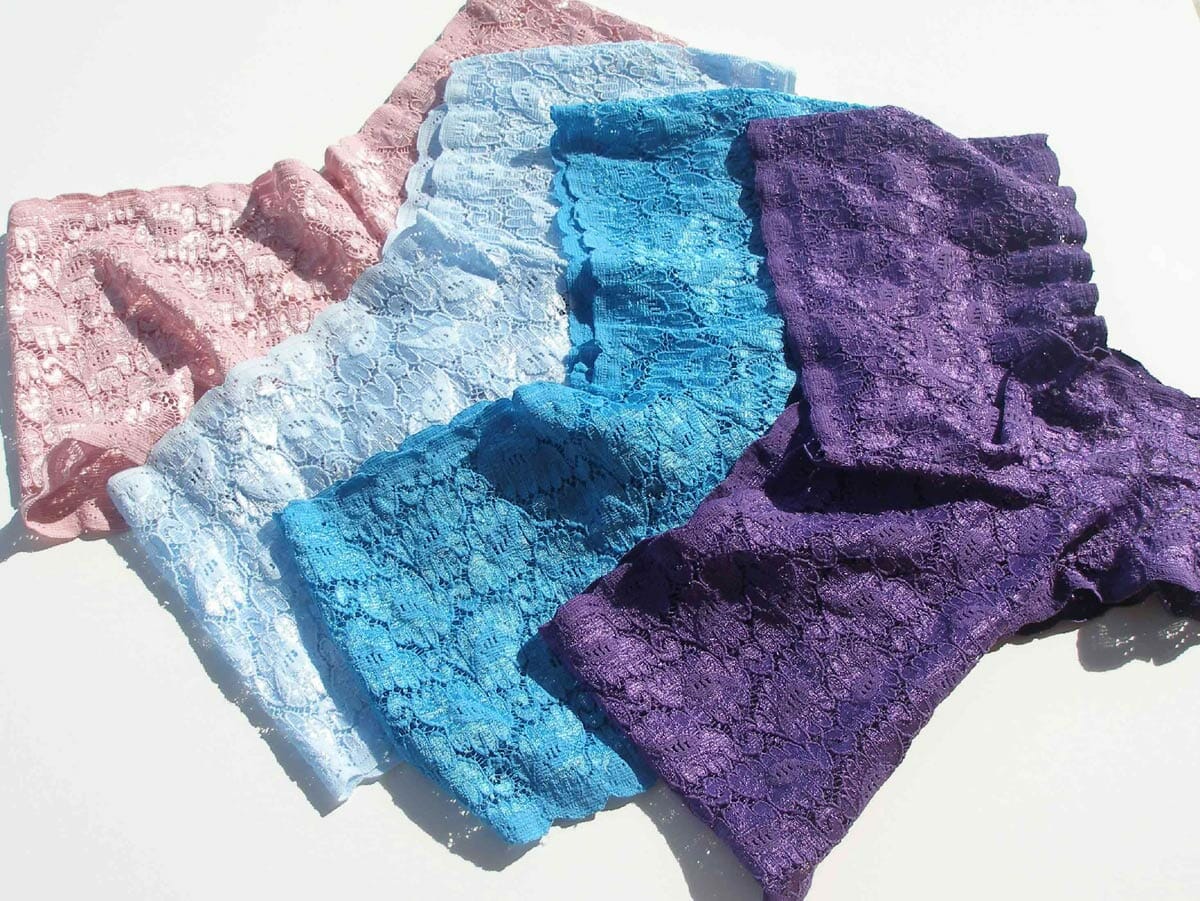
- Stretch lace with a finished edge on both sides – recommended 4 to 6.5 inches wide with a good amount of stretch (recommended suppliers Deb's Lace and Trims and Sew Sassy)
- Matching regular thread
- Piece of cotton jersey – new or recycled
- Sewing machine
- Recommended – Overcasting foot
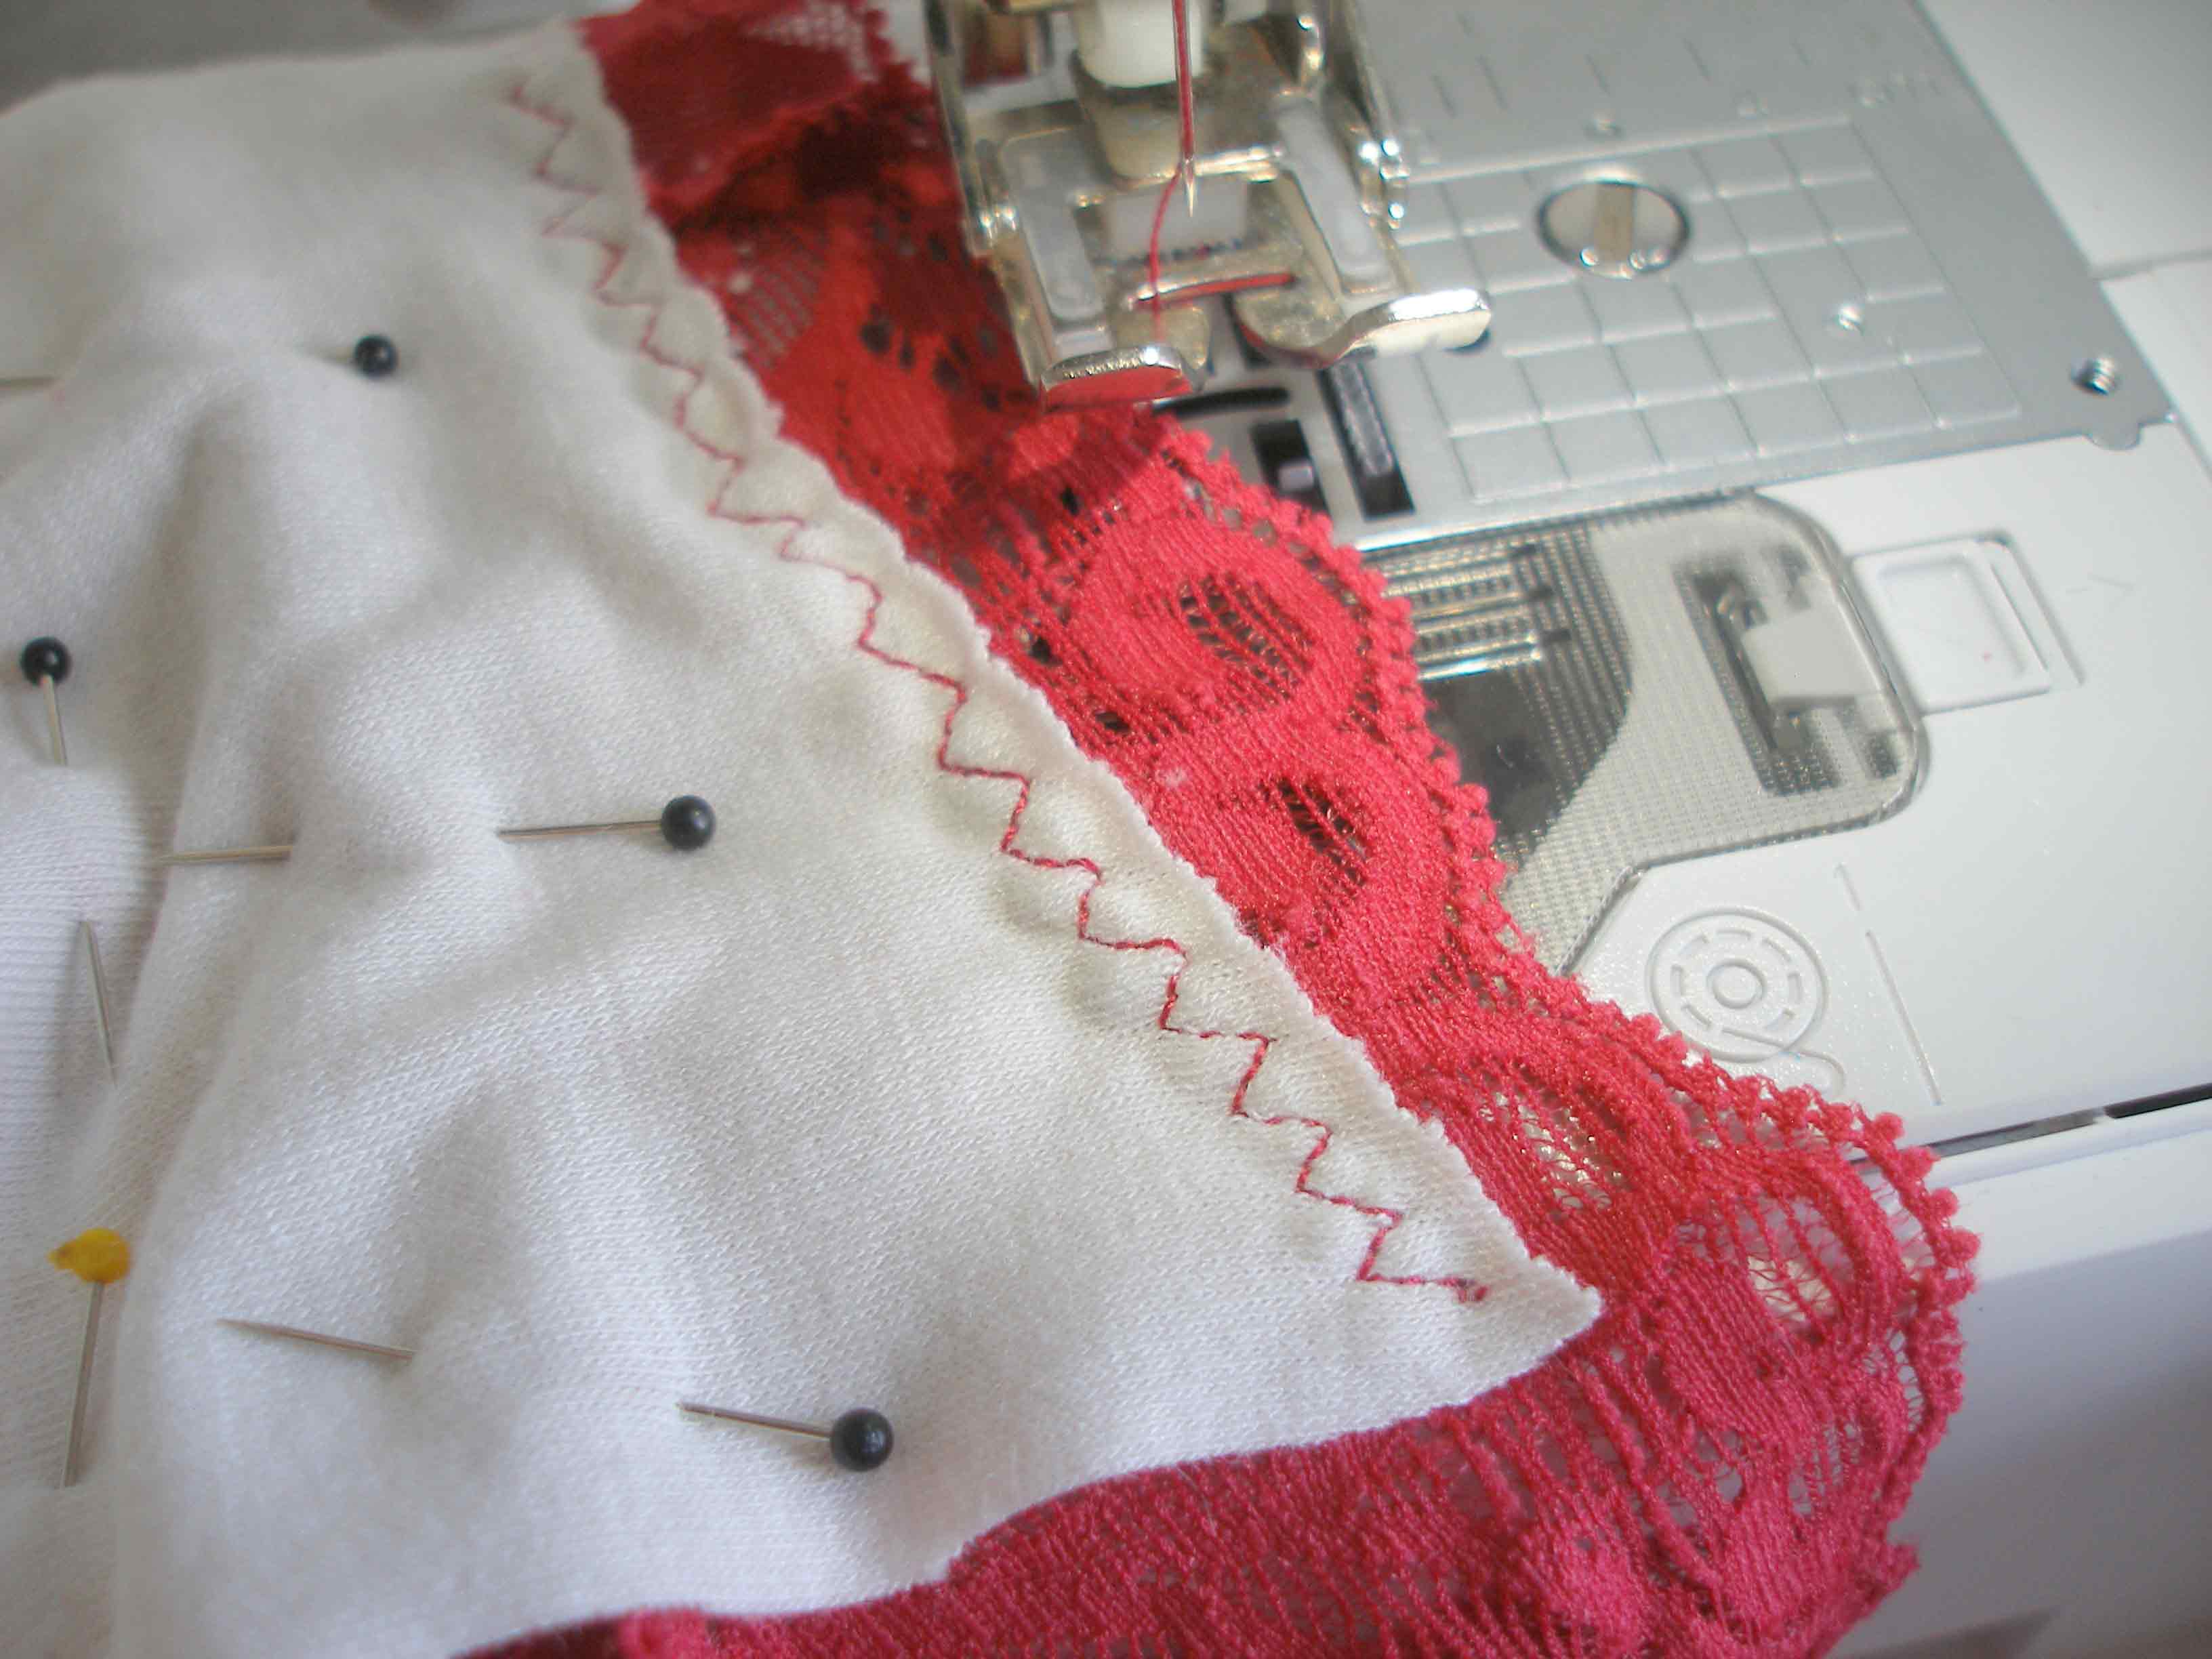
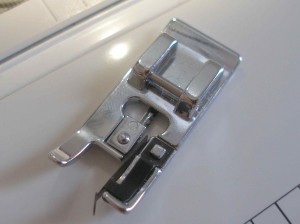 An overcasting foot is recommended for sewing with stretch lace to get a really nice narrow finished seam and edge inside. Along with the special stitch on your sewing machine, you will get an all-in-one stitch, which sews the seam, allows for stretch and neatens the raw edges all in one go. If you don't have the overcasting stitch or the overcasting foot, you can just use a regular foot and a zig-zag stitch sewing close to the edge, or a triple stretch stitch if your machine has one.
Let's get started…
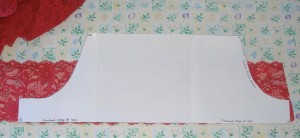
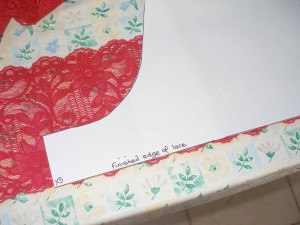
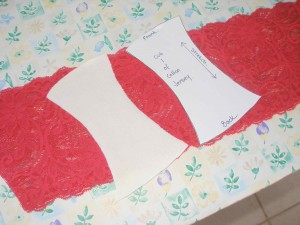
1. Lay your lace out flat with the right side facing up. Place your pattern on the top, lining up the long bottom edge of the pattern with one edge of your lace. You might just peak the edge of the lace a fraction out from under the pattern so you can see it is flat and straight. Cut one piece.
2. Take your cut piece and lay it face down on the remaining lace so that both right sides are together. If you have a large pattern repeat or a distinctive pattern in your lace, you might try to mirror the pattern so the finished undies look symmetrical Use the first lace piece you have cut as a pattern to cut the piece for the other side. By placing the fabric right sides together, you make sure that you have two mirror pieces.
3. Use the small liner pattern piece to cut a piece of cotton jersey.
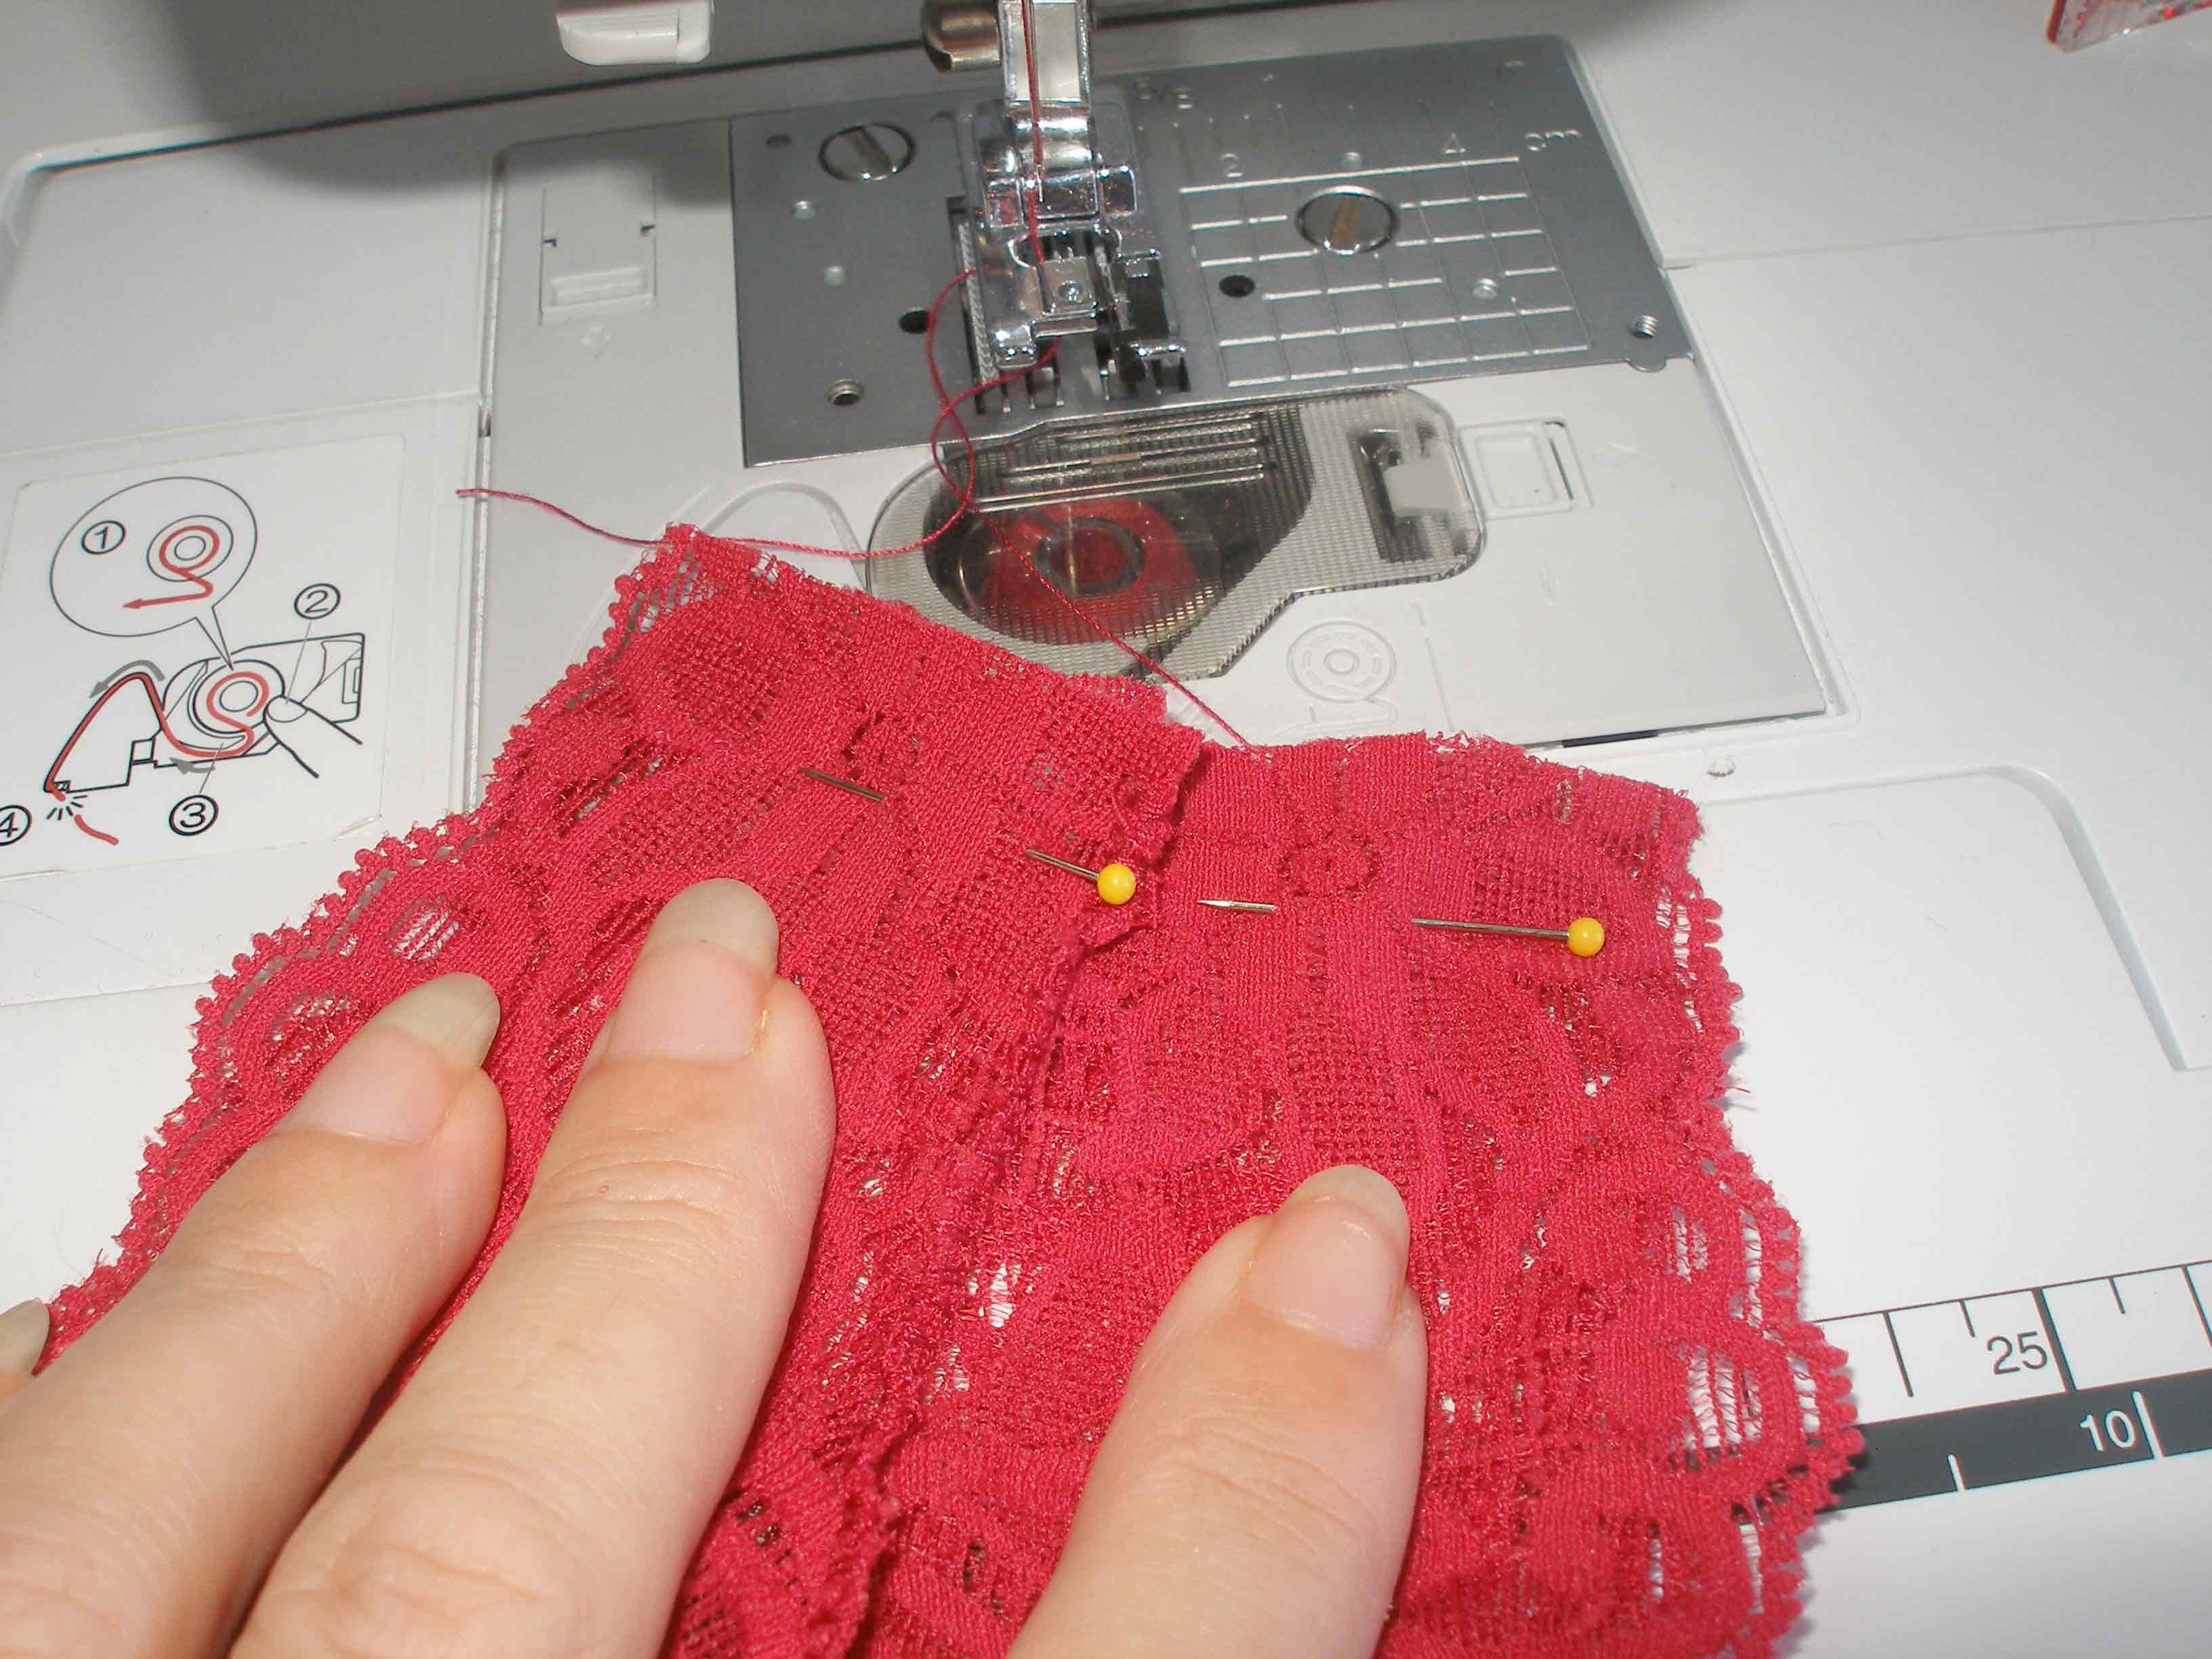
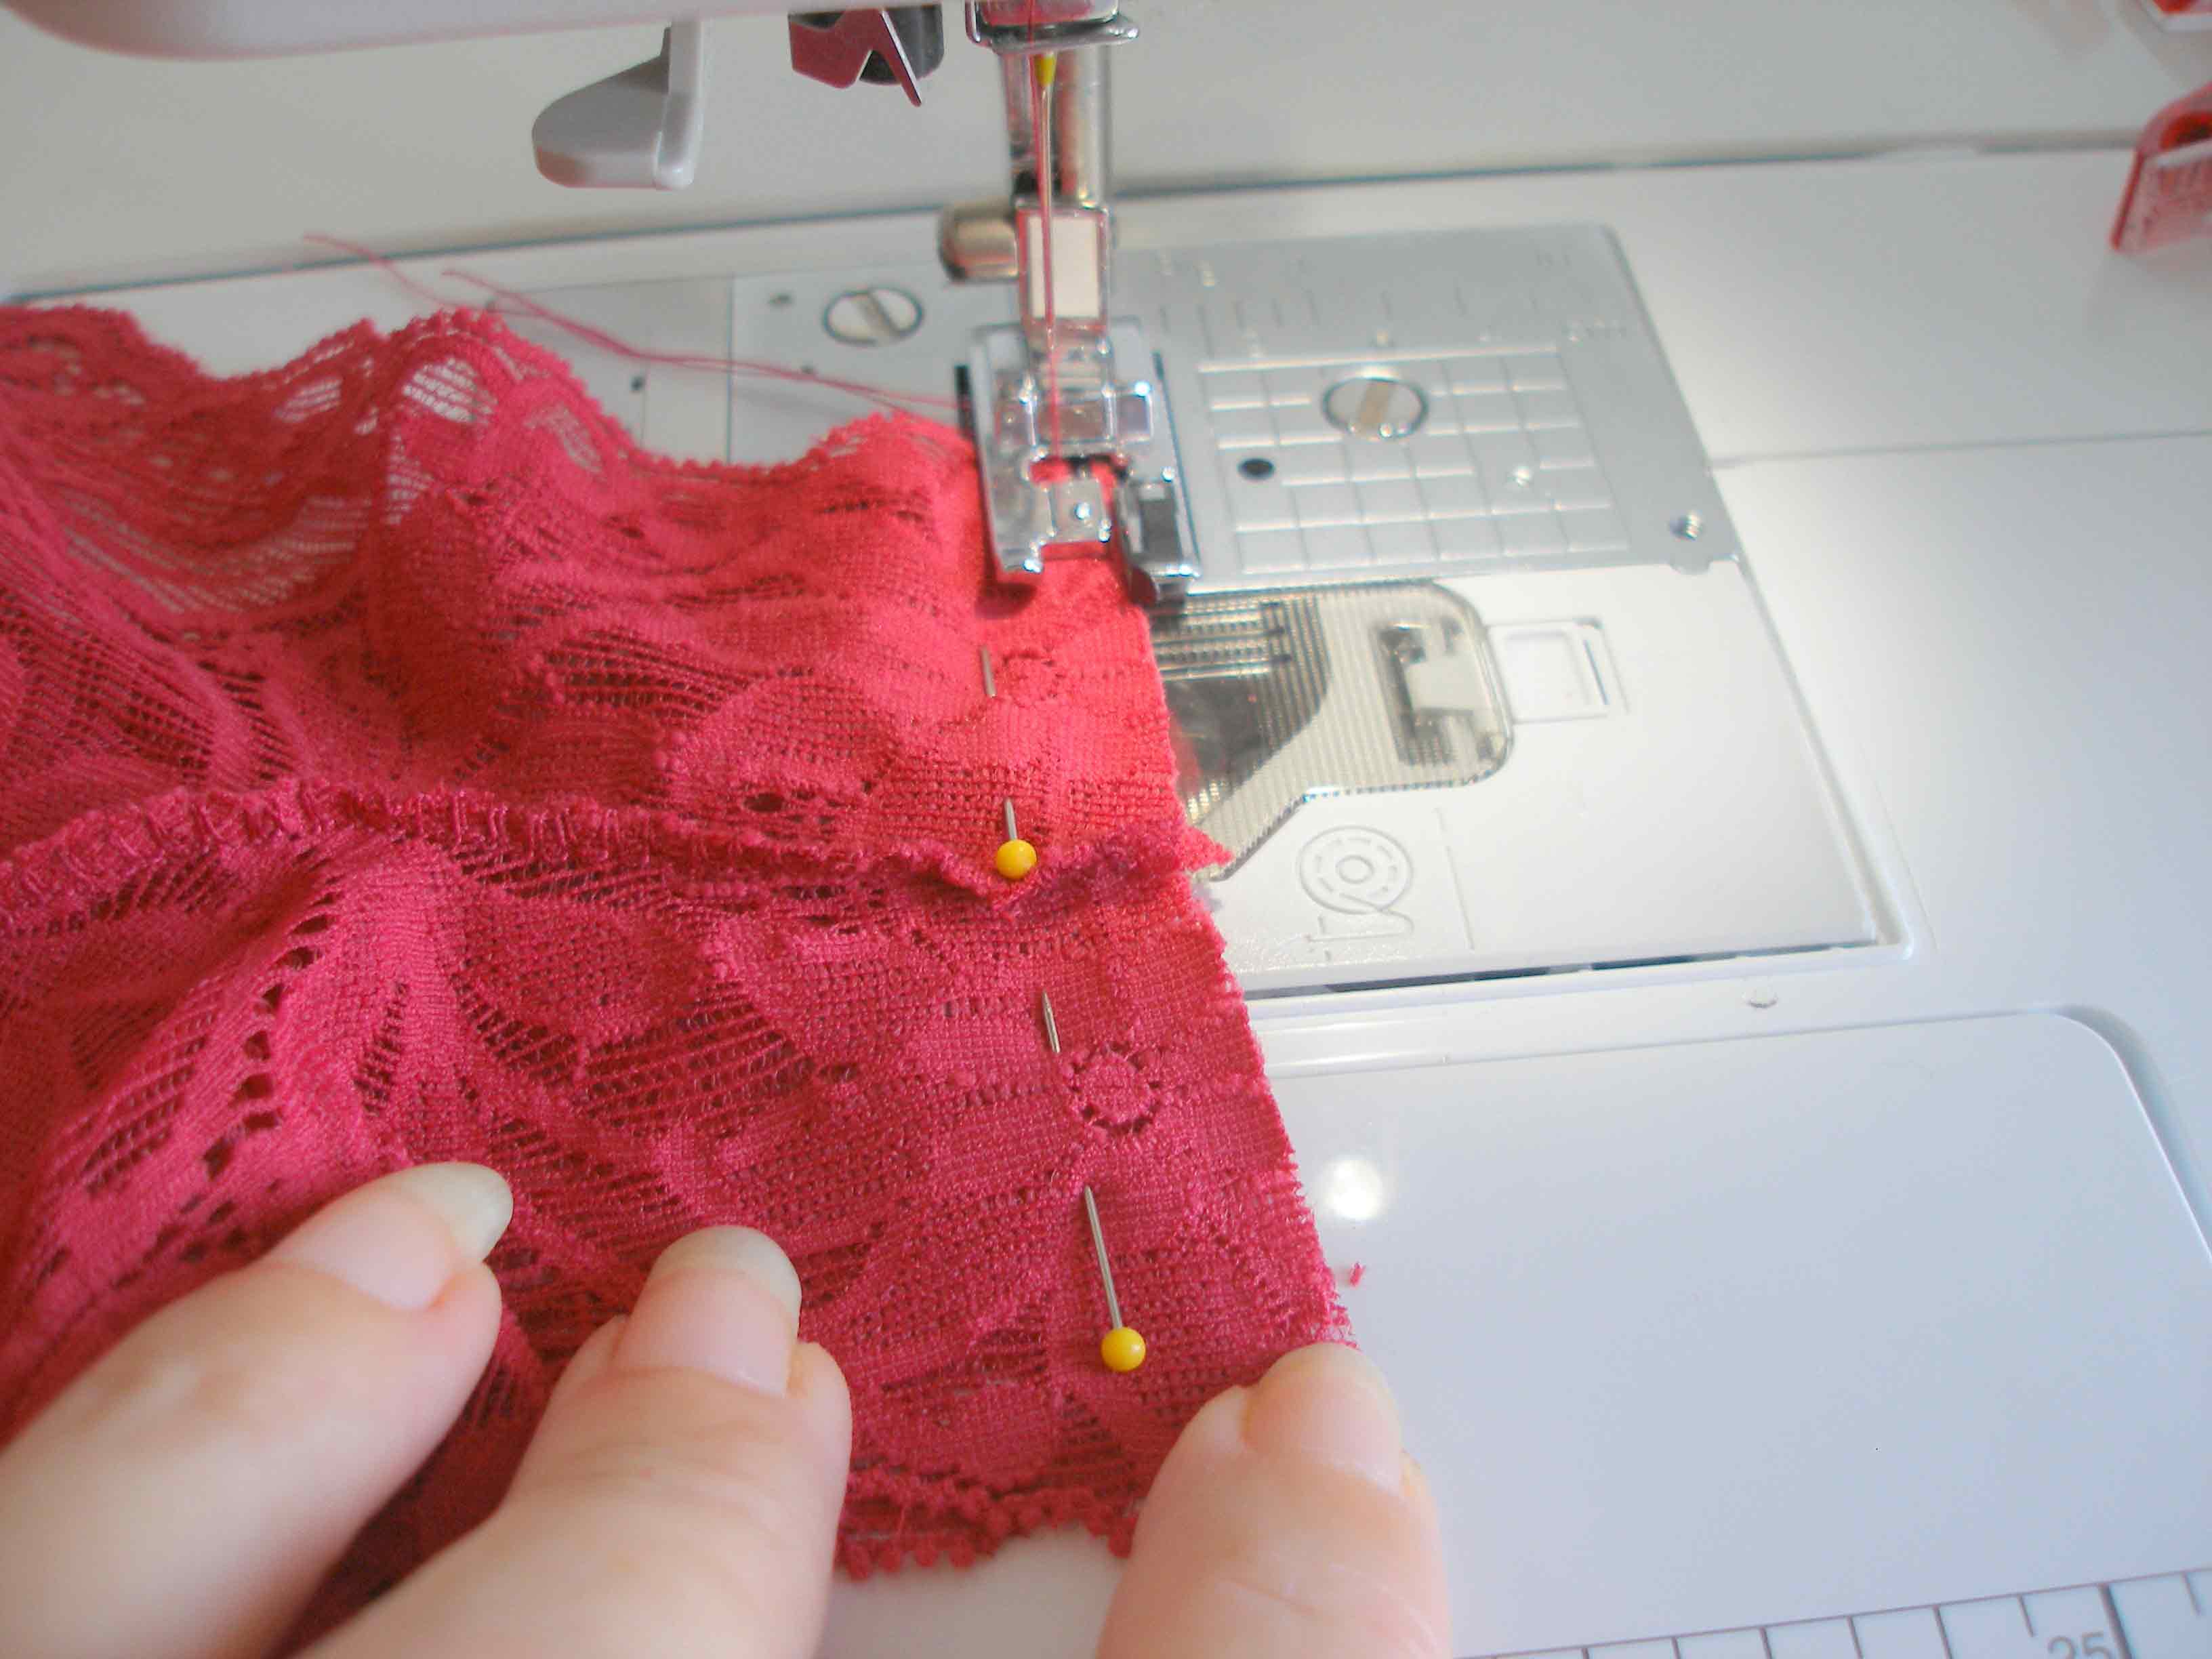
4. Match your lace piece right sides together and pin the two pieces along the curved seams. Match the edge of the lace carefully and then sew, overcast or serge along the two curved seams using a stitch that will stretch. (Stretch overcasting, triple stretch or zig-zag stitch.) Do this for both sides.

5. Keep your fabric right sides together and match up the two squared ends, matching the center seams and lace edges carefully. Sew along this seam.
6. You can now turn your undies the right side out and try them on for fit. If you find them a little loose, you can sew again just inside the existing seams and then trim away any excess.
7. Now pin the cotton liner over the center of the 4-way seam in the crotch. The lining piece is slightly more curved at the front edge, flatter at the back. In case you can't recognise the front and back of your undies, the back will have a longer seam from the center because it has to go over your rounder part (your bum) at the back. I like to use plenty of pins to hold it in place.

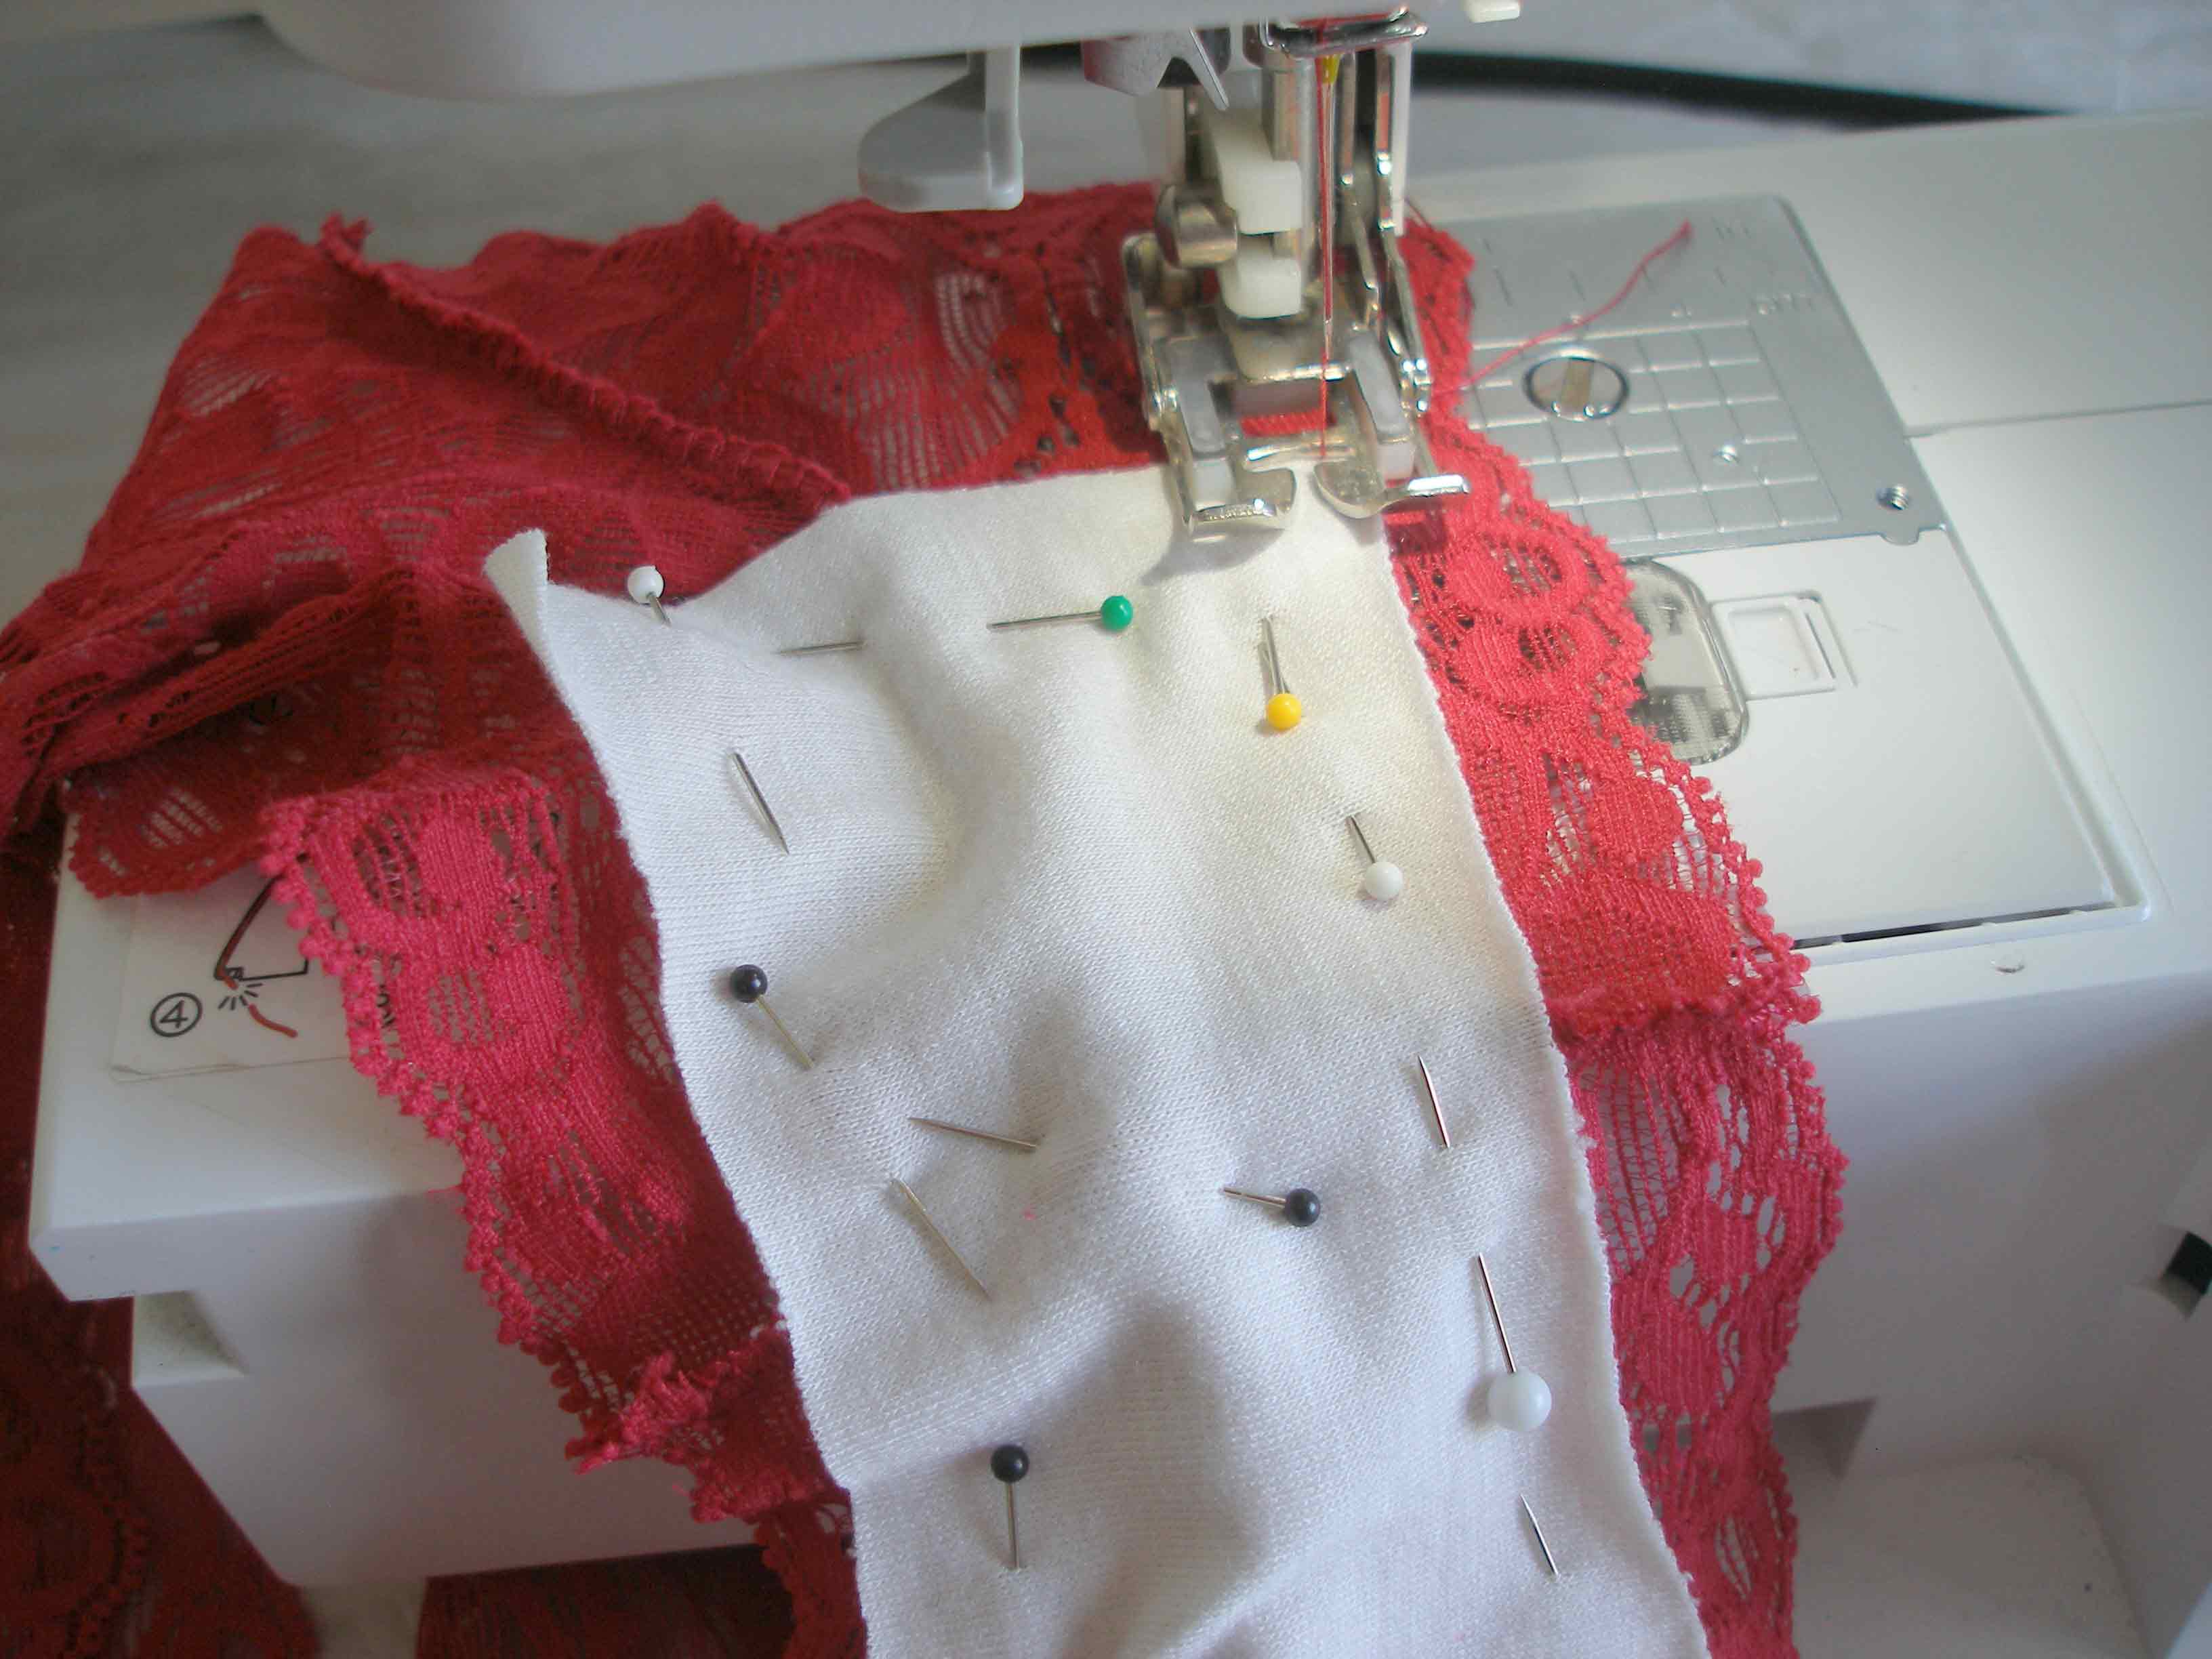
8. Sewing along each long edge with a zig-zag or a triple zig zag stitch. Sewing the front and back seams are optional.
9. Trim any threads and your are done. Parade around the house in your new undies with pride!
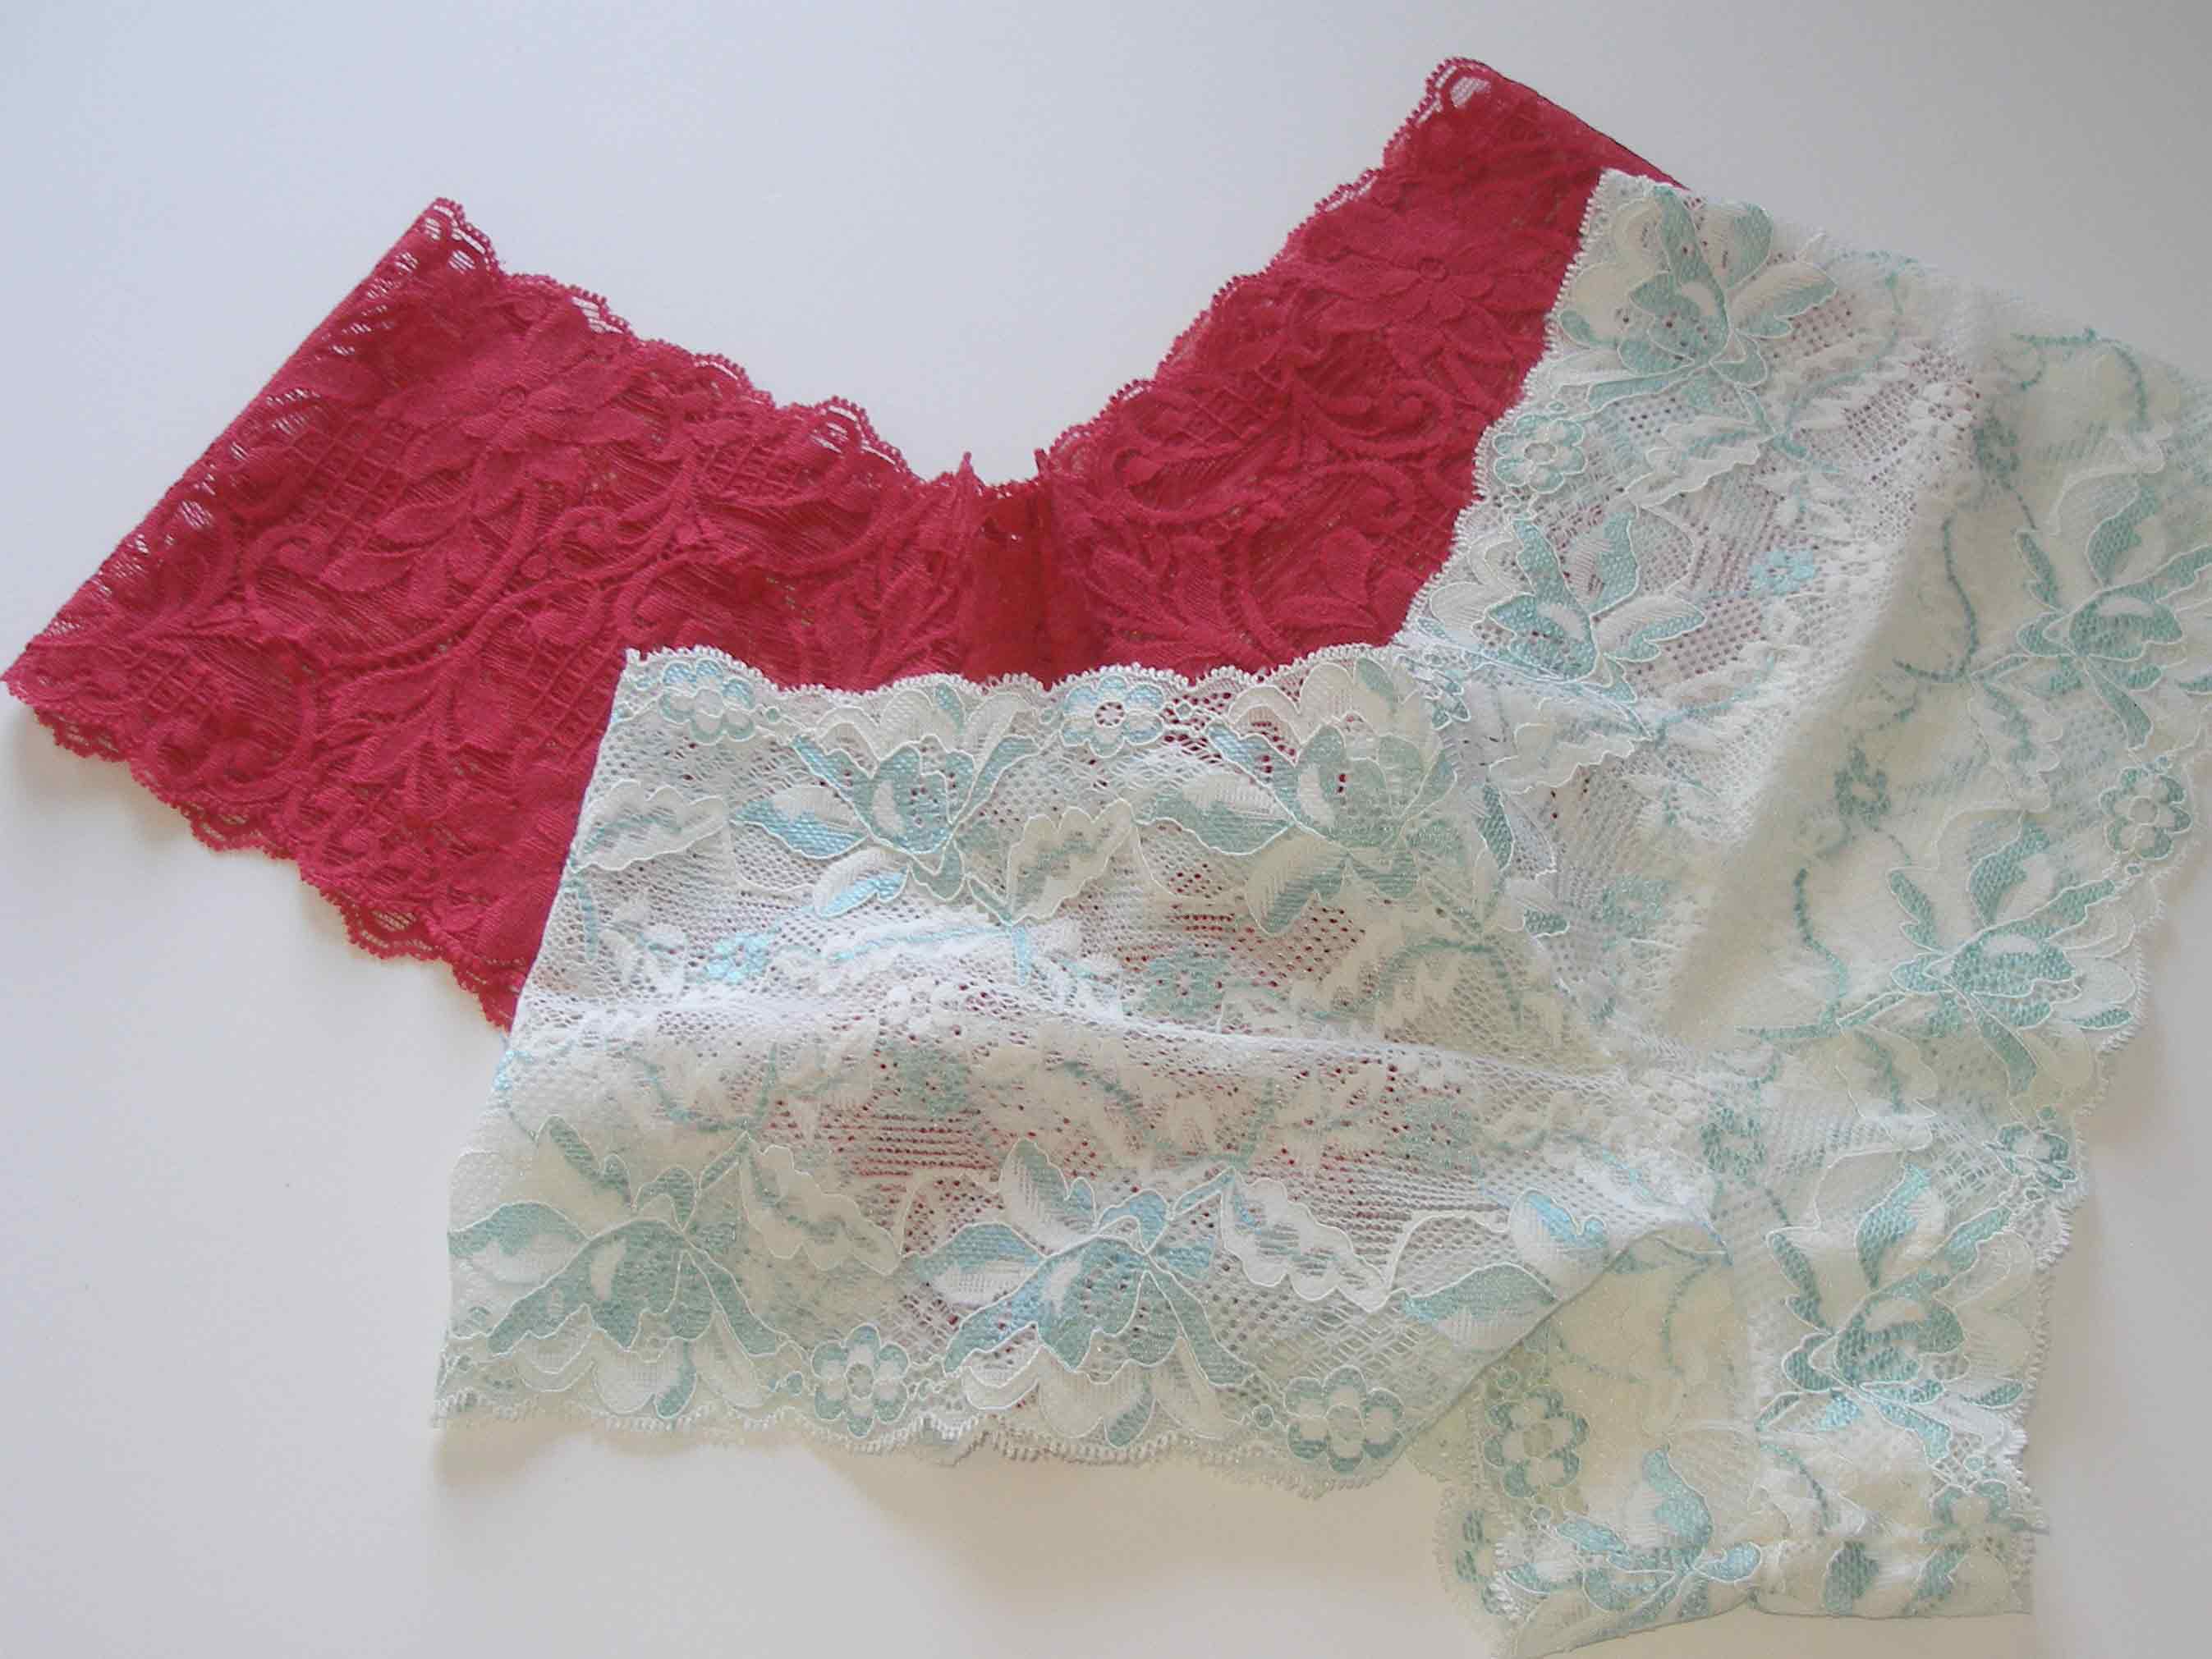
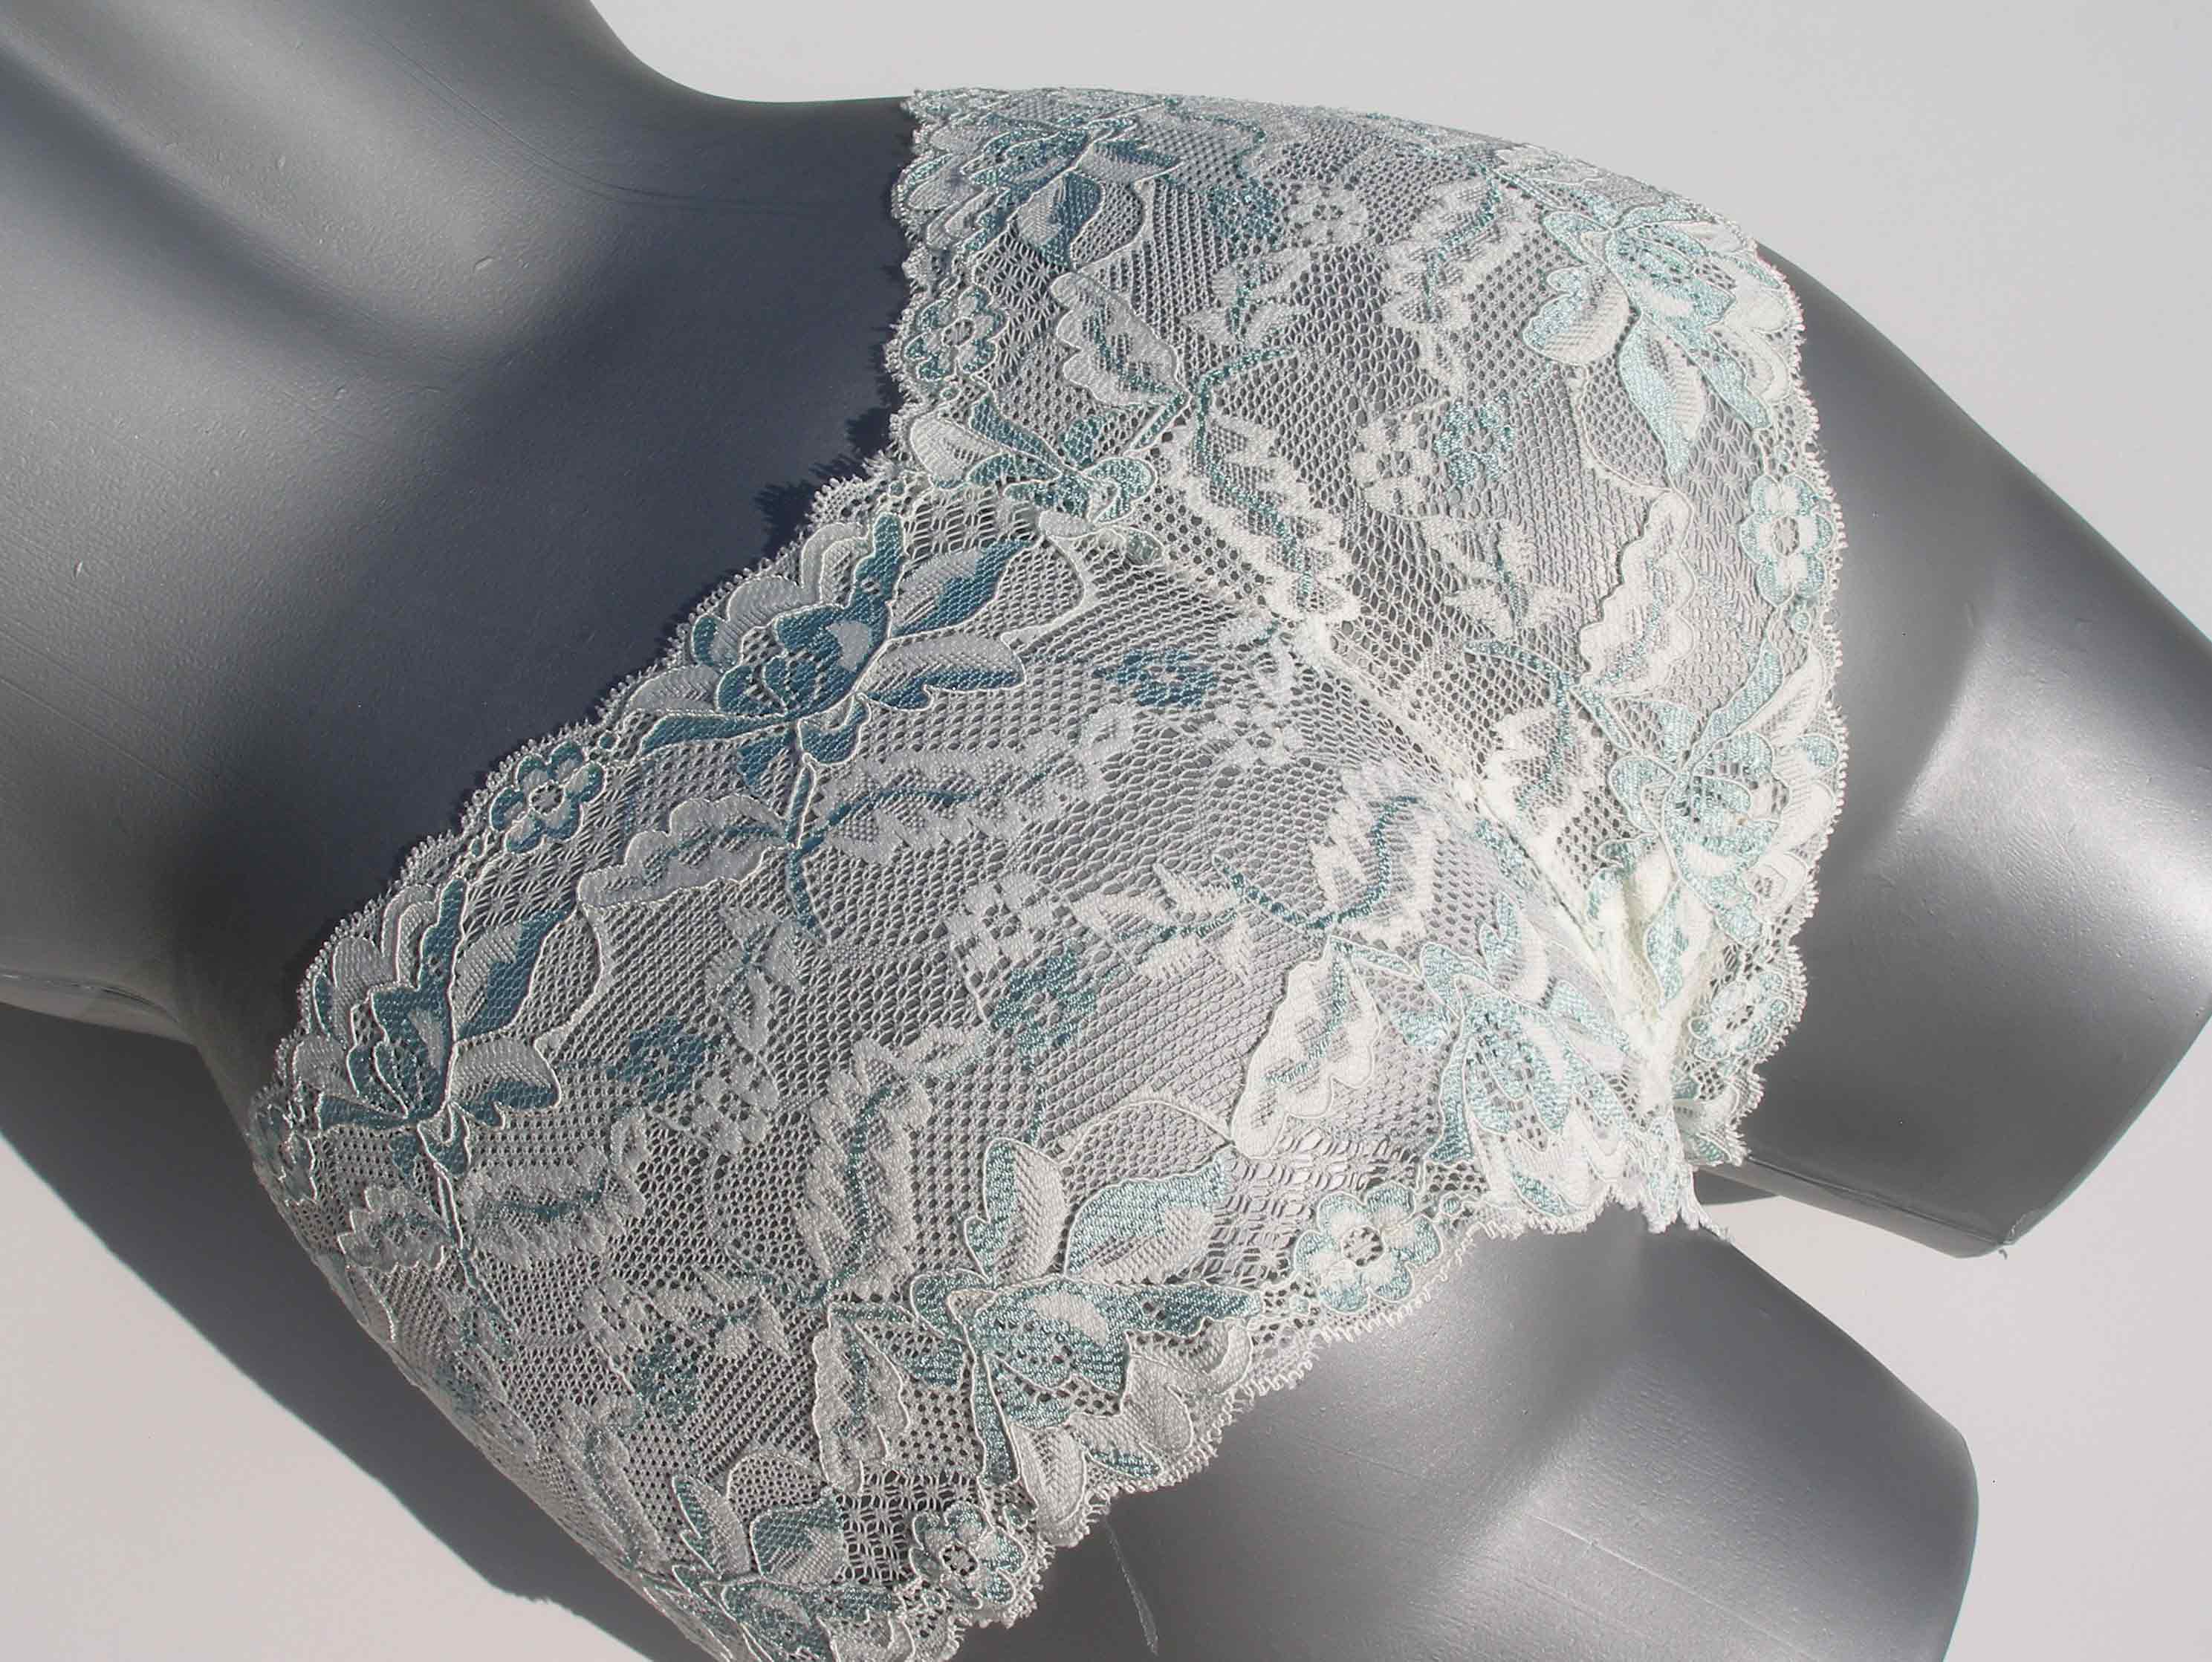
I got all over excited and made several pairs. Here are a few photos of my undies.
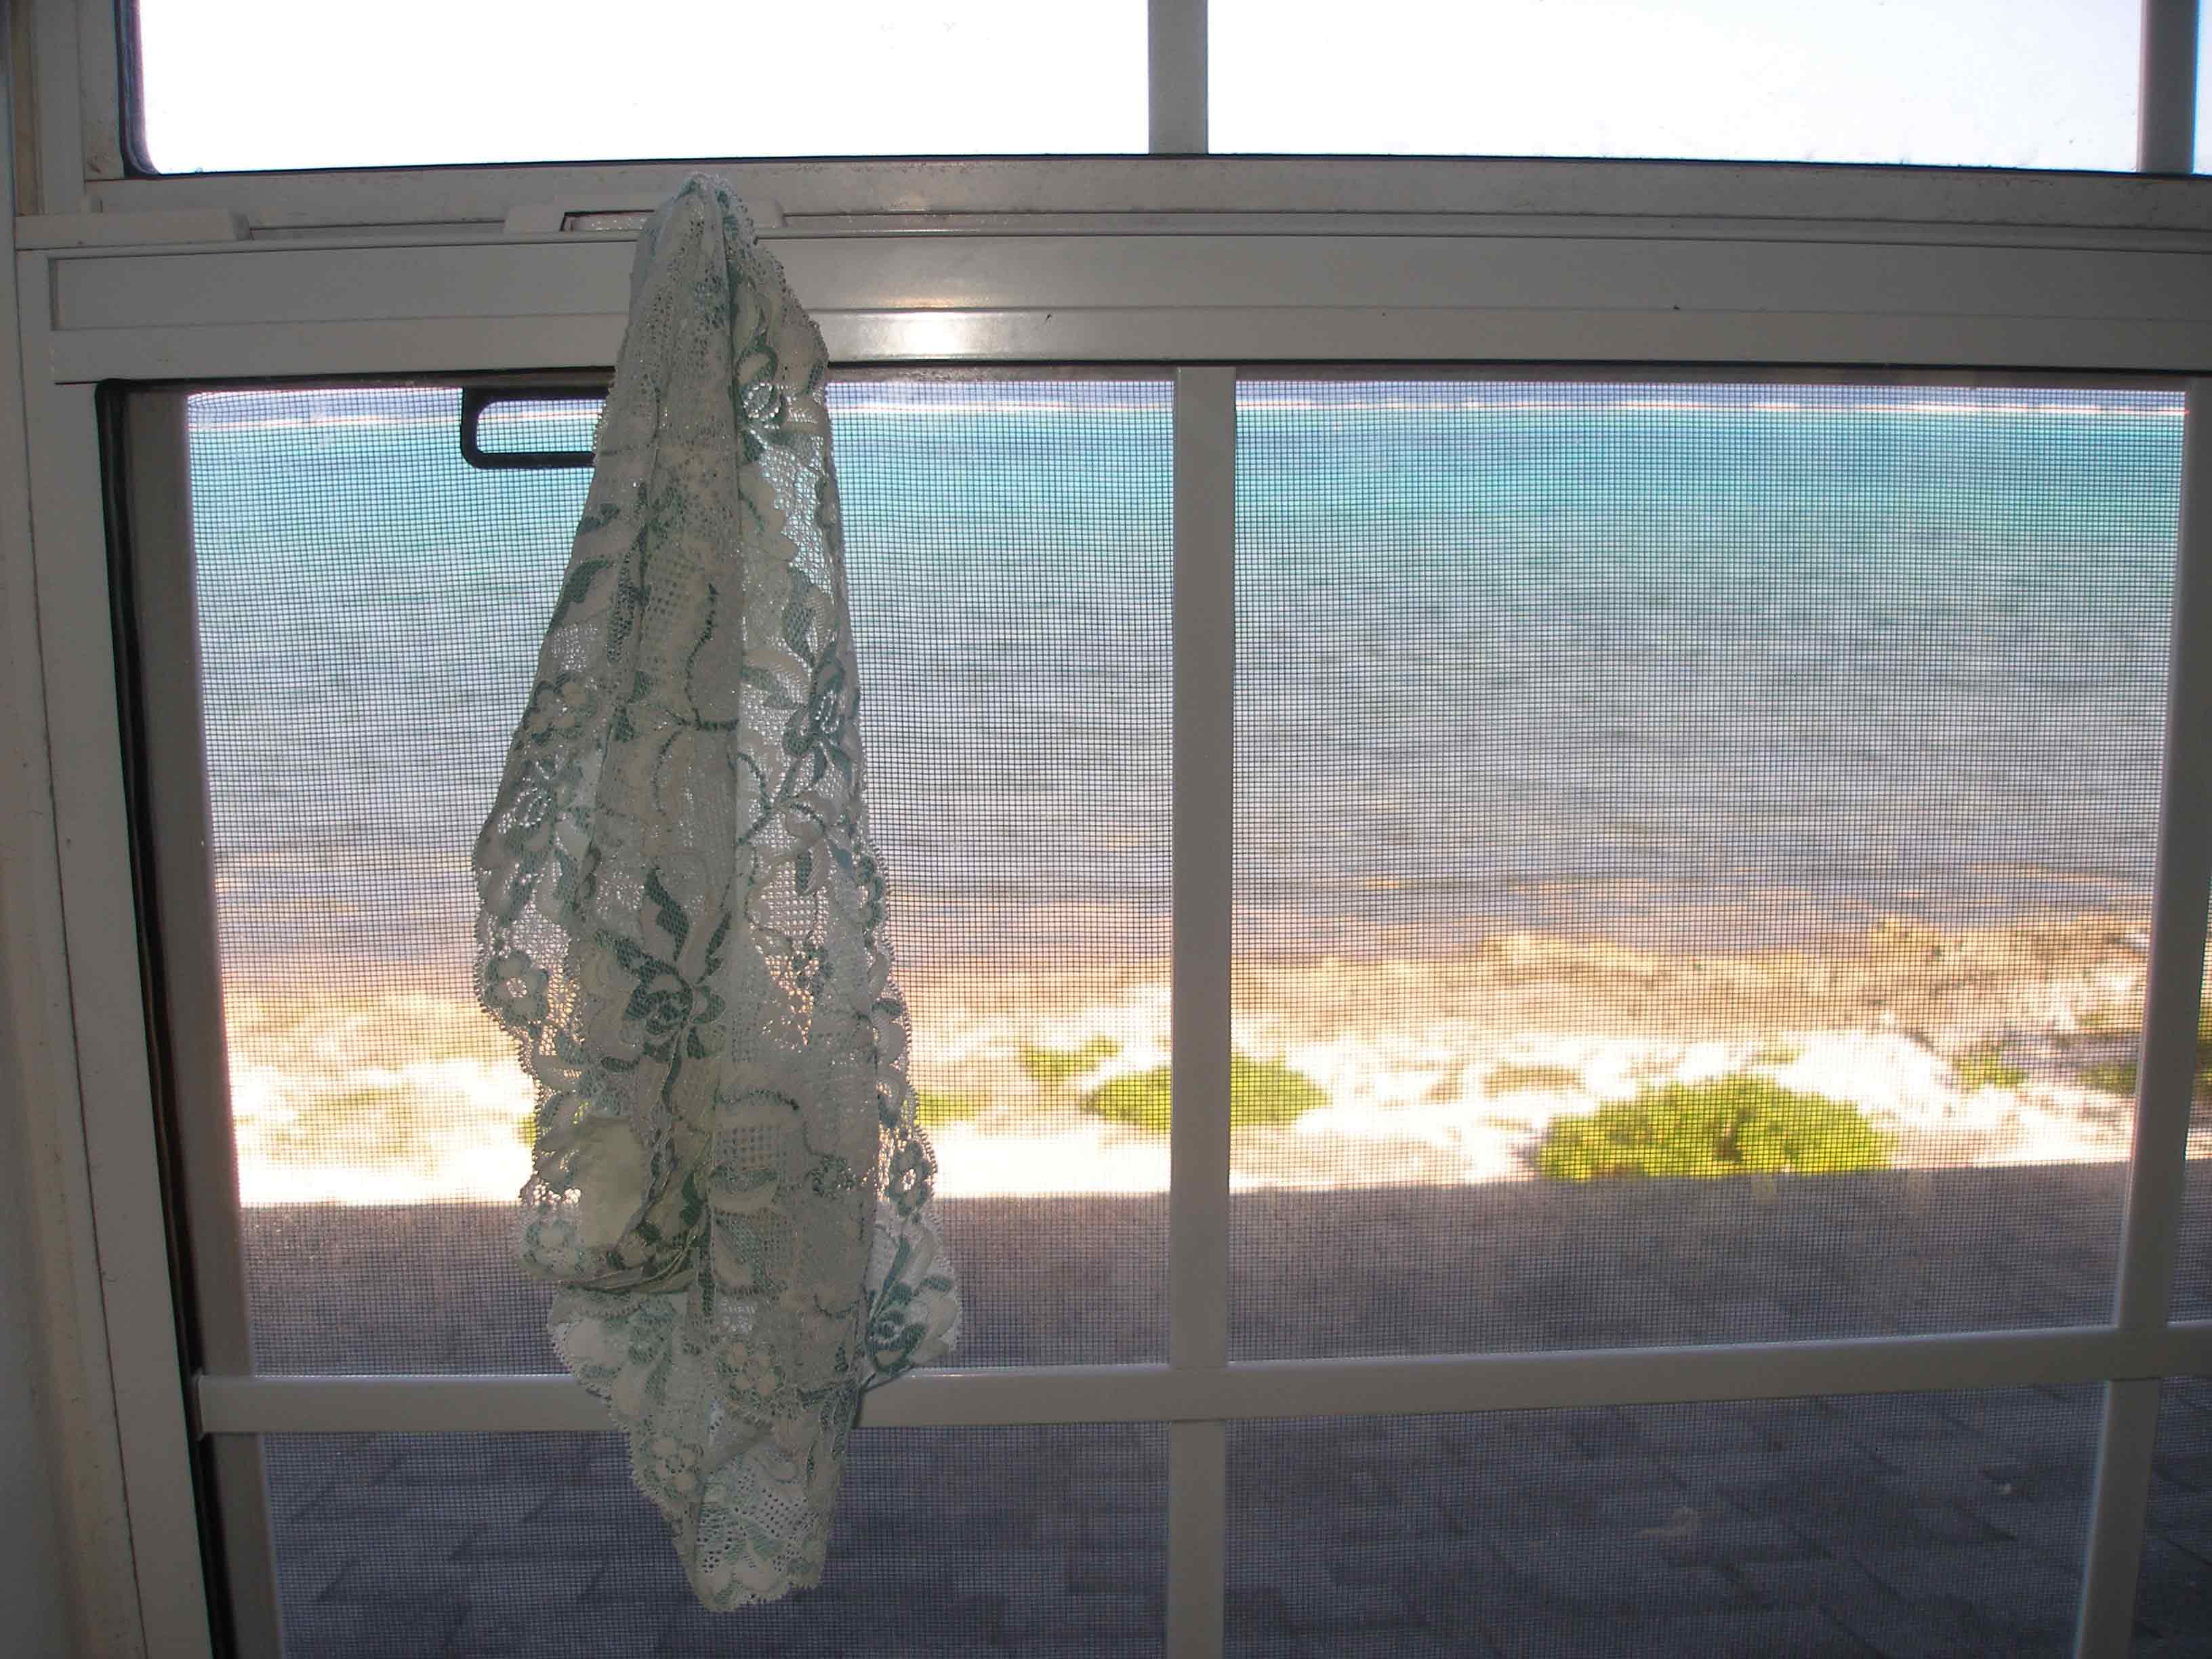
And to finish – a view of my new undies and the view from my sewing room window. What else does a person need to be inspired every day.
Enjoyed this tutorial and found it useful ? – please Share and Pin using the Social buttons at the bottom of the post. I want everyone to see my undies – er, you know what I mean !
Authored by: Deby at So Sew Easy


I am wondering if you think one yard of lace would enough for the pattern? I’ve not printed it out yet, but would like to order materials. Thanks for the great tutorials. I very much enjoy your work.
It depends on the size you make. I recall that I would get 3 pairs of undies from a 5 yard piece with a little left over. So I don’t think that 1 yard would be enough. If you print out the pattern and measure it in your size, double the length to get two pieces and that is how much lace you’ll need per pair of undies. If there is a large pattern repeat to match it might be a little more.
Thanks for the tutorial! Just made some and they are fab, loved the overcasting foot too. Have just posted on my blog with a link to your blog.
Lovely lingerie! Thanks for sharing 🙂
Hi, I love this pattern!!! Really like the idea of being able to make my own pretty knickers! I don’t have the overcaster foot you recommend and wonder if you think an overlocker machine might sew it as well?
Thank you!!!
Absolutely, if you have an overlocker that would be perfect for this.
I actually enjoy your time in showing me how to make your patterns and related services. Really enjoy your interest and business development in learning more about all this garments!! Am interested in learning more,am mindful of your site,thanks!! Pecanskampz.
Oh man, oh man! I just sewed a pair of these in the cutest rosy pink lace, and… erm… WOW. I knew they would be kind of racy, but… I took one look and the mirror and was blushing head to toe! Hahaha, I love them! (Even if my sewing machine did NOT and kept trying to EAT the dang things!)
You think this would work with a stretchy knit to make just a solid pair? This was so much easier than the normal “elastic at the waist and both leg holes” kind.
Thanks for the lovely tutorial, it’s very easy to understand!
He he, you made me laugh. They do look rather good, don’t they! Very flattering and fancy. Yes, you could certainly try with a regular jersey, but it would have to have a good percentage of lycra or the edges would be too loose and would roll. It would need the same kind of stretch and good recovery that the stretch lace has. Otherwise, you’d need to go back to the adding of the elastic on the edges. Why not try a combination? Cut out two layers, the jersey and lace, baste them both together and then sew as one, if you want a little more modesty? Hope it turns out well for you.
Hiya,
Just wondering, what was your seam allowance?
I used a tiny seam allowance, basically just the width of the overcasting stitch. So I set my stitch width to 5 (which I guess is 5mm) and stitched using the overcasting foot which sewed the seam and neatened the edges all in one. Underwear typically doesn’t have large seams, so if using just a regular straight stitch, try no more than 1/4 of an inch.
I got the pattern & was wondering if would a 9″ wide lace be too wide? I am “gifted” back there and don’t want the panty to be “too” checky. I’m looking at some lace at one of your recommened sources and don’t wnat to make the purchade if you think the wider lace wouldn’t work.
I am getting ready to cut out some leggings.
Thank you for sharing.
How about compare it to a pair of briefs you already have or just hold up a tape measure to your body and decide. The lace is used full width at the sides of the body if that helps guide you. I may be old fashioned, but I’m always much more likely to pick ‘big’ and comfy pants over small and skimpy anyway.
Love this. Thanks for sharing.
These arewonderful and sound so easy to make from all the posts just printed the pattern and have to go get some lace Then it will be sexy me!
This is so cute and very easy just love it.
Hi Deby,
many thanks for this great panty pattern. It was very easy to follow your tutorial. I sew two undies(jersey and lace) and I´m total addicted. And yes, I paraded around the house in my new undies with pride! 🙂 New lace has been already ordered.
Greetings from Germany, Muriel
Ha ha, made me laugh. I was the same, prancing around, making my husband look at my new underwear. Glad you liked it. No, I won’t ask you to share some pictures 😉
These are my fave type of undies! Don’t leave lines but so much more comfy than thongs!I bought some yesterday from a store for $12.50/pair. I’m so excited, it looks so easy!!!!
Wow!
Thank you for the tutorial!!!!
A couple of nights ago I was just wondering how I can make a couple of hipsters like these.
I have some from Victoria’s Secret but they can be really pricey.
I like your tutorial cause it’s easy to follow and to the point.
(I also like how you made those pretty dresses.)
Thank you for taking the time to leave a comment, I can see you commented on several posts. It’s very much appreciated to know that my hard work and free patterns are useful. Good luck with your new undies!
I like how your tutorial does not go on and on and your lace undies are so pretty and look like they would cost quite a bit in the stores. Beautiful job.
So cute! Love your new panties. I’ve been wanting to make some of these for a long time since they cost so much at VS! Now I’m going to my sewing room today to make some; thank you for the pattern and inspiration!
Hi do you have a plus size pattern 22w or 24w They don’t sell that size in the stores and so pretty. tired of granny panties
Hi Teresa. I’ve not graded the pattern to that size, but if I can give you a suggestion of how to give it a try. If you measure around where the top of the undies will fall on your body and take of 10% (for the stretch) and then divide it by two, the top of the pattern piece should be increased until it measures this length. The larger sizes can be harder to grade because curvy ladies are often a different shape as well as size to a skinny body. You might need to also add a little length to the bottom of the pattern piece at each end to make allowance for a wider behind – or you might not depending on your shape. As an alternative, if you have an old pair of undies that fit, cut them up right through the middle front and back and use this as a template to see how you might need to adjust the pattern. Try out with fabric from an old t-shirt before cutting into any nice lace. I hope this helps. Deb
they are quite gorgeous and even a bit sexy, must dash and buy some lace.Thank you
I so love these, thank you so much for the tutorial.
Hi Deby,
I’m a sewing novice, but I used your pattern and amazing tutorial to make my first undies last night! Everything worked exactly as you described. Thanks so much for taking the time to make the pattern and tutorials! Happy sewing,
Shelly in Kansas City
That’s great Shelly – well done for trying out my project – I’m so glad it was a success. I’m working on a new pattern, for the more standard set of briefs without the center seam that can be made in all kinds of fabrics with stretch – so keep a look out on the site over the coming weeks.
i love these they are great
? Question, the paper patern is hanging off the material so does that get filled in or does that make them shorter or low rise and not fit properly. I thought it was first rule of sewing to have material cover the entire patern
The pattern is made deliberately large so then it will accommodate whatever width of lace that you are working with. I suggest a 5 to 6 inch width would suit most people, but if you want a larger (belly covering) pair, then you can use wider lace say 10 inches wide and the pattern can be used on this size lace too. If you wanted something much lower rise, on the hips, then you use a narrower lace. Its entirely up to you and what you prefer. So in this case, its OK to have the pattern wider than the lace.
Can’t wait to make these! I love lacy panties, I just can never find a pair that fits just right! Running to the fabric store today! 🙂 Thank you for sharing this!
Great. Wearing my first pair right now. Sexy, cheap, comfy – I didn’t know you could have all three in one pair!
Great! So glad you like them.
Thanks for the Tutorial! I need to make some of these one of these days! Thanks for sharing it at Monday Funday!
Thanks so much for linking up on Tutorial Thursdays, hope to see you again this week 🙂
x
Natalie
http://www.marigoldsloft.blogspot.com
These are so pretty and feminine. They look like some I purchased from a store and paid $5.00 each. Thanks for sharing!
Great tutorial – can’t wait to try it out! Thanks. 🙂
If I had a room with a view like that I might take up sewing! 🙂
Thank you for linking to Raising Imperfection.
Please come back Friday to see if you were featured. 🙂
¤´¨)
¸.•*´
(¸¤ Lanaya | xoxo
http://www.raising-reagan.com
They turned out really cute!
Thanks for sharing your favorite post at Raising Imperfection! We feature our favorites on Friday, make sure to come back and check.
Leslie
You are great! I just love reading your blog and living vicariously through your living in the Cayman Islands! Inspiration galore!! Thank you much for the easy panty tute and pattern. I just ordered some lace from one of the stores you recommended…cheap prices. I blog as well although quite a newbie, but having fun with it. Come see, I welcome any feedback too. 🙂 geniknits.blogspot.com
~Ciao!
wow oh wow!!! I was JUST thinking that I needed to figure out how to make these because they’re my favorite but I hate spending $7 or even more for a single pair…Pinning and plan to make! THANK YOU!!
Visiting via the link party at Adorned From Above.
Helen
Blue Eyed Beauty Blog
Cute, sexy, simple!!! Pinned:) http://www.sewsweetvintage.com/2013/03/brilliant-2013.html
Great! 🙂
These are very racy for me – I tend more toward the cotton ones. Sexy in the red lace!
I’ll be working on another pattern in the future – more of a traditional brief that can be made from regular cotton jersey and trimmed with elastic or stretch lace trim. Stay tuned!
Im new to this but have you done one on bras by any chance? I can’t wait to try the panties.
No I haven’t but I’m really keen to learn. Trouble is I can’t get any of the materials here, I would have to import everything and I need to learn a lot more about it before I start placing orders for the wrong size wires, wrong fabrics etc. Its’certainly on my wish list for one day. I’ve been pestering Craftsy every chance I get to run a video course on this very subject – fingers crossed.
I saw a tutorial on itsseweasytv.com on the tv..but theyb also have it onlined..it was excellent
wow- those are so cute- I always wondered if people made their own underwear? I am also glad you used a model for the underwear so I did not see bottoms at 9 am! these are really great.
Umm, yes, I might ‘only’ be a medium, but at my age, even a small bottom isn’t too pert any more.
yay cant wait to make my own!!
thanks for showing 🙂
Hey Deby,
These are so cute.
Debi
What a great tutorial! And the panties are so cute and look so easy! Thanks for sharing!
I was just thinking last night that aI wanted to make some panties. Thanks for the tutorial.