


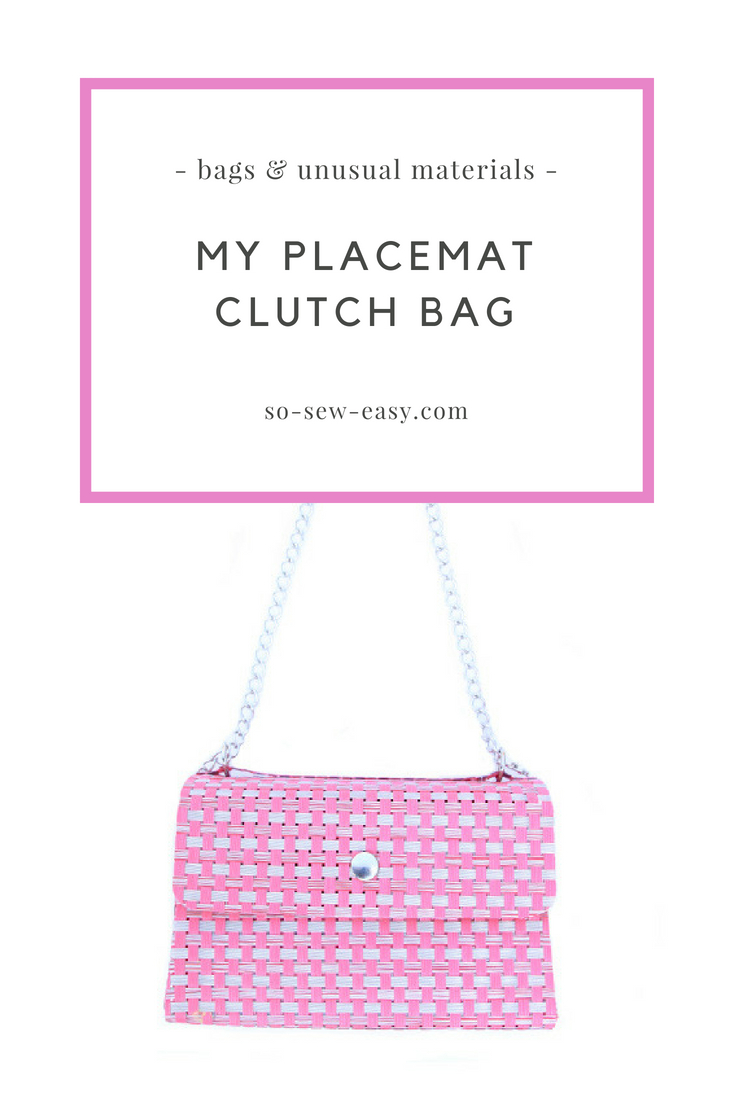
 I know I'm running the risk of sounding crazy by making a placemat clutch bag. But please bear with me. I am using plastic placemats to make my clutch and it only took me two hours to make! (Making the pattern, however, was another story, because of the way the bag is made, but that's finished now for you to enjoy.)
If Grace Kelly were alive today I'm sure she would frown upon my Frankenstein attempt. After all, her famous Kelly Bag (below) takes a skilled worker 25 hours to make and it has 2,600 handmade stitches.
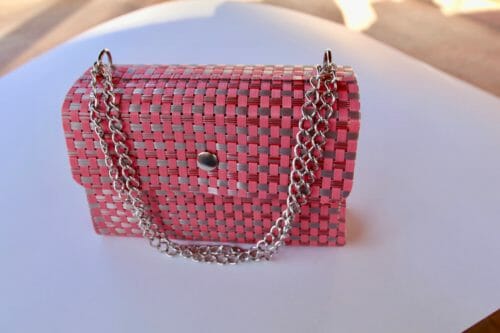
So, it's safe to say that this bag is a far cry from the original one from which a gathered my inspiration, but the outcome still looks pretty good in my opinion.

Source Image: suitesculturelles.wordpress.com/
Just to be clear, the bag above isn't actually a clutch. It's a trapezium which is closed with two straps and it is made in a few sizes. It's also made with three layers of leather so it can stand by itself.
The point of this experiment is to push me to be creative and use an unusual material for making accessories. If you recall, my first attempt was to make a carpet tote bag:
Carpet Tote Bag FREE Pattern – Making Bags From Unusual Materials
I'm creating a bit of stress in order to break from the routine of always using cotton quilting fabrics for bags. Hopefully, in the process, I have inspired you to leave your comfort zone too.
Ahhh… That sounds all good and fantastic. The truth is… I do not have any fabric!!!!!, sewing supplies or a machine at the moment. Our family has moved from an apartment to a house and now things are in the grey zone so to speak with everything tucked away in moving boxes and in transit.
No matter, I have found some material that is perfect for this Placemat Clutch Bag. I think the name sort of gives it away though..
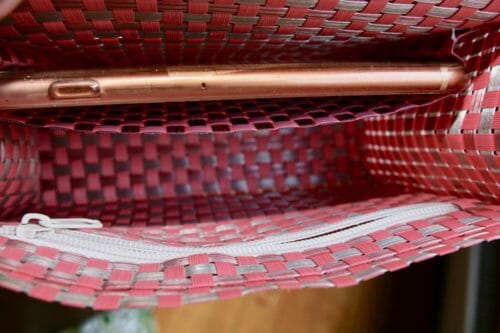
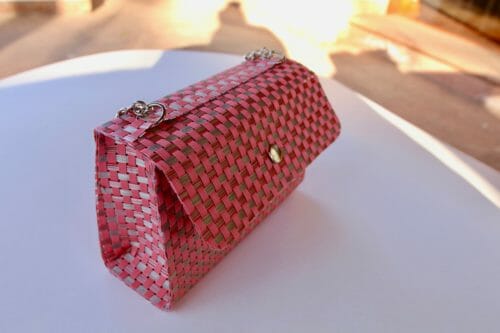
This bag has two pockets inside, one for your phone and another for coins or a couple of credit cards.
You can hold it by the hand or carry it by the chain.
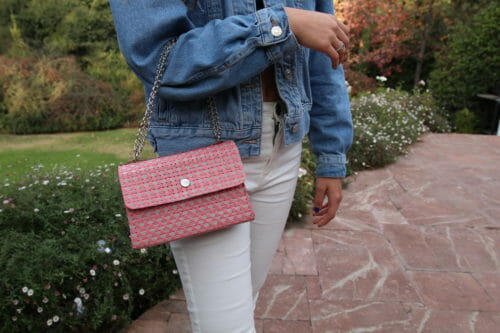
It is possible to use it as a crossbody bag but you would have to add more length to your chain.
Materials For Your Placemat Clutch Bag
- Plastic or PVC weaved placemats (see recommendations below)
- PVC glue
- Brush or palette to apply glue
- Leather thread
- Four rivets
- Polyester thread
- Rivet or magnetic snap
- One yard of silver or gold chain
- Two rings or D rings 3/4″ in diameter
Tools
- Rivet tool
- Cutter or Craft Knife (I like the Fiskars Fingertip Craft Knife.)
- Leather needle
- Walking foot (optional)
Recommended Materials
Pattern Download
You can download the pattern for this Placemat Clutch Bag from our account at Payhip.
For help downloading and printing PDF patterns, please CLICK HERE.
Printing Instructions
We will never ask you to download any extra program, free or paid, other than Adobe Reader which is totally FREE. Please print on a Landscape Mode and Actual Size. Do not scale this pattern.
Cutting Instructions
All instructions are on the pattern, except for the extra pocket which is given below.
Finished Measurements
W 8″(20cm) X H 5″ (12.7cm) X D 3″ (7.6cm)
Assembling and Sewing Instructions For The Placemat Clutch Bag
The following instructions are only suitable for woven materials. A separate tutorial will follow to address those that would rather add a lining and work with fabric or vinyl.
Step One
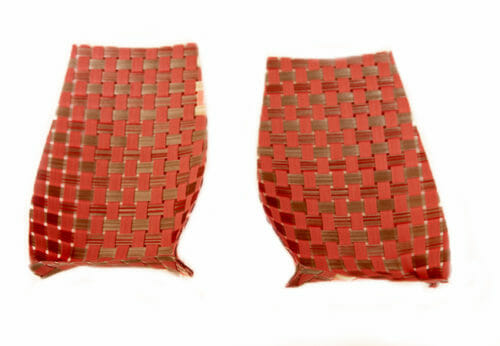
We are going to assemble the front, bottom, and back of the bag. In this step it is important you keep track of the front and the back.
Apply glue at the bottom of the front piece (wrong side) no more than 3/8″. In your pattern, this is marked by a line. Leave the glue for a few minutes to dry.
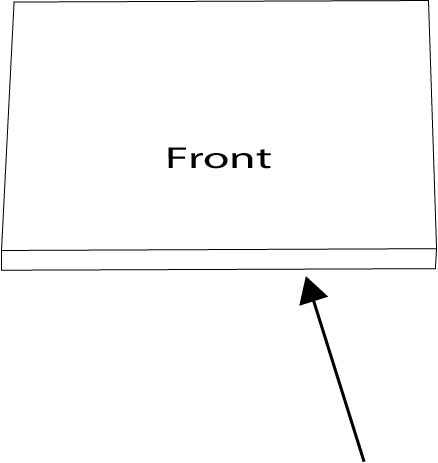
Place the bottom at 3/8″ on top of the glue and press.
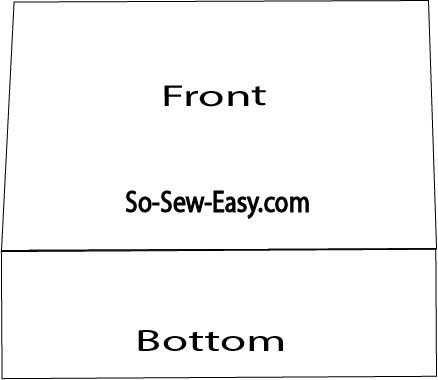
Apply glue on the back and add it to the rest of your work making sure it is placed at 3/8″.
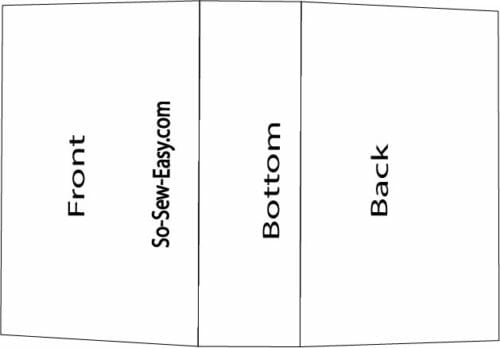 Glue the other bottom piece on the outside of the front/back of the bag. You should end up with a sandwich.
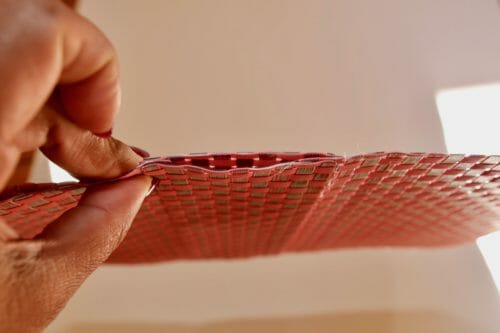
Step Two
This step will show you how to make and place the pocket.
Fold the pockets accordion style. Use your pattern as a guide.
Apply glue on the sides and bottom including under the pleat of the pocket and place it on the inside of the front of the placemat clutch bag.
Note: Do not glue the inside of the pleat at the top. You need to allow flexibility there to be able to place your phone in the pocket.
Glue the pocket inside and to the back of the bag. Sew inside where you have applied the glue.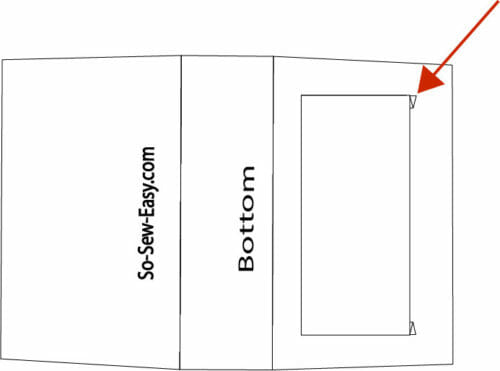
Step Three
I have added an extra pocket on the other side of the placemat clutch bag, for two reasons: it is the perfect size for a credit card and will add strength to the bag.
There is a perfect video tutorial on how to add a zipper pocket to any bag, please watch it so that we don't have to go over skills that we already know.
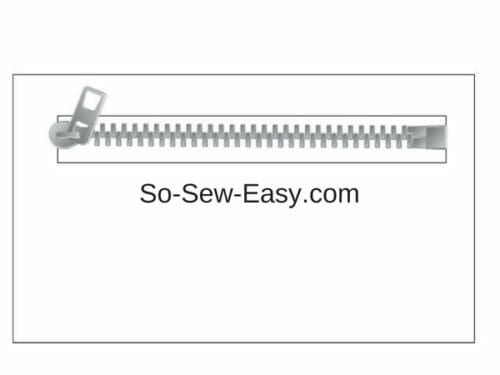
Here are the dimensions of the pocket. Cut a rectangle 7″ (18cm) X 4 3/8″(11cm). Use a zipper that is 6″ (15.3cm) in length.
Sew around the opening where the zipper is located to secure it to the material.
 Apply glue to all the sides of the pocket. Place on the opposite side of the first pocket making sure you leave 1/4″ from the crease or where the edge of the bottom piece is located. Sew the outside of the pocket at 1/8″.
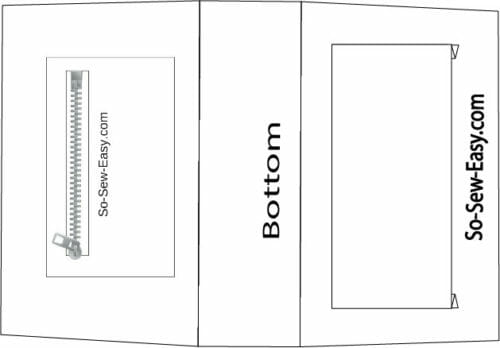
Step Four
Place the pieces three flap pieces with you along the edges behind the flap. You will see there will be some spaces between the three pieces this is to make a crease so the flap falls over the top of the bag.
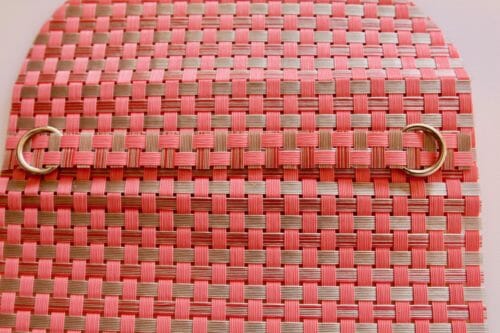
At this point, I would like to add a snap and the rings to the bag. I have to say you can use a magnetic snap if you have one. This works better than a rivet snap but it is all I have.

If you need help on how to apply a snap please use this tutorial that teaches you what are and how to use the many types of snaps.
Next is to add the rings. Cut a strip of plastic 5/8″ by 7 3/4″. Thread the rings and apply glue to both ends of the strap. Glue the middle of the strap leaving about 3/4″ space for the ring to move around.
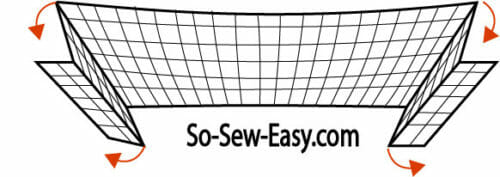
Step Five
Make the gussets. These are important for the overall structure of the bag. Taking into consideration that the original Kelly Bag is made with three layers of the best quality leather money can buy, I had to come up with a way to simulate the behavior with my material to make the bag stand up with just a few pieces of woven plastic.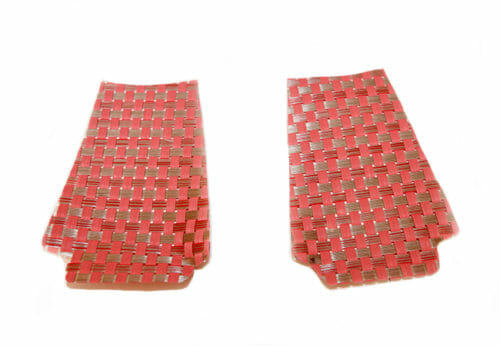
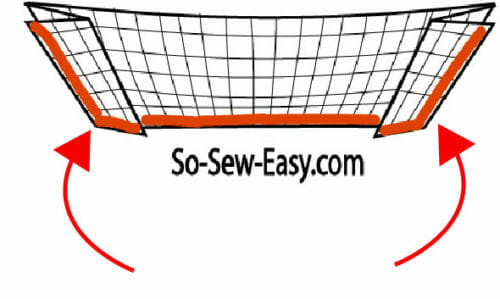
Box the corners of the gusset by gluing and sewing no more than 1/8″. Let it dry at least 5 minutes.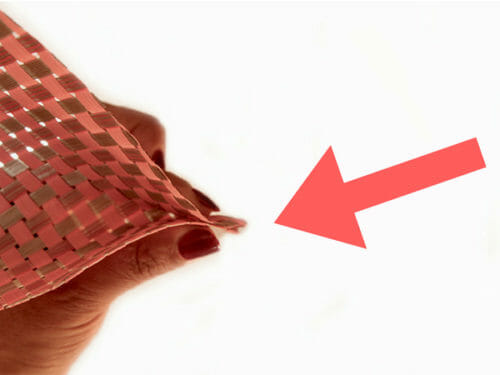
Glue the edges of the gusset except for the top and align it to the side edge of the bag.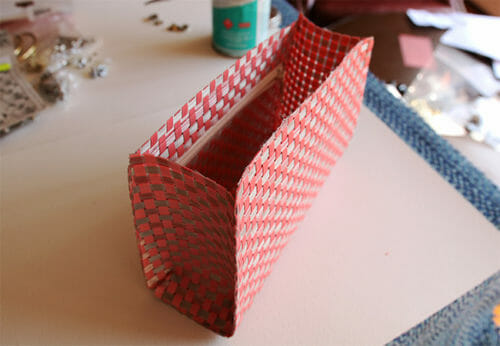
Stich if you can with your sewing machine, I could not, so I will have to rely on my Speedy Stitcher. Although I think a two leather needle technique would work wonders here.
Step Six
Glue the bottom of the flap and place it on the back of the bag. Press and hold until it sticks together.
A placemat is for sure an unusual material to use in a handbag. However, it is a perfect recycling material to train your fingers to work with more expensive and unforgiving materials such as leather.
Conclusion:
Material: I liked working with the plastic placemat. It is easy to glue to the point of not requiring any stitching. However, without the stitching, I think it might look unfinished. However, without the use of an industrial machine, I doubt that a regular sewing machine can handle sewing two layers of the plastic together.
Shape and Proportion: I love both shape and proportion and so did my teenage daughter (who's always pretty picky..). I am going to explore this pattern further to use fabric, vinyl, and leather. Done well, I think this bag can become a timeless addition to your wardrobe.
Finish: The raw edges of the placemats call for a way to smooth them out somehow. It wasn't until I was finished that it occurred to me to weave threads through the holes and sew the sides with a blanket stitch.
Hope you can join me next time where I will be exploring the use of different materials to come up with interesting recycling projects.
Fancy another way to challenge your sewing skills, check out the carpet tote bag or the soft clutch bag.
Until next time! Happy sewing!


Love this and want to jump right in… going to have to wait till the department store opens tomorrow to get my placemat. 🙂
I made several evening bags this winter from placemats. I folded them with the top 3rd smaller than the other 2 basically in half. After sewing the sides, I just attached a ring to the top and attach a chain for a handle and used velcro to close it but put a fancy button or the like to decorate it. Very easy and cute too. I also used placemats to make so many purses throughout the past year, using cloth napkins to make pockets inside and to make the handles . Again so easy and the placemats already are lined so not necessary to make a separate lining. I am an avid recycler and find so many of the placemats and napkins at thrift stores that have never been used or just gently used. I also used large earrings that have lost their mates as decorations on my purses. It took me a while to figure it all out and thanks to you directions on how to make the bottom by cutting out the 2 inch squares on the bottom corners, then together we made quite a cute purse. I love your site and go on it every day.
Hi Susan, you are my kind of girl. Would love to see one of your bags, do share please 😉
I made very simple clutch from a tapestry textured placemat several years ago. I folded the mat in thirds. This allowed for the flap. I sewed the sides,
on original stitch lines, added a fancy button and a short elastic to hold it closed. I wish I still had it. It took no time at all to make and it looked good.
I like to use unusual items to make other things. Like a velour type kitchen towel for a throw pillow. Its different.
yes, I would definitely give this a try. The possibilities are endless… would love a picture:)
Thank you very much for this marvoulous clutch bag and sharing your ideas.
It is my absolute pleasure! let me know if you get to make it 🙂
What a creative way to use placemats. I love it. Going to give it a try for sure. Thanks for all the wonderful ideas.
You are most welcome Bonnie 🙂 Looking forward to your picture.