


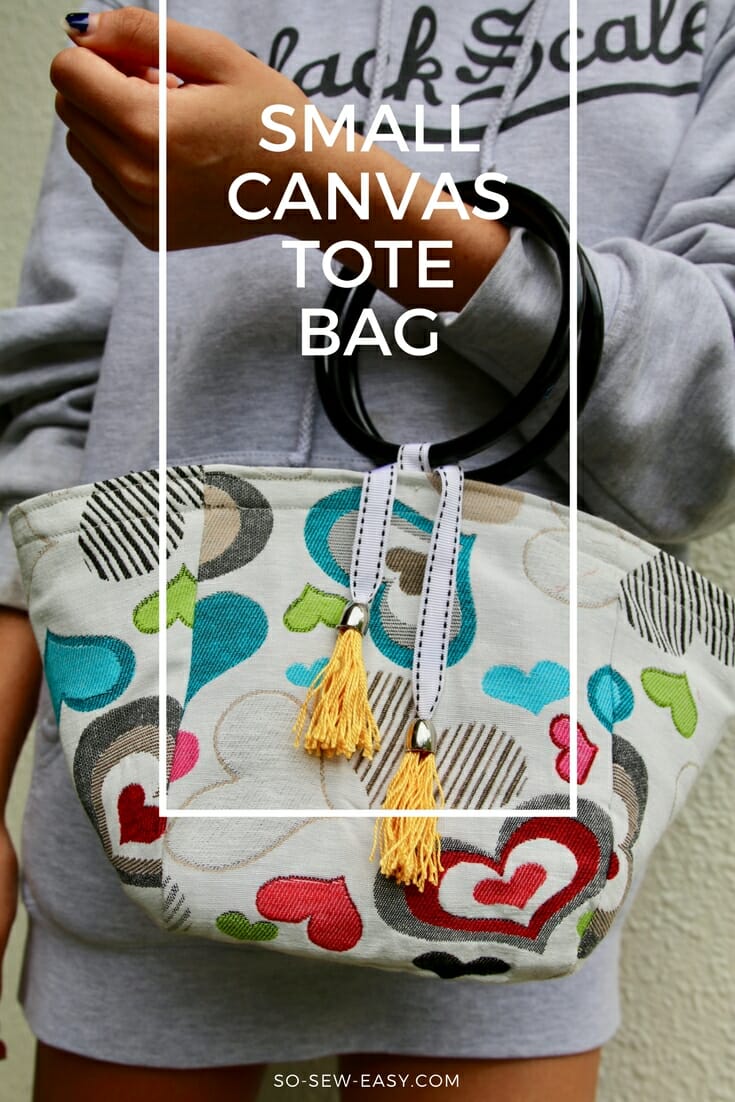
This is an easy tutorial and pattern for a small canvas tote bag. You can also use upholstery fabric as well. It's a request from a few readers who make items to sell at markets, but I think anyone who loves to sew bags will love this one too.
This small canvas tote bag is the perfect companion for the warmer weather and the right accessory to keep up with the current trend which is for small bags, crossbody wallets, and small backpacks. I made this bag so it would be small to carry with the option of having it cross over the body. There's enough room for a pair of sunglasses, phone, keys, money, and a few business cards. You can make it with very little fabric, so it becomes the perfect project to use your fabric scraps.
This small canvas tote bag is also the beginning of my exploration into alternative materials for bags. Fabric is great to make bags with, but I am faced with a huge dilemma. Where I live, the interfacing I need the most costs $35 a yard (on sale too). So where do I put the money? In interfacing or into fabric? I'd rather explore the possibilities of heavier fabrics so I can avoid using quilting fabric. Canvas is widely used in bags, so there is no exploring to do, and the pattern works well as you can see on the bag below. So feel free to explore this pattern with a different type of materials such as canvas, upholstery fabric, cork fabric, neoprene (wetsuit fabric), vinyl, or leather.
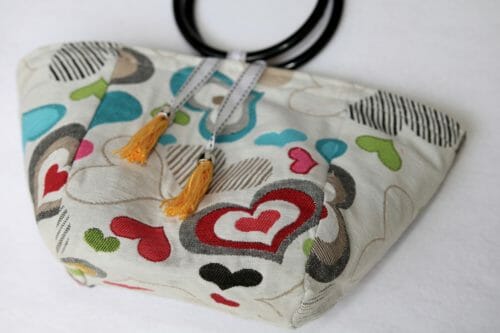
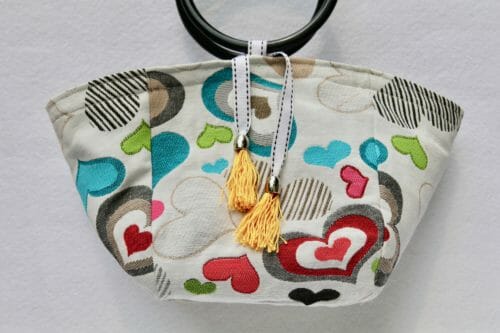
I had a hard time finding springtime colors for the small tote bag, so I decided to go with upholstery fabric. The print is woven, so it makes a great candidate for a bag without fusible or sewable interfacing.
I am going to make this small canvas tote bag with the option of a crossbody bag. However, I will make a separate tutorial for it. I am going to show you the way to transform any bag into a crossbody bag.
Materials:
- 1/2 yard of canvas, upholstery fabric, duck cotton, linen duck, cork fabric, neoprene, vinyl, or leather
- If your machine can take thick fabric, it's possible to self line this bag, if not use calico or quilting fabric with light interfacing.
- Thread to match
- 24″ cotton tape 1/2″ wide, nylon ribbon or decorative tape
- 30″ cotton tape, cotton twill tape or light webbing 1 1/2″ wide
- circular or square bag handles or of course you can use 12″ bag handles
Fabric Recommendations from Amazon.com
Tools:
- tailor's chalk or erasable ink pen
- zipper foot
- walking foot (optional)
- jeans needle or leather needle
How To Download Your Small Canvas Tote Bag Pattern
We will continue using the new Payhip web store to distribute our patterns.
Our patterns are still free, but now you have the option of making a small contribution if you like our work! We'd appreciate it, and it will help us keep going with new and fun designs like this. Even a dollar or two goes a long way.
Thanks so much in advance for helping us out. You can use any credit card, and you don't need a Paypal account, although you can use one if you have one.
Full Video Tutorial
Subscribe to the YouTube channel:
Directions:
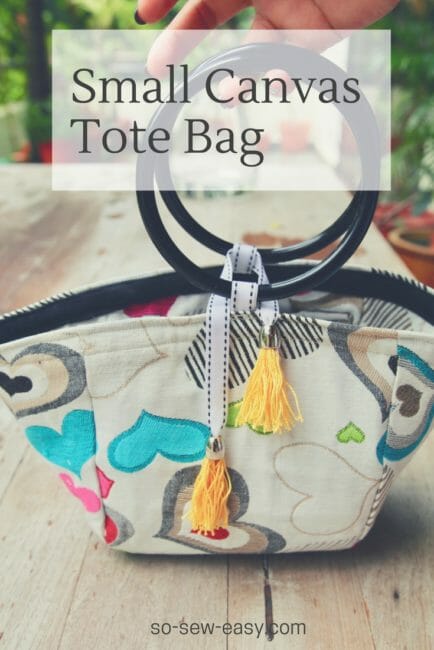
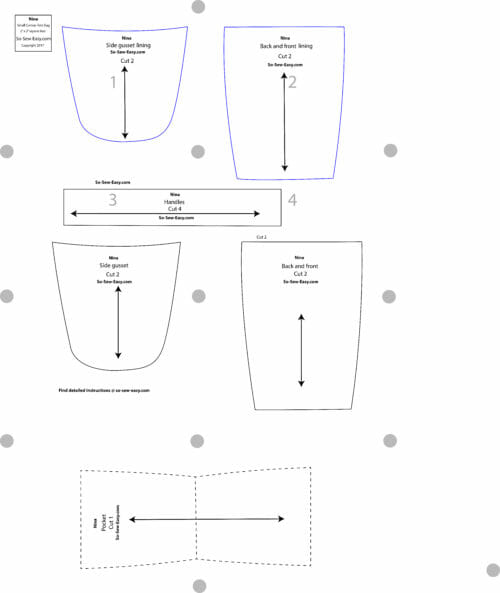
Print the pattern in landscape mode, using the latest version of Adobe Reader. Piece the pattern together and trace it on the fabric. I'm not using quilting fabric, but if you are you will find you need some interfacing to make the small tote bag retain the shape. The main body consists of only two pieces. While the internal part consists of the lining and one pocket that is optional. The finished measurements are 13″ at the widest part, 8″ at the bottom and 7″ in height.
Pattern layout
How to sew the small canvas tote bag
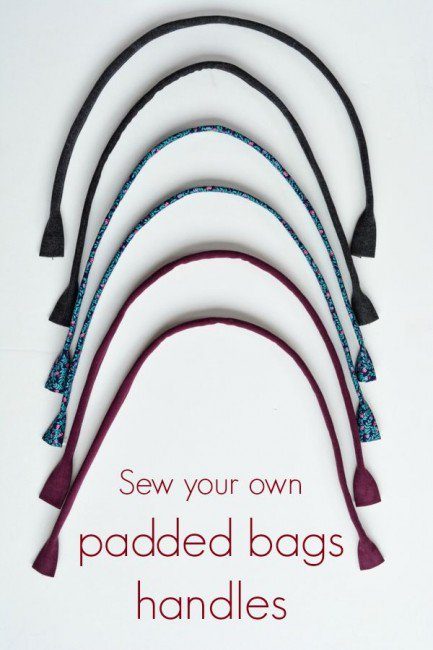
The seam allowance is 3/8″ through the whole project. The lining is one inch shorter than the outside of the bag make it easier to assemble. Sew both lining and outside of the bag in the same way. I have added a strap piece in the pattern for you to have the option of making fabric handles. I think this bag will look good with padded fabric handles.
Step One: Sewing the outside and the lining of the small canvas bag or the upholstery fabric tote bag
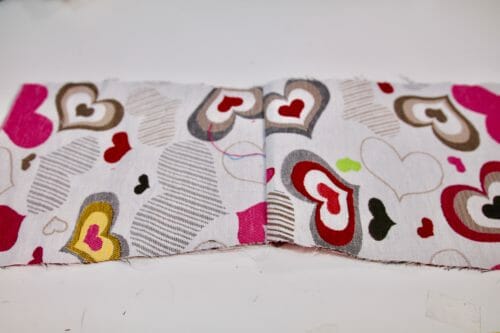
We will start to sew the front and back pieces right sides together sewing at 3/8″.
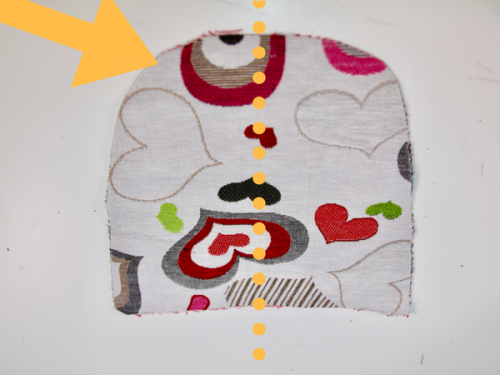
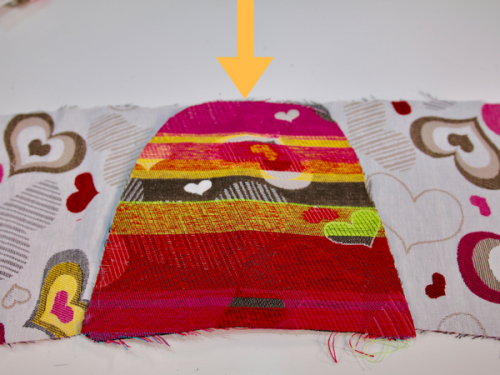
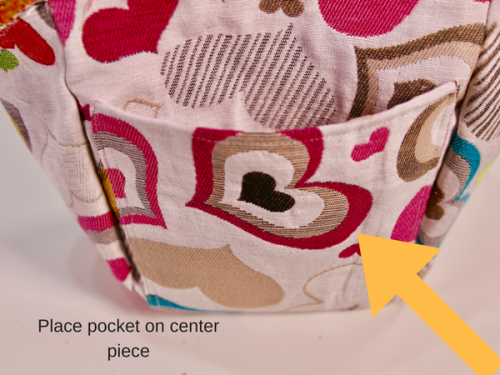
Mark the middle of the gusset by folding the piece in half. Print side down, place the gusset in the middle of the center piece. Align and pin to the stitching you did previously which makes the middle of the small canvas tote bag.
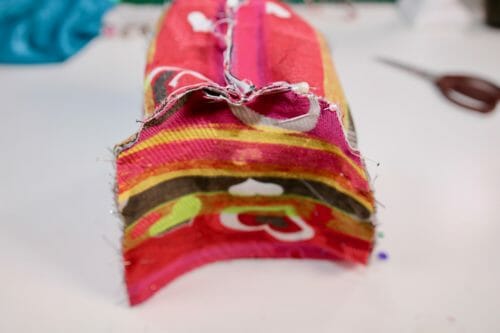
Pin the gusset around the edges of the center piece and sew. You will have to stretch the gusset slightly when sewing the rounded corners.
Attach the other gusset, sew as above and put aside.
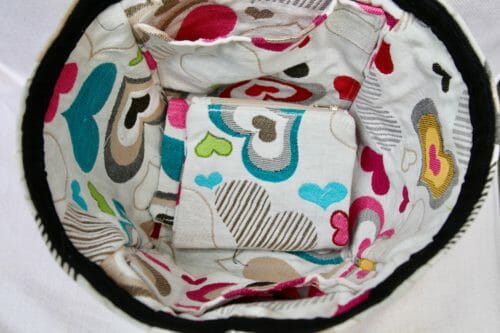
Step Two: Making the inner pocket and lining

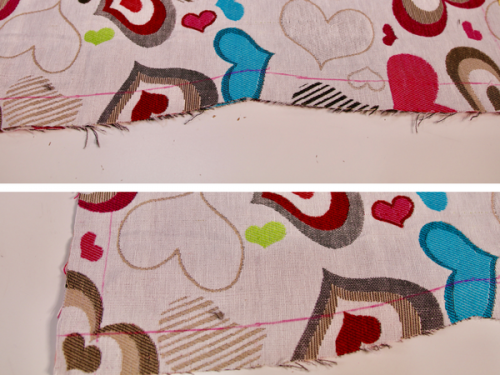

We will be sewing the pocket to the lining piece. Remember that I am self lining this project so using the same fabric both for the lining and outside.Take the pocket piece and draw 1/2″ (1.3 cm) around the edge using tailor chalk or erasable ink pen. Using this line fold the edge in towards the wrong side and sew 1/4″ (.7cm). Place this pockets on top of the centerpiece of the lining and sew the pocket down at 1/8″.
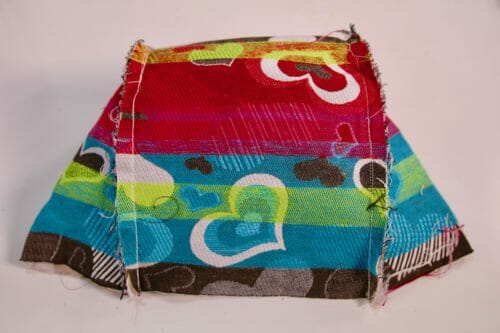
Sew the sides of the lining the same way as you did for the outside of the bag in Step One.
Step Three: Adding the straps or handles
I am using round acrylic handles that I made a long time ago while learning jewelry design. I have put the link in the Materials where you can get both square and round handles similar to this. Both have a similar way of application. The trend is metal so keep an eye for alternative metal handles you can recycle from old purses or buy on your own. (If you are interested, I can make a tutorial on how to make the acrylic handles but I need to work out a supplier for you guys. As far as I know the mold is the issue here. Please let me know in the comments below.)
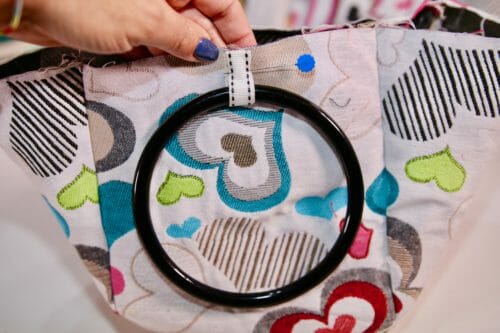
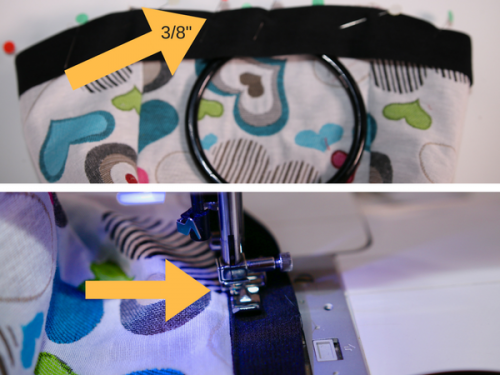
Cut the 1/2″ nylon ribbon or cotton tape 5″ in length. Fold this 5″ in half and wrap around the handle. Pin the tab to the edge of the bag. Make sure both the tab and handle are hanging down and are in the middle of the bag. Repeat the same procedure for the other handle. Top stitch the tab down so it won't move in the next step.Pin the 1.5″ cotton tape around the edge of the bag. You will have a sandwich on the outside of the bag, the handles, and tabs and on top of all that the cotton tape. Sew at 3/8″. Fold the seam allowance to the tape away from the bag and top stitch at 1/8″.
Step Four: Finishing the tote bag
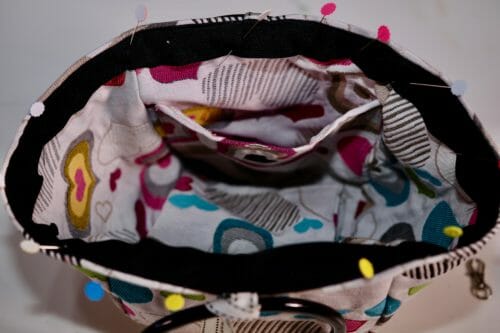
Place the lining right side in inside the bag and align all the seams. Tuck the lining under the cotton tape and fold the tape in. Top stitch again at 1/8″ making sure the tape is not seen from the outside of the bag. At this point, you might have to attach your walking foot for your machine to negotiate the thickness of this bag. But if your machine can take it, sew the tape down catching the lining and making sure this stitching line is straight because it will show.
Finally, I have made two tassels and attached them to the end of a 7″ of 1/2″ tape or deco ribbon. Use the same tape or ribbon you used to attach the handles.

Before you attach the tassel pass it through one of the tabs holding the handle then attached the other tassel.If you need a tutorial on how to make your own tassels here are three easy methods.
As you can see, this is a very easy to make small canvas tote bag even when using the upholstery fabric option. This little number is as practical as it is useful. It truly makes a great gift for a wonderful teacher, mother, sister, granddaughter or any woman you know and need to thank.
Join me next week will have more pattern transformations and a quick video on how to put this bag together.
Until next time, keep your fabric scissors safe!


I have thoroughly enjoyed your site and patterns! They are very easy for me as a beginner sewer to understand and follow. Thanks for all of your hard work!!!
Cute Bag! I downloaded the PDF pattern but the drawings on each page go off the page. I can resize the views of the pages but that doesn’t change the drawings for each pattern piece. I think there may be a problem in converting whatever you used to draw out the pattern pieces to pdf.
having a hard time downloading patters and instructions
Not sure how to help you Linda, can you tell me what is happening?
Even the wrong side of your upholstery fabric looks bright and cheerful 🙂 Great pattern.
Ah yes! this is Ikea fabric and still available in the stores.
If I may ask, where did you purchase the fabric from? Name of fabric?
Is there a larger version of this bag? I love it but it is too small…
No not yet. have a look at this one, see if you like it. https://so-sew-easy.com/ipad-backpack-pattern/” rel=”noopener” target=”_blank”>
Hi, I am a newbie on sewing
Thanks God I found you
Due the material optimalization and I thought it was too small for me,, I had made some modification from your pattern, like :
1. I used patchwork ( cause I haven’t have canvas yet ) and interlining
2. I made it bigger, so I can use it for “Mukenah Bag ”
3. I add more pocket with magnetic buttons
4. I used padded fabric handles
5. I add magnetic button and hooks for savety
because I am a beginner, my sewing had not been neat yet
but, at least I knew how to improve it
thank you
This is a lovely Bag, it does not look like a beginner’s work so I am impressed 🙂
Hi love the look of this bag. You mentioned that you were doing a tutorial for a cross over body version. Do you have a link for it? Also do you have the link for the zipper pouches that are shown in one of the bags you have made. Thanks
Hi Beverly, oh dear! I totally forgot! thanks for the reminder! But here are the pockets. https://so-sew-easy.com/add-extra-pockets-tote-bag/
Silly me lol i cant view the tutorial at first,turns out all i need to d9 is scroll down.awesome bag ?
Love this bag. I see you have two zipper pouches inside. Is this part of the lining pocket? Maybe I’m missing something.
Hi Giulina, they are in another tutorial. I will add the link to this post for the zipper pouch.
Thank you so much for this pattern. I watched the video, and will make it as soon as things quieten down for me. This is a great inspiration. I look forward to seeing your modifications. It has great possibilities. I wonder if the upholstery fabric allows it to stand up? I agree that the lining is so expensive. Love all your videos.
Hi Marg, Yes it is heavy enough to stand up. But, that is partly because of the pattern. A thinner fabric will be needing fusible or sewable interfacing. Hope you get a chance to make it.
What is the name and manufacturer of the fabric? I’m in the US. Perhaps I can find it online or in a store here.
Hi Leslie, I do not have this info but I will try to get it tomorrow when I go to the store.
Which wallet pattern did you use to accessorize with the bag? Thanks again for this adorable pattern.
Hi Yvette, I am using my own I will share with you very soon.
So adorable!! I downloaded the pattern yesterday and I am making it today! Thank you so much for the weekly newsletters which I anxiously look forward to every Sunday.
I may be missing something, but I could not find the dimensions? I know it is small, but I would like to know the bottom width and height as in the last picture above.
Hi Cathee they are in the directions before the pattern download.
Lovely bag and the fabric. I will try to make one. What’s the name of the fabric and where can it get it? Thank you!
Thank you, I got this fabric in a store called Spotlight in Australia in the Upholstery section. I know they have stores in Australia, New Zealand, Malaysia and Singapore where I live.
How big is “small”? Or I have missed the finished measurements?
And I’m glad it was me not being able to find the pattern this morning!
What an adorable bag, Mayra! Perfect for use while running errands or doing some quick shopping when you don’t want to lug a larger bag along. Thank you for sharing this pattern!
What are the dimensions of the tote?
Confusing instructions. You mention previous sewing where there is none just confusing.
Hi Merry, thanks for your feedback. Could you be a bit more precise about where you find the instructions confusing? We strive to make everything perfect but sometimes mistakes are made. We’d like to correct where possible. Thanks and kind regards.
What is the finished size of the bag? I did a quick read through and did not see it.
13″ x 8″ x 7″.
Love the bag! Can’t wait to make one for my sick knitting project. Just the right size? thanks, once again, for sharing.
Thank you for the free small canvas tote pattern. I am going to make one today! Do you have access to an auto upholstery shop? The headliner they sell works magic for purses, gives lots of support without adding weight. It’s not very expensive. I have used it many times and get perfect results every time. Here it is about $13/yd but it is about 72″ wide so you get alot of fabric for your dollar. Just a thought–Carol
I have also used and actually found it Joannes fabric. use the 50% off coupon for bonus.
Love it! I’m anxious to make it. Do you have the cross body bag tutorial somewhere? I Like the idea of the cross body bag.
Working on it Christine, out soon!
Thank you for sharing! My local Joann Fabric store has a nice selection of outdoor fabric in so many pretty colors and patterns that would be great for this tote 🙂
Sounds like you have a chance to make many pretty bags right at your fingertips. It takes only an hour and 20 minutes to make this bag. I would love to see what you come up with. Do share a picture with me I will added to the post.
This is absolutely ADORABLE! I must make one for myself! Thank you so much for sharing the pattern and explanations. It is very generous of you.