


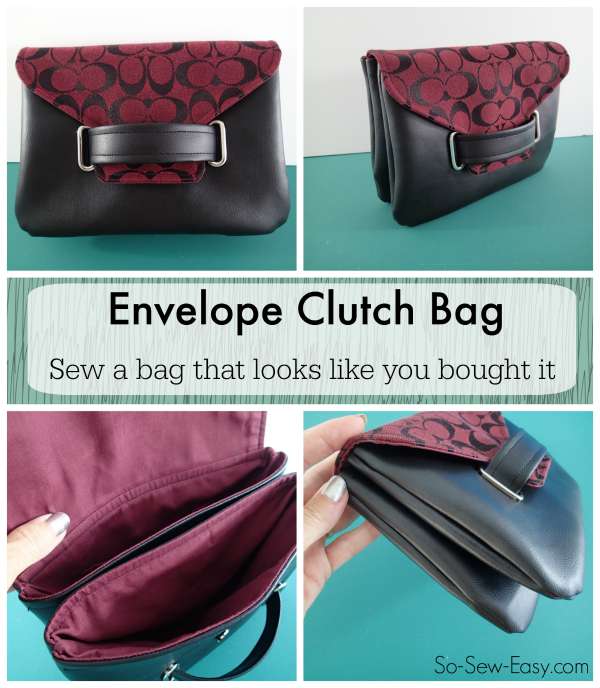
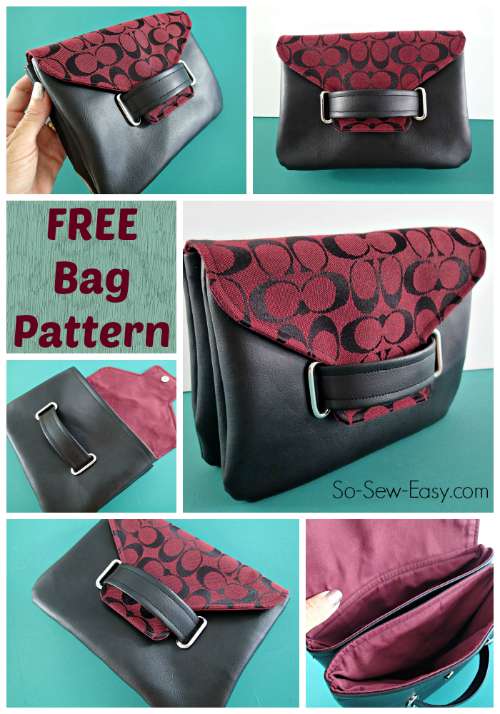
As much as I love fabric bags, sometimes I need something that looks, well, more plain I suppose you could say. Most of my bags are made from quilting cottons and as much as I love the designs of them all, sometimes I need a bag that can go with anything. So I set about using some new materials and playing around with a few designs to see what I could come up with The Envelope Clutch Bag is the result.
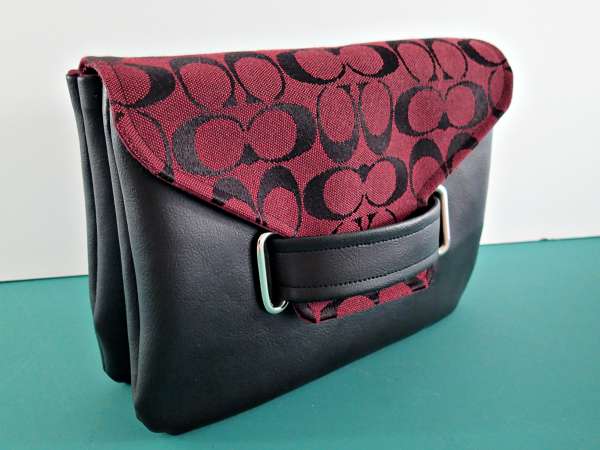
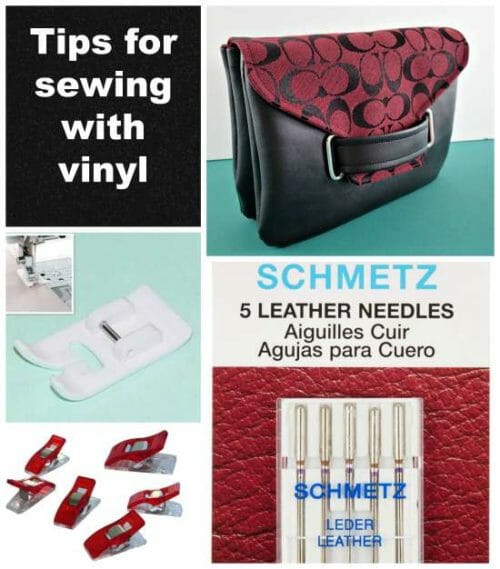
It’s made from vinyl with a cotton lining, and don’t worry if you’ve heard horror stories about sewing with vinyl, it’s really not that bad. I’ll give you a few tips to help out. Or you can make this bag in a regular quilting cotton, or something like a micro-suede would be very cool too.
Features of the Envelope Clutch Bag
- Silver grommets on the front for the handle/closing strap
- Two separate bags to keep you organised
- Closed with a single flap with magnetic snap
- Optional slip pockets inside
- Extra pocket between the two bags
- Stylish and ‘store bought’ look
- Pretty quick to sew
- Finished size approx 9 inches wide, 6.7 inches tall and 1.5 inches deep
You can download this pattern from my design account on Payhip. Add it to your cart and check out - it's free! The pattern will be saved in your Pattern Library safely until you are ready to sew, then you can download and print it at any time.
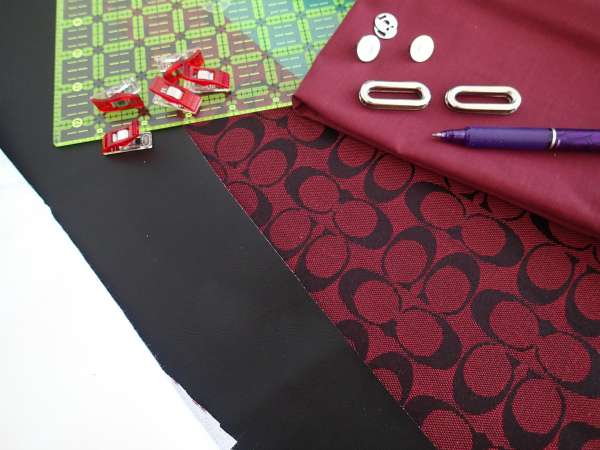
Materials needed
- Vinyl in one or two colors, or an alternative fabric of your choice such as leather, faux leather, suede or home decor, quilting cottons etc – total 1/2 yard
- Cotton, satin or fabric of your choice for lining – 1/2 yard
- Two 1.25 inch oval grommets – Etsy seller here sends worldwide
- Magnetic snap
- Interfacing depending on your choice of fabric (I used ShapeFlex 101 on the lining of my vinyl bag)
Online Fabrics Store has a great range of vinyl and faux leathers including pleather, ultra-shiny patent, metallics and glitter vinyls! I was lucky to find my printed one at my local store which made my day. A two tone look would be cool too, or a heavily embossed one with an animal design.
Or how about mix and match materials with vinyl for the body and a flashy fabric for the flap?
Optional additional supplies for working with vinyl
- Non-stick Teflon foot or roller foot
- Leather Needle
- Wonder Clips
Check out this earlier article in case you missed it – Tips for sewing with Vinyl
How to sew the Envelope Clutch Bag Pattern
Download your pattern and cut out your fabric pieces. If using vinyl, you may decide it doesn’t need any interfacing. I used Shape Flex 101 woven interfacing on the lining of the bag and didn’t add anything to the vinyl.
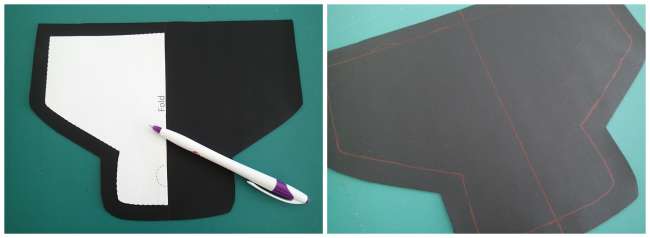
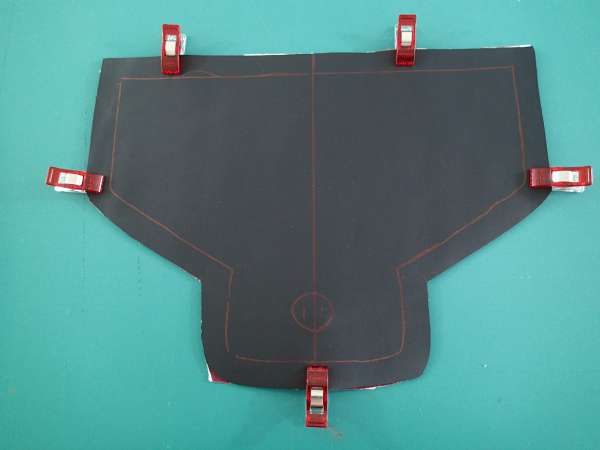
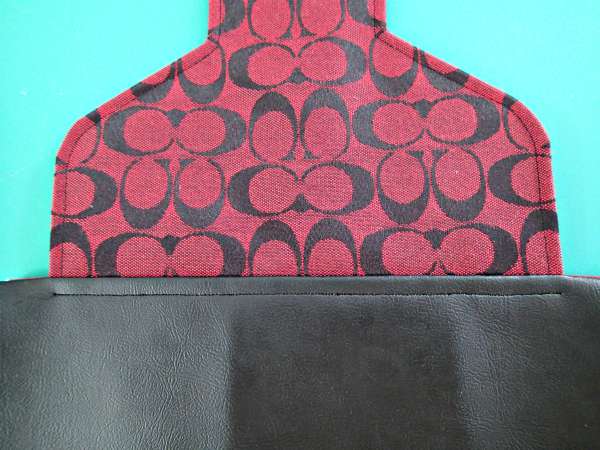
Let’s start with the flap. If your fabric is thick, you might want to print two pattern pieces and stick them together rather than fold the vinyl to try to cut. Or use the pattern piece as a template and draw around it to mark your cutting line.
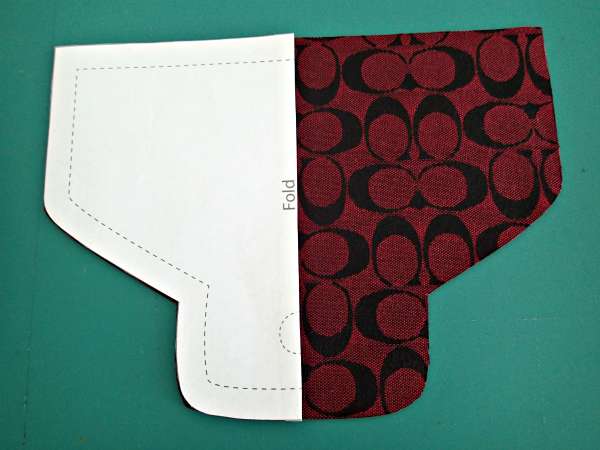
You’ll notice that the pattern piece has the cutting line and the stitching line marked on it. I find this helpful when sewing a shaped piece to make sure I am stitching an even distance from the edge. Cut off the seam allowance from your pattern piece and use it to mark the stitching lines on the back of your outer flap piece if this will help you.
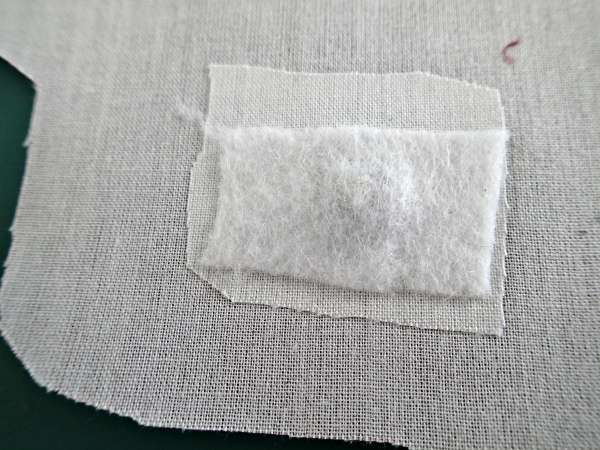
Use the pattern piece to mark the correct placement for your magnetic snap on the LINING for the flap. Add some extra reinforcement with some extra interfacing at this point.
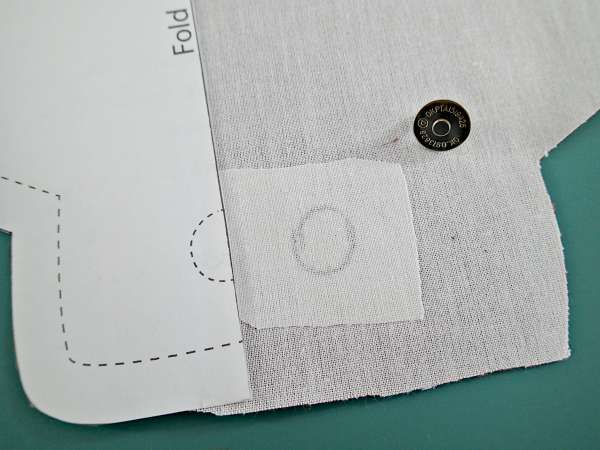
Install the first part of the magnetic snap with the prongs on the wrong side of the fabric, fold over and flatten the prongs and then you may wish to fuse some additional interfacing or fleece over the back of the snap to prevent those prongs from showing through on the right side of the flap, which they can do over time.
Read more here on the correct way to add a magnetic snap closure.
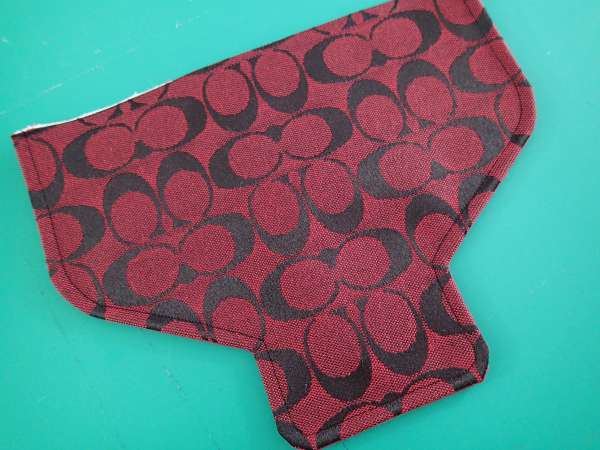
Match the flap outer with its lining, right sides together, and sew around the curved outer edge, leaving the straight edge along the top open. Use a 1/2 inch seam allowance.
Snip and clip your seam allowances around curves and into the inward painting V shape. This will remove the excess fabric and make the flap sit more smoothly when turned the right way. Want to learn more about when you should Clip and when you should Notch? Check out this article – How, When and Why to Clip and Notch your seam allowances

Turn the flap right sides out and use a blunt tool such as the Purple Thang or a point turner to smooth out the edges and curves. You can press carefully from the lining side. Then top stitch around the edge at a 1/4 inch. Set the flap piece aside for now.
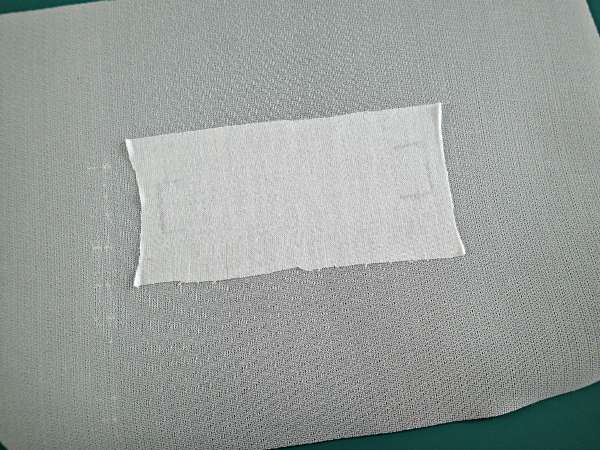
Let’s work on the front of the bag. Cut out the rectangle piece from your pattern template and use it to mark two vertical lines on the reverse side of your front vinyl piece. This is where we will install the grommets.
Add some additional interfacing over this area, extending a little way past those vertical marks to reinforce the area where we will cut. Take care fusing the interfacing to your vinyl, don’t melt it!
Undo the screws from the back of your grommet and use the back piece as a template to mark your screw holes. My husband has the scuba diving multi-tool which often finds its way into my sewing room because it has the perfect sized little cross-head screwdriver and it also has a pointy tool (or awl) for making holes. Mark your screw holes and pierce them with a pointy tool or sharp craft knife.
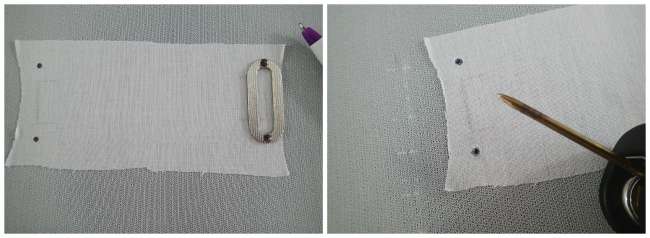
Screw the two grommets in place through these holes.
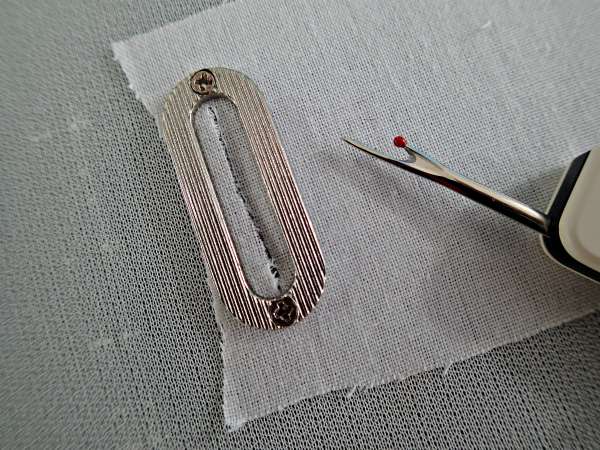
I tried various different methods with these grommets for fixing them to make sure they stayed in there securely and this was the one that worked best. So now take a sharp seam ripper or craft knife and slice up through the center of the grommet. You could try to cut out a curved shape, but I didn’t find it really necessary because once the strap is fitted you don’t really notice, but if you are using fabric instead of vinyl, you might want to take more care here because of fraying and treat the fabric edges with Fray Check.
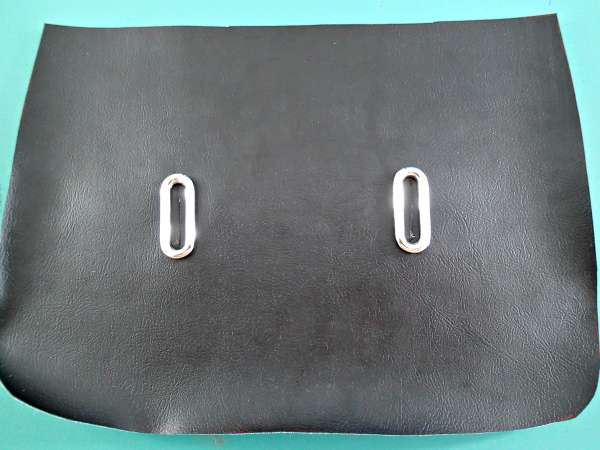
Repeat to do the same on the other side and install your second grommet. Your front of the bag should look like this.
Time to make the strap that goes across the front. Print two pattern pieces and join them if that’s easier, or use as a template to cut your vinyl. Draw a line down the center lengthways and then transfer over the vertical marks onto the reverse too. It should look like this.
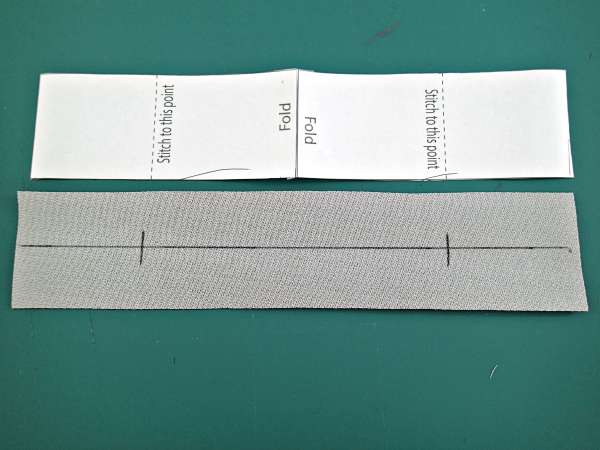
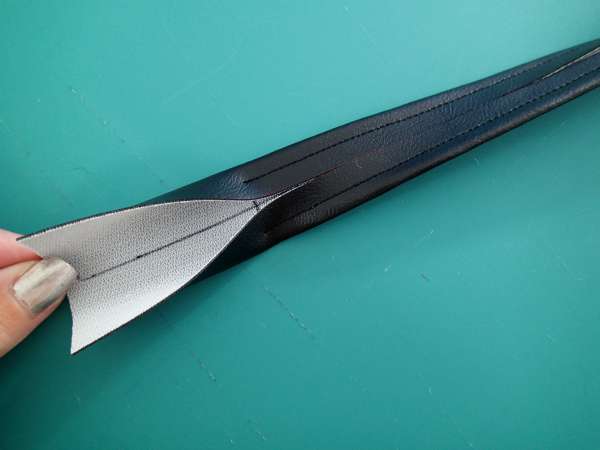
Fold in one edge to that center line and use your clips to hold it in place. Stitch between the two vertical marks, at about halfway between the fold and the centerline.

Repeat that for the other side, stopping and starting your stitching in the same place. Then your strap should look like this. We’ve not sewn all the way to the end, because we are going to cut out some of that extra so we don’t have too much bulk in the side seam allowances when we attach it to the bag.
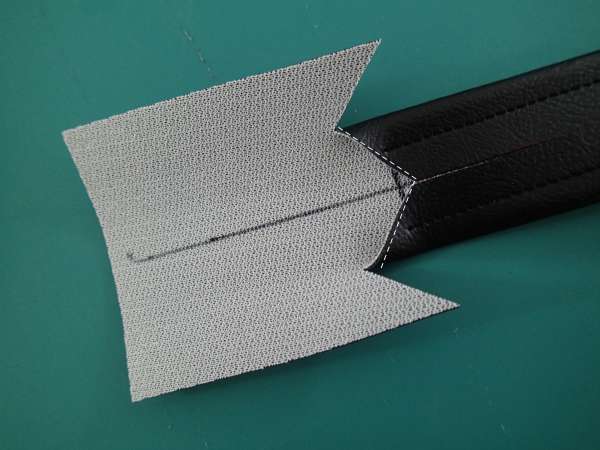
From the ends of the stitching, snip out to the fold at an angle on all 2 sides. It should look something like this.
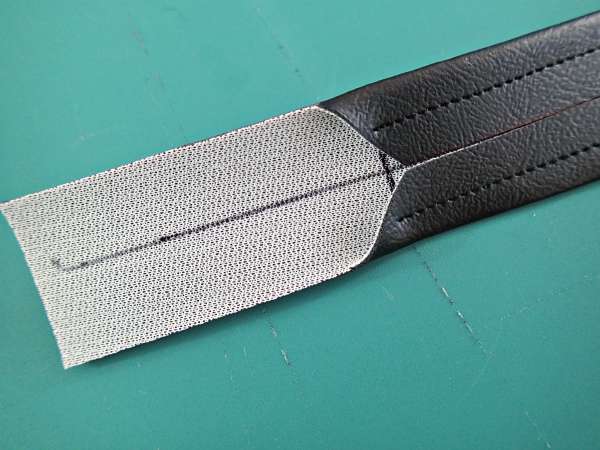
And then cut down from the fold to the end of the strap in a straight line, keeping it roughly the same width as the folded part. Repeat for both ends. Now we only have the 1 layer of vinyl to sew into our side seams.
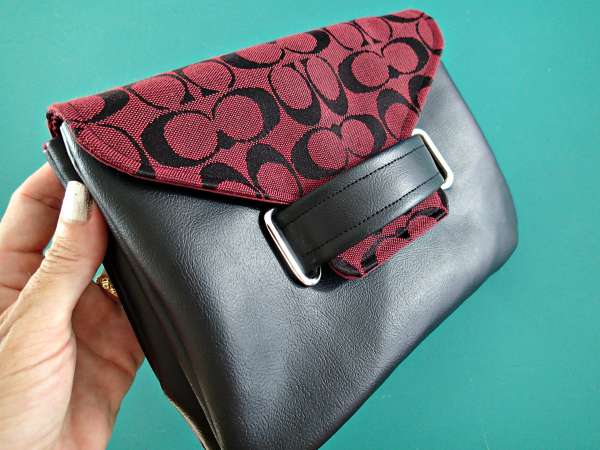
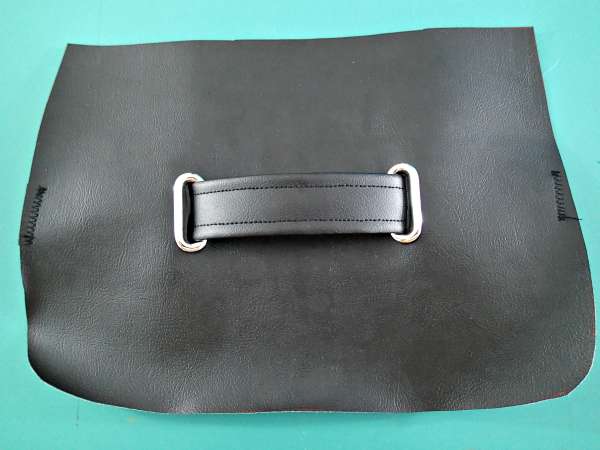
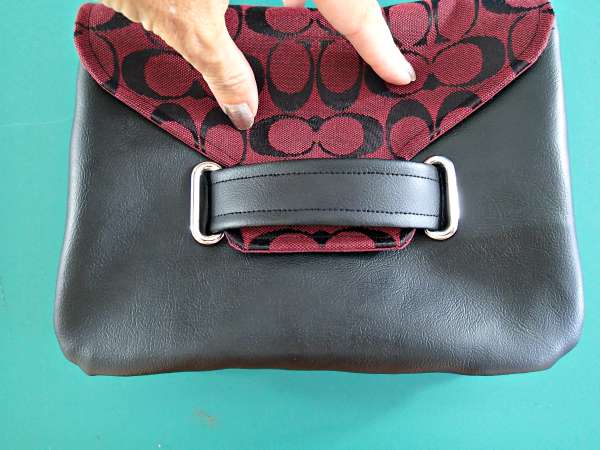
Time to add this to the front of the bag. Feed it through from the front to the back through each grommet. Now to decide how you want to use your strap. If you want it to be purely decorative, then you’ll lie it out reasonably flat against the front of the bag. There is also an option to keep the strap a little longer and use it as a handle, so that you can slide your hand through to carry the clutch bag too. If you want to use it that way, then you can leave more slack to leave room for your hand, the strap is cut long enough for this.
Once you are happy, baste the ends of the strap in place within the side seams and cut off any excess.
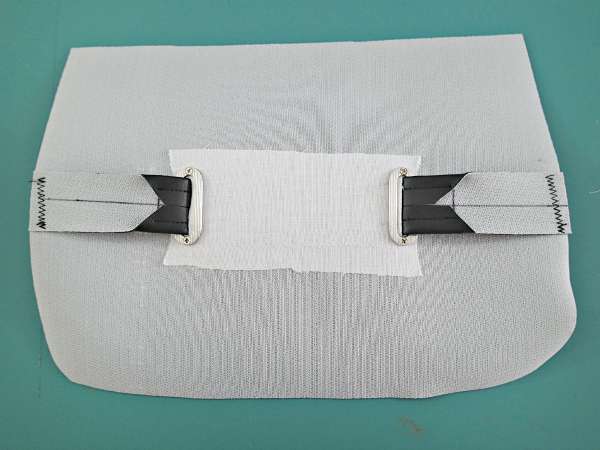
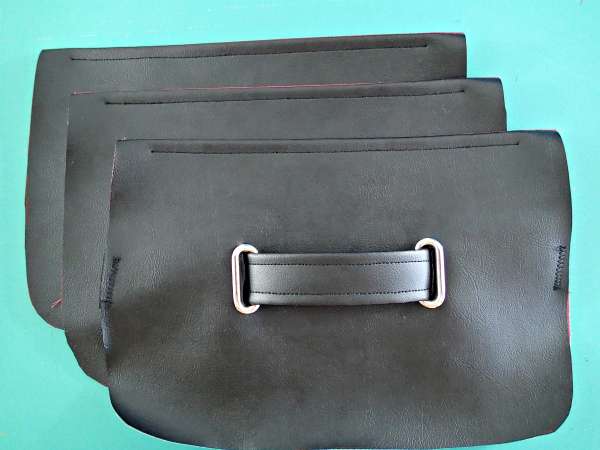
This is how the front of your bag looks from the outside.
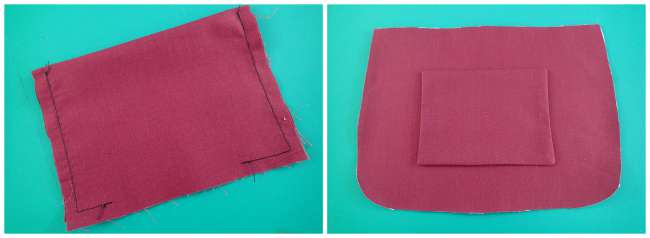
Do you want some simple slip pockets inside your bag? Time to add these to the lining pieces now. Match the pocket right sides together, matching short edges. Sew around the open edges leaving a gap in the bottom to turn. Clip the corners and then turn the pocket right side out and give it a press, turning in raw edges carefully. Attach the pocket to the lining piece making sure the top opening of the pocket points towards the straight edge of the lining. Add as many or as few as you like.
Read here on how to make simple slip pockets.
Now it’s time to start putting all of our pieces together. Start with the flap. Match the flap with one of the outer pieces of the bag, making sure it is centered. There will be a gap at the top either side. The outside of the flap faces the right side of the back so your snap will be facing up. Then add a piece of your lining over the top. Sew along that top straight edge with a 1/2 inch seam.
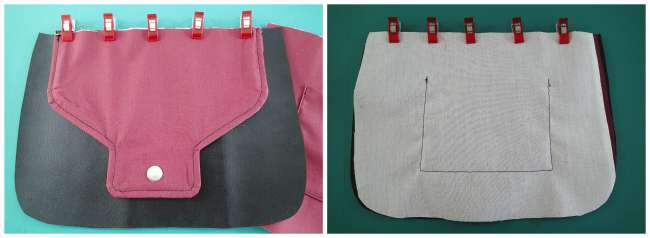
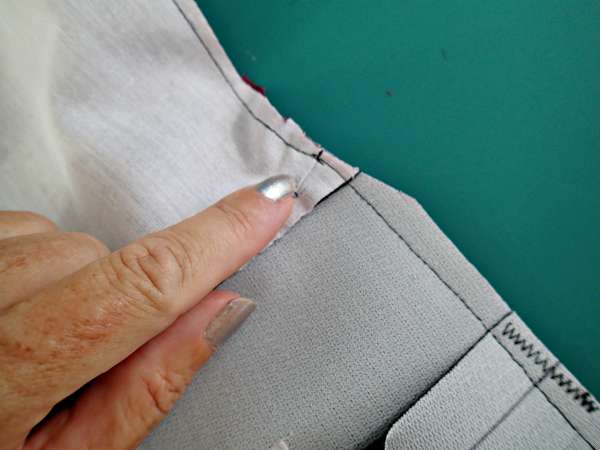
Finger press the layers back away from the flap and keeping them even, topstitch through all the layers and the seam allowance, starting and stopping at the edge of the bag flap only.
For the other 3 outer pieces (including the front), match them up right sides together with a lining piece and again, sew along the top edge with a 1/2 inch seam.
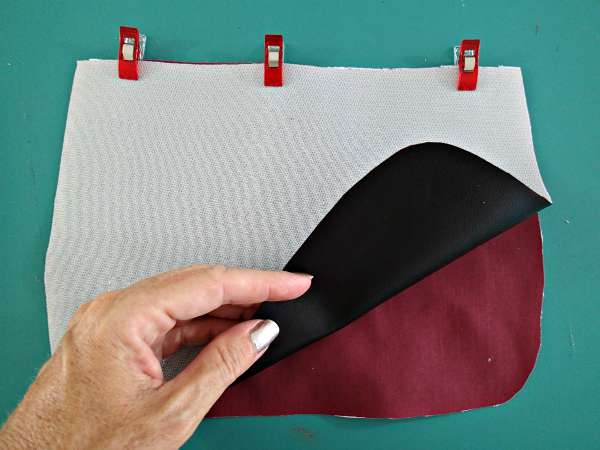
Fold the layers back towards each other wrong sides facing and topstitch across the top edge starting and stopping 3/4 of an inch from the side seam each time. Your 3 pieces should look like this.
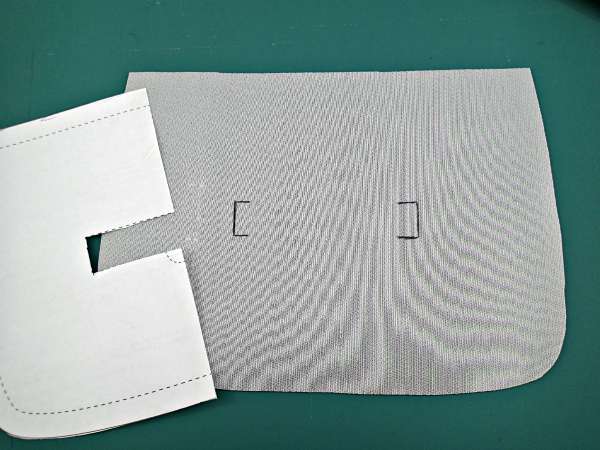
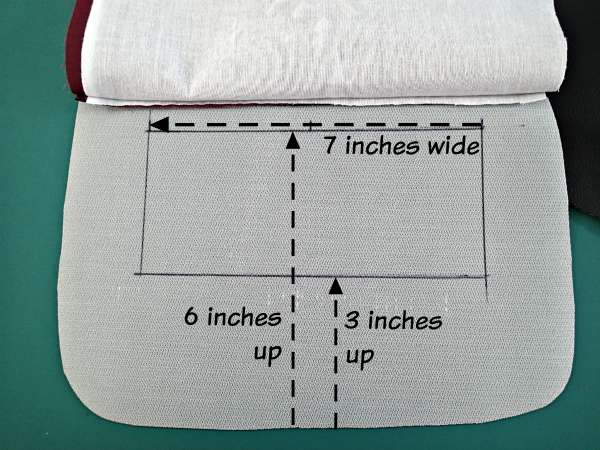
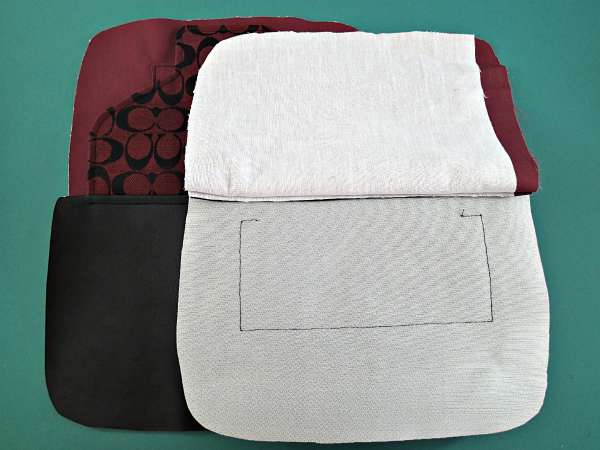
 Draw a rectangle on the reverse side of one of your pieces of vinyl (not the front or the back of the bag, one of the plain middle pieces). It should be centered between the side seams, 7 inches across and 3 inches tall, starting 3 inches up from the bottom of the bag – like this –>
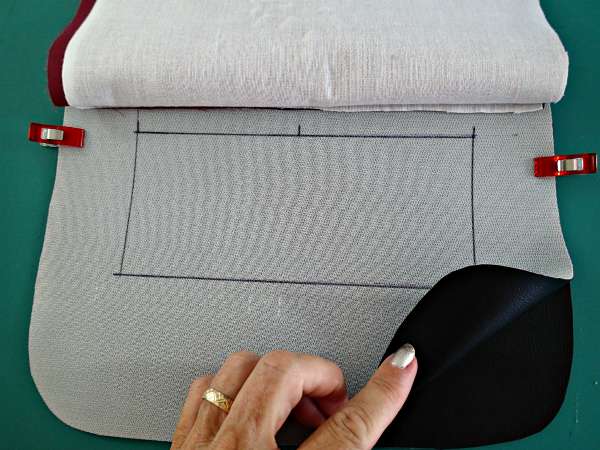
 This is your stitching area, where we will join the two bags together at the center. Layer up your vinyl pieces matching the top edges of them carefully, right sides together. Again, don’t use the front or back, just the two plain center pieces.
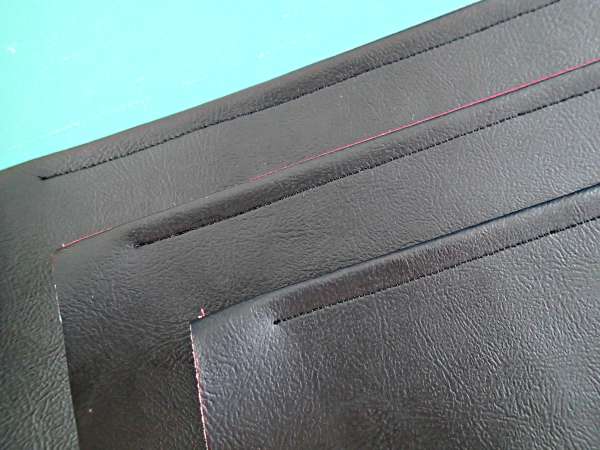
Sew a 3/4 inch at the top of the rectangle on each side, and the sides and bottom so that it looks like this. Backstitch to reinforce the stitching at the top.

Time to start putting out two bags together, but one is going to be in the way a little bit so we need to just add some clips to keep that back in the center while we sew our outer seam allowances. Fold the lining and the outer fabric into the middle of the bag and clip them there.
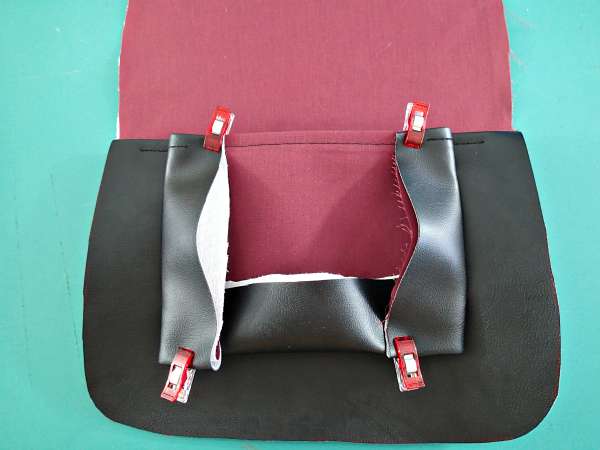
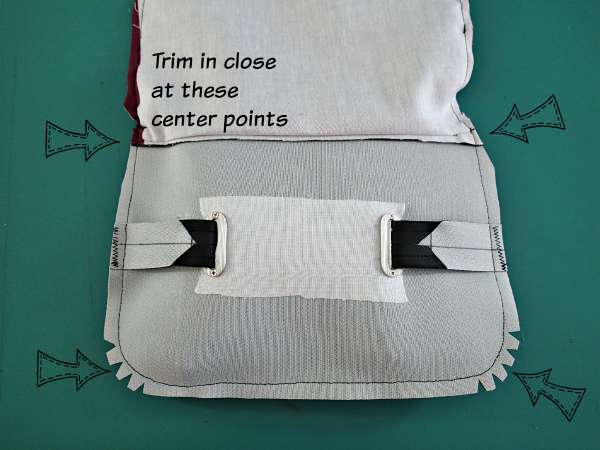
Now take the front of your bag and lie it over the top, matching up the side seams, and keeping raw edges together all the way around. Use plenty of clips and pins to make sure those outer edges stay matched. Sew around the perimeter leaving a gap in the bottom of the lining panel for turning. Backstitch to reinforce on the side seams at the center point where the vinyl and the lining meet because we’re going to be trimming there later.
Notch your seam allowances at the curves. Trim down seam allowances on your lining fabric and trim close to the stitching at the center of the bag where the vinyl and lining meet to reduce the bulk there.
Turn the bag right sides out BUT leave that gap in the lining opening because we need to add in the second half of our magnetic snap later on. Here’s what it looks like so far. Nearly done.
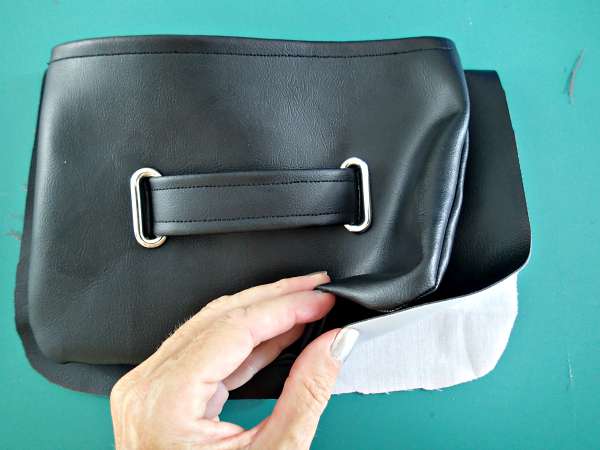
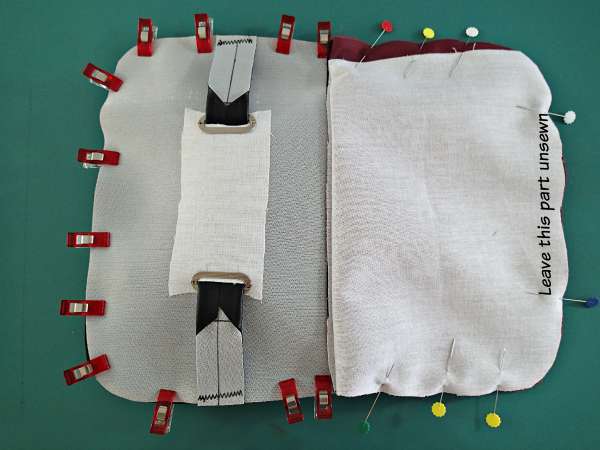
Time to complete the back bag. Same as before, we need to make sure we aren’t going to catch the front bag when we sew our seams. It’s going to be pretty easy because it’s thick so we can feel it there easily, but just fold it in towards the center and make sure you don’t catch it as you sew around the edge.
Match the back of the bag right sides together with the center piece, matching raw edges on vinyl and lining and keeping the center seams matched too. Your flap sits up towards the lining as shown in the picture.
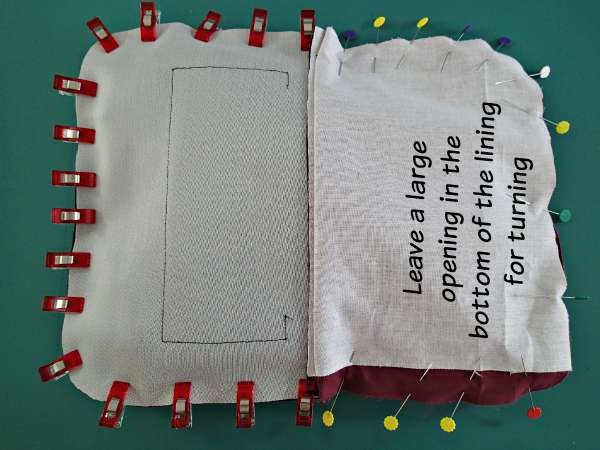
Pin or clip all the way around the edges carefully. If you sew a bit at a time, you can release the next pin or clip and push your finger up in there to make sure you aren’t catching any of the other layers when you sew. Use a 1/2 inch seam and leave a large gap in the bottom of the lining because there’s a lot to turn and get through that gap!
Trim and notch your seams the same as you did before and then turn the bag right sides out. Push the lining down inside. How’s it all looking? If your linings seem a little bit too loose, there is still time to correct that. Turn the bag back right sides in and sew a slightly large seam allowance in the lining to get rid of any baggy-ness.
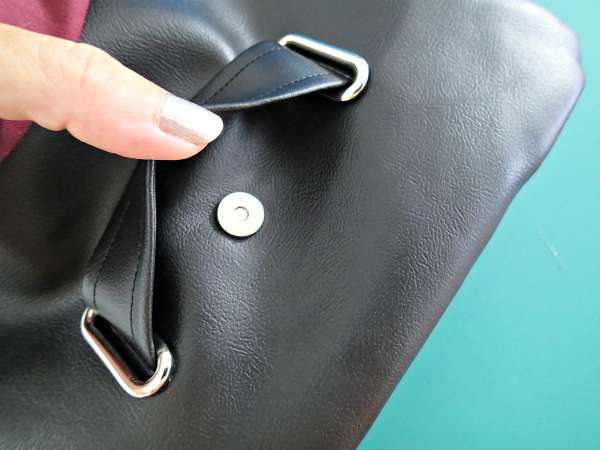
Close up the flap of your bag and use the snap in the flap to mark where the matching half of the snap needs to go on the front of the bag. Remember to leave a little slack and not pull the flap down too tightly or you won’t leave enough room to actually put anything in the bag! (Yes I’ve made that mistake before and then when filled the snap won’t meet.)
Install the other half of the magnetic snap into the front of the bag. Then you can close up the gaps in the bottom of both linings, either by machine or by hand.
And that’s it! The Envelope Clutch Bag is finished. That wasn’t too difficult, was it? It’s a simple and classic design that could look good in a variety of materials. Now, what about a strap to make it into a shoulder bag – I know lots of you will have good ideas for how to make this your own with your own designs and look forward to seeing what you sew.
You can download this pattern from my design account on Payhip. Add it to your cart and check out - it's free! The pattern will be saved in your Pattern Library safely until you are ready to sew, then you can download and print it at any time.
If You’d Like To Support Our Site
If you want to help us continue to bring you a wide selection of free sewing patterns and projects, please consider buying us a coffee. We’d really, really appreciate it.
I love it! Definitely going to try to make it. Where did you get the designed fabric?
This is very old fabric, try to find similar things at upholstery shops.
Good day – Thank you so much for the free Envelope Clutch Bag. Where can I find a printable version in pdf how to assemble the clutch bag? Thank you. Marie
Hi Marie, the pattern has full, printable instructions in the .pdf file. Please enjoy!
What a chic bag! Absolutely gorgeous! Is the flap fabric or other material?
Such a great design. I’m going to try it with cork instead of vinyl.
Do you sell the red fabric you used for this? I would really love to purchase a piece to make this for my daughter’s birthday.
No we don’t, Yes this will make a great present. Enjoy the project!
Thank you for the tutorial..Love the Coach fabric.
Hi Deby, do you have a instructional video for this bag?
Many thanks
Paulette
No, this one doesn’t have a video, just the photos and written step by step. I remember I had a stinking cold, you would not have been able to understand a word I said through all the coughing and sneezing that week!
What a gorgeous, practical bag, and thank you for such generosity taking the time to create this pattern as well as share it with us for free! Your time and kindness is so very much appreciated, Mrs. Deby!
Thank YOU Laura.
Unable to download the pattern. What’s with that? Cute bag that looks practical.
I can’t say without more to go on Shirley. Perhaps you would like to write to me with more details about why you are unable to download and I’ll try to help you figure out what you are doing wrong.
Finally did get it to download. Originally it had told me something about it being closed by the author- Don’t remember the phrases.
I got the vinyl yesterday; now I’m just missing the teflon foot.
I am unable to download your patterns
Can you give me a bit more to go on Rosalina? Drop me an email with why you can’t download anything and I’ll be happy to help you. Please talk me through your process from the start, where you click, what happens etc and then we can track down what’s not working for you and why.
You don’t mention what kind of thread you use. Just the regular kind?
Yes, I just used a regular thread. I can only get an economy unbranded thread here and it worked just fine for this.
The strap at the front for closing the bag is a lovely design feature, Deby. I’ve featured your fab bag today…
Thanks so much Pam.
I love this little bag!! So fab! I’ve got a Craft Gossip post scheduled for this afternoon that links to your free pattern: http://sewing.craftgossip.com/?p=84228 –Anne
Thanks so much Anne, its something a little bit different!
Can’t wait to try out this lovely pattern. I would love to find a pattern for a larger handbag with zipper compatments like this one. Next project??Thanks for your time and for sharing.
You are so kind to give us another free pattern! Anxious to try it! Thanks, so much.
Very nice pattern/tutorial and I do appreciate your time and effort and giving it to us free.
@rrjane011749: if you’re referring to the vinyl, check out the link in the article to Online Fabric Store where it has pages and pages of the stuff.
Just in time! I’ve been planning on trying to sew something with vinyl or faux leather for a while now and in fact today I ordered both special feet – so thanks for the lesson!!
Love this bag! Any suggestions on how to get my hands on some of that fabric?
Do you mean the one with the design on it? You could fly over to Cayman – they have a roll in my local store, but I’ve never seen anything else like it online anywhere.
Does your store ship? Or have a website? If so, can I have the name please
Hi Debby. You are already on the website, that’s where you left this comment. I’m not sure however what product you are asking about for shipping. Can you let me know what it is you want to buy.
This bag looks fabulous. So professional and sleek, and what a clever design. I have to make it! You always have such interesting projects. I don’t know how you do it!