


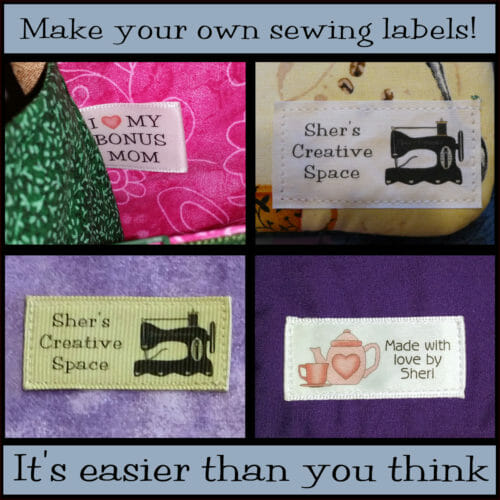
There are so many nice label shops out there, especially on Etsy. I've been wanting to get some custom sewing labels for myself for some time now, but for wanting so many different styles, it would cost me a fortune. Now that I know how to make them for next to nothing, I can make them more personal like “Made for Paige by Nana”, “Made Specially for You”, or “Love Mom”. You get the idea.
I've tried this a couple of ways to see what would work best and quite honestly, I like them all.
Let's get started.
What you will need:
- Sewing machine
- Iron
- Ink Jet printer
- A word processing program, or design program
- Scissors or a rotary cutter, ruler, and mat (preferred)
- Thread to match label
- Sewing machine needle
- Sewing machine foot you can see through (I LOVE my open toe foot for this job!)
- Sewing stiletto (optional but helpful)
If using the iron-on transfer method:
- Good quality transfer paper (I used Avery T-Shirt Transfer Paper)
- Parchment Paper
- Pillowcase (white or light colored, or four layers of cotton muslin)
- 7/8″ wide ribbon (light color), or 100% cotton muslin
- A hard smooth surface that is heat resistant, not an ironing board. I used a piece oak on my kitchen counter (large cutting board would work)
If using the printable fabric sheet method:
- Good quality printable fabric sheet (I used June Tailor Sew-In Colorfast)
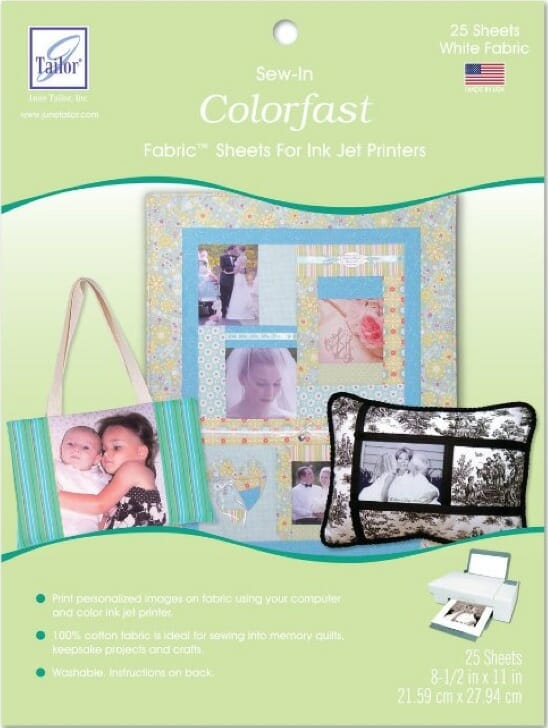
Use June Tailor Sew-In Colorfast Fabric Sheets for Inkjet Printers to print personalized images on fabric using your computer and inkjet printer.
-100% cotton fabric is ideal for sewing into custom sewing labels
-Twenty five 8 1/2" x 11" sheets in each pack
-Fabric sheet is washable and colorfast
Note: The instructions I'm giving for this tutorial are for the brand of printable fabric and iron-on transfer paper that I'm using. If you are using another brand, follow that manufacturer's instructions.
7/8″ GROSGRAIN OR SATIN RIBBON WITH IRON-ON TRANSFER PAPER
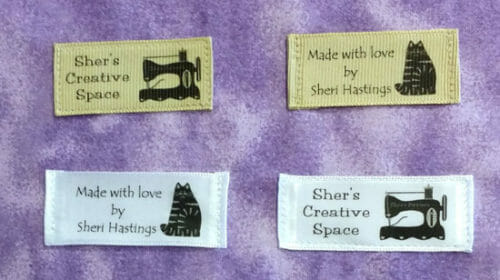
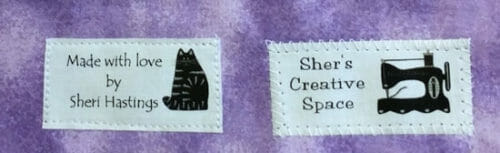
I love, love, love this one! It's my top favorite of them all. I like that there are three different ways to apply it. You can stitch all the way around, or just down each side. You can also put your words or logo on half the ribbon (you can even use both sides of the fold), then fold it in half and stitch it in a seam. This is my preferred method. It looks so professional, and I love the bright, crisp image on the white satin ribbon!
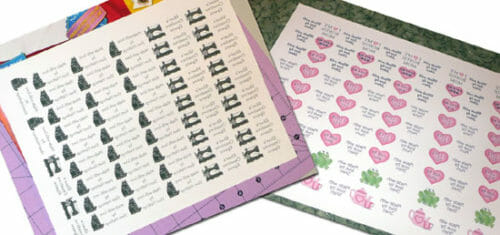
The first thing you are going to do is design your labels in a word processing or design program. You can also use Word, Publisher, Photoshop, anyone will do. If you don't have one, you can download one free from the Internet. I would recommend “Open Office” because it's free and pretty easy to learn. Very similar to Microsoft Office. More recently, sites like Canva have made this 10x's easier.
When making the custom sewing labels for the iron-on method, you want them to be as close together as you can get them, but they must be even rows and columns. You are going to need enough room between each label to cut between them without cutting into them. You can see about how far apart mine are. You might also notice that I've mixed mine up. I am making personal labels for gifts I make, and professional labels for the items I make for my pattern design business, and for items the items I donate to my favorite animal rescue fundraisers. That is the nice thing about making them yourself, you can make them for absolutely anything you need!
Something to keep in mind when using the iron-on transfer paper on ribbon. First, your ribbon is only 7/8″ wide. I keep the label height of mine at a little under 3/4.” You don't want your information or transfer paper to extend beyond the finished edges of the ribbon. This is why it is important to keep them close together. What you can do is print out one label after you complete your design to make sure it will be a nice fit on your ribbon. If there are no adjustments, it's time to tile them and print them out!
Very Important: When using iron-on transfer paper, you must either flip the entire image in your program, or you can print out the page as a mirror image in your printer settings. Do not do both. When your labels come out, they will be backward, but that's OK because they will be correct after you iron them to the ribbon.
When I printed mine, I used the standard ink setting. They came out perfect! Using photo quality could cause too much ink to distort your image or text. Allow the ink to dry completely before handling. I set mine aside for about 10 or 15 minutes.
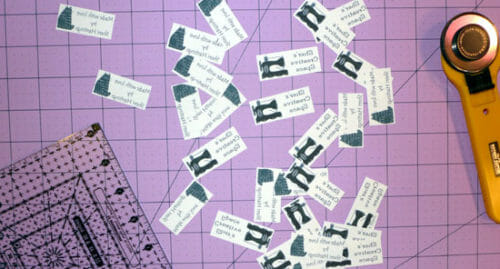
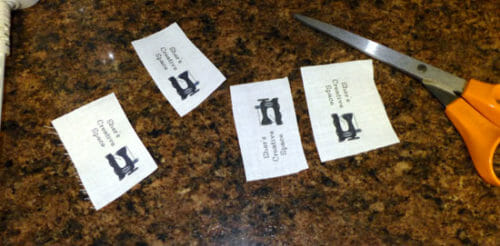
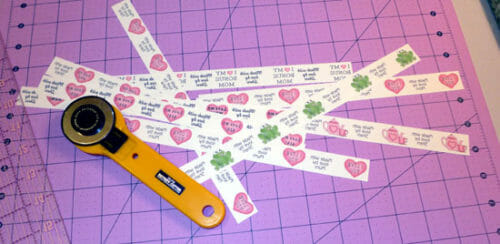
Now carefully cut the labels out. This is where a rotary cutter, ruler, and mat are so helpful. If you don't have one, it will take you longer, but the results will be the same because you don't see the adhesive, you'll only see the images you created.
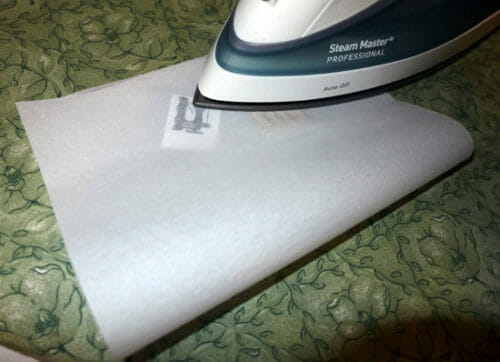
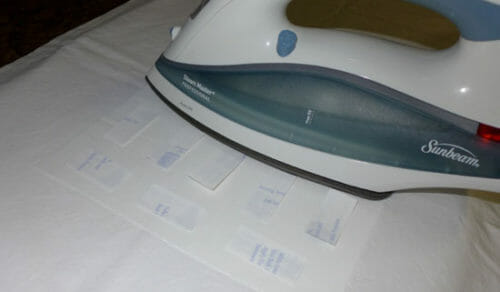
Prepare your ironing surface. Avery recommends that you do not use an ironing board. I don't know why, but that's what the directions said. You do need a heat resistant, hard surface. For the ribbon, I used the ironing surface I made for my studio a few years ago because it's exactly what I needed, but when transferring to the fabric I chose my kitchen counter, but I did not iron directly on that. I have a nice sized piece of oak that my husband made for me to use as a lap desk. I took that to the kitchen counter and flipped it to the underside so I wouldn't chance ruining the pretty side, then I placed a while pillowcase (folded in half) on top of that. If you don't have a white or light colored pillowcase, four layers of 100% cotton fabric will work just as well. Iron it to make sure there are no wrinkles. Create an ironing space, following the guidelines above, that will work best for you.
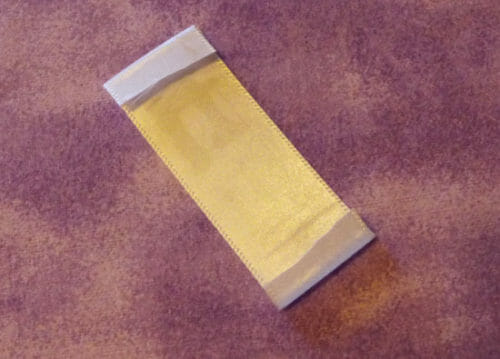
Preheat your iron to the cotton setting. Do not use steam. With the right side up, place your ribbon in the center of your ironing surface. You can do a few at a time. Place the iron-on transfer paper with the design face down (your paper backing will be facing up) on your ribbon, and iron. Hold the iron there, moving around a little, for at least 30 to 60 seconds. Use a firm amount of pressure, but don't kill it. Let it sit there for a few minutes until it's completely cool.
Note: When cutting the ribbon, leave enough length on both ends. I'd say at least 3/4″ each side. You'll either trim them down later or tuck the ends into a seam, depending on which way you want to place your label.
Unless you are folding them in half and stitching them into a seam, turn the ends to the wrong side and iron. When you do this, you will use parchment paper to protect the image. Don't put the iron directly on the image. The image should only be touching the parchment paper. Once it is good and ironed, lift the iron and let it sit on the ironing surface until completely cool. I found that by doing this, my crease was so much crisper and held their fold well. Once it has cooled, you can trim the ends down to 1/4″ if you like.
I think the stitching is as important as the label. It also helps to set your machine to stop with the needle in the fabric rather than above it. I just find that method works best for me when I have to pivot at corners.
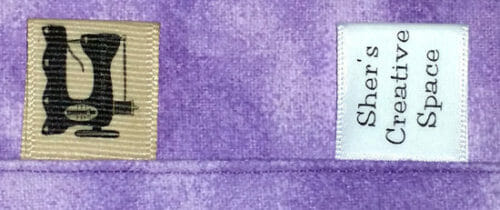
Start stitching! As you can see (second photo from the top), I've stitched mine three different ways. I stitched across each side, (not my preference) as well as all the way around. I also folded my label in half, ironed the crease, (between parchment paper) and stitched it in a seam. I really like that one, it's my favorite. I might start using that method in my purses and other bags. It just looks so neat and tidy!
I also might want to mention not to use pins when placing your labels on your items. I found that they left holes in the ribbon. The labels are so small that you really don't need to use them anyway.
100% COTTON MUSLIN WITH IRON-ON TRANSFER PAPER

These were my least favorite of all. The image wasn't as crisp as it is on the other labels, and it was a little more difficult to stitch around while keeping the label perfectly straight. I do however like the soft look of the fabric. If you had a design or logo that had simple lines without a lot of tiny detail, I think this method would look amazing! You would be able to use up all the fabric space for your image. That is why I included it in this article. It wasn't my preference for my logo, but it would still work well for other styles. You would have to experiment.
For these labels you are going to be following the same basic instructions for the ribbon, with just a few changes:
Instead of ironing the transfer onto the ribbon, you will be ironing it on the fabric. I just cut nice sized pieces and placed my iron-on transfer pieces with the transfer film toward the fabric, but I did several labels on a piece of fabric then cut them down later. I left plenty of room around them to cut them out. I also ran the iron over them about three times as long because I had more area to cover. If you plan to iron the labels again, just be sure to use your parchment paper between the iron and the label. You can also make your labels bigger if you prefer because you don't have a 7/8″ ribbon to limit you to the size.
Also, when stitching these to the fabric, you'll prepare them a little differently. I cut around mine about 1/4″ on all sides. I ironed all four edges to the back, then stitched it down. Be sure to use your parchment paper for these too and follow the same guidelines as for the ribbon.
USING COLORFAST PRINTABLE FABRIC SHEETS FOR INK JET PRINTERS
These are probably the easiest of all. They are also the most expensive of the bunch to make, but not so bad if you use your JoAnn's or Hobby Lobby coupons. Normally it will run you about $12.00 for a package of three fabric sheets, but you can pay half that with a coupon. Avery iron-on transfer paper, on the other hand, will cost you about $15.00 for a package of twelve sheets. Either way, it's still a lot less expensive than purchasing them already made. One sheet made me 27 labels for the colorfast fabric sheet method, and 49 labels for the ribbon or muslin method. When you do the math, it's a bargain either way, plus you can have as many different styles as you want!
When designing these in your computer program you should place them 1/2″ apart so that each label has a 1/4″ border. For my sample, I made mine a little further apart and had to do a lot of extra trimming. Won't do that again, too much wasted time. But I will remember for next time.
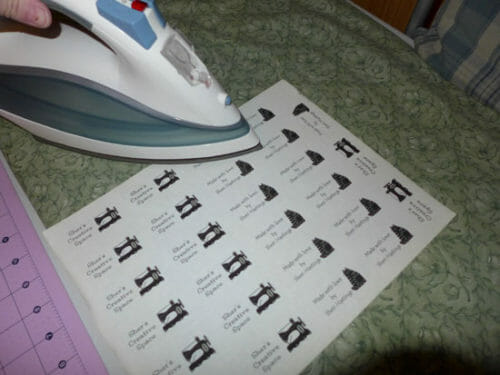
When printing these labels out, print them at normal quality ink setting, plain paper setting, and do not flip the image. Do not use steam. These will print out exactly as seen. Be sure to load your printer so the image will print on the fabric side of the sheet.
After your sheet has been sitting to dry for at least 10 minutes, remove the paper backing from the fabric. Iron for about 2 minutes.
For your colorfast treatment, rinse gently in cold water. Lay flat to dry. You can dab excess water off with a clean paper towel. Do not rub.
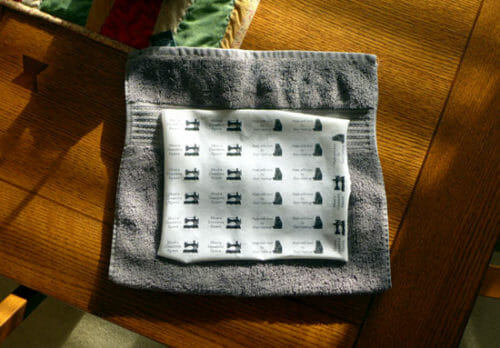
Once dry, iron but don't apply too much pressure because you could distort your fabric. Cut labels apart. A rotary cutter helps tremendously with this part. If you don't have one, just be super neat with a nice pair of super sharp scissors.
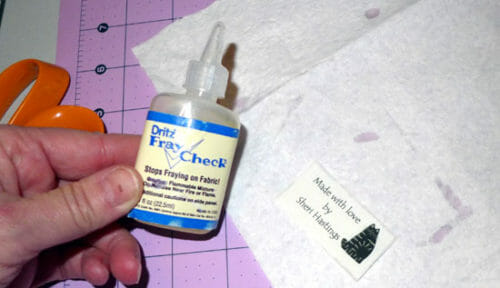
Before you stitch them to your item, you are going want to secure the edges. I used a little Fray Check along each edge. It will dry clear. If you don't have Fray Check available, use a craft glue that will dry clear but water it down a little bit. Test it on a scrap first.
Once the glue has dried, you can stitch them at all 4 edges using a zig-zag stitch or a straight stitch. I personally like the look of the straight stitch. It is also helpful to set your machine so the needle ends in the down position (into the fabric, not above it). I find this helpful since I will be pivoting around corners.
So there you have it! Several different options for you, and they all work quite well. A label on your projects just says that you care enough to put that extra effort and personal touch to your item. If you are in a sewing related business, it adds that professional finish as well!
I'd also like to add for the labels made from the T-Shirt transfer sheets, that you really don't have to spend the entire day cutting and making the labels. Once you have them printed, you can always cut them apart as you need them.
So which is your favorite look for a label? Do you like the folded ones made from ribbon, or do you prefer the rectangles? Do you like them stitched all the way around, or just along the sides? Maybe you prefer the printable fabric sheets. Do tell! I'd love to hear your opinions on this.
If You'd Like To Support Our Site
If you want to help us continue to bring you a wide selection of free sewing patterns and projects, please consider buying us a coffee. We'd really, really appreciate it.


Love this! I think I’ll go for the printable fabric, since the heat transfer one cannot be ironed on…
I made my labels on grosgain ribbon using a stamp I had made with my shop name, and fabric ink. They are nice but it requires a steady hand and some time to make sure each one comes out level on the ribbon. I really like yours with the vintage sewing machine image. I’m not computer savvy so I wouldn’t know how to size it for my labels. But they’re so cute! Thanks for the easy to follow instructions.
I love this article! I will be using the ribbon half folded one which is less time consuming for me. Also I love how versatile it is! Thank you for posting!!
Absolutely love your instruction. Being a sewist for over 50 years I have all the supplies I need on hand. I can’t wait to try your method. Thanks for the post.
thank you so much!!! I’ve been thinking that I need to do this for some special projects that would merit ribbon labels. I usually use the printable fabric sheets and make gobs at a time but the ribbon label does give a project a certain je ne sais quoi.
I use a different method of ironing cotton fabric to wax paper and placing it in the printer to print. After printing, the wax paper peels off. It was very easy!
The June Tailor sheets are washable but they say not to use detergent. I wonder how long the print will last if the item is washed normally.
I use “June Tailor Iron-On Quick Fuse Fabric Sheets for Ink Jet Printers”. A package of 3 sheets is about $8 at JoAnn Fabrics, and there is also a 10 sheet package available. I buy it when I have a coupon. The fabric comes in white or cream. With the iron-on adhesive already on the back of the fabric, I find that the labels won’t fray, and no stitching is required. You just print your label, cut out, and fuse to the project. Great stuff!
this what I use too Audrey, easy peasy, no muss, no fuss. But I do have a project or 2 that might merit a ribbon label….. I will add to my to-do list to make up some for those “special” projects.
Your descriptions are so clear and easy to follow. Just thought you might want to let others know that grosgrain ( and maybe satin) ribbon can be sealed at the ends with heat. If you’re fast, you can run a lighter flame across the end, or if slow like me, use a candle flame and just bring it close. You’ll see it melt, so have some control.
Have you washed the ribbon labels? I am wondering how the ink will hold up to several washings. Thank you for the tips and tutorial!
Can these directions be printed out?
IT WORKED! I was SO skeptical and I can’t believe it actually worked. I was so fearful that when I ran the cold water over the print that it would run and nothing! It stayed solid on the fabric. I’m making a few teaks and I’ll be ready to go. I tried the last process on the list above. It was crazy simple and I’m just thrilled I can make my labels at home and save SO much money! Thank you so much for sharing this info!
I will be trying to get right I need for my school collection. I need just a simple one and your was so easy to understand thanks for your demo
Thank you. You have so many tutorials that you have shared. I would love to make that quilt, but I can’t even see my most of my sewing cabinet. My pole holding part of my fabric (can we say stash?) finally gave up the will to hold and crashed and broke, and fabric is every where. While I love just standing and looking at it and feeling a lot of it,I’m afraid it’s time to revert to boxes for some of the overload because I would love to be able to SEW, darn it. So I’m getting ready to put on my back brace and start packing. : (
I have my fabric folded and then placed by color into stackable cubes that get stacked 3 high. The open end of the cubes are facing out so I can see everything. You might give that a shot. Walmart, Kmart and Target carry them.
Fantastic. I was looking for something like this. I’m going to give it a try. Thanks so much!
Thank you Sher! Great tips. Another great tip for labels that I found in my web-travels is to use freezer paper to iron on to fabric. Then you run it through your printer. I just cut 8 1/2 x 11 pieces of paper and the fabric I want for the labels. Designed my labels in Printmaster (an old program I have) but like you said, you can use Corel,etc.
This is marvelous. Thank you.
I can’t wait to try this.
I love how nicely these come out! I need to buy an ink jet printer. My laser printer can’t do this!! 🙂 Lisa
Thanks for the thorough tutorial, Sher. Pinned for future reference and featured over at ‘Threading My Way’.
One tip I have heard is that you should leave your transfer paper to “set” for 24 hours before applying it. That is supposed to help a lot with a better quality transfer. I tried it once, and it worked great, but I don’t do it that often.
It’s a great idea, but I was just wondering will the ink run?
Hi Mary, if you use the Avery T-Shirt Transfer Paper, it’s a good quality transfer and it’s the same thing you would use for making T-shirts which are washed over and over again. I haven’t had any problems.
It has not happened on mine. But I would suggest testing the method you use before using your labels.
As CatheeB asked, do you notice the Avery transfer sheets leaving any kind of film or adhesive look? I used the Jolee brand from Joann fabrics and I was so sad to print and iron mine only to have it look like they are clear stickers that I stuck on there. They also feel find of stiff. I was hoping to find a transfer paper that would let the empty space wash away and leave just the printed stuff behind. Any ideas?
Hi JoAnna. If you examine the label very well, you might be able to see where the transfer paper starts. But to be completely honest, you have to look for it. I’ve heard that other transfer papers do tend to leave a very obvious cloud or shiny spot that can be seen. The ribbon is so narrow, and your image covers pretty much all of it, with the exception of the finished edges of the ribbon, you wouldn’t notice it if it did show. Just be sure to use the parchment paper between the iron and the ribbon. That could be what makes the difference.
JoAnna, this is the exact brand I used, and you explained it perfectly. If you find that the other product works to your satisfaction compared to these, please post. I am very interested. I used the Jolee’s on satin ribbon. Very cheap looking results.
This is so cool! Thanks for such detailed instructions!
Sher, your labels look wonderful. I have used the ink jet transfer sheets before (Jolee’s easy image with the Wilton logo on the right side of the package). They left a white edge around the design even though they were for light fabrics. I don’t see that around your labels. I am wondering if the June Tayor product does the same thing. I thought the Jolee’s made my labels look cheap. I cut them tp fit a 7/8″ white satin ribbon.
I had quite a surprise when I got the link to this in my email. I’ve been impressed with how customized the internet et al has become with Google & Pinterest & Facebook all targeting me. But when these labels had MY name on them, Wow. Blew my mind. Then I realized that you use Sher as well. ROFL. Thanks for brightening my day; and thanks for the information presented. I am just getting into quilting and will need to be making labels soon.
As a person who is bothered by the sew-in labels being scratchy, I wouldn’t use the Fray Check option myself. But thank you for all the different options!!!
Those look great!
I have used the inkjet printer method to make labels for my quilts. I don’t leave the edges raw; I always turn them under. If I remember to make the label before I attach the binding, I put the label in a corner, where 2 sides will be included in the binding seam. If you only want to print one label at a time, make sure you set up a template in your computer, and then designate the bottom part of the template for that label. That way, you can print one label at a time. I use Print Shop or some of the Avery on line templates.
Thank you for the wonderful tutorial!
Thank you so much! Any chance you would do a quick video tutorial? I love your videos and patterns.
How do you keep your Ribbon from melting?
If you read through the directions, that is why you use the parchment paper. So that the heat from the iron doesn’t melt the ribbon.
It’s ridiculous how perfect the timing is for me to read this posT!! I really want some new labels but my stumbling block is the image I want for my logo. Making them myself will eliminate that and I will be able to get just waht I want! . I love the look of the ribbon labels but I’m worried they might wash away faster, so I might give it a try with muslin. I have to figure out my label and then bite the bullet and give it a try! Oh, and I have to wrap my brain around the whole ink jet ink not washing away with water thing!! Thank you so much for this post!!
Absolutely marvelous tutorial! Thank you so much!
Perfect! This was just what I needed, thank you!
Thank you! Now i need to figure out how to get everything i want to say on a label.
I’ve made labels using the fabric but I’m going to try the transfer to ribbon method – really like that look!
BTW you don’t use an ironing board because it is not hard enough. There is give and the pressure will not be even when doing the iron on.
I think this is the best tutorial I have ever read, very well written and great ideas and instructions. Thank you so much.
Great tutorial!! Thank you!
Hi Sher, what a very good tutorial on making labels! I have everything to make labels, but an inkjet printer. ?. I love your tutorial and will try it, as I make so many things to sell, as well as gifts!
I’m glad you find it useful! I did find one transfer paper for laser printers that looks like it could be a possibility for you. I’ve never tried it though.
Lasersoft Ez Peel Transfer Paper
Thank you, Sheri! I will try the Laser Ez Peel transfer paper and see how it works. If this project turns out, I will definitely let you know. Again thanks for the quick response!