


This pattern isn't for beginners. I'm calling this an Intermediate pattern and as such, it comes with regular pattern-style instructions rather than the full step-by-step tutorial you might find with beginner patterns. So some previous experience in sewing bags before and an understanding of construction would be useful for this project.
But it's well worth it – this is a great bag. Previously my husband told me my Expanding Nautical Tote Bag was the best bag I'd ever made, but now he says he thinks this one is even better – looks like it was from a ‘nice shop' he said. Praise indeed!
Sadly I had a bit of an interfacing issue and my interfacing came away in parts when I turned my bag, giving it a bit of a crumpled and bubbly look, but I can live with it. When I get more supplies, I'll make this one again, maybe in a stripe!
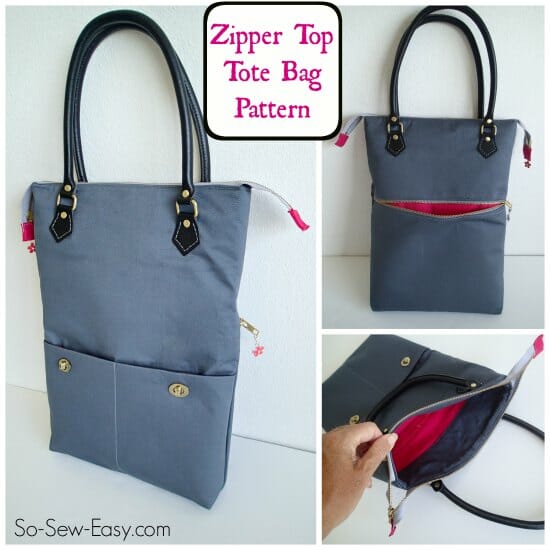
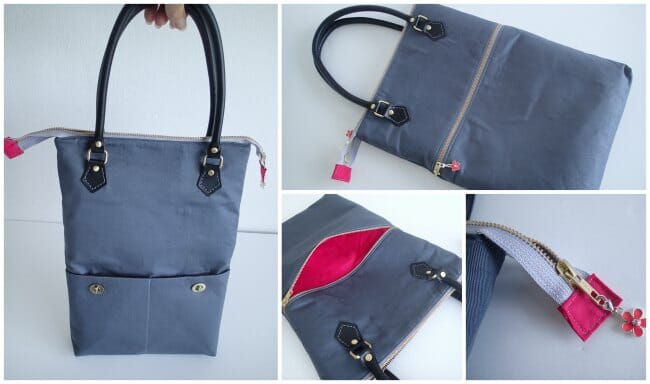
The Zipper Top Tote
Features:
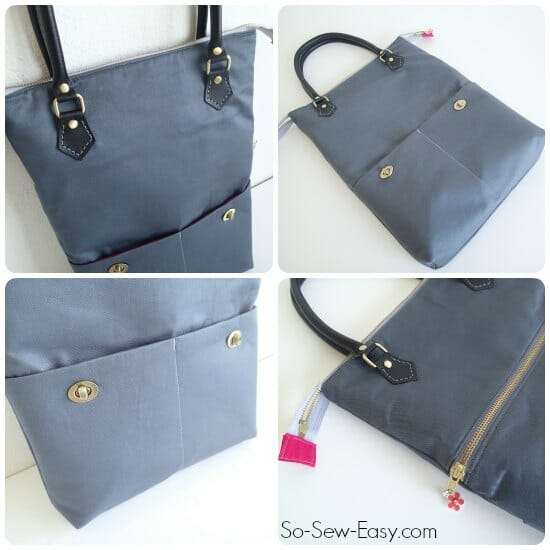
- Full-length top zipper as a feature
- Two front slip pockets with twist locks
- One full-width outside zipper pocket on the back
- Ready-made handles
- Zipper pocket and slip pocket inside
- Finished bag measures about 12 inches wide by 15 tall, plus handles.
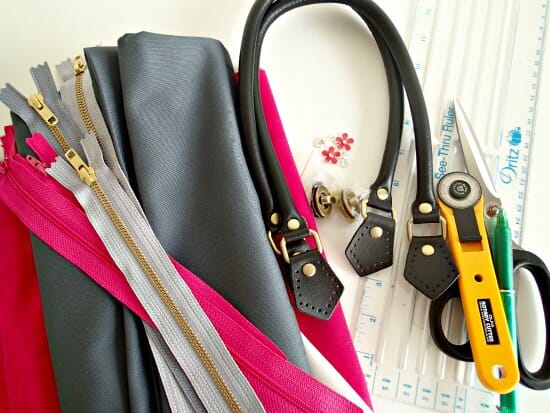
Materials needed (to make one the same size as mine):
- Outer fabric – 1/2 yard ( I used an organic cotton twill from Fabric Mart)
- Lining / contrast fabric – a bit less than 1 yard
- Two small twist locks
- Ready-made handles
- Top zipper – 16 inches
- Back zipper – 12 inches
- Internal zipper – 6 inches (suggested)
- Dangles – cute pink flower dangles – optional
- The pattern download
I used materials that are all available from Amazon.
Fabric Suggestions from Amazon.com
Pattern Download
We're going to continue to use the Payhip webstore to distribute our patterns.
Our patterns are still free, but now you now have the option of making a small contribution if you like our work! We'd really appreciate it and it will help us keep going with new and fun designs like this. Even a dollar or two really goes a long way.
Thanks so much in advance for helping us out. You can use any credit card and you don't need a Paypal account, although you can use one if you have one.
Instructions on how to make the Zipper Top Tote Bag
Full step-by-step and photo instructions are included with the download PDF file. Abbreviated instructions and small photos are included here so you can see if the pattern is for you.
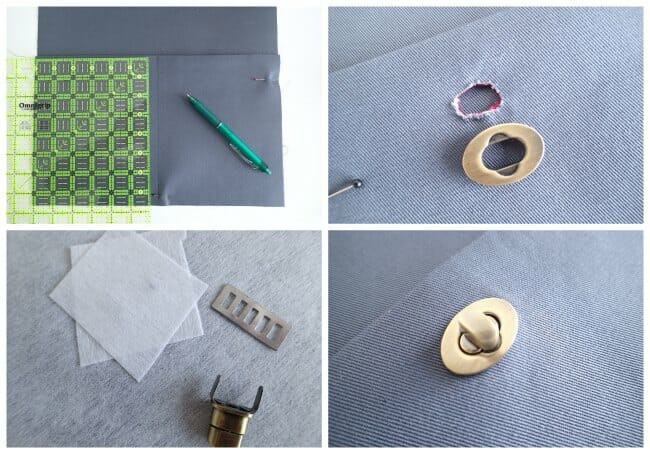
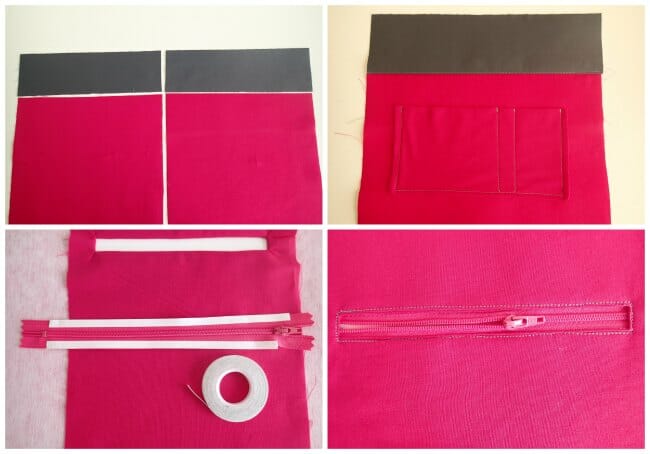
Cut and interface all of your pieces. Assemble the outer front pocket by stitching the pocket lining to the top edge of the pocket. Turn and press.
Line up the pocket on the outer of the bag and pin in place. Draw a line with a disappearing pen down the center of the pocket top to bottom, and stitch through all layers, reinforcing the stitching at the top. Install the twist-lock hardware.

Assemble the back of the bag. Take your lower back piece and the zipper. Center the zipper at the top edge with the right side of the zipper facing the right side of the fabric. Add the pocket lining on the top, face down. Match up all raw edges and stitch with your zipper foot. Press and topstitch.
Take the upper back piece and match it right sides together at the other side of the zipper. Bring the bottom of the pocket lining up to match to the raw edges and stitch through all layers. Press the lining towards the bottom and topstitch along the top of the zipper.
Assemble the lining. Match the facing at the top of each lining piece, pin, and stitch. Press the seam between the two and topstitch. Check the length of the lining pieces to the outer pieces and trim if necessary.
Inside pockets. Add a pocket or pockets of your choice to the lining of the bag now. You can read here how you can add the perfect slip pocket, or how to add in an internal zipper pocket. I'm adding a zip pocket to my bag on one side and a small slip pocket on the other side for my phone, keys, and pen.
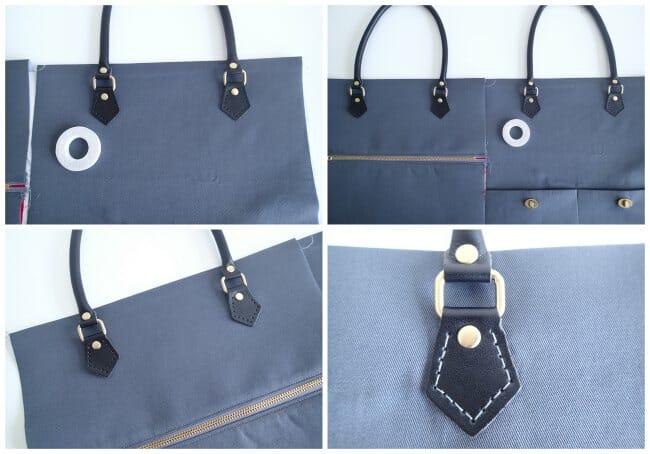
Add in any handles and decorative studs or hardware at this point. I used ready-made handles. To place them, turn over ½ inch at the top of your fabric to check for placement. Make sure the handles are level and equal on both pieces, front, and back.
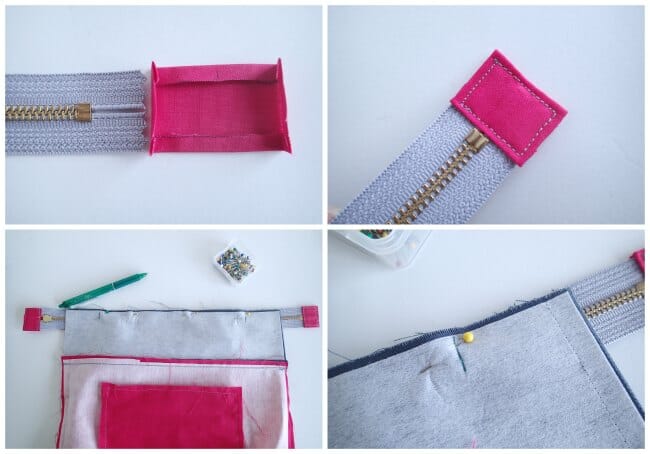
Prepare and add your zipper tabs. Repeat for both ends.
Lay the outer fabric face up. Line up the zipper on top and center it with the same overhang at either end. The zipper teeth should be facing the right side of the fabric. Place the lining on top, face down. Mark in 2 inches from the edge of the fabric on each side and stitch through all layers between these 2 marks only, securing the zipper in place.
Repeat for the other side of the bag and zipper.
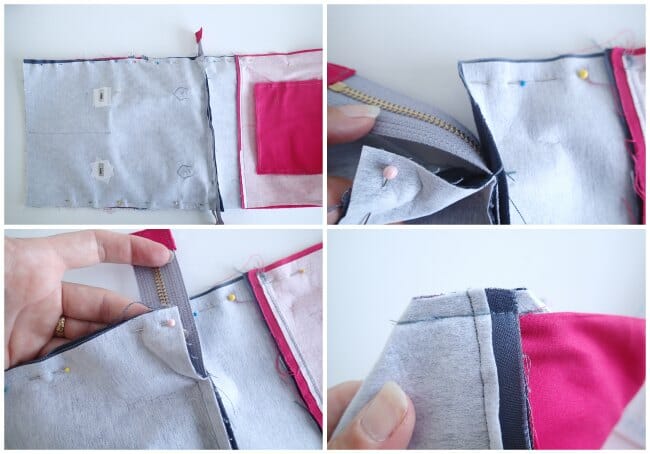
Flatten out your bag with the right sides of the outer fabric together and the right sides of the lining together, and the zipper in the center. Match up seams and edges carefully and stitch around the perimeter. Leave a large gap in the side seam of the lining to turn the bag right side out later.
Box the corners of the bag, both the outer and the lining with a 2-inch line across each corner.
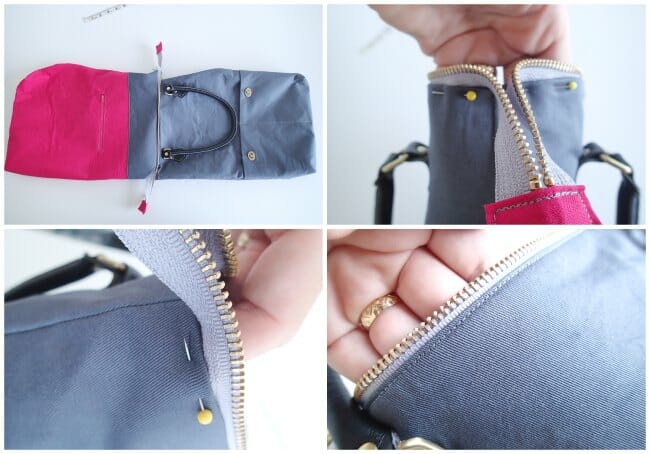
Turn the bag right sides out and give it a good press. Press the fabric carefully away from the zipper, front, and back. Close the gap in the lining by hand or machine. Push the lining down inside the bag. In the gaps under the zipper at each end, turn in the raw edges, match up seams, and pin.
Topstitch all the way around the top of the bag, making sure to push the lining down and away from the back of the zipper as you go. Close the gaps under the zipper. Add on your cute zipper dangles for a bit of fun. Give everything a final press and you are done.
I hope you enjoy your bag as much as I love mine. Do you have any ‘must-have' features on bags that you always look out for or add when making your own?


I “flagged” Sandra by mistake! Trying to get a look at her creativity, which you mentioned in your reply to her.
Beautiful bag, by the way. Great colors.
Thank you for this lovely bag pattern. Cintia from Brazil
I appreciate your patterns and that you looking at options to Bluprint, which I find very intimidating. I’d love to be able to contribute AFTER seeing the pattern. Perhaps a preview page of pieces (like the back of a purchased pattern) could be on the page with the pattern photo itself.
I want to learn how to do the freezer paper photo transfer to fabric for bags. This would be a good one to try I think. I also think I would like to try it as a front pack bag with a strap in the top right corner connecting to the bottom left that has gone around my back. I may make it a bit bigger as I want there to be room for a book as well as all my usual stuff like cell, wallet, sunglasses, drinking bottle. Thanks so much for your generosity. I buy my fabrics mostly from second hand stores either in a garment that I take apart or from their fabrics. I am excited to try this. Just need to carve out the time to do it.
Thank you for the tutorial. :)) Are you in Singapore?
I am, however I am in Chile at the moment. Wow! I just looked at your Instagram is lovely the things you do. I don’t quilt, I wished I had time…
Thank you for all the tutorials . :))
It is my pleasure Sandra! Happy you are here!
Thank you for this lovely bag pattern. It looks great and as I have made some bags before I think I will be able to make this one as well.
The pattern links are not working.
Hi, I’ve checked the links and everything is working fine. The pattern link is in the orange box. Please give it another try.
I like the pre-made handle idea! Did you sew those on by hand or figure out the stitch length for machine sewing? Debbie
Yes I sewed them by machine. It was pretty easy to just turn the handwheel and figure out the correct stitch length. Make them stronger and neater than hand sewing.
Zipper top tote bag printable pattern link is broken. (re Nov. 5 email)
Hi Maureen, I’m not sure what email you are referring to – did it come from me? I’ve just been to this article and checked the link and it does bring me up the pattern page so I’m not sure what isn’t working for you. Can you give me more details.
Beautiful bag and great colours. Nice job with this tutorial!
Megan |
Very nice bag, lovely colours too. Thanks for the pattern and tutorial
High praise indeed from your husband, Deby and a fabulous bag.
Love this bag!!
Thanks Anne, you are wonderful as ever. I very much appreciate the sharing.