


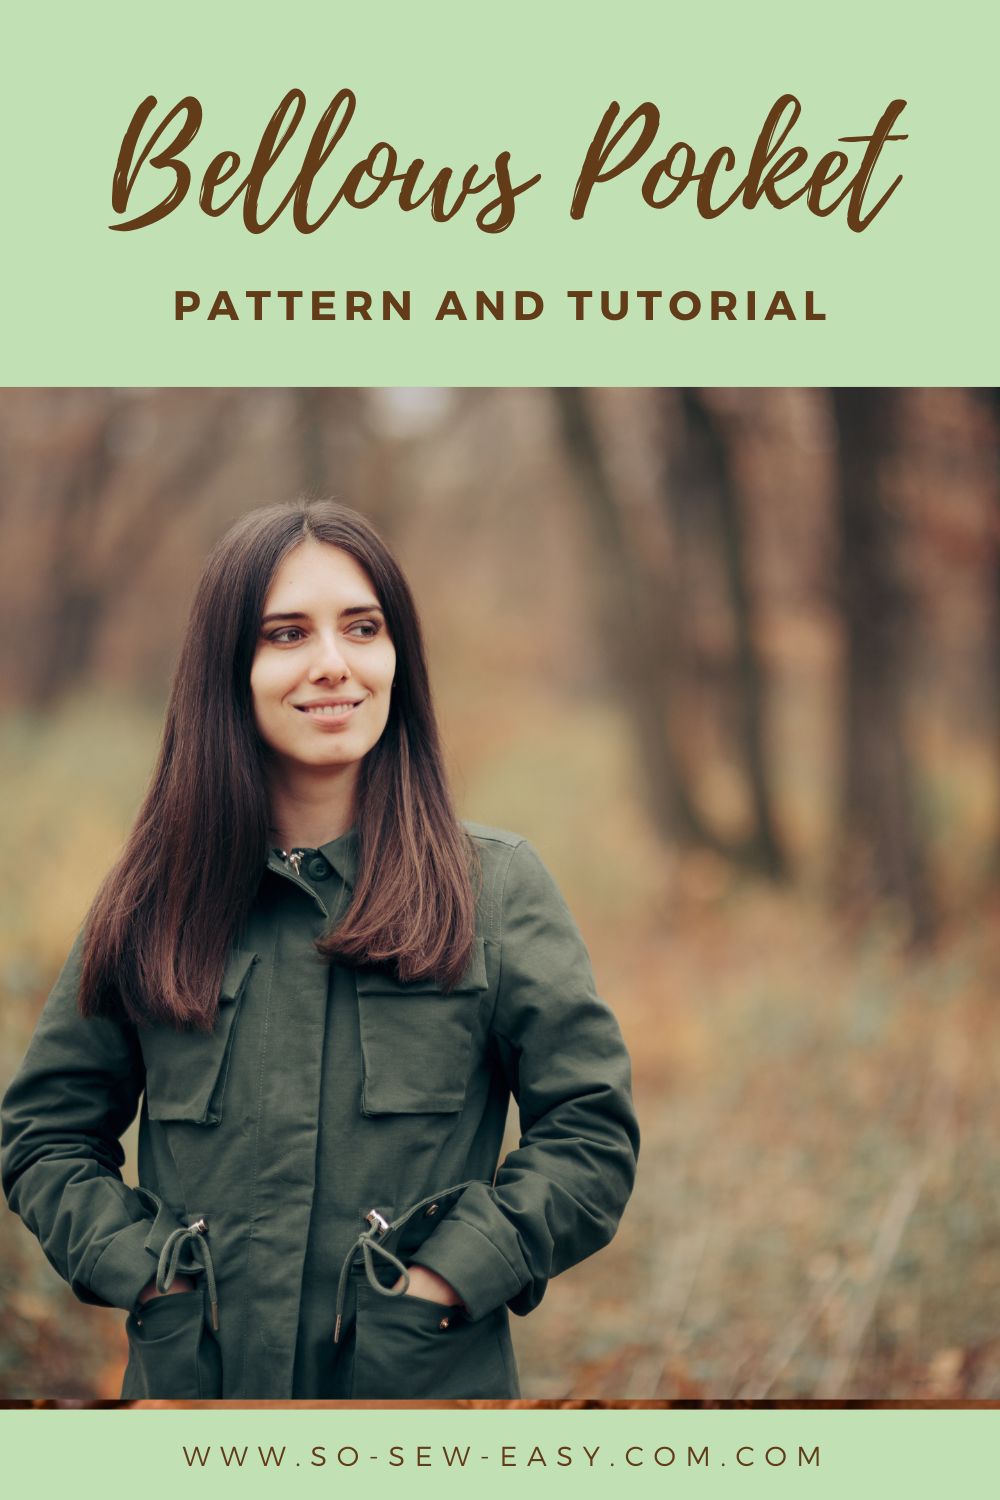
This Bellows Pocket Tutorial will be essential information on this blog for the coming months, if not years. I will be referring back to this tutorial often, so I will ask you to use the print-friendly button on the side of the screen and print the tutorial.
Bellows Pockets are also known as Gusset Pockets and are part of the applied pockets category. It derives its name from the pleats that, when not in use, allow the pocket to lay flat over the garment, but when in use, it expands. This utility and low profile make it very popular in military uniforms and sportswear.
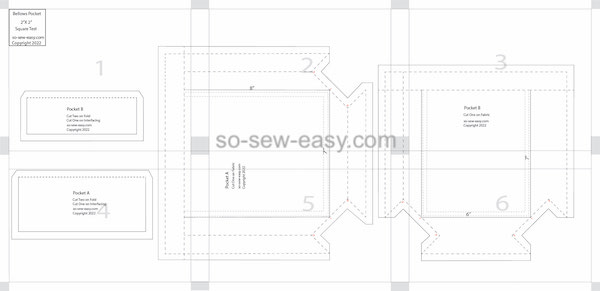
There are many designs of bellow pockets, as the drawing underneath shows you. Many can be complicated to sew, so I have worked a couple of hours to develop the easiest pattern to share with you. I do hope you find the pattern below practical and accessible.
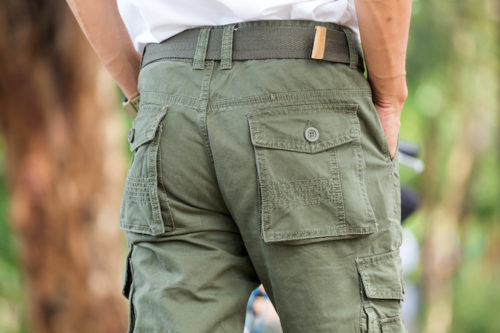
Where To Use A Bellows Pocket
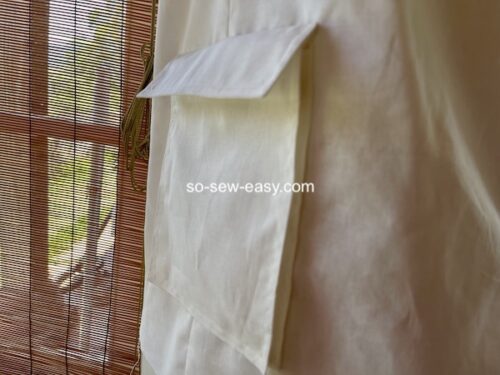
Bellow Pockets look great on sports coats both for women and men.


Materials
- Erasable pen
- Ruler
- Thread to match the fabric
- Pins
- Sewing machine
- Interfacing
Pattern Layout
How To Download The Bellows Pocket Tutorial
We will continue using the new Payhip web store to distribute our patterns.
Our patterns are still free, but now you have the option of making a small contribution if you like our work! We'd appreciate it, and it will help us keep going with new and fun designs like this. Even a dollar or two goes a long way.
Thanks so much in advance for helping us out. You can use any credit card, and you don't need a Paypal account, although you can use one if you have one.
Sewing Skills: Advanced Beginner
You need to be able to sew a straight line. You must be comfortable with your machine sewing an applied pocket since the stitching line will be seen.
How To Sew A Bellows Pocket
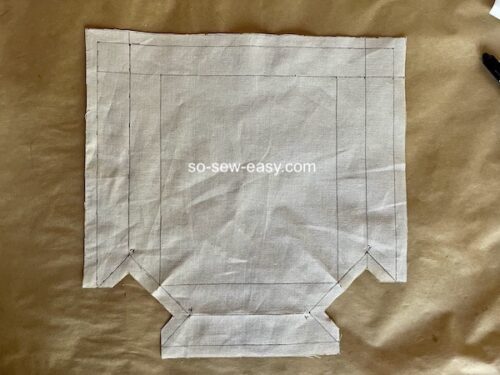
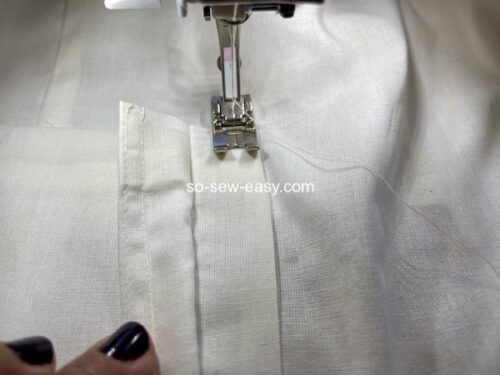
Step One: Making The Pocket
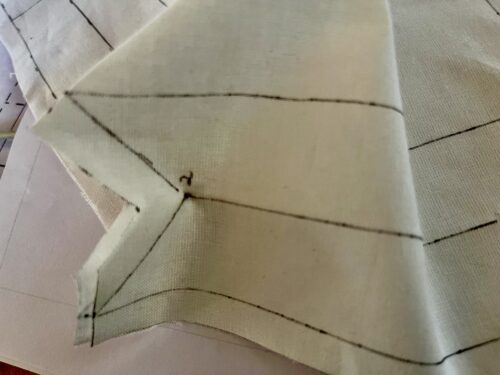
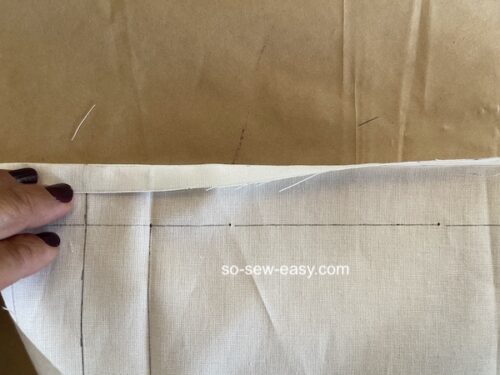
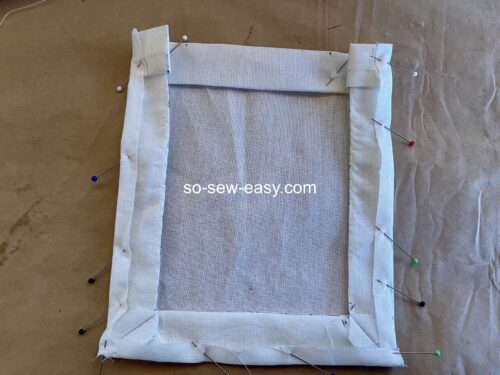
- Working on the wrong side of the fabric. Trace the pattern using an erasable pen or a tailor's chalk. Match points 2 and 2 by folding the corner of the pocket.
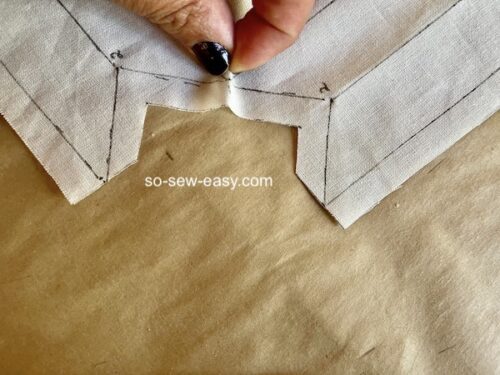
- Sew from points 1 to 2 pivot and continue to point 3.
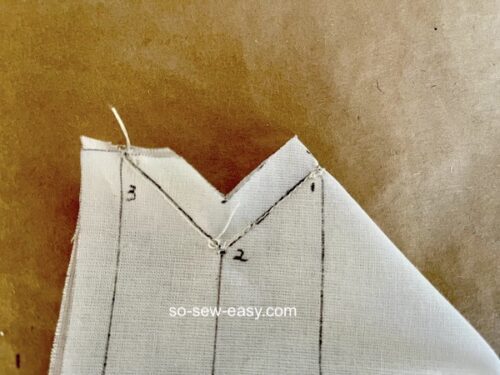
- Snip to point 2 but not through
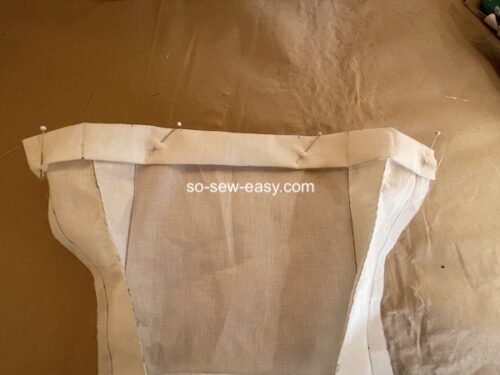
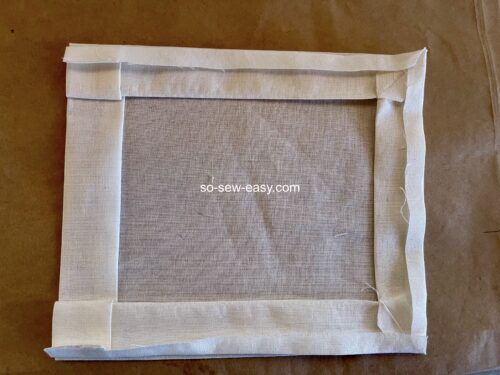
Turn the pocket inside out.
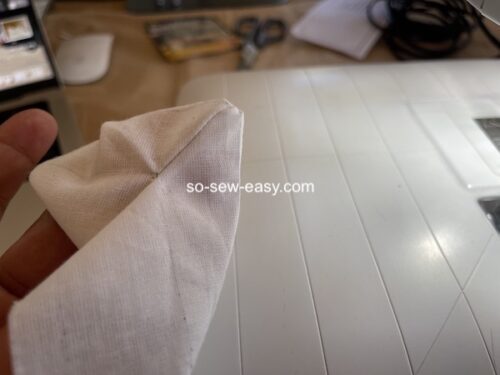
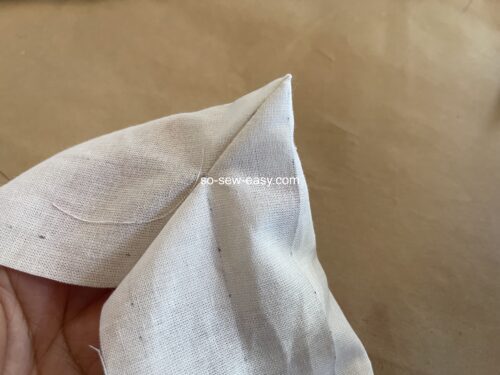
Finger press the pocket to make a rectangle using the corner you just formed.
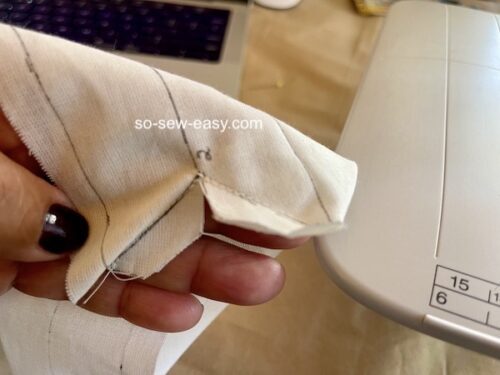
Turn the pocket; we will be working on the inside of the pocket.
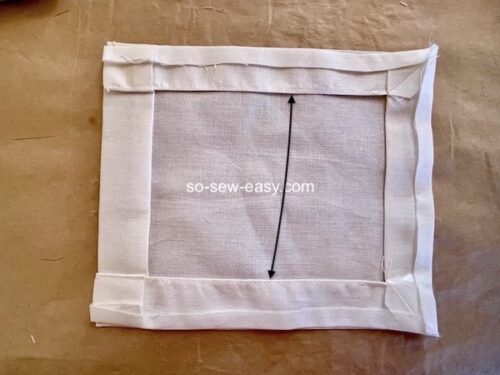
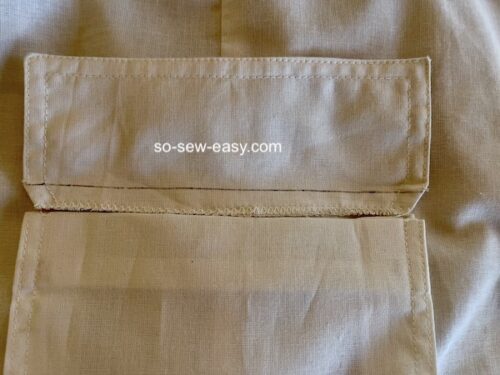
Turn the top edge 3/8″, finger or iron press.
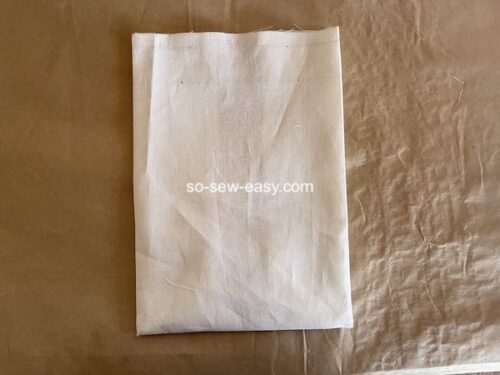
Turn the top edge again 1″. Iron.
Fold the center line to create a box.
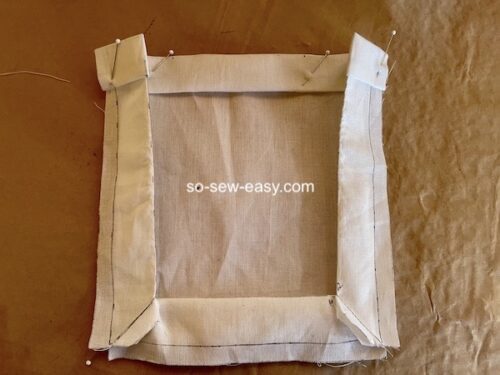
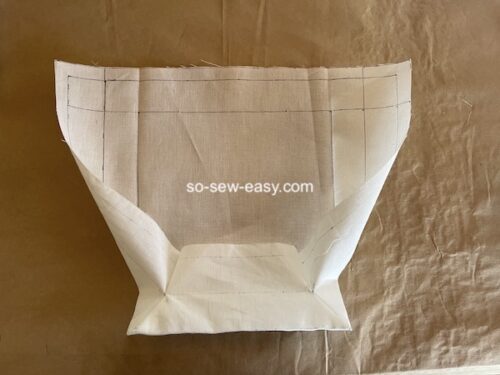
Finger press the corner seams.
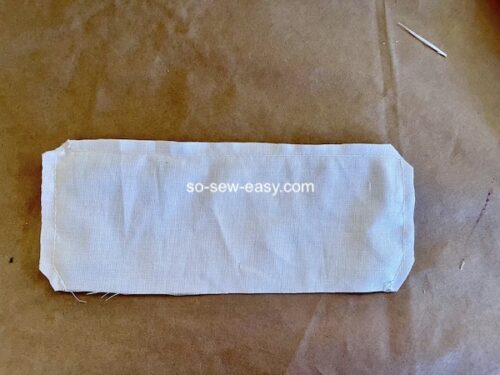
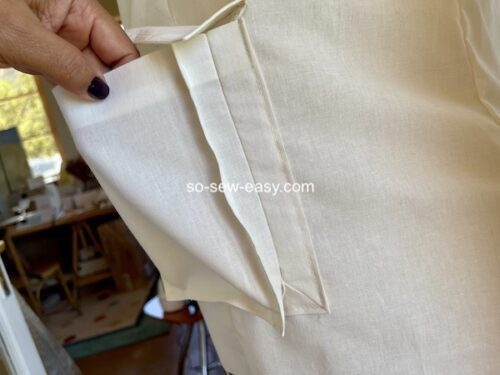
Fold the pocket edge at the bottom and the sides in, topstitch the insides and iron. I rather topstitch so the pocket lays as flat as possible.
Continue to fold the bottom edge and the left edge.
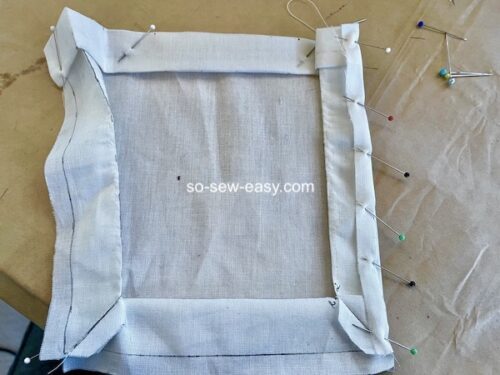
Iron the pocket.
Topstitch the inside edges, this is optional, but I like to do it so the pocket keeps its shape when used.
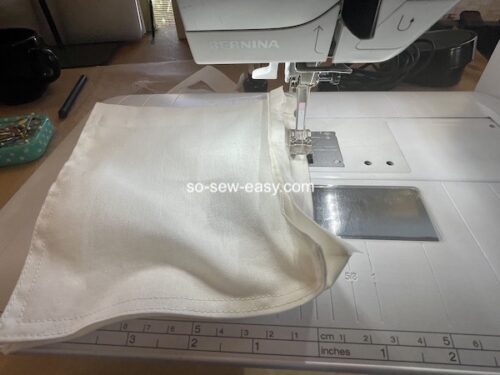
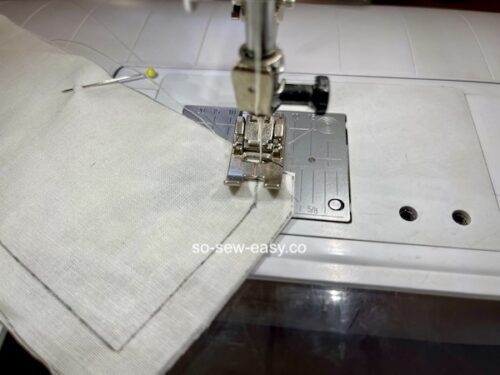
Now we topstitch the front of the pocket.

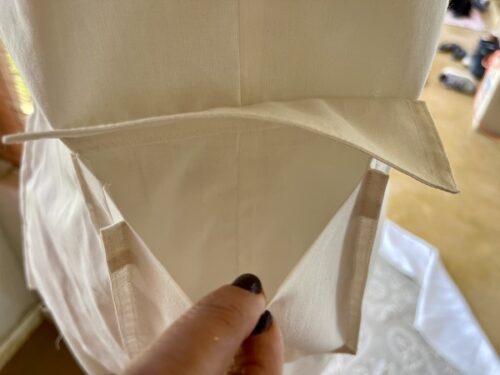
Step Two: Making The Flap
Cut the two pieces of the flap, the wrong side together, and stitch at 3/8″. Start at the slanted side.
Reduce the seam allowance by half and clip the corners.
Turn the flap inside out, iron and double stitch the flap.
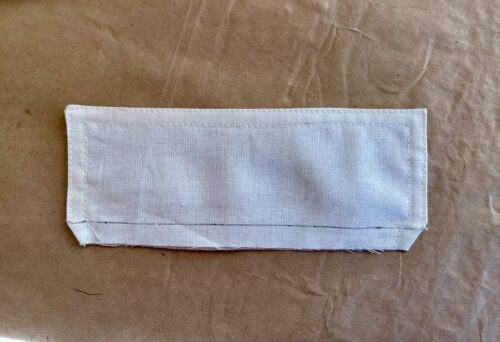
Zigzag or serge the raw edge.
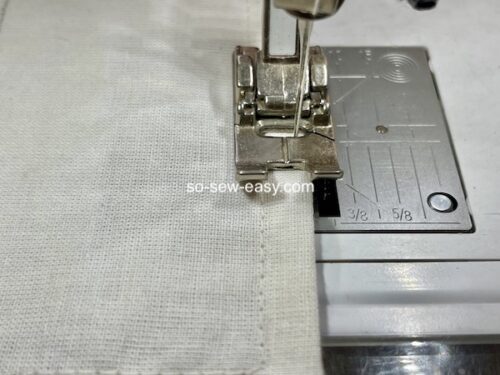
Step Three: Sewing The Pocket
Pin the bag of the pocket, lift the top and sew at 1/8″.
Pin the flat on top of the bag of the pocket.
Need A Different Kind of Pocket? Try The applied pocket with a zipper
Check out this one, from the Small Backpack Series.
Come back next week when we will be putting this pocket to good use by making a pair of cargo pants. You will need this tutorial and pattern to go along with it.
I hope you have a lovely week; in the meantime, let's keep the world together one stitch at a time.


Great tutorial. Thank you. Will you be designing patterns like the jackets or pants in the future to use with the pockets?
Hi Carol, yes I will stay tuned
You guys always do such great in-depth tutorials! Thanks!
Hi Suzanne, I am in charge of tutorials, pattern making and photos; my son does all the back work, editing and history posts. My husband pays the bills and is in charge of security, and my daughter sometimes lets me take a picture with the clothes that need a body since I am the photographer. That has been so-sew-easy since 2016. I wish I could have more people helping out; I would be able to put out patterns for sale if I had a couple of people or 36 hours day.
Kind regards, thanks for taking the time to read this blog.
Just what I’ve been looking for! I want to make a parka and I want bellows pockets on it, but the few patterns available do not show how to do this. Now, if only I can find the pattern download link . . . am I just missing it, or did you forget to include the URL?
It is there before the sewing skill heading.
superb tutorial….and I agree with topstitching the inside edges…little effort for a fine finish.
Yes, it is beneficial when you put something inside.