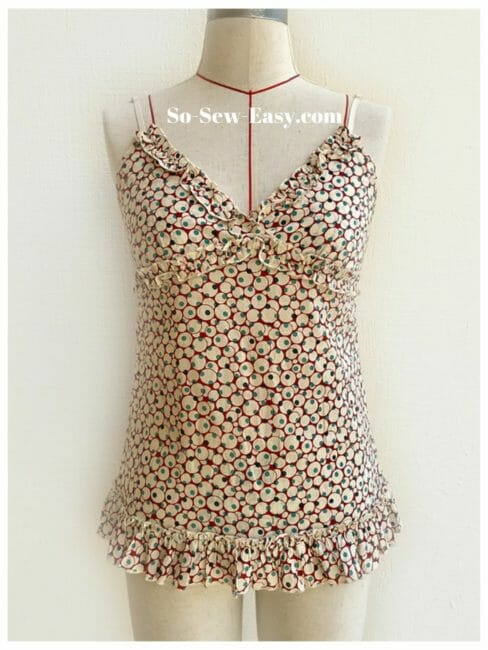
I know that this camisole top pattern will bring a smile to your face because it's one of the most versatile patterns out there. All you need to do is change the type of fabric and you can make numerous tops; from comfy pajamas all the way to a lovely top for a fancy party.
For now, though, we will concentrate on making this camisole top to use with the walking shorts from a few projects ago. For the fabric, I am using some lovely cotton that I picked up years ago from Japan. The best fabric for this project is 100% cotton woven or knitted, but you can check my other fabric suggestions below from that are available easily on Amazon.com.
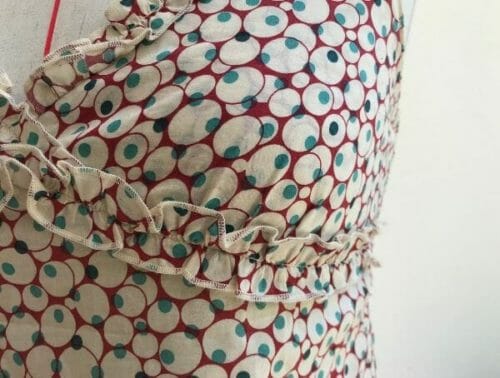
This camisole top has an easily adjustable bra strap and underbust gathers to give a more flattering look and room for the bust.


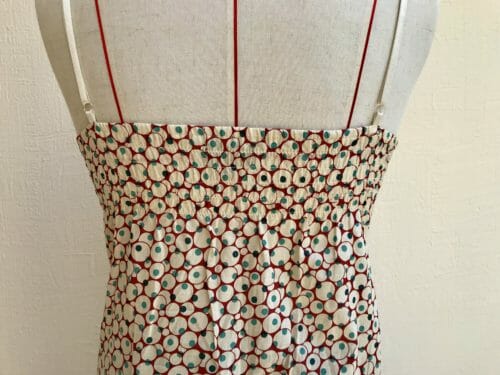
There is a shirred back to allow you room for movement and better support should you choose to not wear a bra.

And there's a cute ruffled hem for a more feminine look.
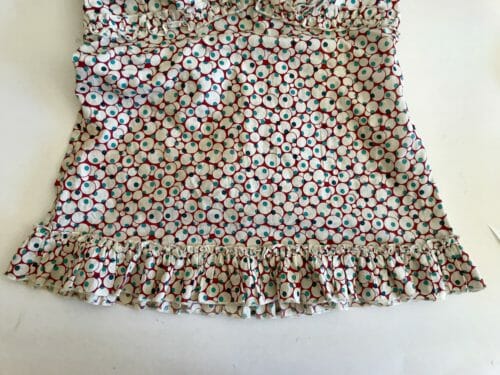

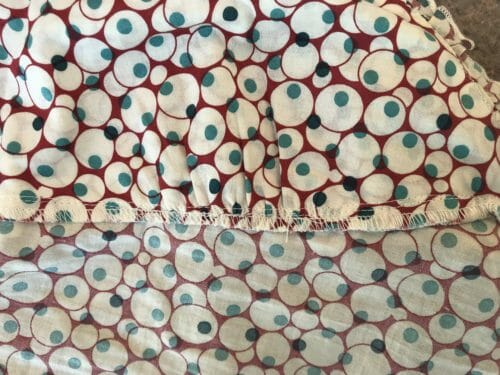
This project is also a perfect opportunity to practice changing the dials of the overlocker (which can be tricky at first). I had the opportunity to test the amazing Bernina 1300 MDC for this project. I must say the results are professional and I love the machine, however, the price of the machine left me gasping for air. I normally use a Bernina FunLock 008D. It's very old and in need of maintenance, but it still manages to do the job.
Really, any overlocker can do a narrow hem such as the one I was able to accomplish, however, be sure to read your manual. There is great information in those pages and all you need to know to be able to get the most out of your machine.
Sewing Level: Intermediate
In order to succeed using this camisole top pattern, you need to know how to make a bra strap, shirr fabric using your sewing machine, and make a tiny hem. Unfortunately, we do not have a tutorial on how to shirr fabric using the sewing machine, so I will write it up in the next few days. If you can't wait for that, or are allergic to elastic or need more support for your bust, I recommend this technique: shirring without elastic thread.
If you do not have an overlocker but still would like to have the ruffle detail you can use a double edge lace.
Body Measurements
| Size | 4 | 6 | 8 | 10 | 12 | 14 | 16 | 18 |
| Bust | 31 1/2″ | 33″ | 34 1/2″ | 36″ | 37 1/2″ | 39″ | 41″ | 43″ |
| Waist | 24 1/2″ | 26″ | 27 1/2″ | 29″ | 30 1/2″ | 32″ | 33 1/2″ | 36″ |
| Hips | 33 3/4″ | 35″ | 37″ | 38 1/2″ | 40″ | 41 1/2″ | 43″ | 45″ |
Fabric Suggestions from Amazon.com
Materials For The Top
- 1 to 1.25 yards of 100% cotton
- 1 spool of elastic thread
- Thread to match
- 15 to 20″s of 1/4″ elastic
Materials For The Bra Straps
- 40″ of bra strap elastic
- 2 rings the width of the elastic
- 2 sliders the width of the ring
Tools
- Sewing machine
- Overlocker
How To Download Your Camisole Top Pattern
Use the latest free version of Adobe Reader, use “Actual Size” and “Landscape” format.
Pattern Download
Our patterns are still free, but now you now have the option of making a small contribution if you like our work! We'd really appreciate it and it will help is keep going with new and fun designs like this. Even a dollar or two really goes a long way.
Thanks so much in advance for helping us out. You can use any credit card and you don't need a Paypal account, although you can use one if you have one.
Pattern Layout


How To Sew Your Camisole Top
This pattern does not have a seam allowance. I like to work with a 3/8″ (1cm).
Make The Bra Straps
I have not written a separate tutorial on how to make a bra strap, however, I have used them in a few other So Sew Easy patterns. If you can not wait until next week when I write the instructions, please have a look at the bralette instructions as the straps in that project are exactly the same.
Sewing The Front
Gather each cup about 2.5″ spreading the gathers evenly right under the nipple.
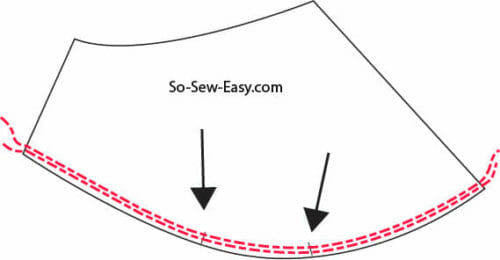


Gather all four cups.
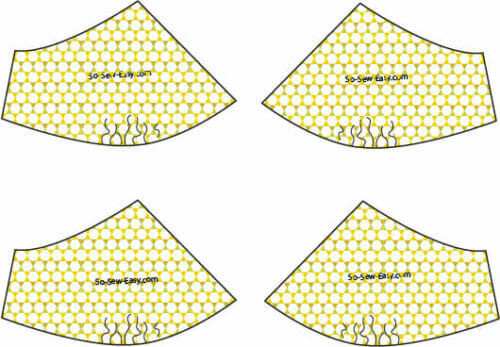

Place two cups print side up and lay the end of the bra strap towards the top and allow to hang towards the gathers.
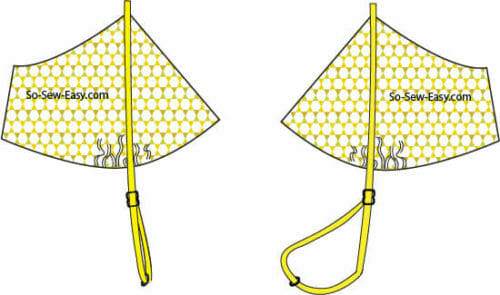

Lay the other two cups print side down and sew following the red stitches below.
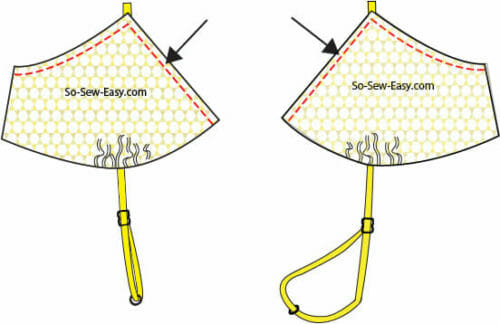

Clip the corners and reduce the seam allowance to 1/4″ (.5cm). Turn the cups right side up and iron.


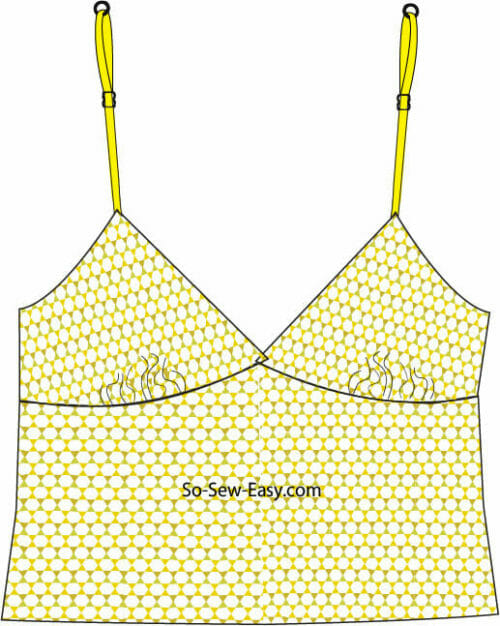
Join the cups to the front bodice start front the side to the center. Overlapping the cups at the front.

Making The Ruffles


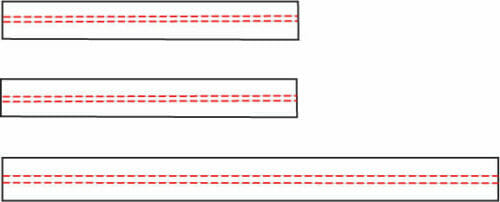
Measure the length of the top of the cup and double it in size. Measure the underbust seam and double it in size.
Make a small hem with your overlocker or make a small hem with your sewing machine. The ruffles are Your length X 1″ wide.
Gather the ruffles in the middle.

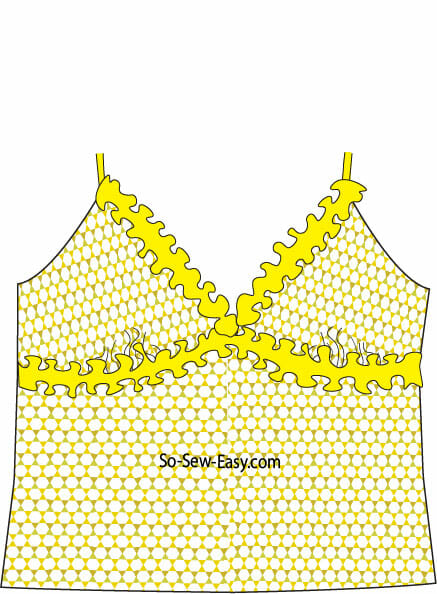

Sew the ruffles starting at the top of the bust towards the center then add the one under the bust. Pull out the gathering thread.
Making The Back
Serge the top of the back.


1 1/4″ from the serged edge start to shirr the fabric. Follow the table on the pattern for your size.


Print sides together, sew from the hem to the armpits. You will notice a 1/2″ difference. This space is where the 1/4″ inch elastic will go. Pin the elastic to the seam allowance and fold the edge over the elastic and sew. Overlock the sides and the hemline.

Adding The Hem Ruffle
To make the hem ruffle you need to cut two strips of fabric 2 1/2″ in width times the amount shown on the chart below. Choose according to your size. You will need two strips one for the front and one for the back.
| Size | Length |
| 4 | 44″ |
| 6 | 47 3/4″ |
| 8 | 48 1/2″ |
| 10 | 49 1/4″ |
| 12 | 50″ |
| 14 | 50 3/4″ |
| 16 | 51 1/2″ |
| 18 | 52 1/4″ |
Sew the ruffle to the hem at 3/8″ from the edge, and you should be all done!
Also, if you are using knit, the best hem to use will be a lettuce hem. Check out the tutorial below for a great guide.
I hope you are able to use your overlocker with this camisole top pattern and get some good practice with that very useful machine.
I'm sure this camisole top pattern will become a regular in your summer wardrobe. It's just so easy to change and easier to wear. This top looks so great with a cardigan, under a jacket or to simply with your favorite pair of shorts.
Anyways, look out for more tutorials coming soon. Until then, Happy Sewing!


You have so many nice patterns – was wondering if you have anything for the more “mature” woman? Something that helps to hide the ‘batwing’ arms, but not restrictive?
beautiful
Does anyone know if the sizes for the camisole are US or UK/eoropean sizes? I couldn’t figure out what country this is from. I’m in UK
Hi Amanda, please check your bust and find the size you need. this are based on my own mannequin size 38 European standard sizing (not UK). Please use this site to convert to cm https://www.inches-to-cm.com/
Hi – are the sizes US or UK, European etc? Thank you so much
Neither, I have haute couture mannequin I base the measurements on. Please have a look at the Body measurements and find your size based on the bust.
I would also like to see a fba for this. Do you add fabric in on both sides of the gathers or just one? I am a DD/E cup and I always need larger cup sizes or the under bust seam ends up in the middle of my breast or close to it.
To make this a larger cup you need to do a full bust adjustment using the slash and spread method, but it is not that simple I will need to make a full tutorial on this pattern to be able to be explain properly.
Yes I have smilled in reading your message, what a funny project.
Many thanks from France for sharing your patterns.
Hi Helene, i will be in Paris in October, if you are around perhaps we can meet. #soseweasy for Instagram updates. Kind Regards,
Yes I need the FBA for this pattern. Thank you so much for all your useful patterns.!
I done a FBA that way one time. It has been a lot time ago though! Lol! Hard to remember how I did it.
I love your pattern and I’m going to give it a try. At one time I was pretty good at sewing but it has been a long long time. I have a new niece in law who will be having surgery and I top like this would be nice for her. I’m going to give it a try. I understand measuring for length, but would you please tell me the width of the ruffle for the bra section? Thank you.
Great question, I had to go back and update the post since I forgot this detail. Do cut the ruffle 1″ wide but do not use the blade in your overlocker. Let me know if you have any other questions.
Wow, what a refreshing pattern! I will definitely go for it, if my newborn son will give me some sew time again 😉 Thank you Mayra, you are awesome. Greetings from Germany, Jessi
Hi Jessi, nothing like a baby to remind you why life is so wonderful, if you get to have energy for sewing after caring for a newborn I think you just become my super hero. Wishing you tons of energy and inspiration and congratulations!
Your instructions never mentioned attaching the straps to the back. I’m pretty sure this was an oversight that you might want to fix.
The strap gets attached as in the bralette. I will be sharing a separate tutorial to show you.
I really like this, and would love to have a go, but I always have to do a FBA to accommodate my H cups! Any tips on how I could adjust this pattern, without losing it’s delicate nature?
I would try doing what you normally do using an inexpensive fabric. The steps are many for me to be able to explain in any useful way without pictures. This pattern will be easy to adjust since there are gathers in the center of the cup and all you will have to do is to increase the size of the cup from the tip to the gathers the amount required. I tell you what if I get enough interest about a FBA on this pattern I will have a separate post. Hopefully a few are in need of it.
Thanks Mayra, I’ll give it a try.
The pattern is adorable. I’m looking forward to making several. Thank you.
My pleasure, do share a photo on Instagram if you have it. #soseweasy
I just spent over two weeks in the hospital and half of that was in ICU. The last thing I remember was telling those around me that there was no air. When I was allowed to return home putting on my bra was absolutely frightening–I felt i couldn’t breathe once again. The timing of this camisole pattern couldn’t have been better for me. I am not able to pay for this pattern but will tell others and pray, that in a small way, this will pay back for your kindness.
Hi Virginia, wishing a speedy recovery and thank you for your kind words.
Thank you for this really cute pattern and for including slightly larger sizes with it. Love it
It is my pleasure!
Really do need an FBA too.