 So what is shirring anyway?
In preparation for a new project this week, I want to introduce you to a technique called shirring (which is sometimes known as smocking) with a simple practice tutorial. According to Wikipedia, “shirring is two or more rows of gathers that are used to decorate parts of garments, usually sleeves, bodice or yoke.” With shirring, the gathers can be both decorative as well as functional since elastic can be used to draw in the gathers giving the garment more give to accommodate different sizes.
Most techniques you'll see around will show you how to do shirring with elastic thread. Personally, I think that technique has some significant limitations, so I'm going to show you how you can do shirring without elastic thread and using normal elastic. When you use elastic thread, this thread can irritate wearers with sensitive skin. Also, to use elastic thread you need to wind the thread onto the bobbin of your sewing machine and it can sometimes cause problems with the machine because the thread stretches. Finding correct thread tension can be a challenge.
Lighter fabrics work best for shirring. You'll need to use really strong elastic if you're planning to try to gather thick and heavy fabric like denim. For more Tips for Sewing Denim, please review this tutorial.
Shirring without elastic thread
Shirring without elastic thread is a technique that calls for a bit of patience, but the payoff is fantastic! This technique is best used on garments that will be close to the skin like pajama pants, children's clothing or corset-inspired tops where the person that wears the garment has sensitive skin and is bothered by elastic rubbing against the skin. Shirring without elastic thread allows for a bit of movement and room to breath, while also making the garment last much longer than when using elastic thread. For best results, it is better to use 1/4″ or 3/8″ elastic. You can use thinner, of course, but that will depend on your fabric and the design you have in mind.
Where to use shirring without elastic thread?
This type of shirring does not give you a lot of elasticity if you use a thick fabric like damask or brocade, but it will give you the support needed for evening gowns, crop tops, and soft corset tops that do not require a lot of boning. With cotton lawn fabric and 1/4″ elastic, you can make a very soft and glorious pair of pants perfect for a Sunday morning. But I guess my favorite place to use this technique is on self-lined crop tops.
Materials
- elastic
- quilting cotton, cotton pique, rayon, challis linen, or silk dupioni. (You'll need a couple of rectangles of the same size for this practice. Roughly a square foot should be enough.)
- thread to match your fabric
- a loop turner or safety pins
- pins
Shirring without elastic thread tutorial
I am using a scrap of fabric with a dark thread so you can see the stitches better. To begin our shirring practice project, take the two pieces you will be working on right sides facing in,
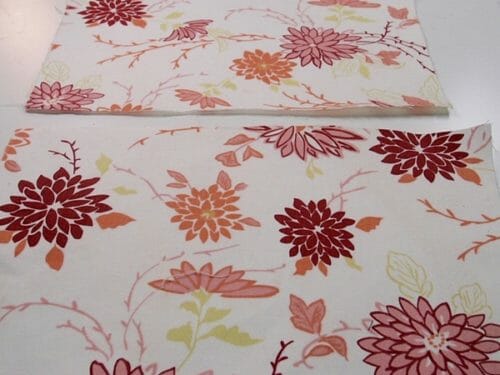

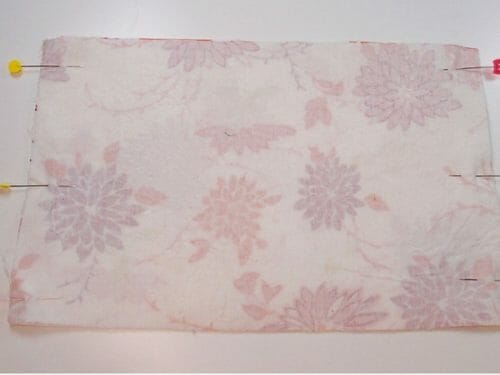

sew the top at 5/8″. Open the 2 pieces and iron the seams to one side. Topstitch on the seam allowance.
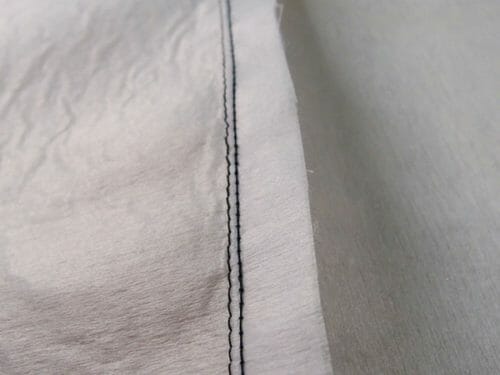

Trim the seam allowance to half.
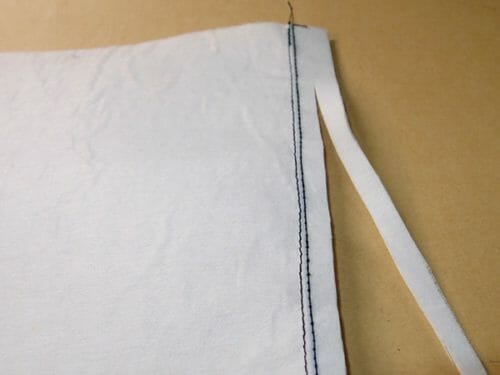

Turn your work right-sides facing out and iron again. Pin the sides so that the fabric doesn't move and the edge becomes distorted. Start by making a row of stitches a little wider than the elastic you are using. I am using a 1/4″ elastic, so my rows are 3/8″ wide starting from the edge. Sew the first row. Since half of my foot is 1/4″ wide, I will be using my foot as a rough guide. If you are planning to make this row larger, I suggest you use a ruler to mark the rows otherwise is very hard to eyeball it and keep the rows straight and consistent.
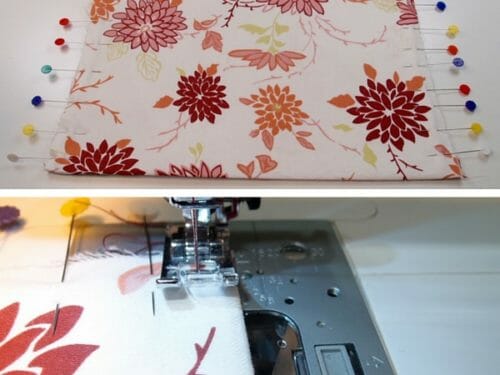

Sew the entire piece, but stop when you have a bit more than 5/8″ at the bottom. This seam allowance is indispensable to finish the hem of the garment or the waistband if you are making pants or a skirt.
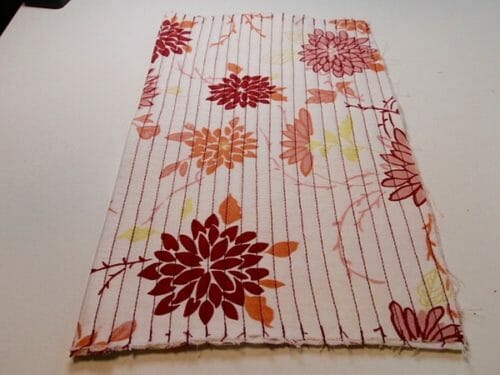

Finishing the shirring without elastic thread
Cut the elastic pieces to 1/2 to 3/4 of the length of your pattern and measurement requirements. For example, the piece without being stretched should match your body measurements. How many pieces of elastic will depend upon how many rows you have sewn.
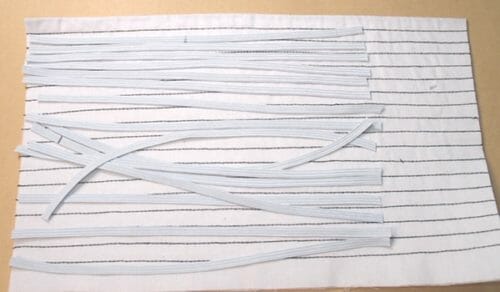

Attach a safety pin at one end of the elastic. The safety pin will help the elastic stay outside of the fabric as you draw the elastic through the rows.
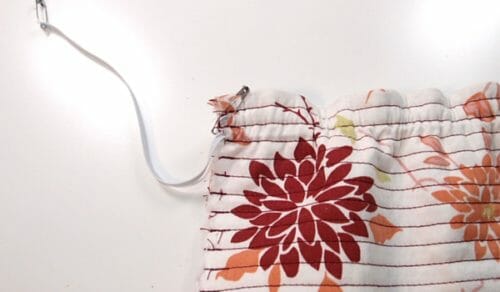

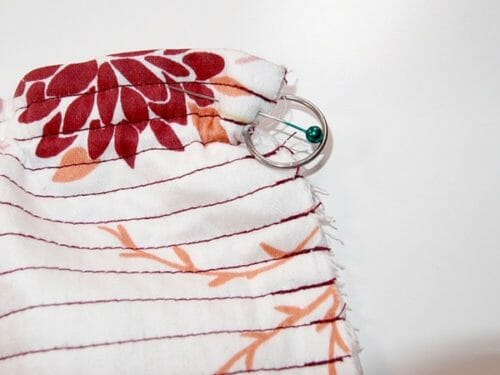

Use your loop turner to pull the elastic to the other side. If you do not have a loop turner simply attach another safety pin and thread the elastic through the rows.
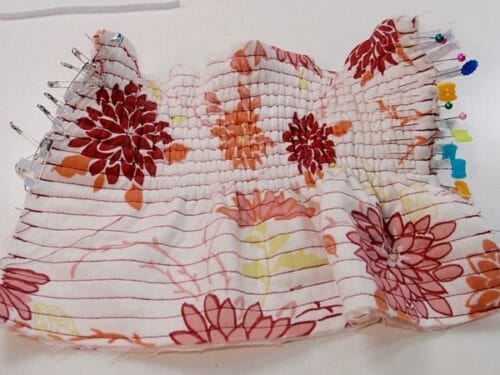

Secure the elastics that have been drawn through the rows with a safety pin or pins.
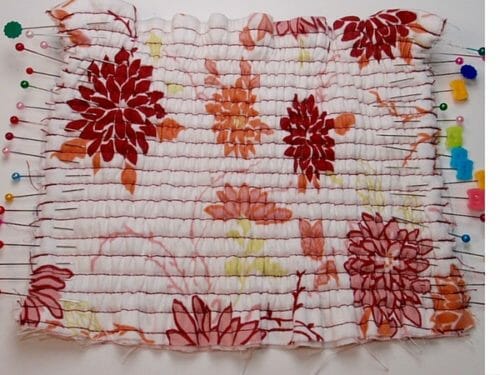

Leave the last row empty because this is what you are going to need to integrate the shirring into and finish the garment.
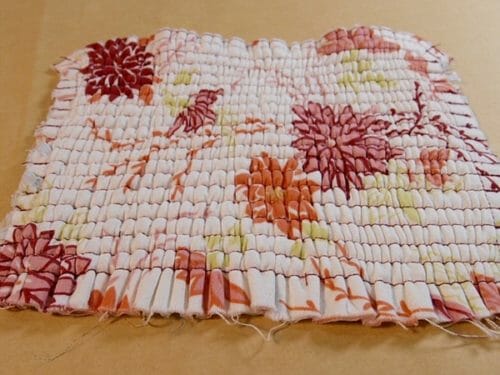


Sew along each edge of the piece where the pins are to permanently hold everything in place. And there you have it. You can use this piece as a beautiful and functional part of your new project.
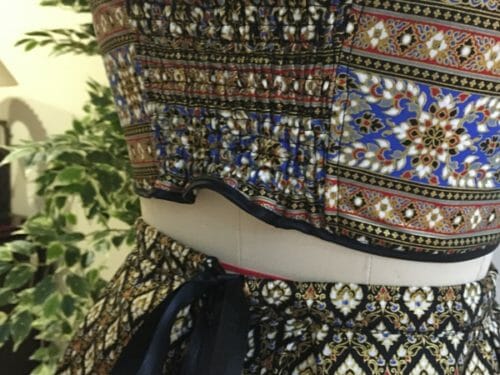
In my case, I am making this crop top for a party dress. We'll share a tutorial for this fun project with you all shortly. You can see some of it below.
I hope you enjoyed this alternative, and I think a better, way of shirring without using elastic thread.
I know is not the easiest, but when it is applied to the right garment, the effect is very elegant and comfortable to wear. It will also last a long, long time.
Please Consider Supporting Our Site
If you'd like to support our site where almost everything we do is free to everyone, we'd really appreciate a cup of coffee to keep us going..


Love love love this! So much nicer looking and more substantial than elastic thread smocking! Thank you for sharing!
Shirring and smocking are not the same thing. Smocking is an embroidery technique that done on pre-pleated fabric.
Hi Mayra, I really enjoy your articles and tutorials. Thank you.
When I looked at the shirred wide leg pant tutorial, you explained this one would have hints for people with small waist and large hips. Did I miss something or is that another tutorial?
What a great idea! I’ve never been able to figure out elastic thread, so this is genius!
This is an old technique before elastic thread that seams not to last very long and yes you are right, so difficult to make it look even and hard to work with depending on your machine.
I love this! I have a double sided skirt with a waistband like this. I’d love to learn how to make more of these. This is what I’ve been looking for. Thank you so much!
I’ve been grappling with elastic thread for shirring for a couple of years now ever since I had a double mastectomy and needed to reduce the excess material in my camisoles which I now wear instead of bras. It was a frustrating exercise. I don’t know why I didn’t think of just using elastic. I like the lining ideas to avoid elastic irritation but the bias tape channels are a good alternative. Thank you.
Thank you for your feedback, it is hard to imagine the needs of someone with double mastectomy unless you express it. So thank you!
Great tips here… thank you.
It is my pleasure!
Thanks for the tutorial. I have been making sun dresses for my daughter and shirring the back area with elastic thread. I have a very hard time adjusting my bobbin case after I am finished with the project. This will alleviate all that stress and frustration.
Indeed, tis technique is also more durable.
Oh wow! I agree, I have trouble using elastic thread 80% of the time I use it. I don’t think I’ll ever have to use it again! We’ll see, thank you! You always have great ideas. I so appreciate everything you do.
It is my pleasure and to be honest I do too.
I’ve done a similar thing but used a different method which is faster and gives a more light-weight finished product, if those two things are desired.
I first finish any raw edge on the soon-to-be-shirred fabric that will need to be finished in the completed garment. The I take the piece that is to be shirred (single layer, no lining) and mark out parallel lines on the back with fabric marking tool, slightly wider than the elastic I’ll be using. Then I sew bias tape on, using the top two lines as a guide. Then I continue sewing bias tape on EVERY SECOND CHANNEL leaving a blank space between each strip of bias tape.
Then thread the elastic through as in the method above.
The finished garment still has a lovely shirred effect but you use less elastic and the garment feels less restrictive as well. The single layer of fabric is a little cooler than the fully lined, fully elasticized version–which is nice for summer dresses or tops.
OH MY MARCIA THANK YOU!!! I will write this technique out and give you credit! Thank you!!!
I’m glad you find it helpful. Another thing I have done in the past is to simply use a long zig zag stitch over very narrow elastic, like 1/8 in elastic, while keeping the elastic stretched. This is a more casual look and a faster technique. It’s good for kids’ play clothes and sundresses. Since they grow out of them so quickly, it seems more practical not to put quite so much time and effort into them.
yes this technique I did know it and you are right much more faster and casual. I do like your way and will try it very soon, will let you know.
Smart again. Thanks for the sewing tip
Smart thinking 🤔 thanks
Oh, Interesting… That is how they are doing it… Thank you…
It is my pleasure!
After losing weight my favorite T-shirts are too lose. I will use your method to reign in some fabric width, maybe with only 3 rows of elastic. I hope it will work the way I see it in my head. Thank you for your wonderful tutorials.
My pleasure Margarete, I hope it works for you. I have a small gadget that will help bring in fabric after losing weight or giving birth. Thanks for your comment because it remind me to make it.
Thanks for sharing this technique I am sure it is much more comfortable on the skin. I always find that shirring elastic tends to chaff and rub, especially in hot weather this will be so much softer.
Thanks for this much needed tutorial. I rediscovered a couple spools of elastic thread from 2008! Needless to say I wasn’t to certain I wanted/could to use them, such a great alternative.
Yes, I like this alternative much more since it is more durable than elastic thread. Also, it gives much more support. I will be sharing a superb summer dress in the future and will be using this technique. Stay tuned.
I like this technique but have a question about getting all those elastic pieces even. After threading them all I usually end up with all sorts of distorted and uneven rows that need a lot of work to adjust. Any secrets to help?
I see your point, I normally mark the elastic on both sides to remind me how much to stretch and how much to let out to use as a seam allowance. Also when sewing the rows make them just 1/8″ bigger than the elastic so the elastic does not twist inside the rows and distort your work.
Really love this & will try on some bloomers for my granddaughter, thank you!
I love this idea!! Being new to sewing the thought of elastic thread and all that has to be done is a bit daunting. This seems much easier for someone of my skill level to do. Thank you for all of your tutorials as they are helping and have helped me have a better understanding of all that is Sewing!!!!
Hi April, glad you enjoyed the tutorial. Let me know how you go with this new technique.
This is brilliant! I think it would be Alot better for tops, for those of us that are bustier. More substantial to help support.
My pleasure April, I like this technique because it last longer and does offer more support.
Good idea! Thanks for posting this. I hope you’re not offended, but I had to read “thin fabric like damask or brocade” a few times, thinking I was missing something… are you sure you didn’t mean “thick”?
Not offended at all, thank you for your feedback, it helps me improve the article, amending it right now, hope you use this old technique.
this is an amazing and simple technique. Just a bit more time consuming. I always found shirring elastic thoroughly frustrating and unsuccessful.
I’m new to sewing and tried tried using the elastic thread once but it didn’t turn out as I imagine. Will try this technique the next time, thanks
Hi Ada, this technique take a bit more time, but I think you’ll get a better outcome overall. Good luck and happy sewing.
i have been shirring this way for a long time. Last year I tried using the elastic thread method and for me the method above is a lot easier for the clothes that I make.
Hi Talliana, thanks for commenting. I certainly agree with you!
I have been shirring by wrapping elastic thread around the bobbin for years as I love using this technique on tops and maxi dresses and I love your alternative tutorial as it looks a lot longer lasting and looks well worth the effort! Thanks for sharing.
Thanks for the tutorial. I am looking forward to seeing your crop top.