


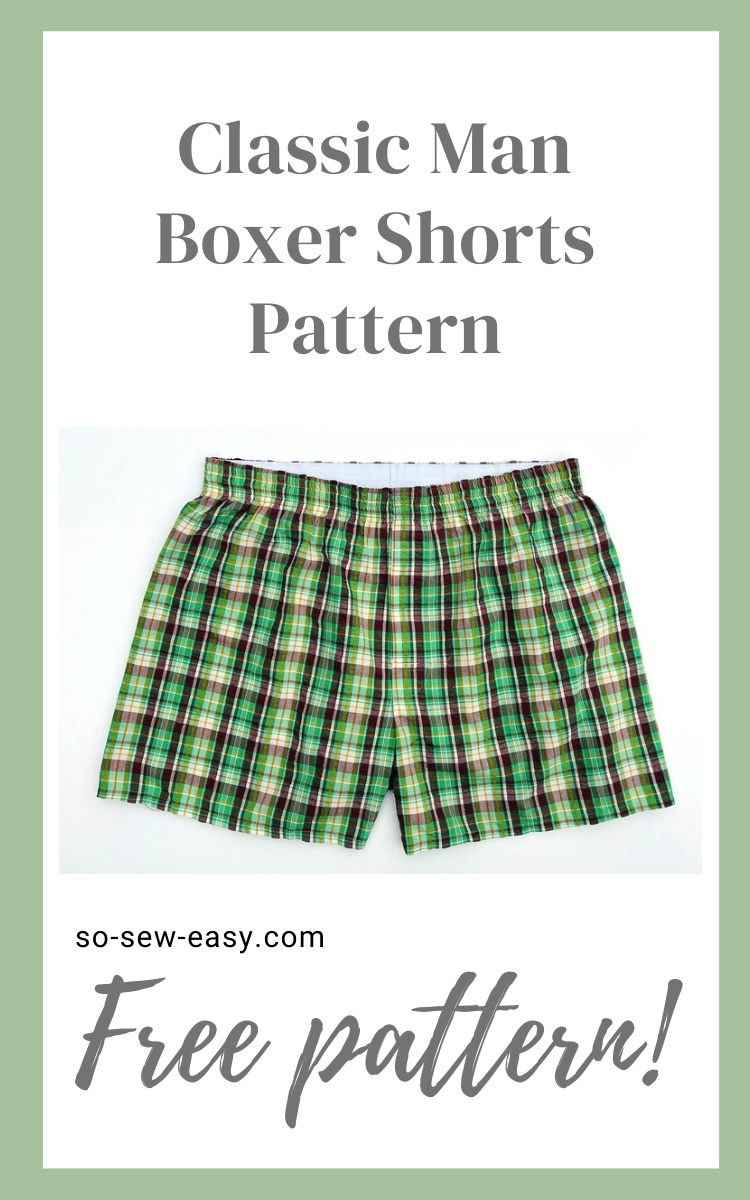
Classic man boxer shorts pattern is my attempt to get more men to join the wonderful world of sewing. So-sew-easy.com has very few patterns for men, and lately many of the project requests I have received through email have been from men. I am going to be sharing a capsule wardrobe with you, starting with these boxer shorts.
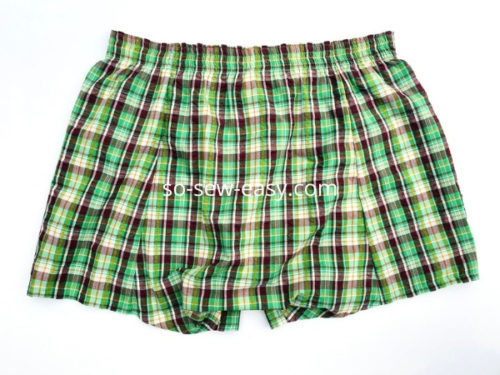
These classic boxer shorts feature and elastic waistband, front fly, and hemmed bottoms.
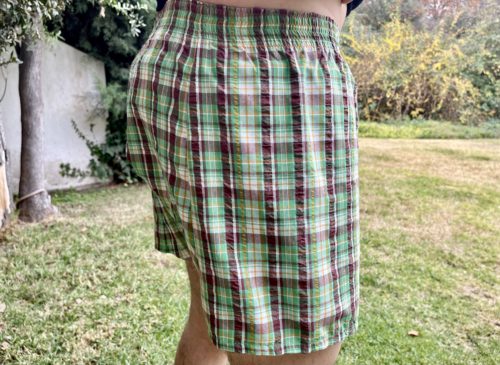
This classic man boxer shorts pattern makes a pair of very comfortable underwear for summer and an easy to make gift for Father's Day.
Materials
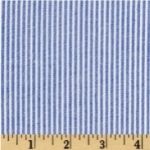
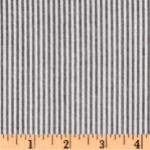
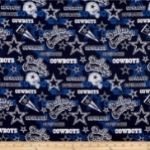
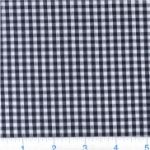
- 1 yard of 54″ lightweight cotton
- thread to match
- 1 button or snap (optional)
- 1 1/5″ wide elastic enough to go around the waist comfortably
Tools
- sewing machine (optional)
- seam ripper or a buttonhole puncher (optional)
- universal sewing machine or hand sewing needle
- erasable fabric pen
- a ruler to add the seam allowance
Fabric Recommendations from Fabric.com
 |
 |
 |
 |
Sewing Level: Advanced Beginner
Although this is an easy project, basic knowledge of sewing is needed. Please review the following material prior to starting the project.
- Mistakes to avoid when cutting fabric
- Guide to snap fasteners
- How to make button holes
- How to sew a button using your sewing machine
How To Print And Download The classic Man Boxer Shorts Pattern
Please use Adobe Reader, print in Landscape Mode and do not scale.
Pattern Download
Like most of our patterns, this pattern is free. But now you have the option of making a small contribution if you like our work! We'd really appreciate it and it will help us keep going with new and fun designs like this. Even a dollar or two really goes a long way.
Thanks so much in advance for helping us out. You can use any credit card and you don't need a Paypal account, although you can use one if you have one.
Pattern Layout
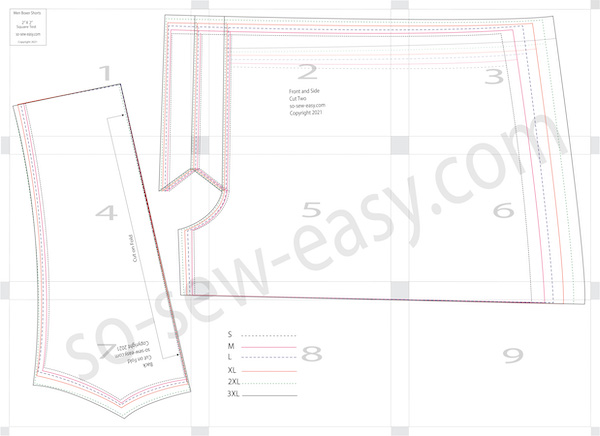
Sizes
| Size | Chest | Waist | Hips |
| S | 36-38 | 32-34 | 32-36 |
| M | 40-42 | 34-36 | 36-38 |
| L | 42-44 | 36-38 | 38-40 |
| XL | 44-46 | 38-40 | 40-42 |
| 2XL | 48-50 | 40-42 | 42-44 |
| 3XL | 52-54 | 42-46 | 44-46 |
Sewing Instructions
There is NO seam allowance in the pattern, I suggest a 5/8″ seam allowance.
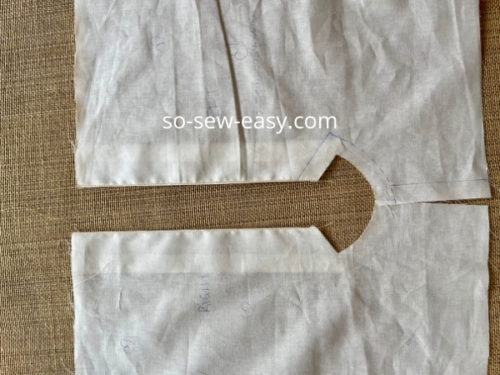
NOTE: This is a project that could use a print that can show the right and wrong side of the fabric. I have never made this type of underwear before so I am using muslin to test the pattern out.
When I mention the left leg I mean the left leg on the body but in the picture it will look like the right leg.
There is NO button placement on the pattern nor do I mentioned it in the instructions, but if you need to apply one do so in the middle of the fly opening.
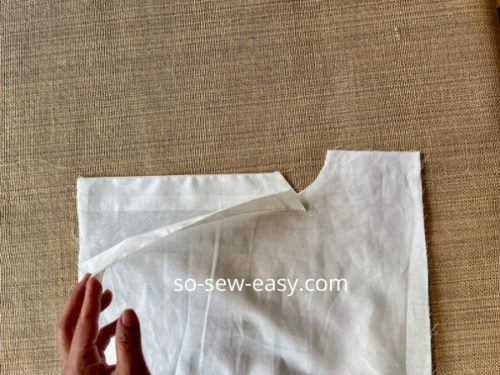
Step One: Sewing the front
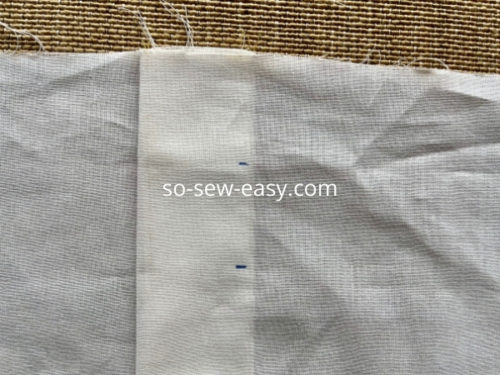
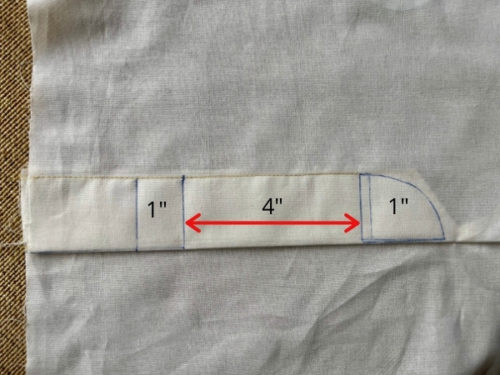
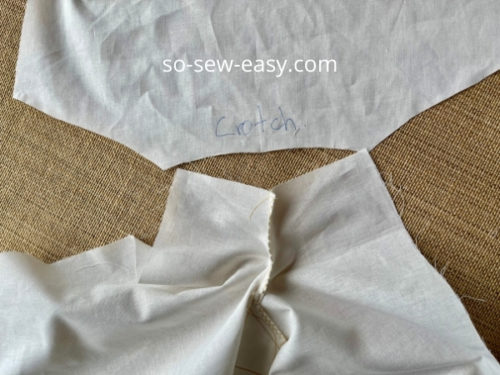
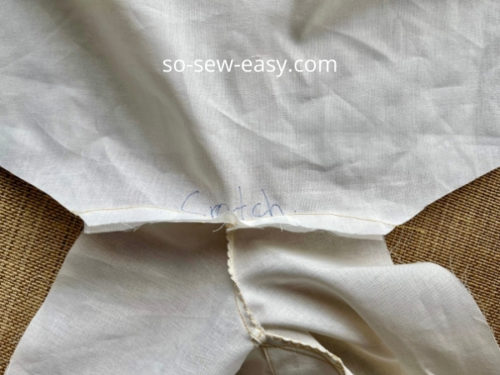
The first thing you will need to do is to trace the seam allowance using an erasable pen around the crotch on both legs. As shown in the drawing below with a blue line. Trust me it will make your life easier.
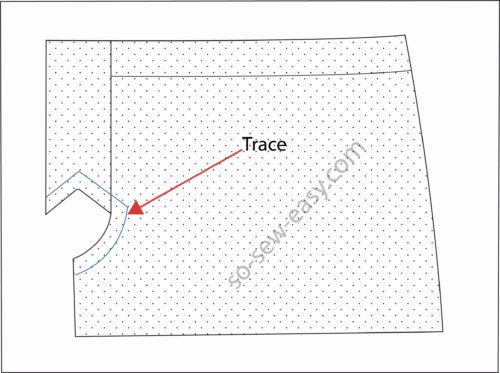
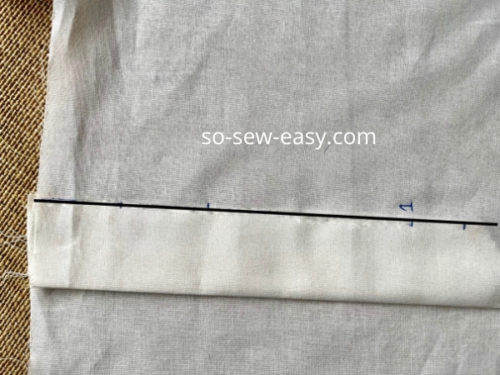
Place the leg side of the shorts print side down. Fold the seam allowance on the flap. Stitch very close to the fold of the fabric I am doing it at 1/8″ so it can be seen on the photo but you should do it slightly closer to the edge.

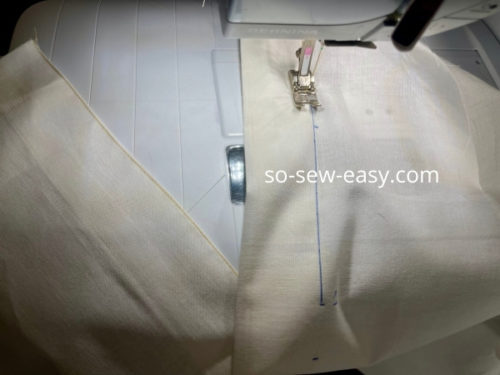
Fold the fly and stitch the edge. Repeat on the other leg.
Print sides together, sew the crotch following the erasable pen trace you did before.
Trim the sea allowance to half and zigzag the edge.

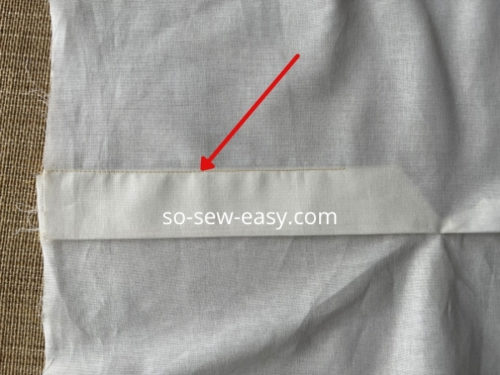
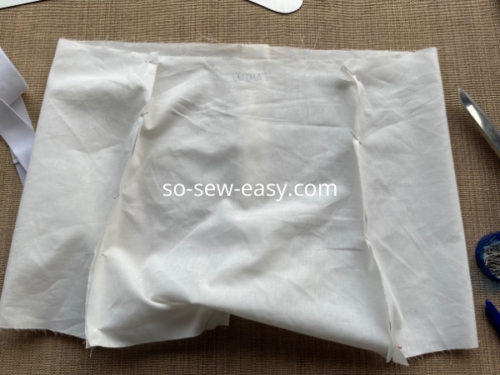
Open the legs and place them flat print side on the table,
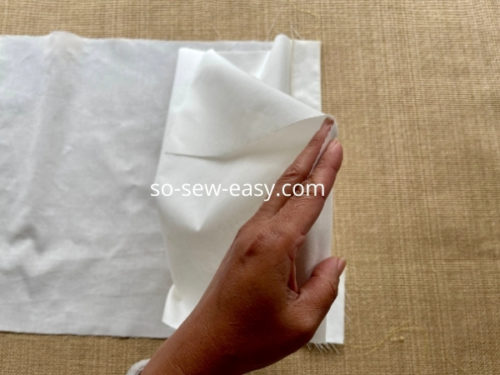
making sure the fly is turned over to the left. Iron. This is for a right-handed person, reverse for a left-handed person. Iron.

Mark the waist shown in your pattern twice.
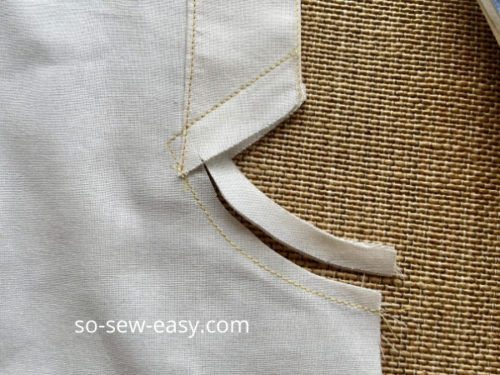
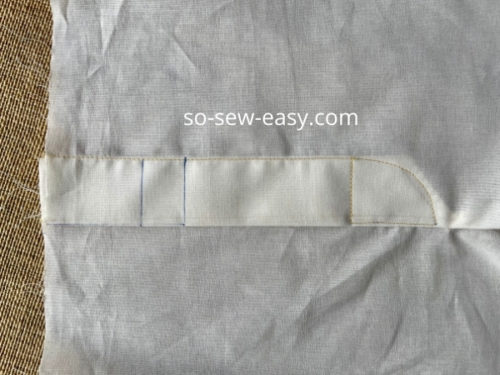
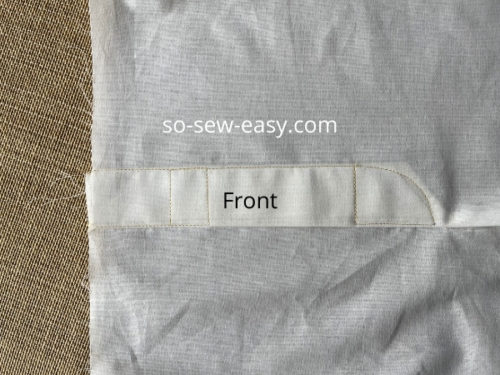
Here is where it gets a little complicated but in reality, it is easy to achieve. The point is to sew the fly leaving an opening so the person wearing these classic man boxer shorts pattern can release without taking the shorts down.
We will need to sew one leg then both legs together to achieve this.
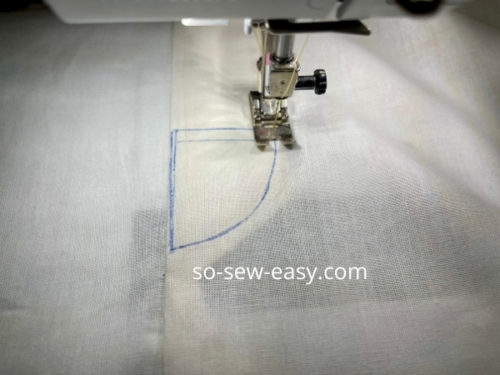
Start by sewing one the left side a straight line to secure the fly down.
Align both sides of the fly together one on top of the other. Sewing the following pattern. The space in between should measure 4″.
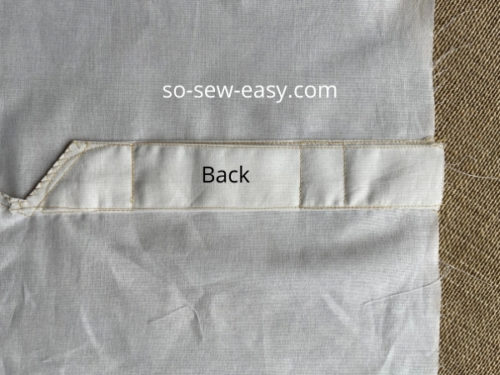
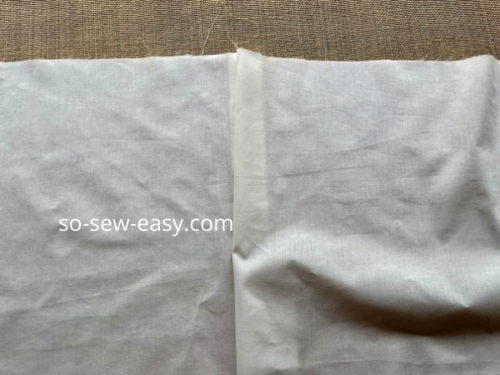
Step Two: Sewing the crotch and the back
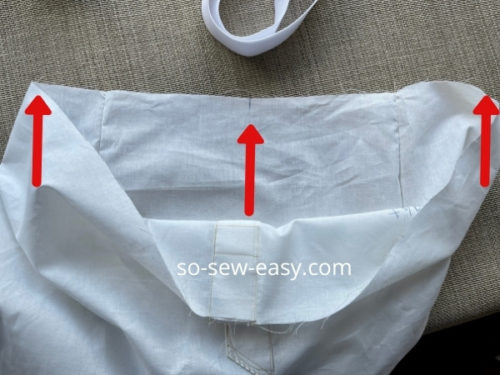
Pin the front of the boxer shorts with the back.
Sew and zigzag.
Join the back to the front with pins. Sew and zigzag.
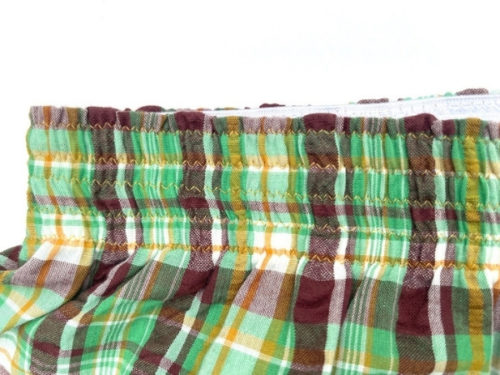
Cut the elastic the size of the waist as shown in the measurement chart above. Fold in half and mark front, back and sides.
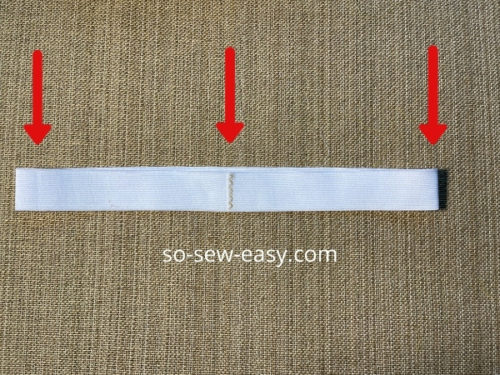
Mark 1/2″ around the waist where you will sew the elastic.
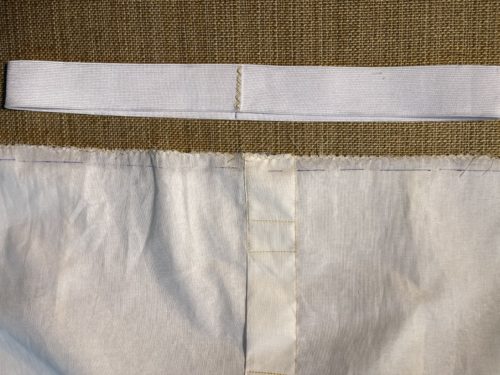
Pin the elastic to the shorts matching the marks.
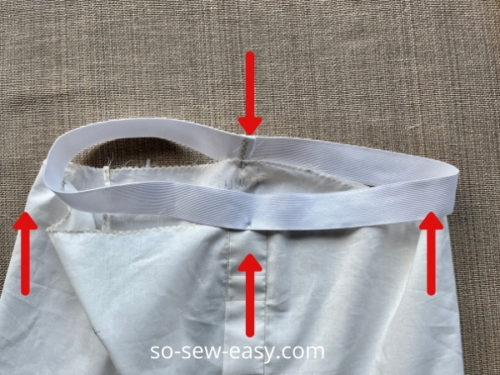
Start sewing at the back of the shorts. Pull the elastic to match the shorts using a medium zigzag.
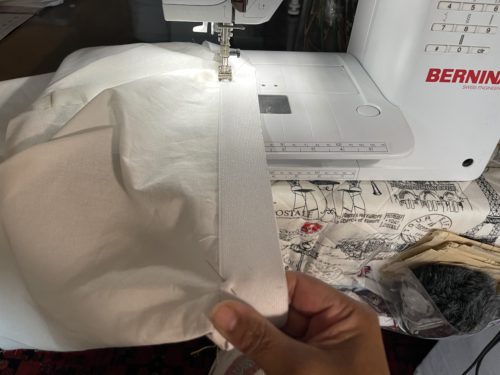
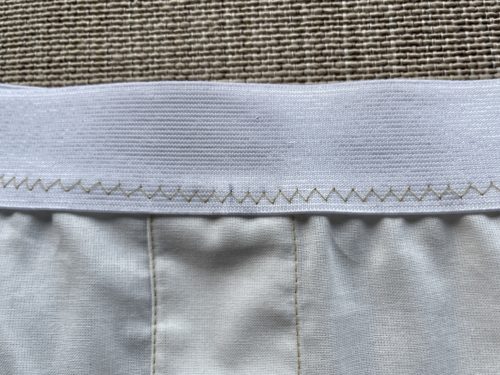
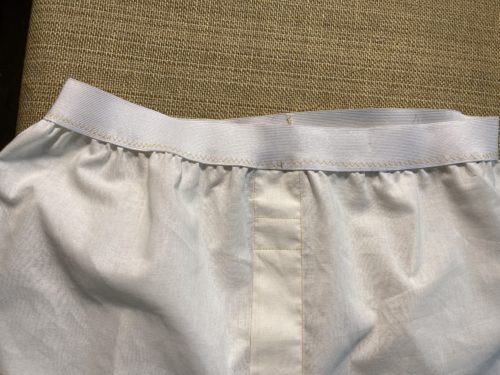
Turn the elastic inside and sew three to five rows on the elastic. Remember to pull the elastic as you sew.
Step Three: Hemming the boxer shorts
Serge the bottom of the boxer shorts and turn the hem 1/2″. Use a medium to small straight stitch to sew the hem.
I ended making a larger pair for my son, I am still waiting for his feedback, but if you end up using this classic man boxer shorts pattern I will be very happy with your opinion and suggestions. Do you need to increase the waist or make the shorts longer? Please let me know in the comments section below and I will be more than happy to show you in a separate tutorial.
The next pattern on our capsule wardrobe for men will be a t-shirt with a small v-neck.
Until next time, Happy Sewing!
For more ideas for men who love to sew, please check out this article.


Hello. I downloaded this pattern. Honestly, it took forever to figure out how to tape it together. Like a couple others have other have stated, the pattern didn’t print out correctly. It’s literally mirrored and upside down. Thinking when the pattern was created, something went amiss. Tried many times with different settings to no avail. It’s not my printer. I’ve done so many pdf patterns without issue. I did get it taped and lined up using a ruler at times. There’s an inch between the lines like you said. But, the grey boxes are only 1/2″. Everything looks ok from seeing the pattern pieces on the layout you have. Will try it out first with some spare fabric to check the fit. Maybe you should check that pattern to see if it can be sorted out. I have sewing experience but maybe someone that doesn’t, might get really flustered and shy away from sewing after something like this. I’ll post again once I try it out. Laura 🙂
Hi Laura, when you tape the pattern together, the grey-out boxes, when taped together, must measure 1 square inch, even if your printer does not print to the edge of the paper (this is normal on cheaper printers). You must use the photo under the heading PATTERN LAYOUT to put the pattern together.
Preparing to make these for my husband. I have looked at the pattern, and printed it off. Thank you for doing this!! The question I have is regarding the elastic. I have made elastic plackets before…but this doesn’t seem to have fabric enclosing or being folded over elastic. Looking at pictures online, it doesn’t appear to. What am I missing? Or is elastic just stitched on?
Hi Emily, I hope the boxer shorts come out well; these are classic, with two seams at the back.
You aren’t missing anything. These are made just like store bought boxers, which usually have elastic just sewn on instead of having a casing for it. Make sure you buy the right elastic so it’s smooth and not scratchy!
I made these for my dad last Christmas, and here we are again. Going to use a different fabric this year. The feedback from him (he’s in his 80s) was that it would be easier if the fly opening was longer. However he does wear them and they are very comfortable.
Hi Mayra,
Thank you so much for posting this pattern. This afternoon I sewed up my first prototype and your pattern and detailed directions worked like a charm.
I would appreciate your thoughts on an alteration I have in mind. I like my boxers a little more voluminous than this pattern provided. My thought is if, on the pattern, I make the side seams more convex (i.e. curving out rather than in) below the waistline, that should add volume through the seat. …your thoughts?
Thanks again!
Jim
Hi Jim, Indeed I think that would work very well for you.
Hi
I am excited to make my first pair. I would like to make these shorts a bit longer in leg size. Maybe by 10cm. How can I do so?
Thank you
Hi Zuzana, this will be a bit hard to make longer due to the fact that they are the olden day type. Perhaps you can do the pyjama bottoms instead that can be worn as underwear. https://so-sew-easy.com/mens-pajama-shorts/
Hi, I am having trouble fitting the back crotch to the front. I have a lot more in the back and it makes it look like it would fit a diaper. Where did I go wrong? Thanks.
Sorry not sure what you mean by a diaper. Please send me a picture I am not sure what you mean.
This happened to me. My mistake was that I added a 3/8 inch allowance at the “fold” side of my back pattern, resulting in a larger width when I cut my fabric.
Hi Annette, I have several pairs of commercially produced boxers with a panel in the back like this pattern. That panel is what gives the (poofy in the back) diaper affect. It also adds volume and easement which makes them more comfortable (especially when sitting). A pattern that has a seam down the back of the boxers should minimize the diaper look.
Cheers,
Jim
I’ve made my first pair, for (female)me! I just never know how much elastic! I cut a larger size instead of adding seam allowance, it seemed to work ok! I think they are going to be quite comply, I’m using them as shorts this summer, cooler than wearing undies!???? thank you!
Hi Lee, thanks for your review. I am truly happy you made this for yourself! Now everyone can see this work for man and woman alike!
I have let a small donation, how do I retrieve the pattern for Boxer Shorts.
My email address:
margaretslittle@hotmail.com
Hi, Margaret is this the email you used for the donation? My apologies, I just saw your comment!
Hi
I just can’t seem to put the pattern together. do you have a screen shot of all pieces together.
Also does it ask for a 1 1/5 elastic or is it a 1/5 elastic?
any help would be great.
thanks
carole
Hi Carole, it is under the heading “Pattern Layout”
The printed pattern does not seem to match the picture in the post. It is like it is inversed or something. I am also having a difficult time taping the pattern together.
Hi Amanda, take a look at the pattern Layout picture it will help you align the two pieces of the pattern together. The grey squares measure 1″, and you are supposed to tape in rows, first 1 to 3 then 4 to 6 then 7 to 9. Then you tape the rows from top to bottom. make sure the squares measure 1″ There will be no need to cut the paper. Do not scale and use Landscape mode using Adobe Reader only to print. Hope that helps, if you are still having problems please send me an email to mayra@so-sew-easy.com
Hi, my printed version does not match either, its a mirror image it seems, as what should be on your page 9 is on my page 3
Yes, exactly! Upside down and backwards as well. It was a game to get it together 😂
It is a mystery to me, and I will check the pattern and see what you guys are talking about, thanks for letting me know.
Glad to see someone besides me had a problem with this pattern.
I have spent all afyernoon trying to figure this out. I’ve been sewing for 50 years so this is not my first downloadable pattern.
I’m a man that loves to see and just finished my boxer shorts, recycling some old flannel sheets. The fit was near perfect for a 2x size, though mixture time I will shorten the elastic to fit tighter around my waist.
Interesting
Thanks for the pattern. However, I am having difficulty taping the pattern together. Do you cut on the solid lines and overlap each piece or butt them up against each one? Thanks for your response.
There is no need to cut the pages, the grey squares should measure 1″ X 1″. The thin lines are there to help you and they also are 1″ apart.
I need to make the pattern bigger for my son. Can you tell me how to do that if it is possible. He would probably be a 4x
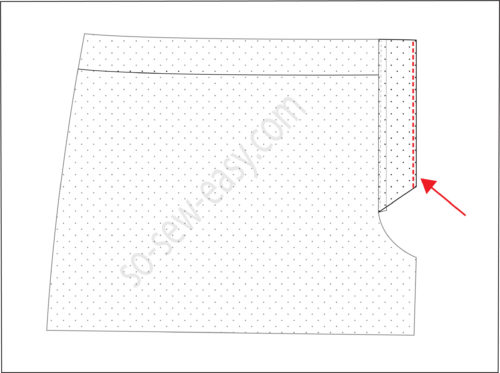
Hello. I’m confused about the seam allowance. It says there is NO seam allowance, but in Step One, it says to trace the seam allowance around the crotch on both legs. In the picture, it looks like the seam allowance IS included here.
So, do I ADD a 5/8 seam allowance to the pattern? Which would mean drawing off the size I need, but 5/8″ larger all around?
The picture I showed you is what it would look like if you added the seam allowance. Yes do add the 5/8″ to your pattern.
My first thought when I saw these was “OH, this will make great summer shorts…for ME!”… but then I thought, gee, bet these are sized for a male butt and not a female. And I correct? These would have a poor fit over a full female butt?
Please read the comment section you might be surprised.
I’m so glad to see you doing this. There are really so few patterns for men and often one finds similar oens again and again. My husband wanted a chunk style short (welt pockets, side pockets, belt loops, zipper fly with button) and I found only 1 (!!!) sewing pattern on the market. So i snapped it up. Dope Men Sew is a great resouece for men. Check out @norrisdantaford on Instagram. His wife is behind Mimi G Sews. Together they’ve done a line of patterns for Simplicity that has some really interesting menswear designs.
Great tutorial! My husband loves when I make him something, but men’s’ sewing patterns are few and far between. This looks to be doable, and it is something useful that any man could wear. Thank you!
Thank you for starting creating patterns for men.
Sunny Greetings from Cyprus
This looks like a wonderful project to sew, unfortunately my hubby doesn’t wear boxer shorts but some of my favorite shorts have been this style (for women obviously). My any chance do you have a pattern for women’s boxer-style shorts?
Thanks so much for all the great information!
This looks fantastic, but I was wondering if it could be made with stretch knit too??