


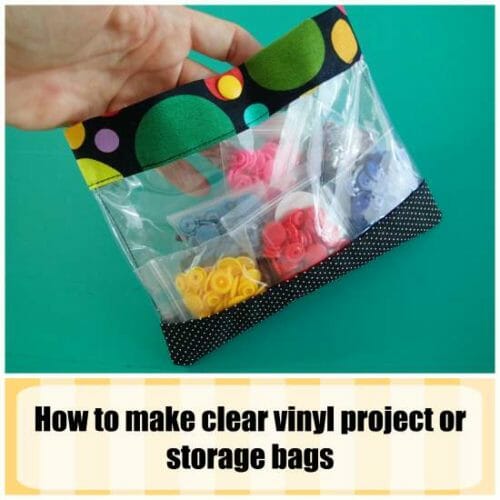
 Did you see the earlier article about the clear project and storage bags I made with the snap tops? These have been very handy for sorting and storing my small sewing supplies. I can quickly see what is in all of the bags without having to open them.
Hubby even had me make him a couple for his work bag, so that he can keep stuff organised in this great big backpack he lugs around at work. It really helps him that they are vinyl because he works as a scuba diving instructor and often puts damp stuff into his bag and the vinyl pouch keeps the damp off whatever else he is carrying, paperwork, money, phone, etc.
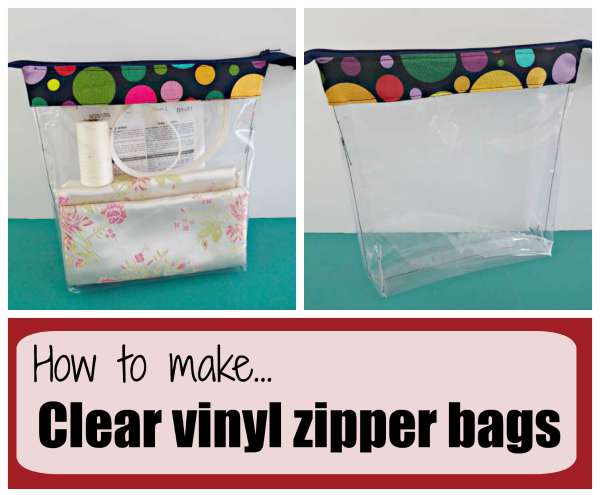
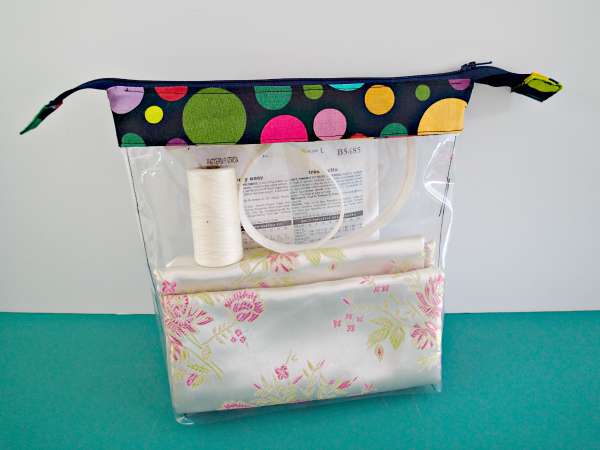
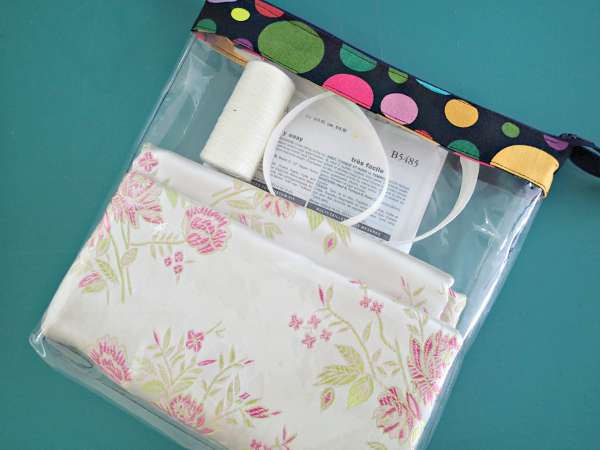
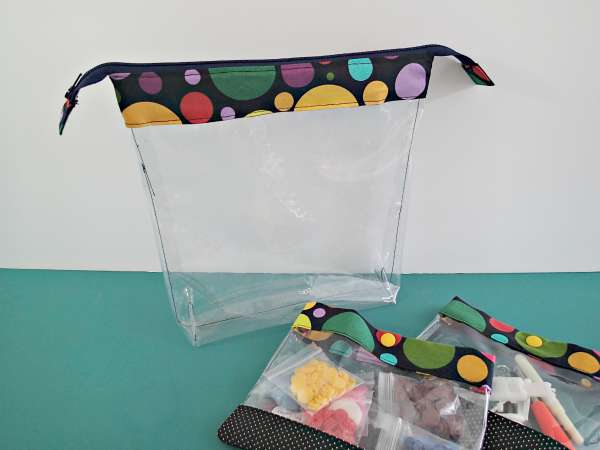
But I needed more bags, bigger bags, and ones with a totally closed top so I gave it a try with a zipper and a small gusset at the bottom for a bit more volume. They turned out really nicely and are just what I was looking for to put my fabric, pattern, zipper, and thread together for future project planning.
Er yeah, I know…when am I going to get around to all these plans? Well, that's why I need these bags! To keep everything in order until I do get the time, or a sudden enthusiasm to work on one of these projects – only to find the zipper has been used for something else.
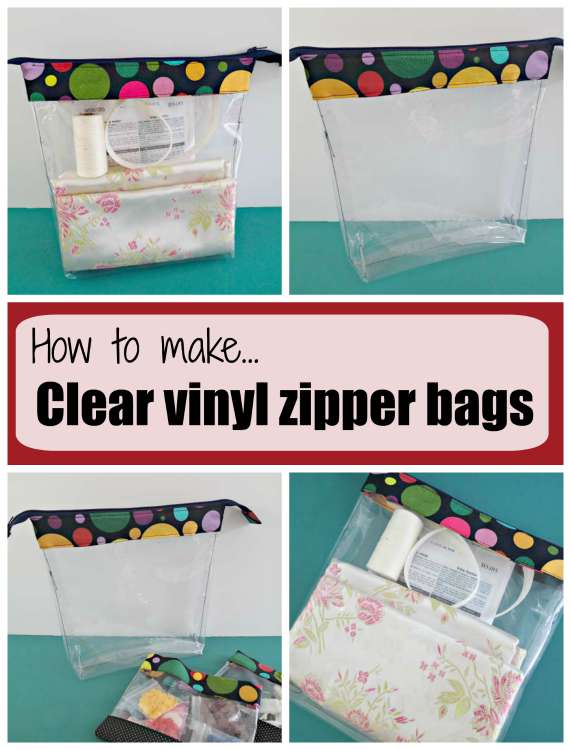
How to make clear vinyl zipper bags
Subscribe to the YouTube channel:Materials needed:
- Pretty cotton fabric
- Zipper 3 inches longer than you want the bag to be wide
- Clear vinyl
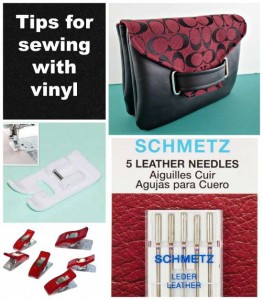
- Ideally a Teflon foot or roller foot for sewing with vinyl
Check out this earlier article for tips on sewing with vinyl.
Cut your pieces of fabric as follows (for a 14 inch zip)
- Two pieces of fabric at 11 inches wide by 4.5 inches tall
- Two zipper tabs at 2 by 2.5 inches
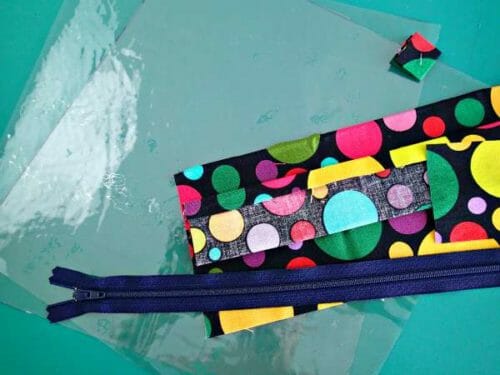
- Two pieces of vinyl at 11 inches square
Full instructions are provided in the video. Here are a few tips and tricks for you!
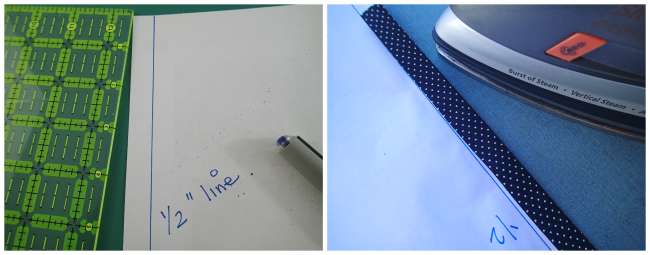
We need to fold some nice neat 1/2 inch seams in our fabric. I find the quickest and easiest way to do this and avoid getting my fingers burned by the iron is to find a piece of sturdy paper or thin card and draw a line along the length at 1/2 inch from the edge. Now I can fold my fabric over the edge of the card until it hits than 1/2 inch line and press it. You can even fold it over with the tip of your iron and avoid getting your fingers in there altogether. Nice neat fold and a straight 1/2 inch turned over – quick and easy.
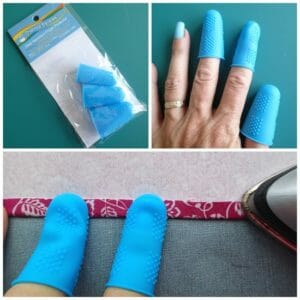
Always burning your fingers? Try out these thermal thimbles for turning and pressing narrow hems.
 I've got quite a good supply of bags large, medium, and small now, to keep me organised. But I just want to make another of the large ones with the zip because I think it's ideal to keep in the car with a small first aid kit too, and maybe some wipes etc.
Oh and I need another one for my damp swimmers when I go to the pool, and another one to keep my phone, cards, and money when I go diving and put a load of wet gear in my bag. And probably a few more for the sewing room, and another to store all of my printer cartridges and another for a travel cosmetics bag – the more I think about it, the more I find I need another one!
I wonder if you could make one to use for your carry-on toiletries for airport security? I'll have to check the size and see. Would be nicer than a tatty Ziploc bag.

If You'd Like To Support Our Site
If you want to help us continue to bring you a wide selection of free sewing patterns and projects, please consider buying us a coffee. We'd really, really appreciate it.


Lovely and I am going to make one. It is ideal for when you travel overseas and need a clear bag for your cosmetics to go through Customs.
Looking forward to making a few. Plan to use them for organizing little parts/tools fro sewing projects. Thank you.
These are wonderful directions and great detail. I was just wondering what gauge of the clear plastic you used in you bags?
Thank you
PS my grandkids will love these for all those little collections they have!
Hi Wendy, I think I used 10 gauge. That should be flexible and durable. You can sew through but it is tough enough to stand up to heavy use.
Excellent zipper insertion. I’ve never seen one like that. So easy. I’ve made zipper bags with a fabric back that were flat but having the gusset allows for more “stuff.” I can’t wait to make some! Thank you as always for you great ideas.
Sew fun! I made one with a material back because I didn’t have enough plastic to hold my collection on zippers!
Oh, a fabric back would be fun as well, did you quilt it too.
This is a great tutorial. This weekend I made 13 bags to use in my classroom to hold computer mice and headphones. Before I sewed on the zipper pulls, I attached a plastic snap. I will attach the bags via snaps to a larger sheet. I will be able to see at a glance when items are returned.
Genious! I do get my plastic warm with a hair dryer and turn it quickly when it is inside out. Loved your tutorial and cant wait to do this project!!!
Thank you So Sew Easy, for another great pattern and tutorial. These little bags are simple to sew in many sizes and are useful for storing so many different items. Perfect for quick gifts too, everyone could make use of one of these.
I used a Teflon presser foot and clear thread for sewing the vinyl and the bags turned out beautifully.
Que ótimo tutorial.
Obrigada por compartilhar.
Thanks so much for this tutorial. It is exactly what I was looking for.
Made 4 using white heavy duty shower curtain for my grandsons to use on a missions trip to Trinidad. Wish I could post a picture.
Don’t know when you made them but of youbstill have pic you could post on thier fb page
This is a really great, fun project. It takes very little time to finish one bag. And you end up with something that you can really use!! I starched all the fabric pieces as I did my pressing and it made for really accurate easy sewing.
Fab pattern and very clear instructions. Thank you Deby. I made one for my granddaughter for her crayons and she loves it because she can see the colour she wants.
Hi. I enjoy Deby’s tutorials, they are always very clear. Not heard much from her lately, is she ok?, miss her.
Hi Ruth, stay tuned for something new from Deby in the very near future.
how do you find the instructions and video for making the clear bags?
Hi Jan for some reason the link was not working I have updated it so it is there now, here it is for you to try, Enjoy! https://www.youtube.com/watch?v=ZhQdkWaORYs
Excellent video–what grade of vinyl did you use? I would think maybe mid weight
but if it is for cutting tools, maybe heavy? Any thoughts on this. Thanks again!!!
Hi Nancy I think if you can sew thick vinyl, go for it since you are making it for cutting tools.
I just watched the video and all my questions have been answered! I advise everyone to do the same. It’s very thorough video! Thank you!
Hi Carol, thanks and glad you found what you were looking for.
Oh ! Nevermind about the video! I just found it…it just wasn’t showing up when I looked before, but I see it now :). Thanks for sharing your talents with us! Your bags look great!
I was very pleased to see this project, as I have recently started to make these vinyl and fabric bags, for my daughter to use for baby food jars and snacks. Do you back the wrong side of the fabric with the other fabric strip, so you can’t see the wrong side of the fabric from the inside of the bag? Or do you sew the second fabric strip to the other side of the zipper? How o I access the video for the rest of the instructions. I would love to see it! Thanks, in advance!
Hi, I love this idea! I have a question about the leftover vinyl when forming the square bottom, did you trim that? Kind regards, Delores
Hello Dolores,
No it was not trimmed. But you could, leave 1/4″ for seam allowance.
I love these. If you put a piece of tissue or parchment paper between the vinyl just the size of the finished bag, not where your stitch line is it will keep the vinyl from sticking together. I love the zipper application. I need to make about a dozen of these.
Thank you for your great tutorials. I wonder if you could do a tutorial instead of a video for the clear vinyl zipper bags as I have no way of playing the video in my sewing room and can follow written instructions and photos much more easily and I would really like to make some of these bags.
Hi Marge, I don’t have plans to go back and rewrite this article now, too many new projects to work on! Might I suggest if you can’t watch the video while you sew, that you watch first, make any notes that you need and then take your notes to the sewing room. It’s a pretty simple project with only a few steps so I’m sure you can watch and then recall. Hope the bags turn out nicely for you.
What an excellent idea – I could think of tons of usage for these. Thanks for sharing.
Debbie, first i would like to say thank you for all of your creative projects and knowledge you share with us. That being said this project is genius! Now i know what to do with the 4 yards of clear vinyl i accidentally ordered! Did you use white thread or clear?
Excellent! I used white thread, and wasn’t too bothered about it. They were only ‘utility’ bags for me so I wouldn’t mind. But if you were making them for gifts/sale etc you could certainly thy out that clear thread.