


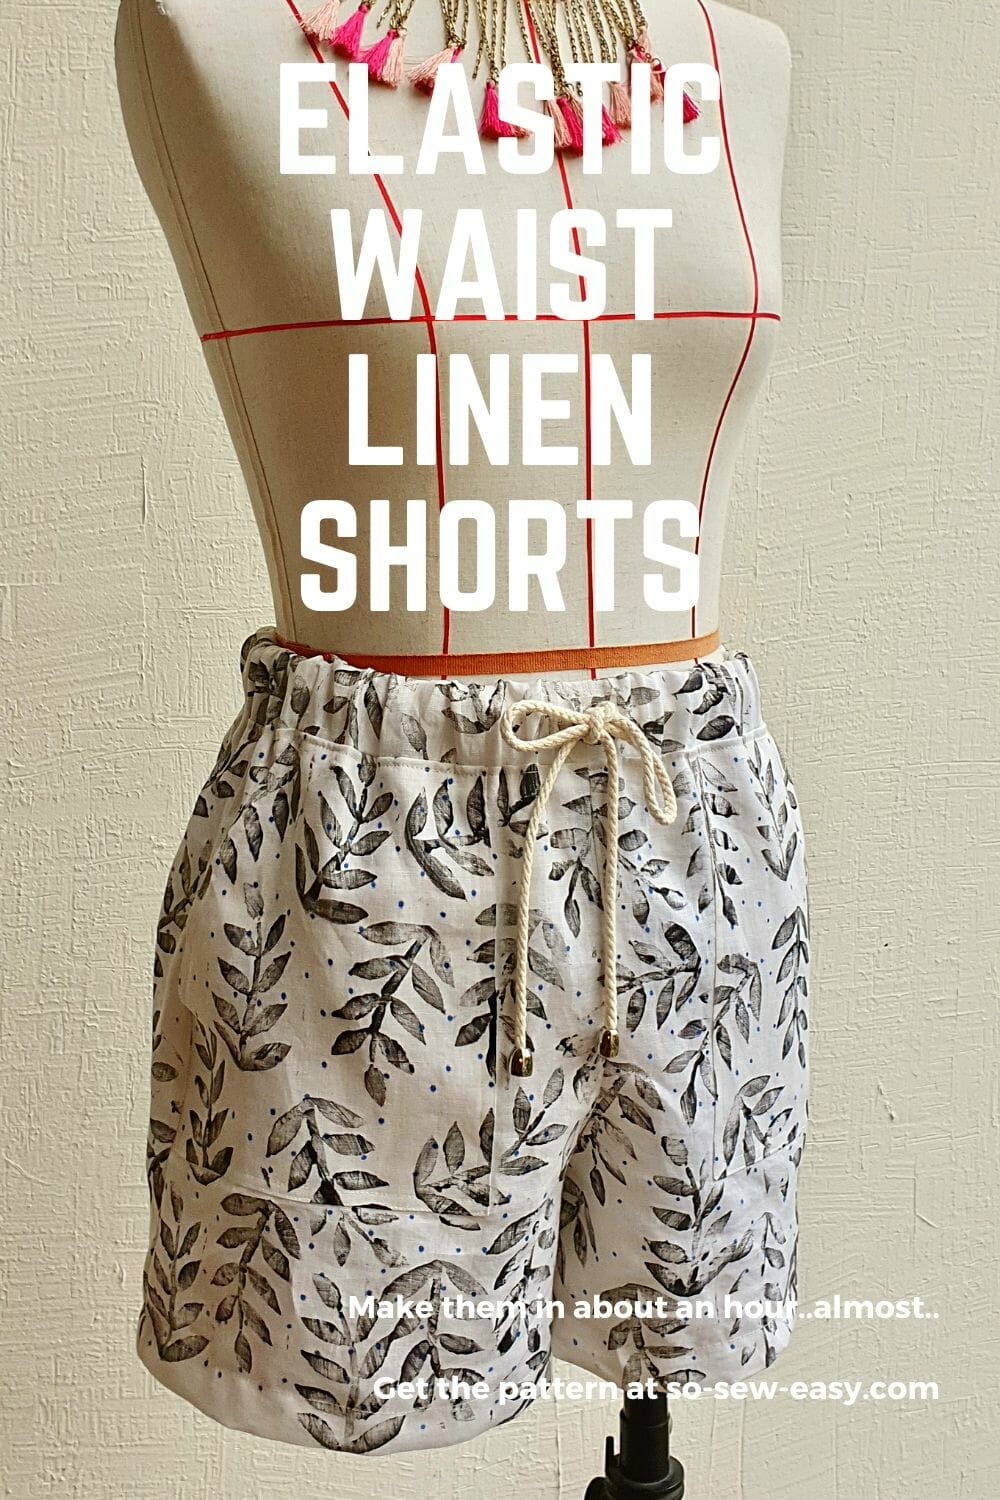
 This elastic waist linen shorts project is something that has been requested by quite a few of you by email. I appreciate the kind request. Sometimes I forget that the majority of the readers of this blog are beginners. So sometimes I need to dial back my impulses and to simplify the projects. However, that does not mean that we are going to be making an ugly pair of shorts, nor will I be promising that you can make it in two stitches, and just by magic you’ll have a pair of elastic waist summer shorts like so many videos on YouTube promise.
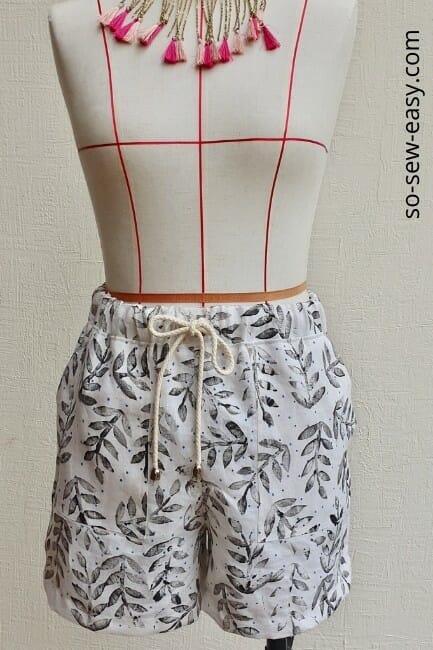
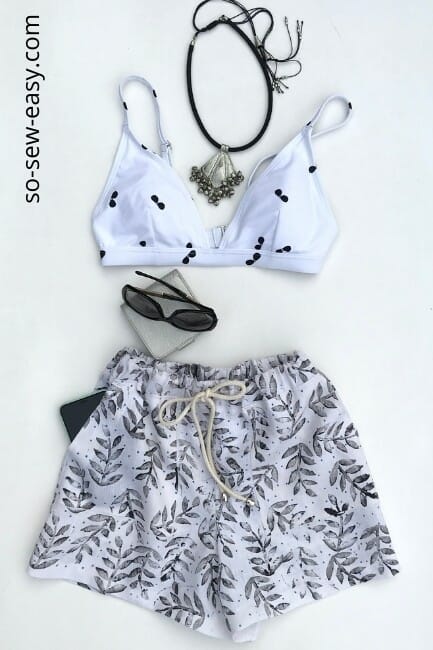
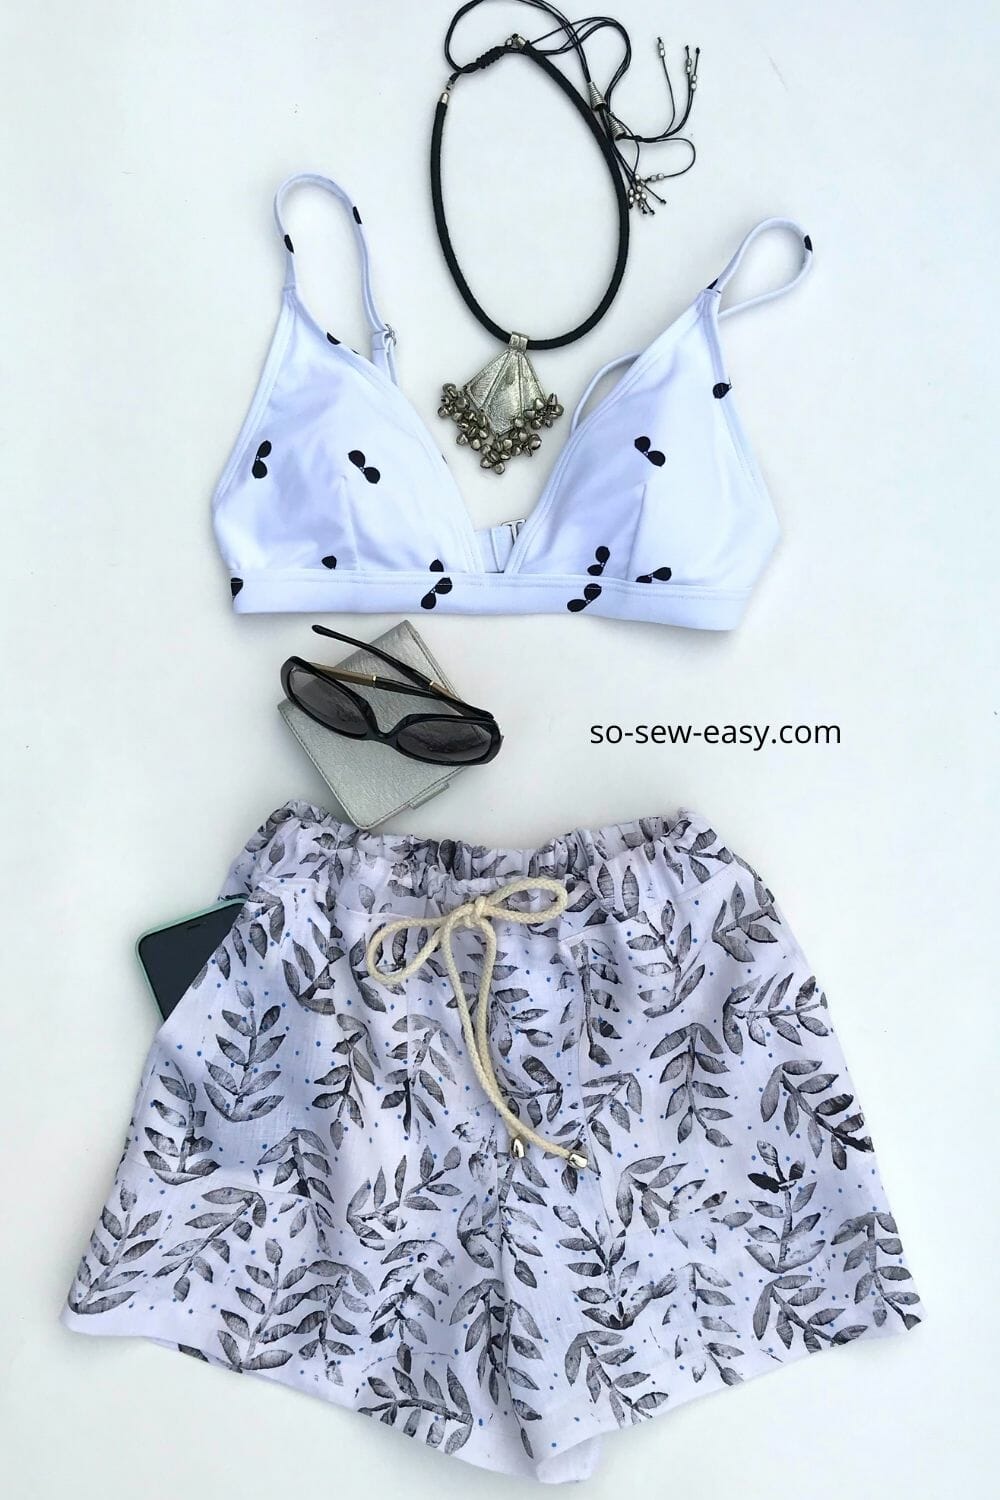
These shorts are designed to be worn over your swimming suit, to hang around the pool and garden, or relax on the terrace. Be sure to make them in linen or good quality, loose weave cotton so they can drape on your hips and be worn through the summer comfortably.
Please have a look at my fabric suggestions, they are the four pictures that look like advertising, you do not need to buy from that site although it helps me with the affiliate program to keep going at giving you free patterns. At least please read the type of fabric and the description so you know what I am talking about. This part is often forgotten, yet it is crucial to use the right fabric to be successful in the project.
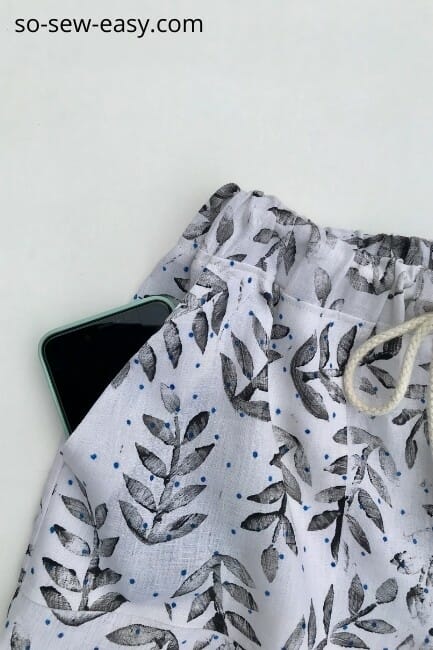
These elastic waist linen shorts have a type of slanted patch pockets. Yes I know, I had to go and add a little challenge for you. How else can we make it more interesting? The pockets are optional of course and can be subbed out for any of your choosing.
Materials
- 3/4 to 1 yard of 56″ linen (see fabric suggestions below)
- Thread to match
- A small strip of fusible interfacing for the pocket facing
- 1 1/2″ elastic, enough to go around the waist of the shorts
- 3/8″ cotton cord, the amount depends on our waist plus 16″
- Two large beads with a 3/8″ hole
Tools
- Sewing machine or hand needle
- Scissors
- Pins
Sewing Level: Advanced Beginner
You should have knowledge of grain line, seam allowance, how to sew a straight stitch, and some knowledge of fitting to your own body shape.
Fitting your shorts: the most important detail is that the waist stretches as far as the widest part of your hips and the elastic rests comfortably around 1″ above your belly bottom.
Do you need to make the shorts larger? Then check out the first part of the Walking Shorts sew along where I go into detail on how to do it.
Fabric Suggestions From Fabric.com
How To Print Your Elastic Waist Linen Shorts Pattern
Please use the latest version of Adobe Reader, which is entirely free—print on Actual Size and Landscape Mode.
We will continue using the new Payhip web store to distribute our patterns.
Our patterns are still free, but now you can make a small contribution if you like our work! We’d appreciate it, and it will help us keep going with new and fun designs like this. Even a dollar or two goes a long way.
Thanks so much in advance for helping us out. You can use any credit card, and you don’t need a Paypal account, although you can use one if you have one.
Use Adobe Reader to download and print the pattern. Print on Landscape and use the Actual Size setting. Do not scale at all.
Pattern Download
[button link=”https://payhip.com/b/TLeD” type=”big” color=”teal” newwindow=”yes”] Download HERE[/button]
Pattern Layout

Body Measurements
| Size | Waist | Hips | Length |
| S | 27-29″ | 33-35″ | 15 1/4″ |
| M | 29-31″ | 35-37″ | 15 3/8″ |
| L | 31-33″ | 37-39″ | 15 1/2″ |
| XL | 33-35″ | 39-41″ | 15 5/8″ |
How To Sew Your Elastic Waist Shorts
The seam allowances are not included in this elastic waist shorts pattern, so please add an amount according to your level of skill, beginners 5/8″ and everyone else 3/8″.
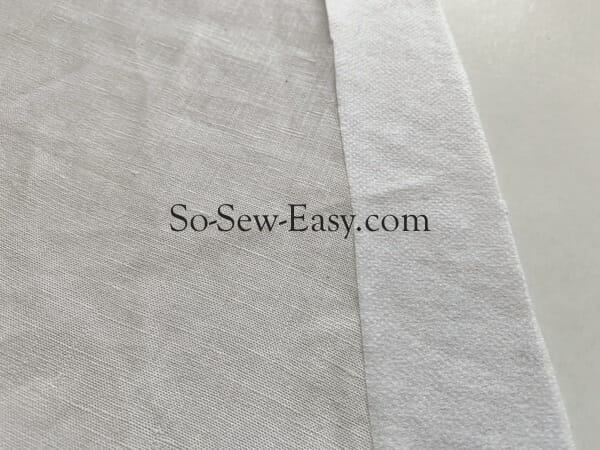
Sewing The Pockets
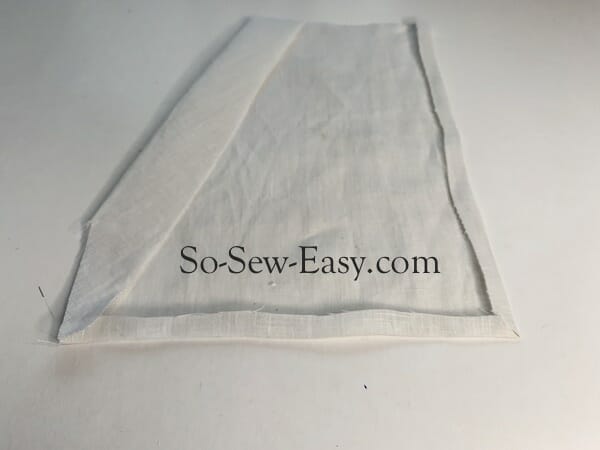
Iron a piece of fusible interfacing on the facing of the pockets. If you do not have fusible interfacing you can use a piece of thin cotton fabric. We are trying to stop the pockets from gaping since the opening is on a bias.
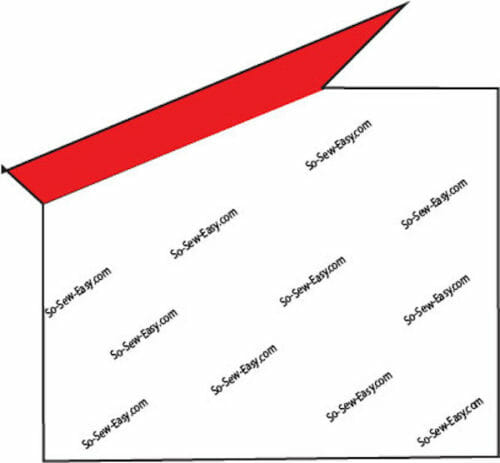
Fold the facing and stitch the facing down using a double stitch.
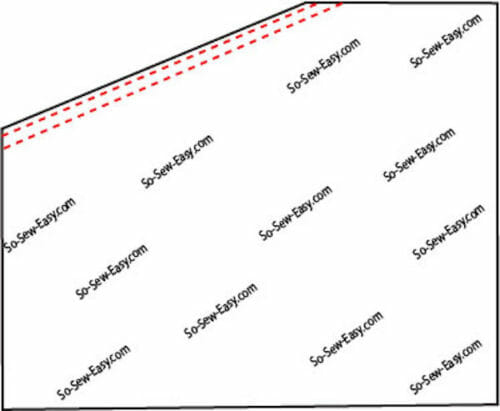
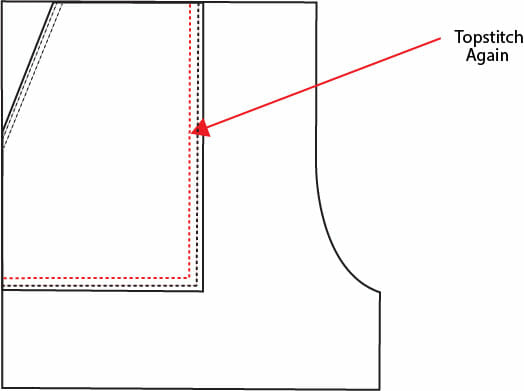
Follow the steps in the photo below. The amount of fold will depend on your seam allowance. 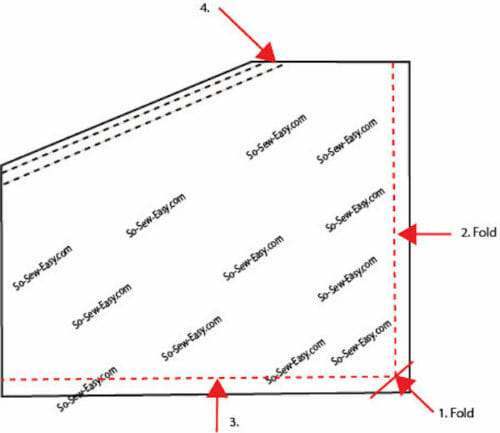
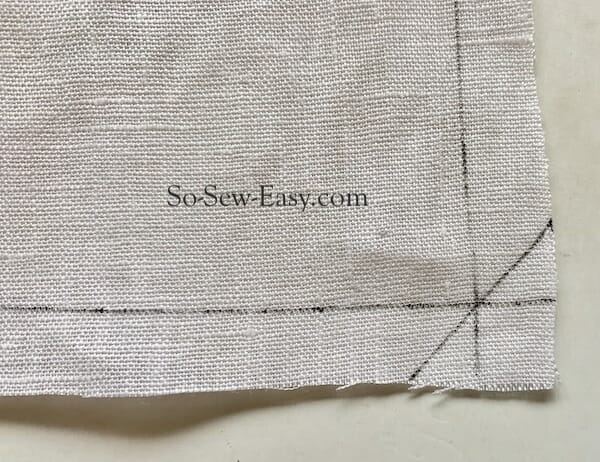
- Fold the corner
- Fold the bottom of the pocket
- Fold the side
- Align the side of the pocket with the side of the front of the pants and stitch the pocket down very close to the edge.
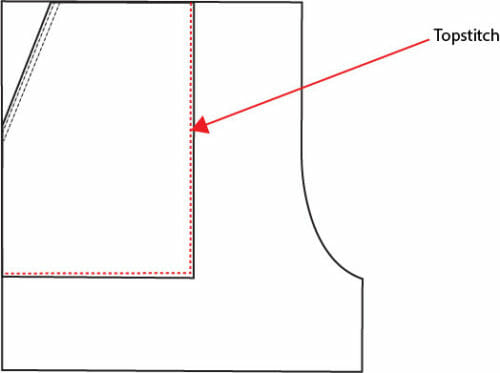
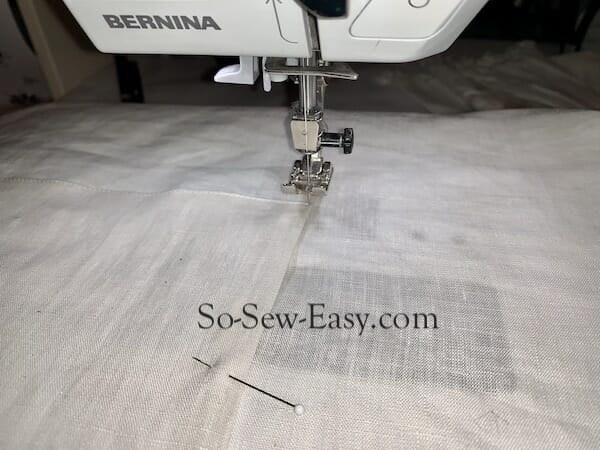
Topstitch again 1/4″ from the first stitch line. Repeat on the other side.
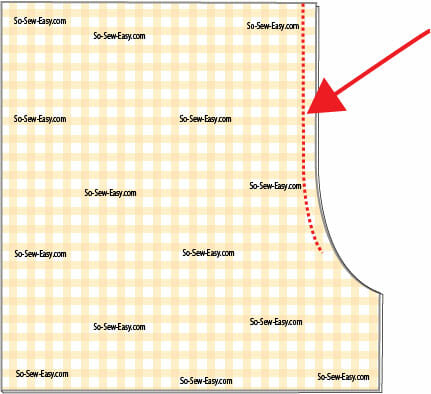
Joining The Fronts Together
Place front sides together and sew just a little past the curve.
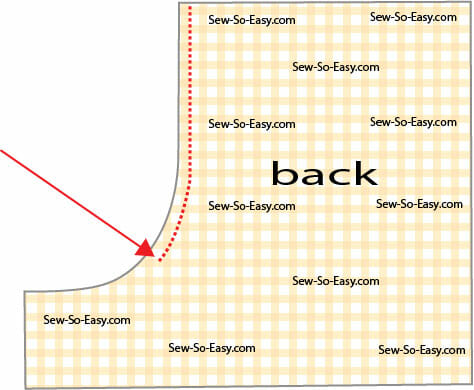
Joining The Backs Together
Sew the two backs together ending a little past the curve.
Serge all the seams including the hem and iron open the inseams.
Sewing The Front And Backs Together
Here is where I change the print of the fabric. If you have been following me on Instagram you would have seen some carving on linoleum to make prints for sharing with you guys.
Place front and back print side together, then sew the sides together using the seam allowance you have chosen.
Sew the inseam on each leg.
Sew the rest of the crotch closed, making sure to keep the seam allowances of the legs open.
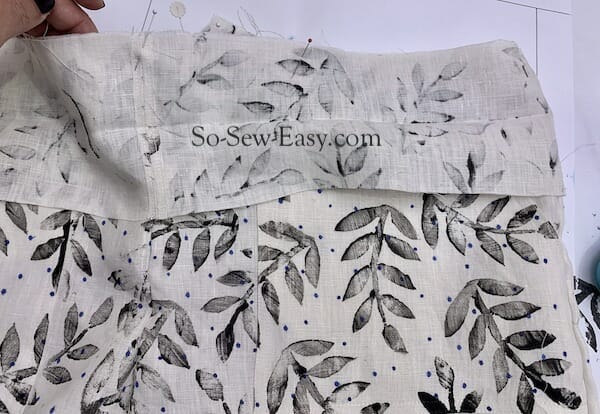
Making The Waistband And The Hem
Measure the waistband on your shorts.
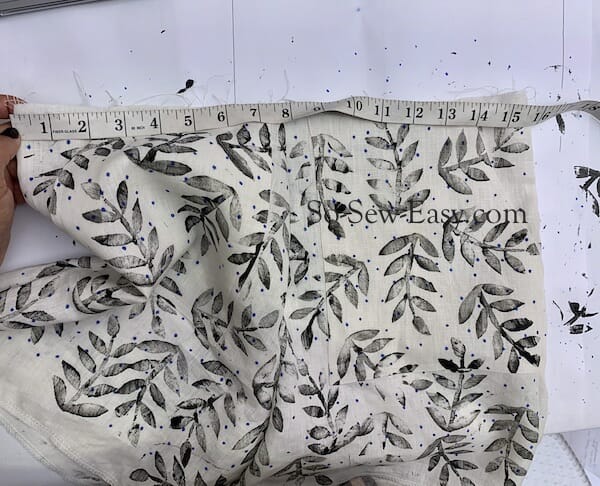
Take the measurement of the waist of the shorts X 4″. Iron the strip lengthwise. Sew the strip to form a band. You need to divide the band in four, front back and sides.
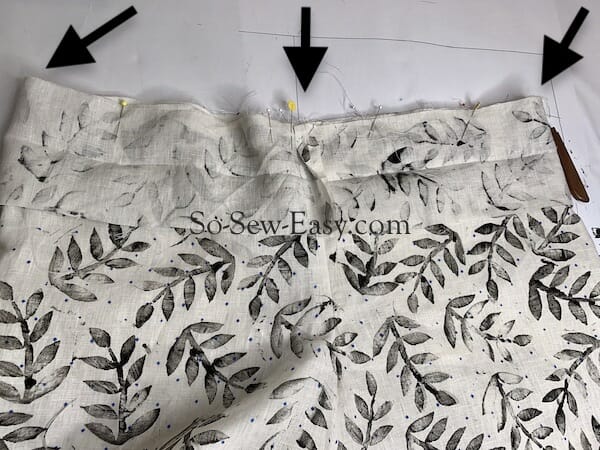
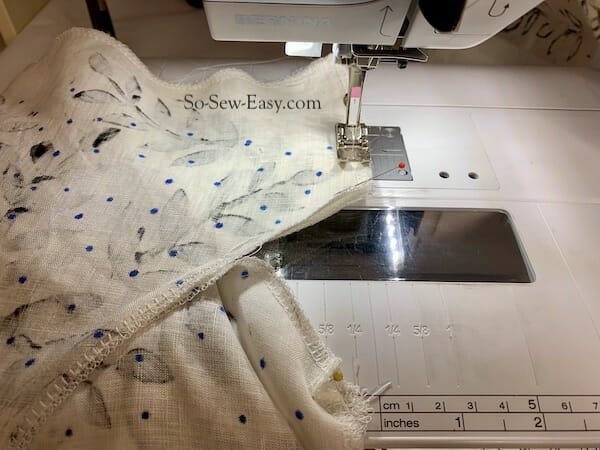
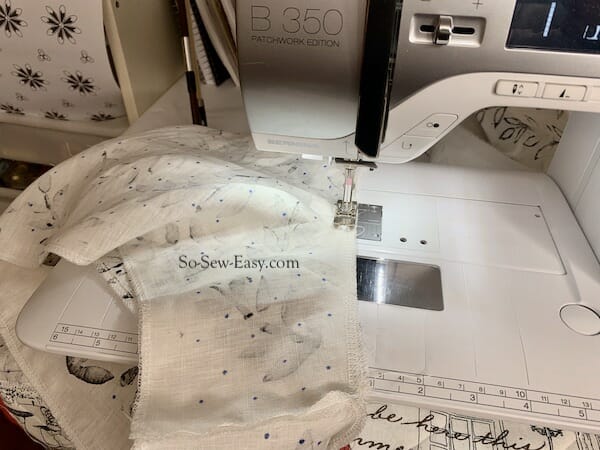
Pin the waistband placing the seam on the back. Sew the waistband from the outside to the inside. Sew the band from the outside to the inside.
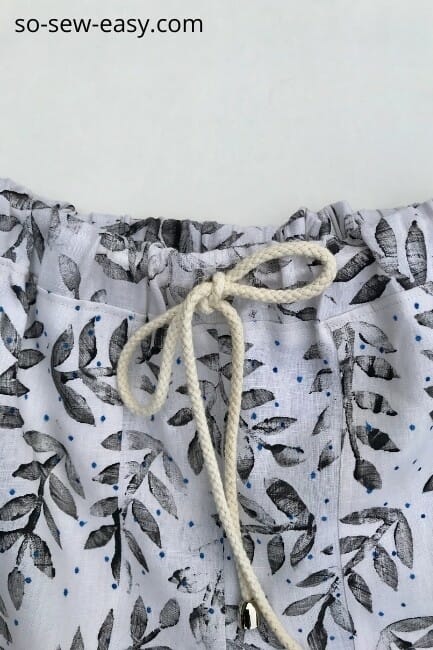
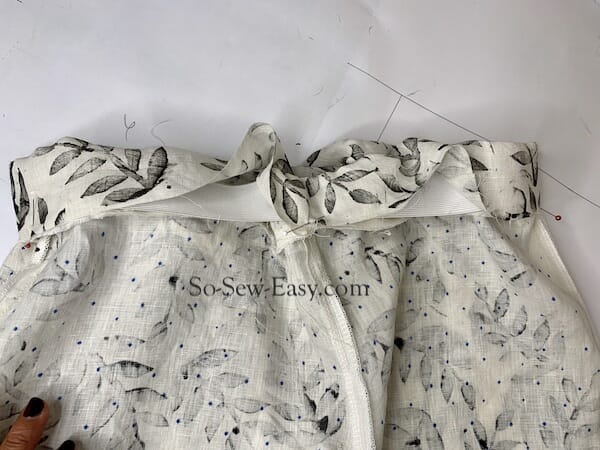
Attach a small amount of fusible interfacing on the front of the band and either insert some grommets or make two buttonholes to be able to add a cord to your elastic waist linen shorts. Make a band with the elastic. The amount of elastic depends on your waist, but make sure that the elastic is large enough to go over your hips.
Insert the elastic through the pants. Please watch the video on How To Make Short Pajamas from minute 10:40 to 13:00. Here is the link https://www.youtube.com/watch?v=2P_idySKaiY
Pin the band to the edge you have already sewn.
Start sewing the band at the back of the shorts. Put the needle down and pull the waistband front and back. Be careful not to catch the elastic.
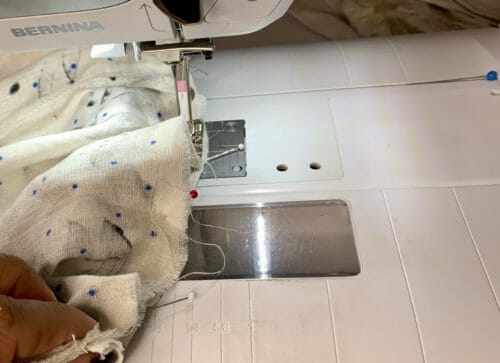

Finally, fold the hem up 1″ and sew. Insert the cord and iron your shorts!
I hope that you can make good use of these elastic waist linen shorts since so many of you guys have been asking for a pattern like this one. The perfect top to go with them is the linen V-top which is also a free pattern.
Thanks for reading, And Until Next Time, Happy Sewing!
Need a pair of dressy shorts? Something more elegant to get back to school perhaps? Try the ones below. Or maybe you want some walking shorts, these ones are a three-part sew-along starting by altering the pattern to fit your body.
Women’s Dressy Shorts Pattern – Great For All Ages And Seasons

If You’d Like To Support Our Site
If you want to help us continue to bring you a wide selection of free sewing patterns and projects, please consider buying us a coffee. We’d really, really appreciate it.
There is no waistband pattern piece provided in download. What a waste of printer paper. Also vague instructions. Stick with simplicity or Vogue etc. At least you get a good result. This was just amateurish instructions.
I’m very unlucky. It’s really thin. Inside, you will have flat ass, you cannot walk.
Who wears short shorts? Not me. Can I add length to these?
This pattern works great!
I made the small size. It’s super small! Maybe about a 00. The hip width is no wider than the waist! And they are very, very short–not the proporions I see in the picture. What kind of sizing did you use?
I am just starting to work on this pattern. I have 1 yd of wide linen and am very happy to have found this pattern. Does the facing piece for the pocket require me to add the seam allowance as well? Thank you!
Thank you for creating such awsome patterns, I am enjoying them all the way in South Africa, I did a medium as per my sizing, but its way too small. Is there a regular size shorts patter available?
Hi Anel, I love your country; the natural beauty is unparallel. The pattern has no seam allowance; did you add them?
Hello I’m a beginner sewer. I’m making the elastic waist linen shorts. What pattern number is the waistband.
Hi Kim, welcome! Please refer to the Body Measurement table. Kind Regards,
How do I find the same fabric these shorts are make in
This is linen, the print I made myself.
How and where can I purchase the material the shorts are made in.
This is linen, and I made the print. I am editing the video to show you how easy it is to do at home.
I have a question about the necklace that is on the mannequin in the top photo…did you make it or is it store bought? Very pretty!
Made will share when I find the unique gadget I have to make this very fast and easy.
why not add a slash pocket instead of the patch pocket?
I should also say that I am a very new at sewing. This will be my first shorts/bottoms and I have no idea how to size up.
Love the look of these shorts but to small. Do you have a way to make them plus size?
Yes, I do, I will share soon with the video.
Hi Mayra, thank you for all the well-drafted, free patterns! Appreciate all that you do for us. Every project has worked out well. I’m out of your size range, so have had to customize the fit. Everyone – take your time, measure and do a mock up.
Here in Uk Chrome blocked the fabric choices block/advert! Possibly cause I am not a version 11 user? Ah well, I will look for some crisp material in the local shops. I have been teaching myself about Bermuda style shorts and my shape by making a toile from an old sheet first. Your pattern looks a bit easier!
Hello Mayra! My hips are 43, my waist 34. How to enlarge the shorts around the hips? Thank you so much for your answer!
I will offer larger sizes soon.
Somehow I missed the waistband pattern piece, or how to measure the dimensions of the waistband . Help.
Hi, Mayra. Is the waistband cut as one long rectangular piece, joined at the center back seam of the shorts? Also, is the seam allowance for attaching the waistband to the shorts 3/8″ or 5/8″?
Thanks for your help! I have just retired and am getting back into sewing after 25 years! Wish me luck!
Hi Melissa, welcome back to the wonderful world of sewing! yes, the waistband is one long rectangle. The pattern does not include the seam allowance so please add it to your taste.
It looks like a great pattern but the instructions are really hard to understand
Does the interfacing go on the right or wrong side?!
Hello! Thank you for sharing this pattern, I am excited to give it a try. Just to be sure, what do you base your hip measurement off of? Do you base it around the largest part of the bum, or up higher around the hip bones? I’ve seen patterns base hip measurements off of those two different areas, and when I measure around the largest part of my bum like the most common hip measurement location I see, I am an XL in this pattern which is uncommon for me, I am usual closer to a M or L, so just wanted to double check!
I’m curious, could I make these shorts exclusively draw string and exclude the elastic? Thanks for advice!
Hi Shari, you can however it is more comfortable to use elastic as well, especially if your hips are narrow or if you are very thin.
I finished the shorts last night in XL and run like a M was for a gift. How I can modified? I add 2′ 1/2 to make the elastic band in one step. My first language is Spanish, sorry for my bad English.
Hola Mirty, me puedes escribir en Español, le añadiste las costuras al patron?
I can’t make it fit me 🙁 the biggest size is too small and I tried to add 4 inch to it, to have a bit of wiggle room, but now the legs are too wide while the crotch area is still too tight. Anything I can do to fix that?
Oh dear.. whoever needs to read this: the sizing up worked, but I sewed the crotch all wrong, robbing me a full hand width of crotch seam. Feel pretty stupid now!
Hi Mayra love this pattern. Just wondering is the waist band fabric additional to the fabric pattern pieces? There does not seem to be a piece for the waist band. I understand how to sew it but just wondering how much fabric I would need to purchase. Thanks
Hi, I am excited to print and try the shorts!! Thank you.i do sewing part time but I don’t attempt pants , but I will really give it a shot.But one question can u share with me how to use the stamps to make tags/ labels for my sewing work.I dont have access to those other fancy materials but i have access to limited fabric where i am living .thank you
I will in the near future. Stay tuned.
Do you happen to have video instructions on this pattern? I do not understand how to sew the inseam and crotch. Thank you!
I am editing, please wait for me, it is easier than explain. I will be telling on the video the reason I prefer this way of sewing the crotch. But you can always sew the crotch like the mass production factories do. Join the two sides of the front, then join the two sides of the back then sew the legs from one leg to the other. There is another way, but it is so hard to explain without photos. Thank you just gave me an idea for a post.
Is the a video out yet?
I am a true beginner. This would be my 3rd project and I totally messed it up, unfortunately. BUT I will be attempting it again. Turned out too small for me. I think I assembled the pattern wrong. I did not follow 1 inch squares guideline.
I will try and add some extra fabric as fit seems tight (even if I did not mess up). Wish me luck!
Hi Edita, first of all congratulations on having such a positive attitude, don’t loose it since it is the number one ingredient to be successful in the art of sewing. We do learn from our mistakes. There is a saying in sewing ” measure twice, cut once”. Please read the instructions before attempting any of the projects in this blog. Many time I do not add seam allowance to the patterns sometimes I do, but it depends on block I used to make the pattern. The 1″ square is to tape the pattern correctly but the 2″ X 2″ square Test is so you know you have the right scale of the pattern. If not this will change the entire pattern. Measure your hips then measure the pattern at the waist and see what size you need, you just need enough to get the shorts thought the widest part of your hips. Since it is an elastic waist the difference will be taken cared by the elastic and the cord. Hope this helps if you have any questions, drop them here as a comment, I do check them everyday. Kind Regards,
I love this pattern, it’s just what I was looking for. I notice that the sizing is smaller than some of your other patterns, for example the waist measurement on the XL of this pattern is the same as the M on the walking shorts pattern referred to above. The good news is that it’s an easy alteration, just compare your measurements to the chart above, divide the difference by 4, and add or subtract that amount at the straight side seam on both front and back. I added 2 inches on each side for a nice comfy fit.
Hi Heather, the walking shorts pattern was design exclusively of a wide bum girl. I used a different block for it. This shorts are very easy to alter up or down. I can see you know ypur body and exactly what to do. Would be great if you could share a photo on Instagram so I can see your shorts.
Looks like a fun make. Hopefully I will try to make this before the summer is over. Thanks for sharing.
Thank you for the pattern, I made it into culotte style knee length shorts and then made a linen V top which I ended up hacking til it almost is unrecognisable- 10 hours of happy sewing – thank you x
bravo! due tag me on Instagram to see what you have come up with, it would me my delight!
i do not understand how to make the waist band. I have read about the waistband you have and still do not grasp it. I have never seen a pattern without the waist band. Please help.
It is a strip of fabric rectangular shape, you need to measure the waistband of your shorts then cut the strip on that length plus the seam allowance, the width of the band is 4″. Do not take this project if you don’t what the video I linked to, or if you do not understand the instructions. Please wait for the video.
Hi Mayra!
You do such a beautifully thorough and thoughtful job in with your patterns and suggestions. I have my college daughter with me these days and we have been looking for a simple, cool, and comfy short pattern. You nailed it – the linen is on its way from Fabric.com too. Many thanks and keep up the good work!
Hi Cindy! Glad to help out, and very happy you enjoy my work. Would love it if you or your daughter takes a picture and posts on Instagram and tag me so I can see the final result. Cheers!
The shorts are so pretty but where did you find that print? It’s beautiful and I know my daughter would love it. I went on fabric.com but they didn’t have any prints other than a few plaids. I would love to make a pair for her either in that print or something similar. Thank you for all the patterns you post. Your instructions are excellent also. Thanks a bunch
Liane
Hi, Liane, I made the print, (it will be available on my Ko.Fi account) I will be using the print for a few more projects a summer dress and autumn version of the dress, a tote bag and a pair of sandals. Hope you visit the page and join in the fun. Cheers!
Thank you so much! I’ve been hoping for this pattern. I cannot find your links to fabrics however.
It is under the heading Fabric suggestions from fabric.com, they are 4 pictures that look like advertising but they are not.
There’s no images, advertising or otherwise under the “Fabric suggestions from Fabric.com on my screen! Help.
Hi Gill, you probably live outside the USA or have a window blocker. Use linen; it is the best fabric for these shorts.
Those are adorable. Where can I find that fabric please?
So happy you noticed, I made the print, keep tuned I will share the method on this blog and on Ko. Fi next week.