


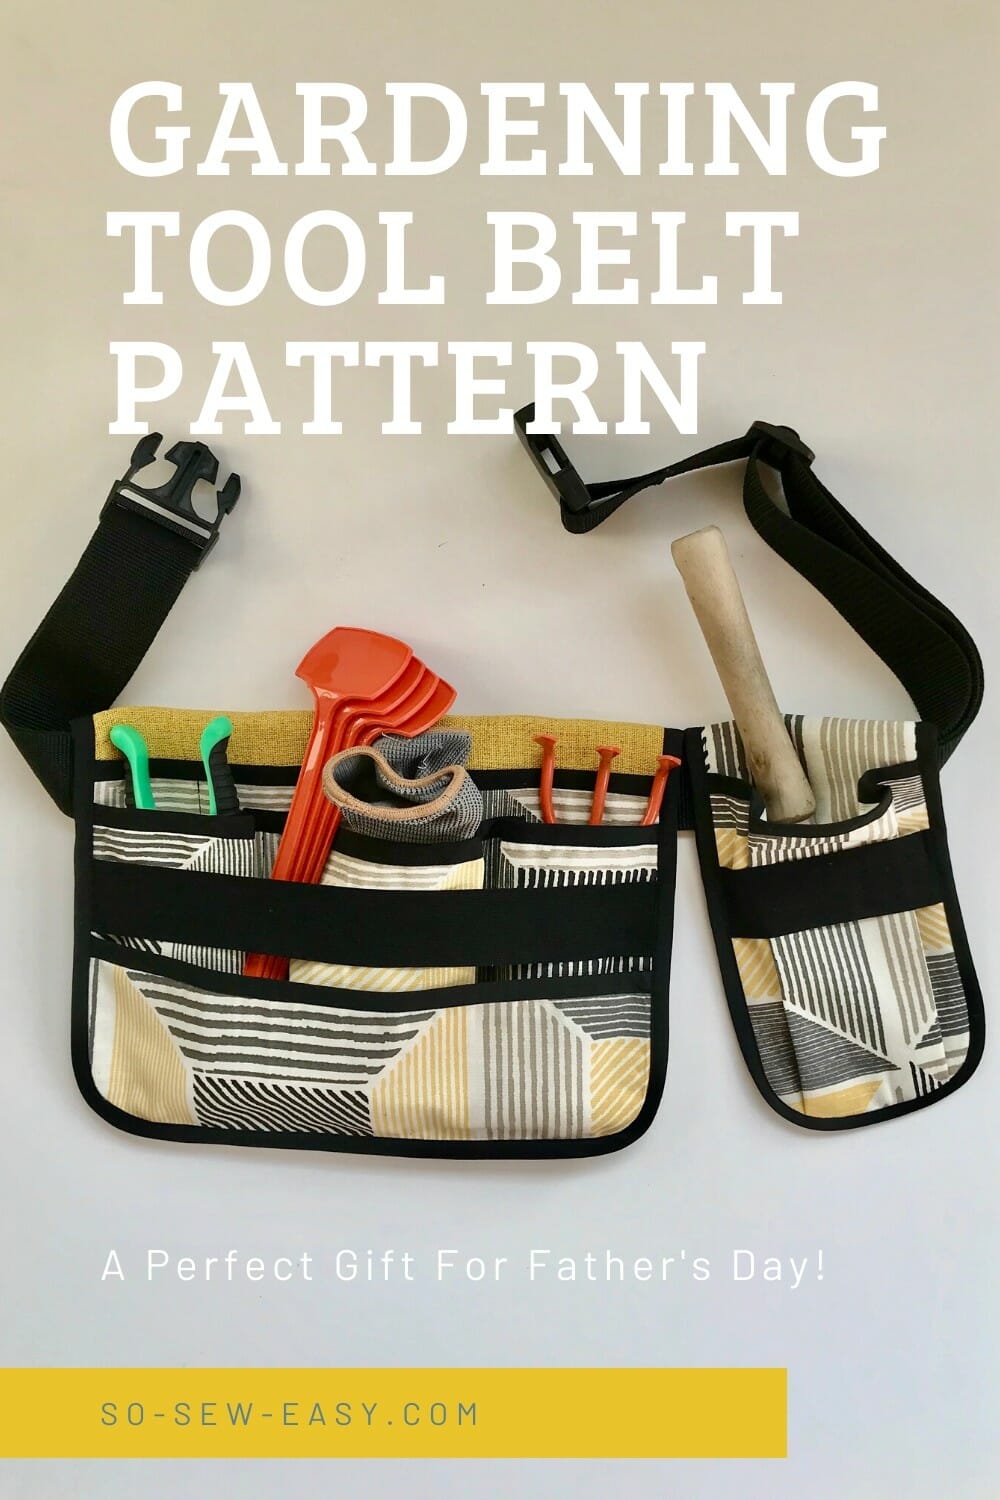
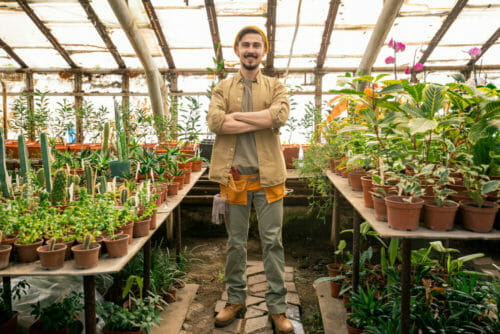
 This gardening tool belt is my project for Father's Day and my gift to all the handy mamas who read this blog.
I am well aware that I don't really share many projects for men on this site, so this is my attempt to balance things out a little. Having said that, in my house I think this tool belt may not make it to anyone else's waist but my own. One reason is because of the color combination. If I had olive green/black canvas or nylon, things would be different, but I don't have these colors on hand right now.
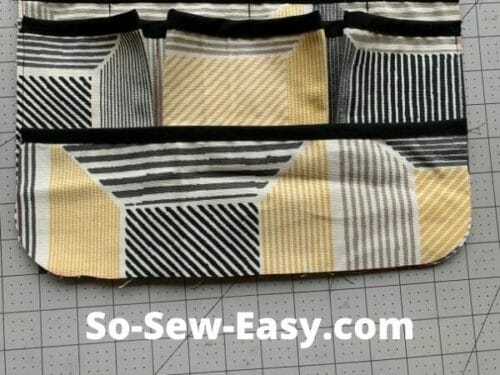
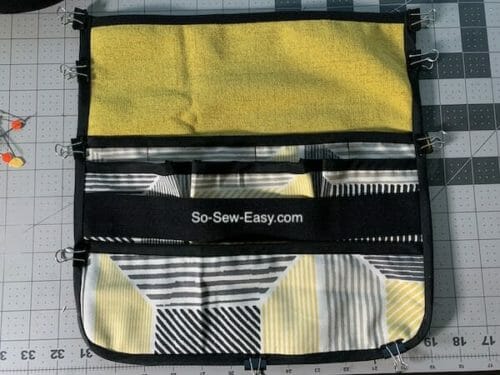
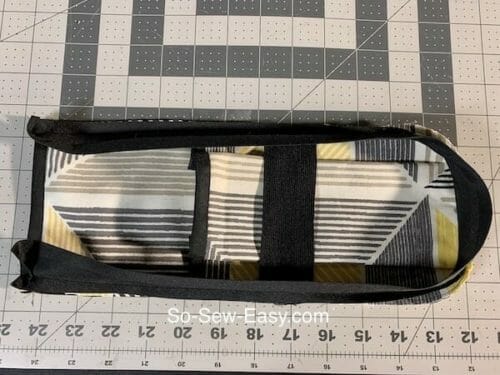
The gardening tool belt has a main pouch and one additional pocket. You can easily add another pocket if you choose. I think this decision you will have to make according to the number of tools you have.
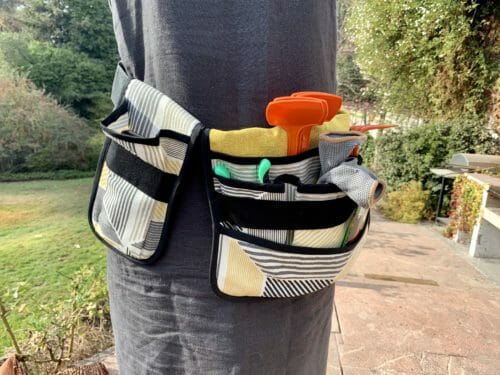
There is space for 8 tools including the extra pocket. There is an extra layer that I decided to add for flat seed packs and a phone. I like to listen to music or a book on Audible to help pass the time in the garden.
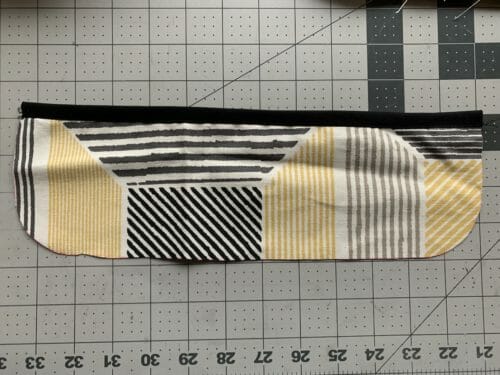
The main pouch is 12″ in width and 9″ in length.
The small pouch is 9″ long and 5″ wide.
The belt I'm showing is extendible and not included in this tutorial since it would make it way too long, so I've made a separate tutorial on how to make this sort of belt from nylon webbing. Also, I'll be using this belt in a few more projects in the future so it will have its own post since I'll be referring back to it often. The webbing belt tutorial is linked below.
Webbing Belt Tutorial – A Fast And Easy Gift For A Loved One
In any case, the pouches for this gardening tool belt project can be used on any belt and just slipped on and off when it's time to garden.
Materials
- 1 yard fabric 54″ wide (see recommendations below)
- 2 1/2 yards of 2″ bias tape (make your own) or 1″ store-bought bias tape
- 1 yard of elastic 1/2″ to 1″
- Thread to match
Tools
- Sewing machine
- Rotary cutter
- Walking foot
- Jeans needle
Experience Level: Intermediate
If you do not understand the tutorial do not try until I realise a video tutorial. If you manage to make it please post on Instagram so I can see what you have made. My Instagram is https://www.instagram.com/soseweasyofficial/
Knowledge of how to make and apply bias tape is a must. Please review this free tutorial if you have any doubts.
Seam allowance is included and it is 1/2″.
Fabric Recommendation from Fabric.com
The Fabric I Used Making This Gardening Tool Belt
I used the IKEA fabric below:
How To Download Your PDF Pattern
We're going to continue to use the new PayHip Webstore to distribute our patterns. As most readers know, Craftsy (Bluprint now) is closing and they have stopped designers like us from publishing new patterns on their site, so we've had to move to another service.
Our patterns are still free, but now you now have the option of making a small contribution if you like our work! We'd really appreciate it and it will help is keep going with new and fun designs like this. Even a dollar or two really goes a long way. Maybe you don't know it takes an average of 26 hours of work to make a post and that does not include a video.
Thanks so much in advance for helping us out. You can use any credit card and you don't need a PayPal account, although you can use one if you have one.
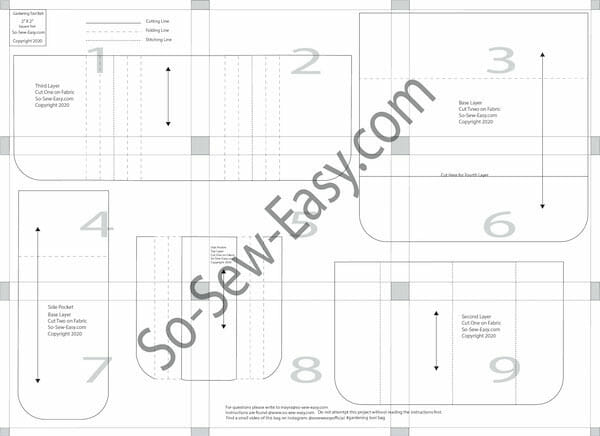
Pattern Download
Pattern Layout
How To Sew Your Gardening Tool Belt
This gardening tool belt is going to be sewn the same as the running belt I shared with you a while back. We need to start with the layer underneath.
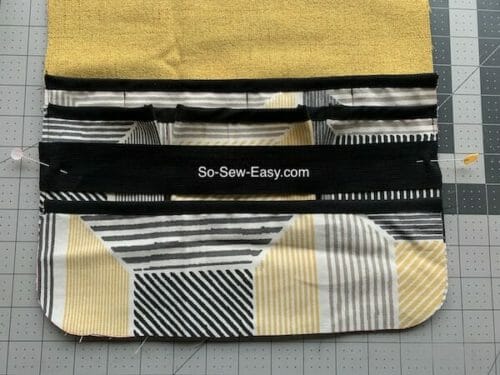
The fourth layer which I added after I had digitized the pattern is not included in the PDF. However, you can retrace it using the Baselayer but only 3 5/8″ inches in height. Of course, this layer is optional but I thought it would be nice to keep my phone on the front and have space for the seed packs I am planning to sow.
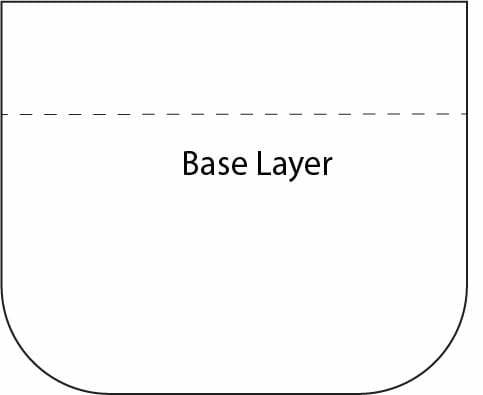
My base layer is an upholstery fabric with a black backing. I think black canvas would be better but I do not have any at the moment.
Step One
Apply bias tape to the top of the second, third, and to the optional fourth layer if you are adding it.
Sew the bias tape at 1/2″ on the right side of the fabric in all the layers mentioned above. Then turn and sew very close to the edge of the tape or use the stitch in the ditch technique.
Step Two
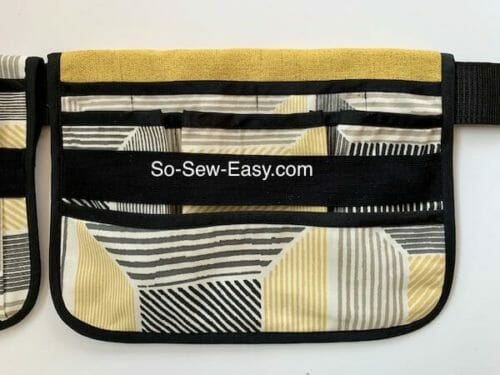
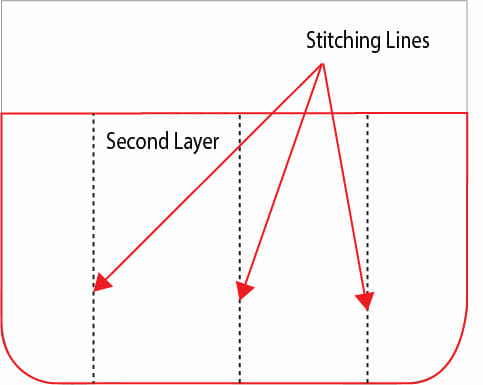
Place the second layer and sew the three stitching lines in the middle.
Step Three
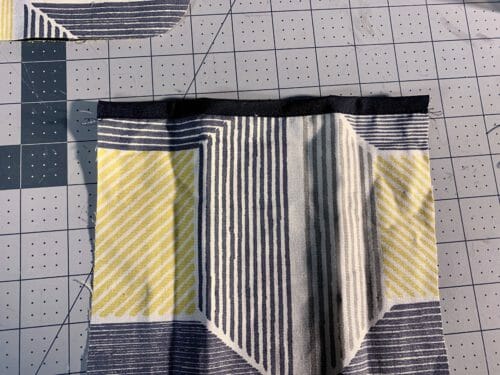
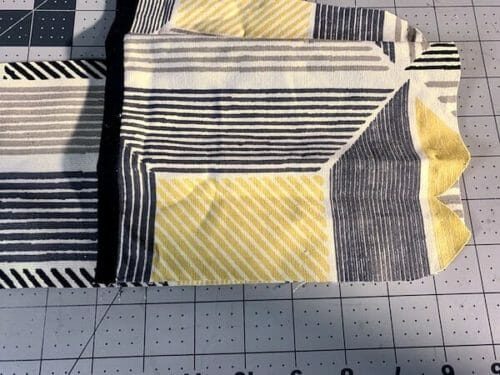
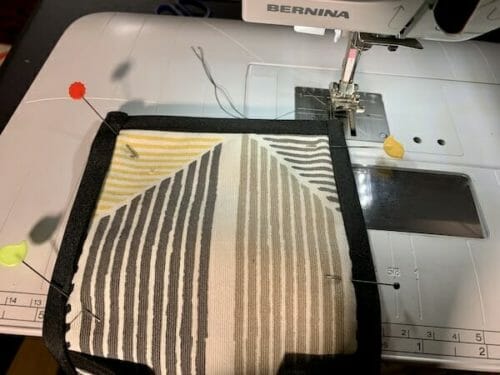
Place the Third layer. This layer has a type of boxed pleat pocket design to accommodate thicker tools such as a small shovel.
The easiest way to make pleats is to fold the fabric while you have it pinned to the pattern and apply the hot iron over it.
I am marking the pleats first by ironing but I will add the bias tape before I sew the pocket down.
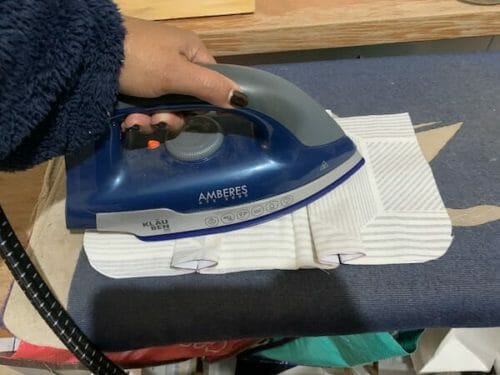
Place the third layer on top.
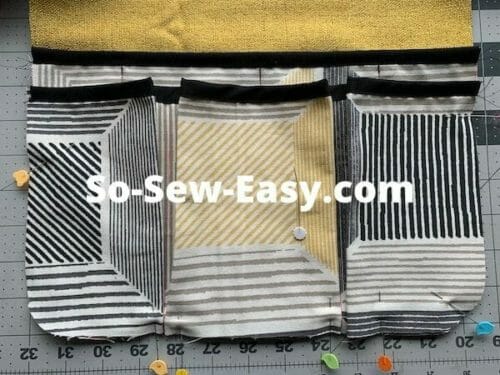
Sew in between the pleats to separate the layer thus making three pockets.
Step Four
Add the optional layer, the fourth layer as I mentioned before will be made by tracing the base layer but making it only 3 5/8″ in height.
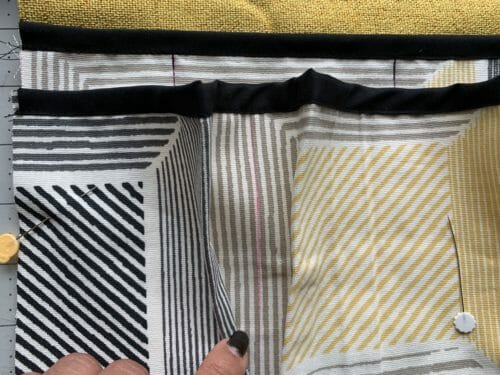
Apply the bias tape to the top just as you did on the previous layers.
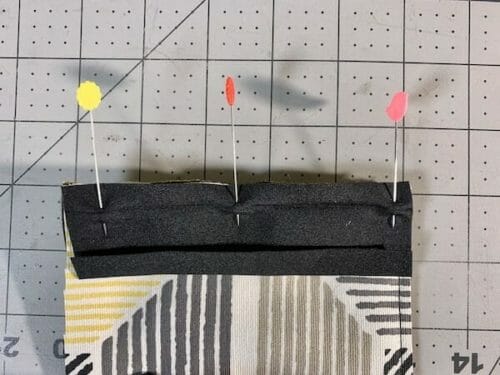
Add the strip of the elastic one inch from the third layer top edge. This will help keep the tools from falling out, as I found in my first try
Stay stitch around at 1/4″ starting from the second layer and ending on the other side of the second layer. This is to prevent the layers from moving when we apply the bias tape.
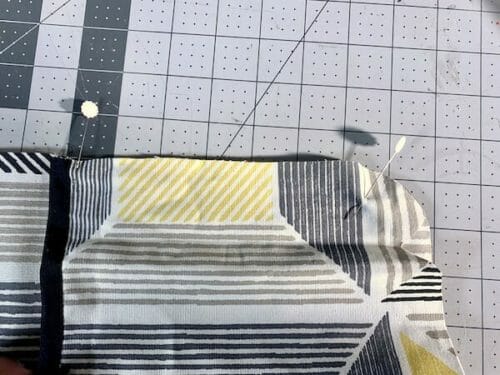
Step Five
Apply bias tape. We need to start at the top. Sew at 1/2″, turn the tape and sew on the edge or on the ditch, either way, is fine.
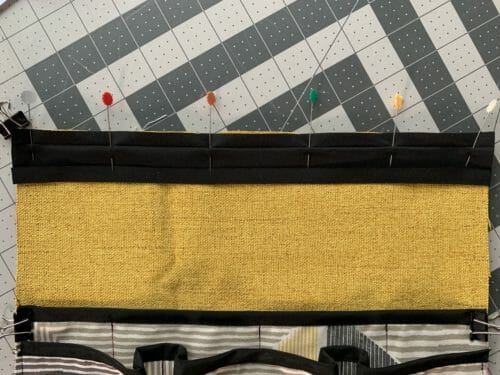
Fold the end of the tape and apply it to the right side of the gardening tool belt.
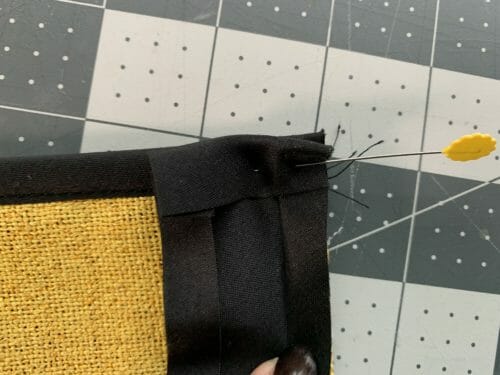
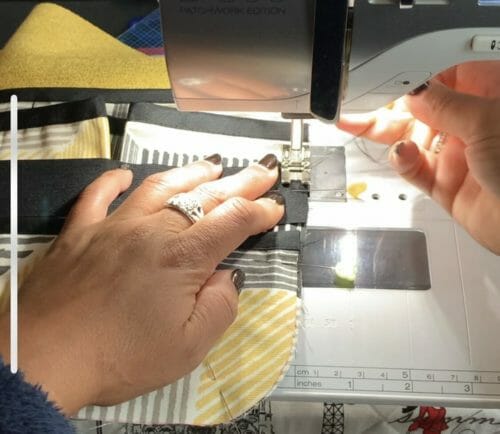
Sew around carefully, a trick I like to use is to pin or use art clips to align the tape edge to the fabric edge so when I sew around the curves the tape does not stretch too much.
Sew on the right side using, as before, a stitch close to the edge of the tape or by the on the ditch technique.
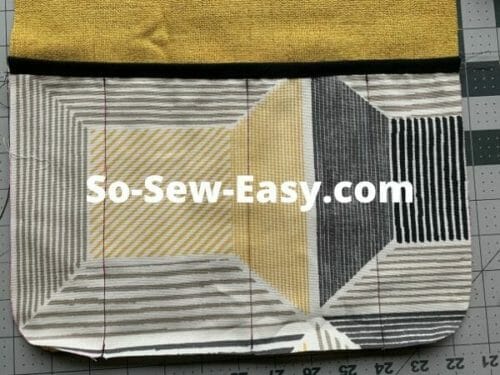
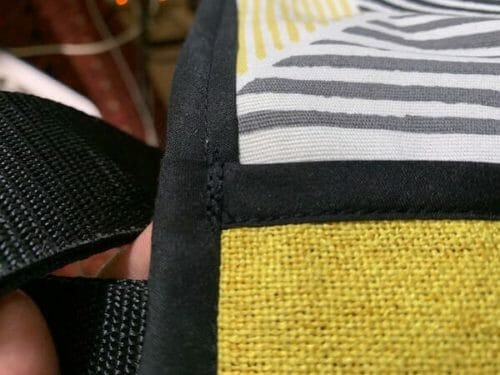
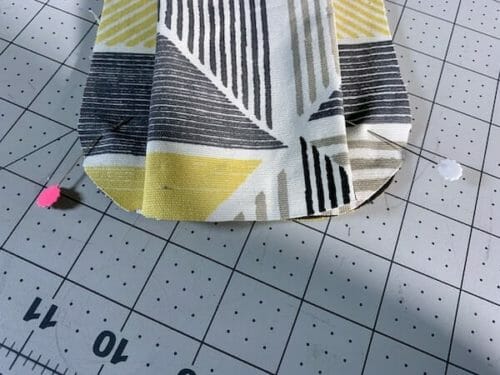
Turn the top to the back and tack the bag using your sewing machine in three places: on the left and right and in the middle. Make these tacks on the second layer making sure you are catching the folded top at the back. This is what make the pouch hang from your belt.
Left side
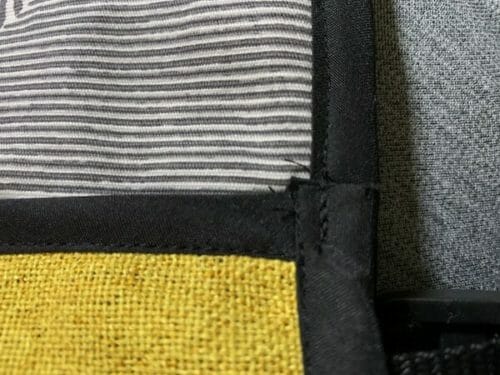
Right Side
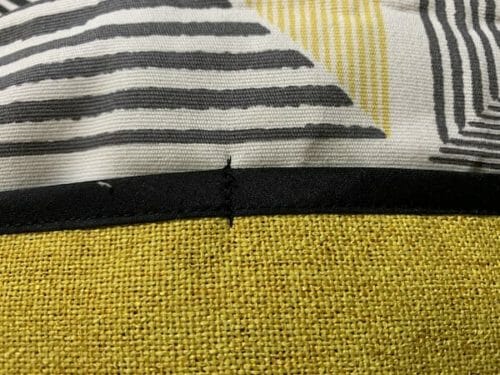
Center
Step Five
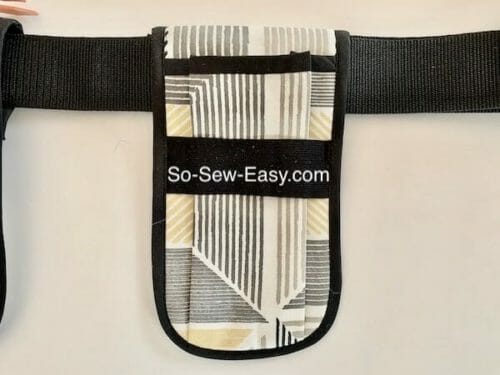
Making the additional pocket starts the same way, applying bias tape to the pocket.
Place the base layer print side up on the table.
 Lay the pocket on top of the base layer. This time I will show you a trick on how to fold this type of pocket very fast.
Align the left edge of the pocket and pin.
Align the left side of the pocket with the left edge of the base layer and pin.
Make the fold to the sides
Add the back layer.
Stay stitch, apply the bias tape at the top.
Add bias tape around the pouch.
Turn the bias tape and stitching down.
Turn the top part of the pouch pocket 3 1/2″ and tack just like you did before.
All that is left now is to make the belt, check back on Tuesday when I will be sharing a short tutorial on that.
I am seriously thinking of keeping this gardening tool belt of myself, so what about father's day then?
We are currently trapped in the southern hemisphere where it is winter. The first thing that comes to my mind would be a cozy pair of sweatpants, a bomber jacket, or some cargo shorts. I think I am going to need your help on this one. What project for men would you like to see next time?
Need another gardening companion? Try this lovely bag. And Until Next Time, Happy Sewing!


Hi, I’ve bought the pattern, but can’t find your instructions, especially the video. Please tell me where to find it?
Hi Louise, when you mentioned you bought the pattern, please tell me where you bought it because this is a free pattern. If you have donated, please tell me, and I will send you the instructions to your email. However, you can use the print-friendly button on the left of your screen to print the instructions without the ads. Let me know if this is not possible for you so I can help you better. Kind Regards, MC
Is the video available yet. I too I’m very confused by the instructions on what layers get sown to what
Have you done the video tutorial yet? I’ve had a look on your You Tube channel and can’t find it. Thanks.
HI, I have downloaded the pattern through the link to payhp , however only the pattern pieces come in the download but no instructions. Do we have to continually view this page to see the instructions? I would rather have something i can print out and have next to my machine, Thanks, Tracy
Instructions are free on the site, Kind Regards,
[…] Father’s Day is this weekend and if you’re still looking for a gift to make, you’ll definitely want to check out this fun gardening tool belt. […]
First, I do like the style of the gardening tool belt and will make one for a friend. Second, I am however confused on the stitching between the pleats. What is it being stitched to–if it’s the second layer will it not interfere with the pockets already formed? Just a little bit more clarify please.Finally, I think I understand how the “pocket for the web belt is formed but I’m not sure. Maybe a picture??
Hi, you mentioned that we should “check back on Tuesday” for how to attach the belt.Is that tutorial out yet? Thank you in advance for your help!
Hi Mary, it will be out shortly. Please check back in two hours.
Thank you for the inspiration and pattern however I cannot see how it would attach to a belt . I have read the instructions several times but cannot see what to do. I am also confused by having 2 pieces to cut for the base layer but again do not understand what to do with the 2nd one. Also there is no mention of the elastic required until it appears in the pattern instructions, which it just a surprise!
Hi Lindsay, the best thing for you would be to wait for the video. The elastic was an oversight of mine. 1 yard of elastic 1/2″ to 1″ would do to keep the tools from falling over as I found in my first try. Thanks in any case for letting me know. I have updated the instructions accordingly.
I understand everything but why we need to have 2 base layers. I’m not sure if the video was made, still looking. Thanks in advance for directions.