


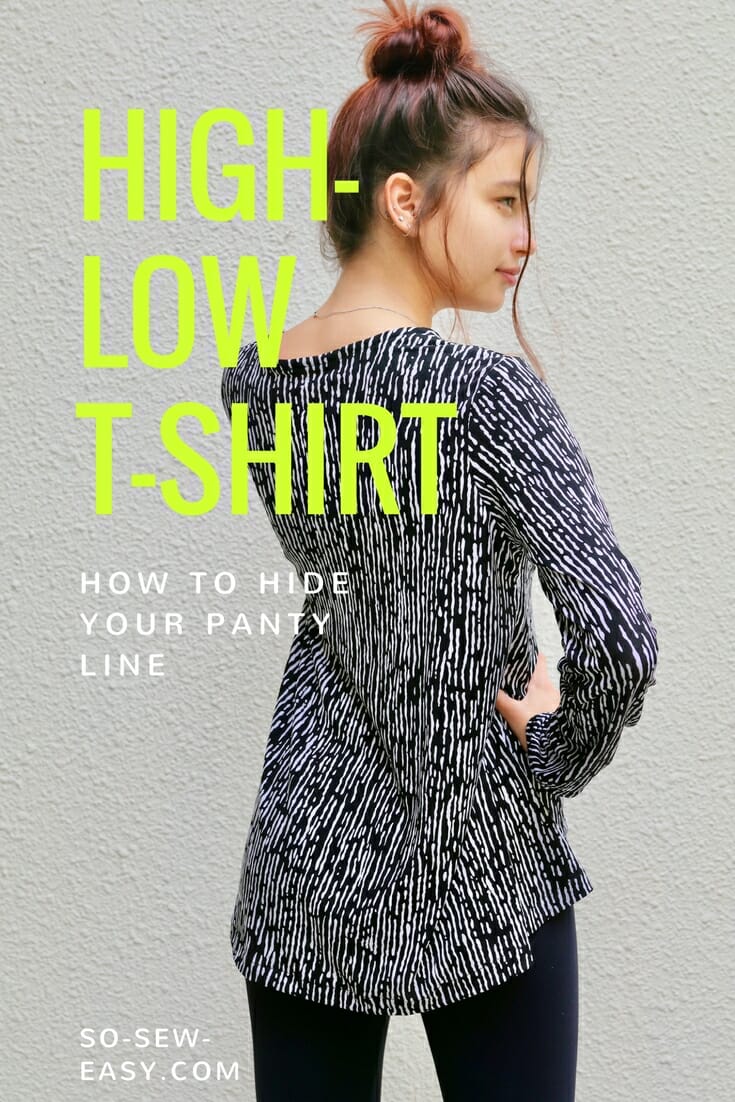
The High-Low T-shirt is the perfect item to hide your panty line. Let's face it, girls, sometimes depending on the mood and “time of the month,” we feel like wearing an underwear that leaves us with the dreaded panty line. We're not always in the mood for a tiny g-string, a sports undergarment, or a sexy lacy number. There's nothing good about a panty line, but sometimes you just don't care.
I've recently taken up Pilates and I'm determined to tone my Gluteus maximus aka my butt. Not for the reasons you might think, but simply because this muscle helps us keep a straight posture. In other words, no more back pain. If that isn't reason enough, this is simply a great high-low t-shirt that is easily made and transformed into a great top.
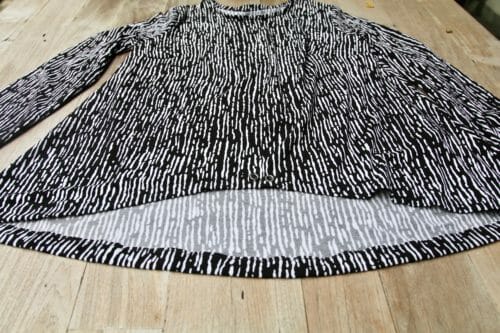
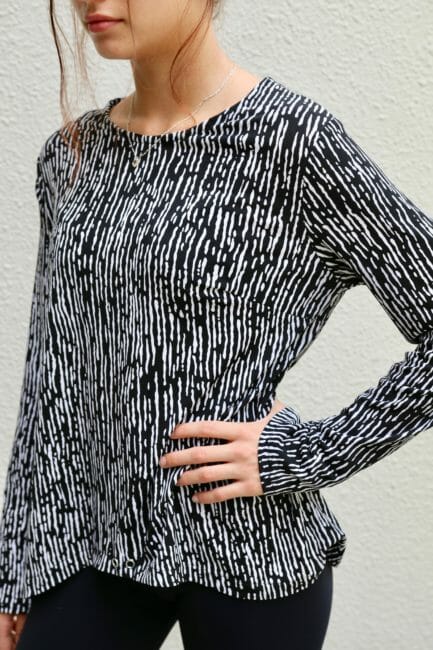
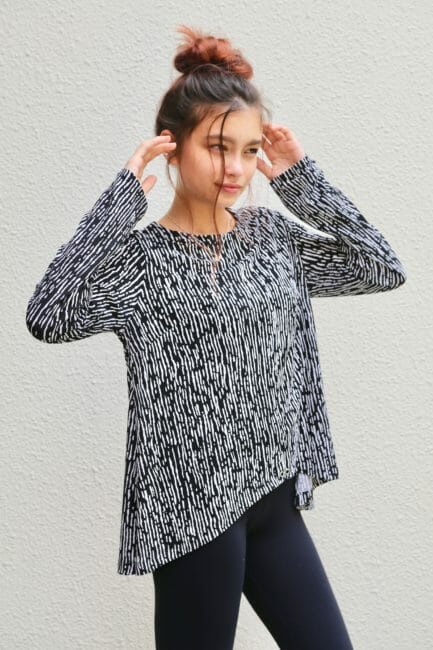
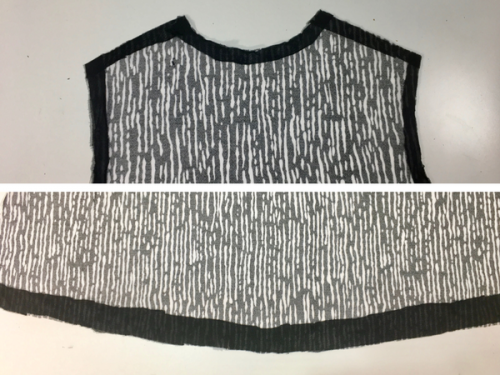
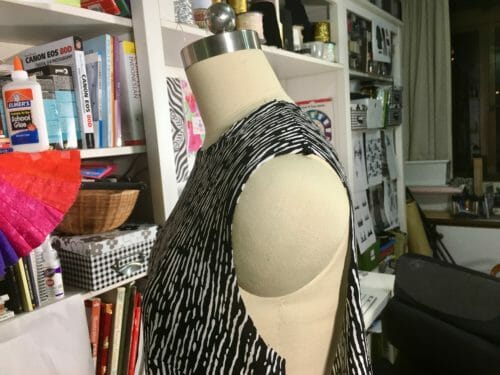
With this top, the back is 4″ longer than the front. The ease of the high-low t-shirt is fairly minimal at the shoulders because it's A-line and semi-fitted above the bust point. It will be loose around the hips and closer to your body at the shoulders. Perfect for the ladies who want to hide some extra pounds around the waistline and are looking for an easy-going, comfortable top to walk around in.
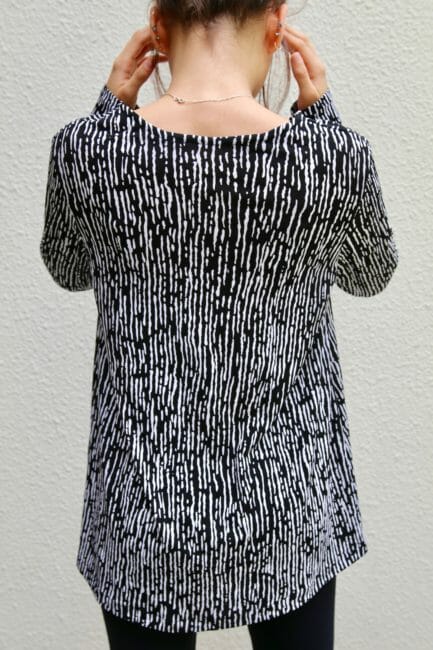
If used for Pilates or Yoga, this high-low t-shirt has a string at the bottom where you can tighten it so you will not have to worry about the t-shirt curling up your back when you bend over. But, of course, this feature is optional.
This pattern is suitable for two-way stretch knits or jersey knits only. I know what you are thinking, why is she using that fabric since this is supposed to be a t-shirt after all. Well, I just like to exercise in style..
If you do not have a serger and are using jersey knits, zigzag the seam allowances to prevent raveling. If using an ITY knit, there is no need for a serger since this type of fabric doesn't ravel.
Skills required to make this t-shirt
- This is an easy top to make, but if this is your first time working with knits do not attempt this top until you have read all the instructions thoroughly
- Good knowledge of your sewing machine
- Ability using a ball point needle or a walking foot
- Experience in cutting and sewing with knits
- Knowledge on assembling and printing a PDF pattern
Materials
- 1 1/4 to 2 yards of jersey knit or ITY knit, 60″ wide
- Jersey needle size 70
- Thread to match
- 1″ Stay tape or stretchable fusible interfacing
- Two grommets 5mm in diameter (optional)
- Grommet tool (optional)
- 2 to 2 1/2 yards of thin cord or ribbon (optional)
- French ruler (optional)
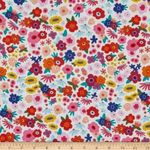
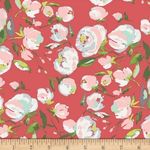
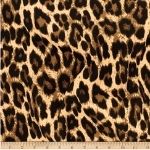
Fabric Suggestions From Fabric.com
 |
 |
 |
 |
 |
Pattern Download
You can download the pattern for this High-Low T-Shirt from our account at Payhip.
For help downloading and printing PDF patterns, please CLICK HERE.
Finished Measurements
To convert the measurements to centimeters accurately use this site.
| Size | Chest | Waist | Hem | Front Length | Back Length |
| Small | 36″ | 40″ | 54″ | 24″ | 28″ |
| Medium | 38 1/2″ | 42 1/2″ | 56 1/2″ | 24 1/2″ | 28 1/2″ |
| Large | 42 1/2″ | 46 1/2″ | 60 1/2″ | 25 1/2″ | 29 1/2″ |
| XL | 46 1/2″ | 50 1/2″ | 64 1/2″ | 26 1/2″ | 30 1/2″ |
| XXL | 50 1/2″ | 54 1/2″ | 68 1/2″ | 27 1/2″ | 31 1/2″ |
Pattern Layout
Print on landscape, in actual size, and using the latest version of the free Adobe Acrobat Reader.
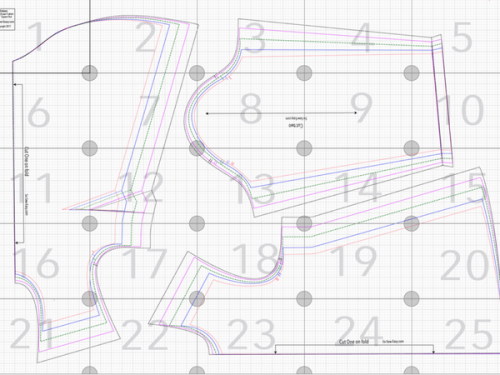
Step One: Cut the fabric
The amount of fabric required will vary a bit depending on the size you choose to make. So the best thing you can do is to print the size you need and work it out with the fabric you have in mind. Do take into consideration when buying online that you can usually only ask for a whole number amount. Few companies will sell you half yards especially when on sale. As always, I recommend you to look in your fabric stash for the appropriate fabric.
Cut front and back on the fold. Apply stay tape or stretchable fusible interfacing on the shoulders, neckline and at the hem.
Step Two: Sew the dart and shoulder seam.
Sew the darts. Try to finish the dart without creating a bubble at the end. If you need some help, here's a complete tutorial on How to Sew Darts.
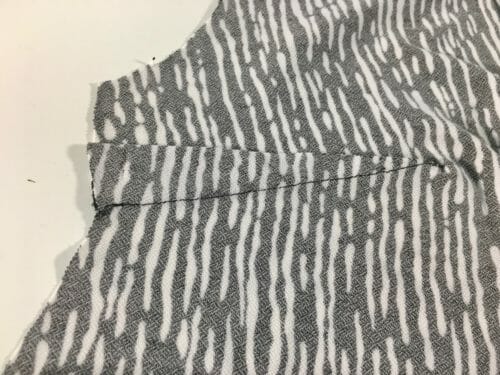
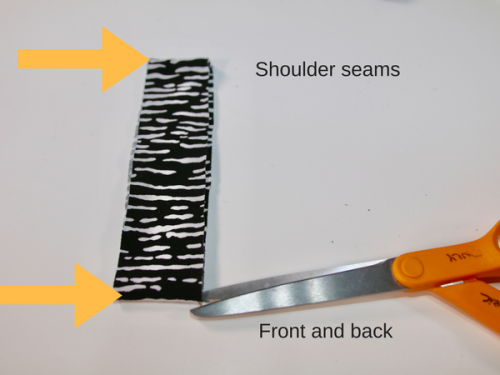
Sew the shoulders and zigzag or use your serger.

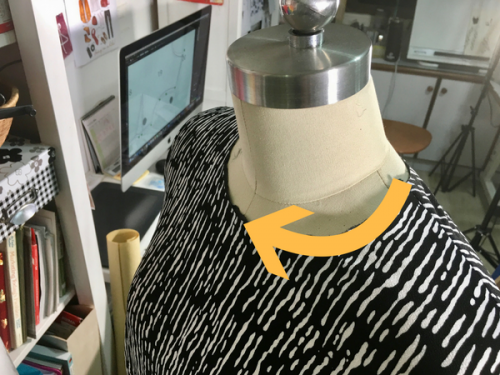
Fitting tip: Taking in consideration that you will have a 3/8″ seam allowance, put on the top and check whether the neckline is too high. Increase or decrease using a French ruler according to your taste. Once you are happy, apply 1/2″ Stay Tape or stretchable fusible interfacing to the neckline.
Step Three: Drafting and sewing the neck facing
The neck facing is not included in the pattern. You will have to measure the neckline and cut a rectangle with that measurement by 1 1/2″. When sewing this neck facing to the neckline use a 1/2″ seam allowance. For the rest of the high-low t-shirt use a 3/8″ seam allowance and a 1/2″ hem.
Measure the neckline.
Cut a strip of fabric across the horizontal stretch of the fabric. Use this exact measurement to cut the facing. Right sides facing each other, sew the sides at 1/2″ to make a loop. Use small notches to divide the loop into four equal parts indicating the front, back
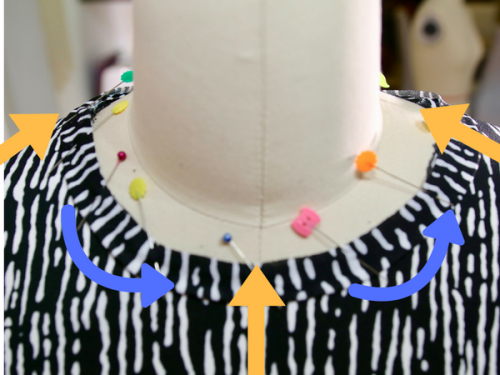
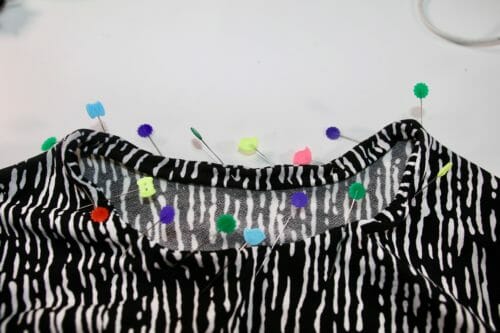
Working on the right side of the fabric, pin the seam of the band to one of the shoulder seams and match the other notches to the center front, center back and the other shoulder seam. Sew at 1/2″ seam allowance.
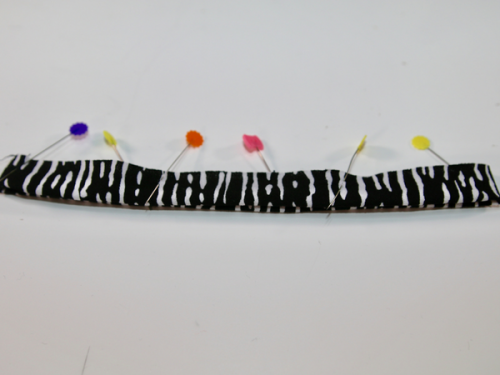
Pin and stretch between the four points.
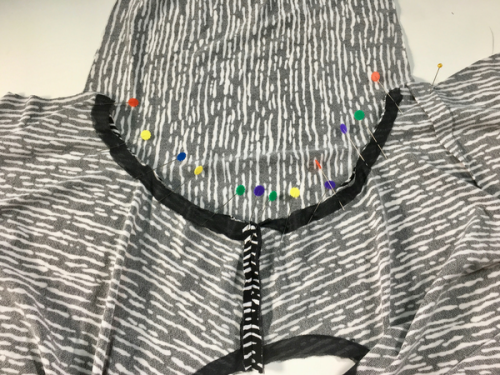
Sew the facing at 3/8″. Iron.
Step Four: Sewing the sleeves and the sides
Match the notches on your sleeves.
One notch is the front of the sleeve. Two notches indicate the back of the sleeve.
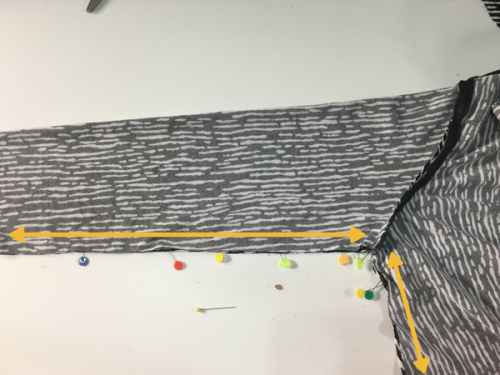
Sew the sleeves using a 3/8″ seam allowance and continue to sew the sides.
Fold the sleeves hem 1/2″ and sew. Iron the sleeves.
Step Five: Hemming and finishing the high-low t-shirt
Place the grommets at the bottom in the center of the t-shirt. (optional)
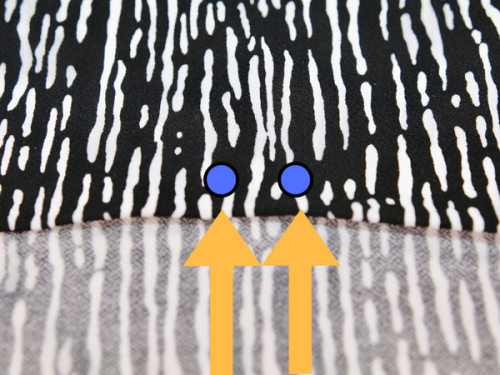
Attach the grommets following the package instructions.

Serge the bottom without stretching the fabric. Fold 1/2″ and sew at 1/8″ from the serged edge. Iron and your high-low t-shirt
This was my mock up and I like how it fits. Now I'm going to look for an actual t-shirt fabric to make it, one in white to go with my yoga pants, and one in gray to wear while walking the dog.
Need to make this T-shirt longer? Try this easy tutorial on how to lengthen a top.
Want to change to change the look of the T-shirt into a blouse? Try the bell sleeves transformation using the pattern you already have.


having a problem figuring out the neck facing attachment. Is it sewn on with right sides together, turned all of the was under, and top stitched? or folded in half with wrong sides together before pinning and sewing in place? Thank you for your help.
Wrong sides together Deb, turned under and top stitched.
Love the shirt! I noticed in the pictures you have a sewing form and I have been looking everywhere for one and haven’t found one I like. Are you able to tell me where I can get one like the picture? It appears to be what I have been looking for. Thank you
HI Shirley that is a collapsible magnetic shoulders fully pinnable here is in size 22 but check the site and they have many sizes available. If you can have it mail to you in the USA do buy the full body, you can make lingerie, swimsuits, cat suits and pants with it, Instead of having to buy another dummy. I wish I could get one here but it is much too expensive for me to have it delivered.
This looks like a useful pattern but I was hoping for a sizing guide i.e. body measurements for the different sizes so that I can choose the correct pattern for my measurements.
Thanks,
Alexa.
I don’t publish body measurements, I work with finish garment measurements, allow at least 3 inches from your body.
Thank you.
Do you top stitch the neck facing down?
yes I do . Apologies for not adding that up.
Thank you so much for the pattern. It is very lovely. I can’t wait to finish this project.
Happy you enjoy the project.
Is there any video tutorial for this? Thanks in advance!
I would feel better if the body measurements were listed. The finished garment size is good but without the ‘ease’, I’m unsure what size would work best for me (or my sister, who I am making the top for). Are body measurements listed somewhere on the site?
No they are not, simply because a better accurate way to fit a person is to use the finished measurements. It is an A-line knitted top. Choose the size closes to her chest measurements. You can use woven fabric on a bias just so you know why the dart in the pattern.
This project looks great. Congratulations on a very good job. I am happy to see all your ideas and finished projects. Such projects are very inspiring. I am waiting for more such good projects.
I would recommend that you purchase and look thoroughly into the Stretch N Sew methods, so much easier and better looking results with the neckline. And sewing methods are simplified for working with knits… why reinvent the wheel and try to adapt the methods for woven fabrics when we can copy what knit garment makers know>Ann Person developed this method and I learned it as a 16 year old many moons ago… so glad I can easily make knit things! https://amzn.to/2JCPNEM
Just printed out all the pattern pieces and got them put together. Can’t wait to make this. Did you ever get the video made? My girlfriend and I just recently went to the sewing expo and scored on some great knit fabrics.
Is seamallowancd included in this pattern? If so, how much?
Hi Jo! yes, it is 3/8″.
I have everything I need to make this top, but I have a question about sizing. Is the chest measurement around the fullest part or is it like the band size on a bra? (I’m new at this.) Thanks!
Hi Elizabeth, if you are referring to the finished measurements, in this case, the chest is the bust measurements. Note this measurement already has the ease included.
I just finished making the top and really love it. My one concern in the back neckline. The neckline doesn’t fi flat to my back. Did I do something wrong?
Otherwise a great pattern. Now I’m looking for more fabric!
I think you might have pulled or stretched the fabric while sewing.
Is there a printable pdf version of the pattern instructions? I don’t see a link… Thank you!
Not at the moment, instructions free on the website.
With the recent update is it just the sleeve that has changed? Do not really want to print all of those sheets again if not necessary! I have made the top and was happy with the length of the sleeve but they are a little tight at the top. A video would be great especially for the neck which I found tricky. Bought new jersey yesterday to make my next one thank you. Hmmm short or long sleeve?
Hi Sallie, only the sleeves changed so no need to print everything. But please also have a look at the post publishing today which will give you a few more options of what you can do with the sleeves to be even more creative. Please check it out.
Hmmm I can’t seem to find a post relative to the sleeve options, would you please post a link or give me a clue where to find it!! Thanks.
HI Sallie, check your email if you are on the mailing list please.
Thanks for the pattern. I just made it. I needed more tops to wear with my leggings. The next one will be short sleeve for summer. Love it!
Thank you!!!
I just finished making a lovely top using your pattern.
The time and effort you put into this is greatly appreciated!
Thank you very much for this pattern. I have one question: I have downloaded the original version and now I want to download the second version but then Craftsy says “you own this pattern already”. Does that mean that the pattern is adjusted automatically in Craftsy?
The current version on Craftsy is updated. Check the 2″x2″ square test, it should say Updated, if it is not you need to delete the old version from your library and download the new version.
Hi, Thank you for the free pattern. I have done several necklines but there is a visible seam when done. You call yours a facing and the picture doesn’t look like the seam is visible. Can you direct me to where I can learn how to do that? Thanks!
I had a question about the facing. I posted it yesterday but I don’t see that it showed up here. Will the video make the facing step more clear?
and now I see it below . . . sorry . . . it’s still awaiting moderation from yesterday
For the facing piece, the first seam is sewn with a 1/2″ seam allowance. Do I understand that it is then folded to the inside of the shirt, along that stitched seam, and then stitched with a 3/8″ seam allowance from that edge? And is the second edge of the facing folded under to the inside at all or is it left as a raw edge? This is the only part of the instructions I can’t quite grasp.
Thank you!
Hi Kathleen, there are no raw edges at the neckline. Do saw on the outside, fold in the stitch.
Kathleen, from the photos I would say that the facing piece is folded wrong sides together before stitching. Place both raw edges of the facing along the raw edge of the neckline and sew. Turn to the inside and sew down. Mayra, does this sound right?
You got it! this is the way to do it.
Is there a video for this pattern?
Working on it! 🙂
Thanks so much for the pattern. The instructions look very detailed and easy to follow. Looking forward to making it.
Should have clarified…I have a small so I thought the top would be more flattering. LOL
As long as you are happy with the fit…:)
What do you thread through the bottom of the t-shirt?
A really thin elastic or a ribbon.
Thanks for the free patterns. I enjoy everyone of them. I can’t keep up sewing. My teenage granddaughter loves me to sew for her.
You are lucky, most teens rather go shopping, so you are doing something well to keep her interested 🙂
I love this!
Thank you!
Still won’t let me download the pattern. When I click the download button it takes me to a craftsy error page says OOPS!
Hi Marion, try again. 🙂
I finally did get the pattern. I was locked out of craftsy, but OK now. Thank you for the pattern.
That is a very strange. Glad you are back in.
You guys are the best, I saw the pic and my first thought was I have to buy this pattern, and here you are giving it away! Thanks so much, trip to the fabric store this afternoon!
You are welcome, enjoy!
Thank you for the cute pattern. I have a few T-Shirt tops but the front & back are the same lengths just high on the sides. I also have a cute blouse that has a longer back end that covers the “Butt” and I can wear leggings. This will be perfect. Looks comfy.
Hi, Bijoux, yes it is comfortable. Leggings, jeans or a pencil skirt would be ideal to finish up our outfit.
Cute pattern! I only see one photo of the front of this top. My only issue is…as much as I want my back assets covered, I also want my front ones covered as well (lol if you know what I mean ?). By the way it’s pictured, it doesn’t look like the front comes low enough to cover me up if I were to wear leggings. Is this true for the pattern or is it just the photo? Thank you so much ?
HI Lesley, I will cover this issue on the video. About how to transform this pattern, I am working on it today.
Are there recommendations on percentage of stretch required. Two way stretch percentage
HI Jo, any two way stretch will do, just check the finished measurements to make sure your chest area has enough room.
I Love this top. Could you tell me where you purchase your fabric at?
HI Linda, I got it at a store called Spotlight in Australia. It was designed by Whiston and Wright a UK company.
where do i find the size to cut
Hi Shirley, the sizes and finished measurements are on the website –Small through XXL in five sizes. You’ll see these different sizes indicated on the pattern itself.
As I prepare to download this wonderful pattern I am perplexed by ‘double point needle’. I am not certain as to what it is and obviously I don’t have one but do have the walking foot. This pattern is just the ticket.
Hi Maggi, thanks so much for pointing that out. Should have read “ball point needle”.
Here’s a bit of info on names and uses of various sewing needles that you might find interesting: https://so-sew-easy.com/which-sewing-machine-needle/
For someone like me who is seated pretty much all the time this is perfect. Only trousers made for me sit straight on my waist so often my back gets cold. I can see many fabrics, sleeve , neck and legnth hacks. Heavy, medium and lightweight fabrics. Casual, smart and formal styling and potentially a wardrobe full of them!
My health isn’t up to sewing at present but this has flown to the top of the “to do” list. Also looks simple enough and with brilliant instructions so that I could get a non sewer to help with this so maybe I’ll get one made quite soon.
A brilliant, all round pattern and I hope the work to stregthen your back goes well.
Thank you for a brilliant pattern ?
Great pattern! Just what I need for Pilates.
Off to the local fabric store for cotton jersey!
Thanks for the instructions very easy to understand
Thank you. I really like this pattern.
Thank you for the pattern! Can’t wait to try it.