


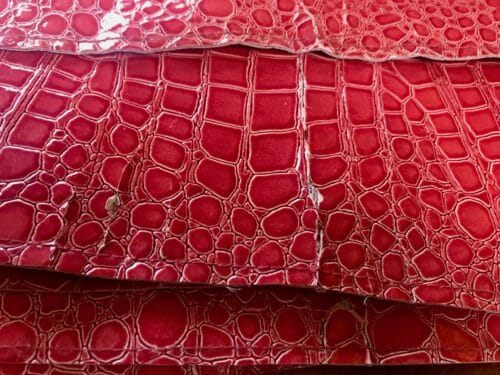
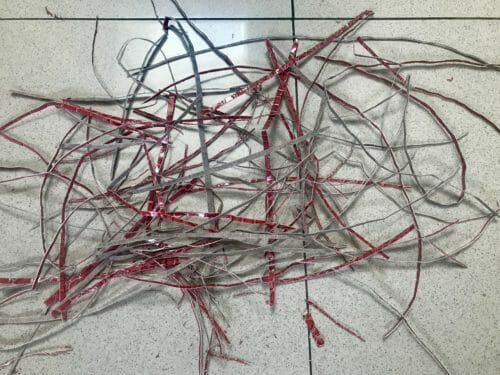
At home, I have eight ugly, crackly, and wavy old-looking vinyl placemats that I keep using every day. Sadly, they have become an eyesore in my kitchen. However, as you all know, I hate throwing things away –so I thought I'd breathe new life into them. In this article, I thought I'd show you how to go about recycling old placemats.

Don't get me wrong, I have enjoyed these placemats and they've served us well. Before we were living in a rather dark apartment and the dash of red brought a bit of color into an otherwise somber place. I have had these placemats for 11 years. Now, it's time to change.
I did think of tossing them, but they're vinyl and therefore not recyclable where I live. This gave me pause, I can't help feeling guilty about filling up some far off landfill with silly plastic items. I am not the sort of women to complain about an issue on social media and do nothing real about it. I value action and there's no better place to make a change than in your own home, no matter how small.
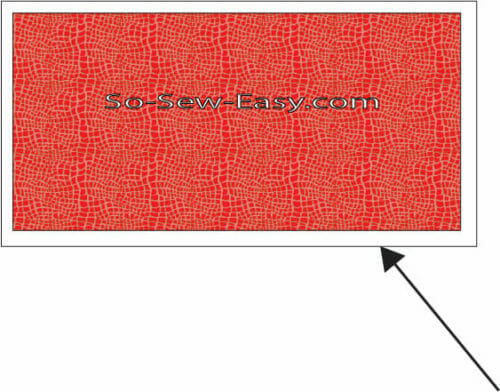
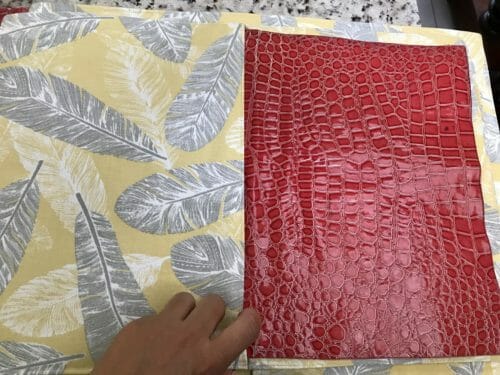
So here is my way of using that hideous pile of placemats without throwing them out (with the bonus of reducing my out-of-control fabric stash). I have used cotton and linen canvas fabric. It is the perfect hardy textile for the kitchen. Please check out the fabric recommendations from Fabric.com below for something similar you might like. There's a terrific print from one of my favorites, Marimekko.
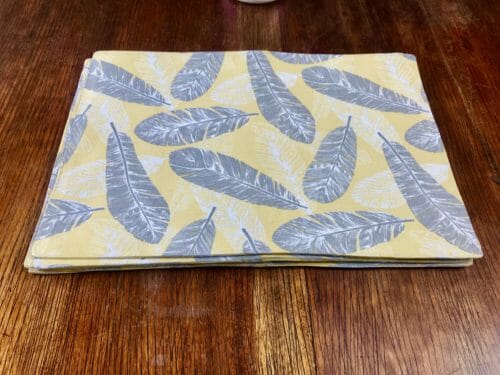
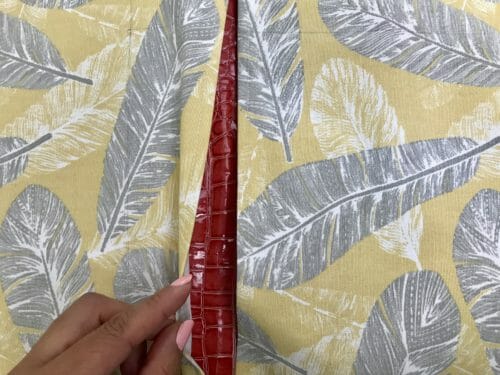
I have made a sort of pillowcase to cover the old placemats. Like this, I can take the old placemats in and out to be able to wash them.
Materials
- Old placemats
- Fabric (canvas, cotton twill, upholstery, waxed cotton or any fabric that is used to make cushions or cover a sofa) depending on how many are you planning to cover. You can estimate about 1/2 yard per placemat but best to measure as detailed below.
- Thread to match
Tools
- Rotary cutter
- Cutting mat
- Sewing machine
Fabric Recommendations from Amazon
Covering Or Recycling Old Placemats
Ah yes, we are going to cover the placemats. We are going to use the placemats as a stabilizer so you will not need to use fusible interfacing for this project.
Step One:
The first thing to do is to take your fabric and wash it in hot water and dry it in the dryer until it is almost dry, then iron with a very hot iron. This will shrink the fabric and you will be able to easily wash the placemats.
Not washing the fabric before using in a sewing project is one of the most important mistakes to avoid when cutting fabric. Please read the linked article to learn the other 4 big mistakes.
I found that my fabric, due to its composition 80% cotton and 20% linen, shrank by 4 inches. This is a lot of you are making something that is supposed to fit snugly on something or someone.
Step Two:
Measure your placemats horizontally and vertically and add 1/2″ around the whole rectangle.
Step Three:
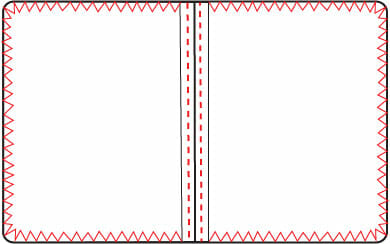
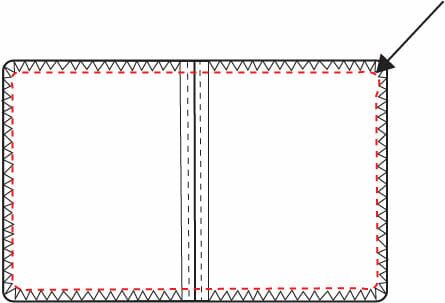
Take this large rectangle and mark and fold it in the middle. Then to each half, add 1/2″ in the center.
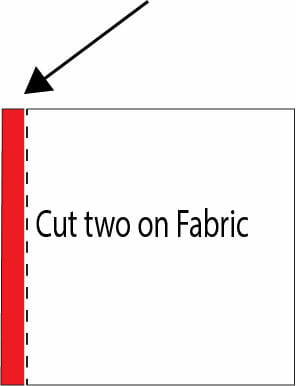
Step Four:
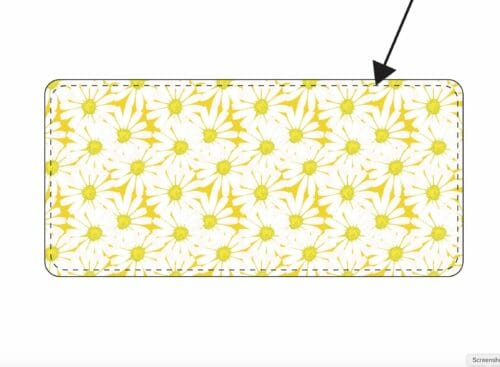
You should have three rectangles now. If your placemats have curved corners you can use a coin to shape the corners.
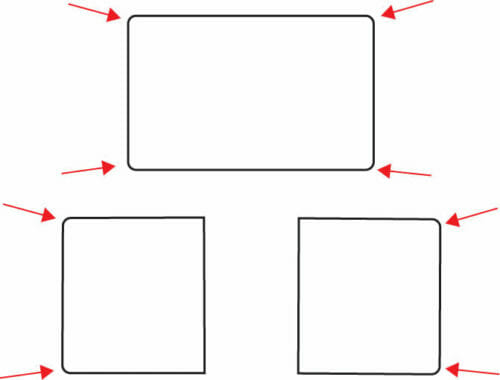
Trace all these rectangles and cut the fabric.
Step Five:
Fold the sides that will become the center back of the placemats by 1/2″.
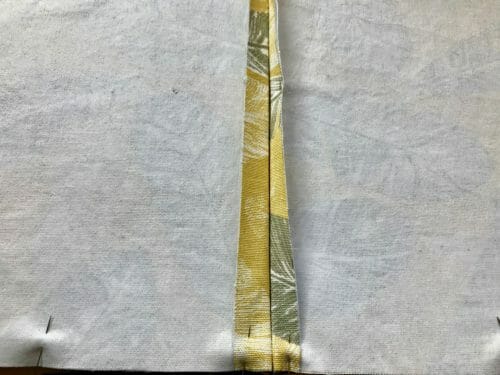
Pin the front and the backs print sides together.
Pin the front and back together. Line them up then turn the center sides, zigzag the edge then topstitch. Zigzag at 1/8″ all around the placemats.
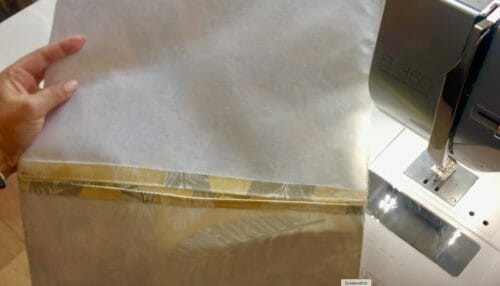
Sew around with a small to medium stitch at 1/8″.
Turn the placemat inside out and top stitch around it at 1/8″
If the vinyl placemats are too hard to insert, you can trim them about 1/4″ more like I have done here.

It is said that the fashion industry is in the top ten most polluting industries in the world. Largely due to the two dollar t-shirts and mass production of ready-to-wear garments, many items are often worn for less than three months. Let's do our bit to repurpose the things we have around us, both to limit waste, beautify our surroundings and save the planet.
We talk more about this in a past article about Why Millenials Should Learn to Sew. You may want to check it out.
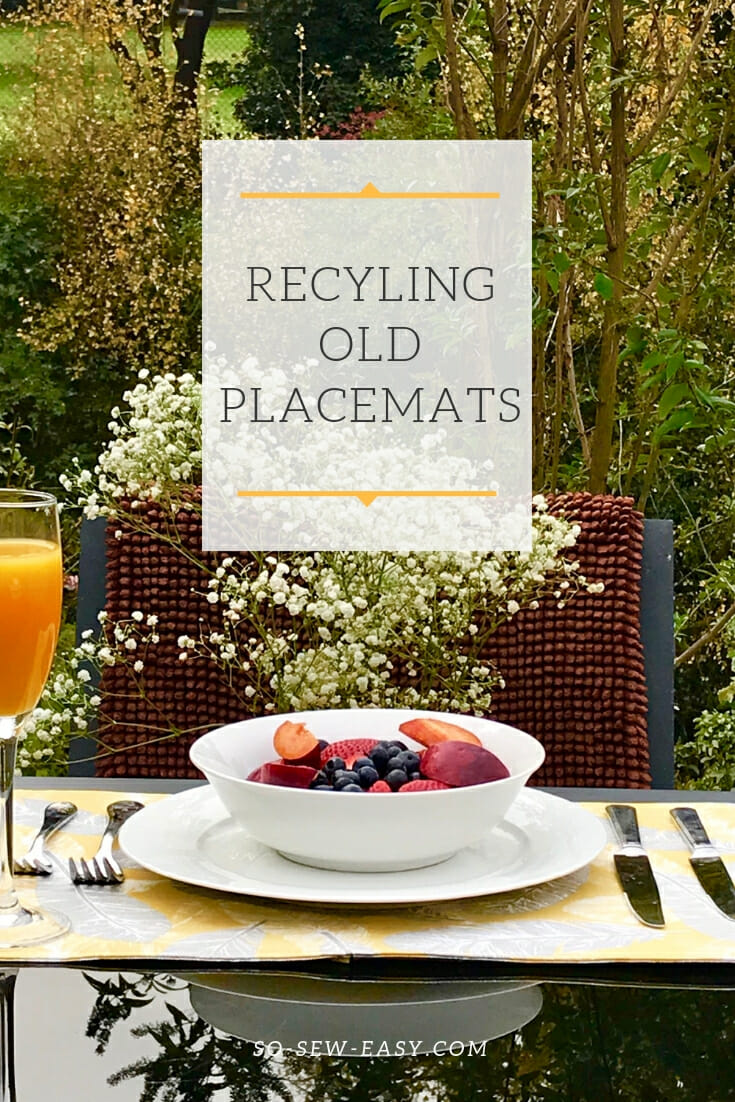
So we've finished the project. Below is my kitchen table where we spend most of our meals. This is exactly how I set the table for every meal of the week with the exception when we have guests over that we use our dining room. It's not fancy, but there is no TV or phones. The flowers are changed and in their place, the food will be served.
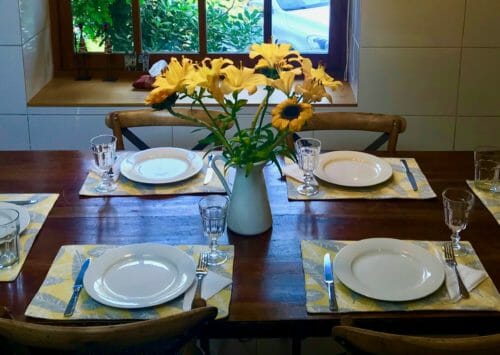
P.S. Yes the table is set for left-handed people 🙂
Need to do more recycling? Have a look at these fantastic ideas.
Or, if you have too many t-shirts…
What do you think about recycling old placemats? I think it's a simple, fun way to practice your skills and beautify your home.
While I was making them I came up with two other ways to do it. I made six placemats, but I have two more to go. What would you do differently? Leave your ideas as a comment or better send me the pictures of you recycling old placemats and I will add it to this post. Until next time, Happy Sewing!

For Berneice who has cork placemats
Thanks for your comment Berneice, I hope the drawing below gives you an idea of what to do in case the placemats do not bend. The view is seen from below. I would not make the bottom side too think. perhaps single layer if you are using canvas or any other think fabric. Let me know if this works for you.


I almost skipped this article, as I have never used vinyl placemats, but now I’m glad I didn’t! This is such a clever makeover that the next time I see some abandoned ones, even mismatched ones, at the thrift store or yard sale, I might adopt them for this treatment!
Great idea. In our family, we constantly think about waste recycling and collect what can be recycled later. We even make a little money by returning empty bottles and cans. In the store, we give priority to those products that can be recycled. I think everyone should try to minimize their waste for our common future.
Excellent initiative.
Re: setting the eating utensils….My husband was raised with fork, knife and spoon on the left side. I finally put up an article on a cabinet so he would figure out how to properly set a table! It seems Europe’s way is to set it with the knife on the left and fork on the right because they cut with the left and eat from the right. Makes sense since that is the way they eat. I actually wonder how America came to change that. It would be interesting to know. I also really like the idea of covering plastic placemats and the idea of covering old hotpads. Hadn’t thought of that before. Will be using this suggestion soon! Thanks for posting!
Hi Peggy, In Asia where I have lived almost 11 years of my life, the knife is replaced by the spoon and it is placed on the left. Left or right it really does not matter to me as long as my kids are using a knife and not pushing the food with their fingers. I will research and see what I can come up with.
Thank you for this info! It’s fun to find out how people do things from around the world!
I think you’ve been looking at a mirror image. 🙂 In UK, we have the knives on the right, forks on the left. Soup spoon to the right of the knives, dessert spoon and fork at the top of the place setting.
Thank you so much for the information! I like learning new things, especially the customs from around the world!
Would love it if you made your projects printable. Would be greatly appreciated. Thank you! Great project! I have some placemats that are getting shredded and must be some form of plastic as well. This is perfect!
Hi Marilyn, I need to make close to 5000 US dollars a month to keep the site running, this includes all the social media accounts, security (the biggest bill), plugins, apps, Adobe suit, hosting and servers and the Five people that work on the site. This is a big site, huge in fact. It take me 16 to 48 hours of my time to make a post, that is not counting YouTube videos. I make the big corporate companies pay for all this with the advertizing you see on the site. How can I publish something for free? who will I need to charge to keep the site going. Free is for you, so you can be on the iste reading the blog. I could make the project available for printing on Etsy for say USD 3.50, would you be happy with that? Do you have a better idea? I love to hear your opinion because this is a very common comment and one I would like to find a happy medium. Thank you for your time, Literally!
Good luck!
I frequent two sewing websites daily – yours and one called Sew Can She.
The person(s) behind Sew Can She makes her projects printable for a very slight fee. Perhaps you might contact her and get some help in how to do that.
Also, anyone can copy and paste your projects into a word processing program (pages on Apple; word on pc). It takes less than a minute of their time to do so.
It is not too difficult to cut and paste these posts if you are on a computer. Just highlight, copy, paste in a word document and save. I even include pictures and sometimes resize to fit my page. Then I have instructions forever that I can refer to or print if needed.
Awesome idea Mayra. I am putting that on my next project list. I recently made some other placemats using up scraps of fabric and putting pieced batting in them – its called “tickertape” quilting. I loved doing it so much I made 9 of them, each a different color!
Never heard of it, will research more. Thanks for the tip.
Great ideas and now inspired to cover my old hard place mats…but think I will use scraps of fabric and make each one a different design.
yes, i think it would make for a happy table.
Very good idea. Thanks. I will be doing the same process with 2 potholders I have that are still good for heat resistance, but the outer
fabric is really fraying and have permanent stain. And I really like the idea from another sewist about using the sturdier vinyl mats as a base for fabric totes. I have 2 or 3 of them I will be using for that purpose.
Great site. Thanks for your efforts and for the freebies you provide.
How timely. I was just looking at my very old marked place mats & thinking I must try to make them look better Only problem is that they are the solid cork backed mats – not flexible so can’t be slipped into the back openings of this design. I am scratching my head trying to think of an idea without a bulky opening. Maybe a pillowcase type of opening one end ? Any suggestions?
yes, Berneice how about making the top larger and the bottom smaller open on both sides. I have added a drawing at the end of the post to illustrate what I am trying to explain in words. Hope that helps.
Thank you Mayra. So clever, so simple. Perfect.
Great idea I have fabric ones and can do the same thing. If making new fabric ones could use old towels inside in place of batting.
Great Idea!
I like the idea, however instead of putting the opening in the middle of the back I would put if closer to 1 end so you don’t have to fold the old mat so much and have only about 2″ from 1 end.
Your place mats came out lovely! I did the same sort of thing with the cushion mats in my kitchen. Couldn’t find the sizes I needed to match – so I covered them with upholstery fabric adding in just a little ease so i could get them on and off. I used an old sheet for the backs and added some anti-slip rug cushion/shelf liner.
BTW I noticed that you set your table differently than I do. I learned that the fork(s) go on the left and the knife (with the sharp edge facing the plate) and spoon on the right. With the napkin by or under the forks and the glass at the tip of the knife. Is this just a US custom?
Not at all, this is only for left handed people:)
I grew up in South Africa and we set our tables like in the picture! Of course we eat with a knife (in the left hand) and fork (in the right) at all times When we moved to the USA I realised people here eat only with a fork and seldom or hardly ever with a knife.
HI Ella, I have lived in 8 countries so far, I can say that in half of them the knife is non existent and often replaced by a spoon!
I am South African and I have NEVER even seen that someone puts the knife on the left and fork on the right …? I definitely eat with my left hand and cut with my right hand, as this is the dominant hand and needs to do the “real” work.
That is certainly one way of recycling old vinyl placemats.
However,another idea occurred to me. Where I live, they are working on banning plastic grocery bags, and the ones they sell in the stores are flimsy at best and will wear out quickly.
Therefore, I will be making my own out of bits and pieces of leftover fabric including blue jean material, and remnants that I find.
The vinyl placemats would make really good stiffeners for the bottoms of the fabric bags, and be easier to use than the stiff plastic often used in the commercially made bags.
I would love to see your finished product.
This is a great idea! Thanks for the inspiration
You are most welcome!
I LOVE this idea! Now I know what to do with my old, ugly vinyl placemats. Thank you so much, it’s such a great idea and I can make different covers for different occasions and different seasons. Brilliant!
My thoughts exactly!
Only thing I would do is mare with different colors and prints. Make them for the seasons and holidays etc.
yes, I will do that too, I have so much fabric around, and the good thing is that you no longer need to match all the placemats.
Love this idea. At the end of your article, the title of the project is misspelled, but at the front it is spelled correctly. Thought you’d want to know.
Thank you for letting me know, I never read my posts after I finish so this is great help for me.
Great idea. I actually planned to recycle some faded cloth one-sided mats by sewing on a new top. I’m thinking now that this cover idea is not a bad idea for those! The old placement will be like a thin batting.
Indeed that is exactly what the old placemats end up doing. Very interesting blog BTW. I will haeva closer look.
I think this is a great idea. I also recycle everything I am able to. Save the environment and less to the land fill.
Thanks Sue, If you have any ideas you would like to share, do let me know.
Fantastic results.
I put plastic placemats in my refrigerator on top of the glass shelves. Then when I need to wipe out the fridge I can just take them out to clean them instead of trying to reach all the corners from the front. Keeps the fridge door closed while cleaning, too.
Wow, very smart.
Until today, the old ones were relegated to pet mats for feeding time. Now I think it is time to save the next set for this project. In fact, I can just make covers for them NOW, and the best part is that I don’t have to look at the same mats day in and day out… I can make a few of them to change out for seasonal use!
Great project!
Thank you!
Thank you Lynda, did you make that lovely quilt in your blog?
Hello Myra! Yes I did. It is “And So it Crows” which is a pattern from Karen Walker at Laugh Yourself Into Stitches.
I like this idea. I’m going to cover my old placemats too. Thanks
Hope you share a picture with me:)
Thanks for the wonderful tips…..AND thanks for a great example of how we can all help to keep our environment cleaner (and prettier, too)! Everything we do (or don’t do) can help.
“Or don’t do” powerful words. I think I am going to go back to the table and come up with another project. Thanks for the inspiration.
Wish I had seen this a couple of weeks ago! What a great idea. Unfortunately I had just thrown out my set, but I’ll keep it for future reference. Thanks!
Fantastic idea! Even the old fabric mats can be slipcovered! Thank you, I am going to do this.
This is genius! And a perfect way to reuse non-recyclable items. Thank you for sharing this!
are the photos backwards? if not the knife and fork are on the wrong sides, otherwise lovely placemats and table setting, sorry, correct placement of silverware and table settings a pet peeve of mine
Ha,ha,ha the table was set by my left handed daughter. and yes you are right, I was actually counting how long will it take for someone to notice 🙂