


As most of our readers would know, I'm not a fan of gyms as I explained in my post on creating A New Workout Wardrobe: My New Year Resolution. But I actually would love to own a sports bra that gives me not only support but comfort. I think this particular item of clothing is the “unicorn” in our wardrobe. Almost like a myth, it seems to be a never-ending search for that one bra that will give me comfort while securing the girls during a vigorous workout. However, look no further….. the Ultimate Sports Bra Pattern does exist –although you may have to make it yourself.
This project is for making a racer back sports bra pattern with a front facing for extra comfort and the ability to insert pads. There's also a 1″ under-chest band for maximum support.
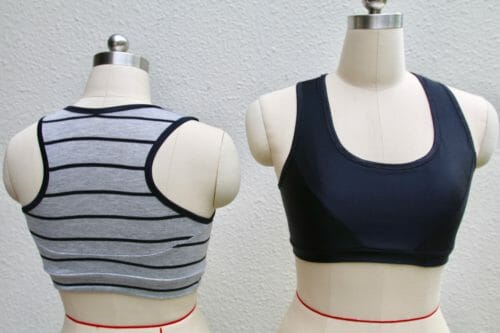
A sports bra is designed to compress your chest. If there's too much compression you'll end up feeling like you want to take the bra off while driving home from the gym –or at least that is how I feel. It's the reason I carry a huge gym bag so I can shower and change from that awful squeeze which can be like being hugged by that smelly old uncle who you can't wait to get away from. Well, I'm trying to change that with this design, which will give you support without excess compression.
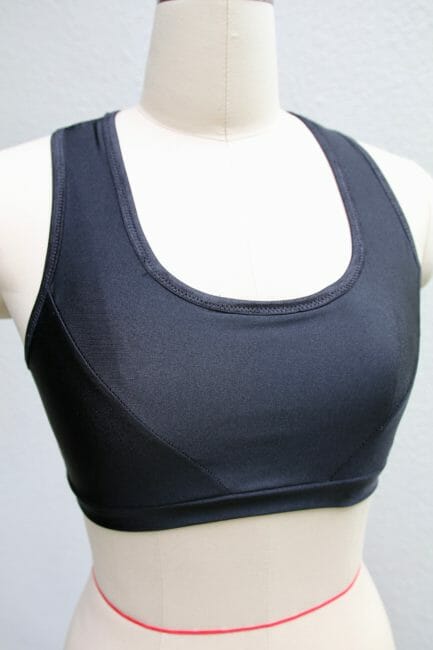
This brings me to the point of choosing the right fabric. The best fabric for the job is called Supplex if you can find it (I am still looking). There is another fabric and this holy grail of sportswear is trademarked COOLMAX. You'll see it on many high-end sports brands, but you need to buy a lot of it as it's not commonly sold at retail.
Thankfully, however, there are many good alternatives that are more readily available. The best option is to use a 4-ways stretch knit or cotton 80%/lycra 20% content. Here are some specific fabric suggestions that should work well for this project:
Fabric Selection
Video Tutorial
Subscribe to the YouTube channel:
How to cut and sew the sports bra pattern
Sewing stretch fabrics can be a bit tricky. The ideal way to sew a sports bra would be to use a cover stitch and a flatlock machine. Sadly, I possess neither of these machines but you can make do with a normal machine and a serger would help as well.
I have drafted the pattern pieces on the fold, but you will have to draw the other side on a large piece of paper because the best way to cut this type of fabric is by using a rotary cutter and you should never cut knits on a fold.
It is possible to make this bra without a serger/overlocker. This is why in the material list I have given you a special kind of elastic. All you have to do is use a ballpoint needle, a medium zigzag stitch (3.0 to 3.5), and a small (1.0 to 2.0) zigzag stitch to sew the main pieces. I am using a universal Singer ballpoint needle this time. I will also show you how a normal needle will sew to answer some of the questions I get from beginners who ask about using a normal needle and no walking foot.
If using a serger/overlocker, do not use the knife to cut the fabric because the seam allowance for this sports bra is only 1/4″.
When cutting the elastic, measure the armhole and cut the elastic 1″ smaller. You need to stretch the elastic while sewing.
When sewing the band to the hem, use a small zigzag first then the serger/overlocker if you're using one. This is because you have to stretch the fabric and by sewing a small zigzag first it will make it easier to distribute the fabric evenly without making any pleats. This is a mistake beginners make frequently.
I will be showing you three different types of fabrics: spandex nylon, cotton lycra, and rayon/lycra knit although I only finished two bras. A very important point I want to add is that this pattern is unsuitable for stripes. Prints are OK, but stripes will not line up correctly because of the stretch.
Materials:
- Two yards (more if you are 3XL) Fold over elastic for bra 5/8″ or fold over elastic in 3/4″
- Ball point needle #10
- Thread to match
- 1/2 yard Spandex/nylon 4-way stretch, lycra milliskin nylon Spandex
Tools:
- Rotary cutter (optional, but highly recommended)
- Serger/Overlocker (optional)
- walking foot (optional)
Pattern Layout:
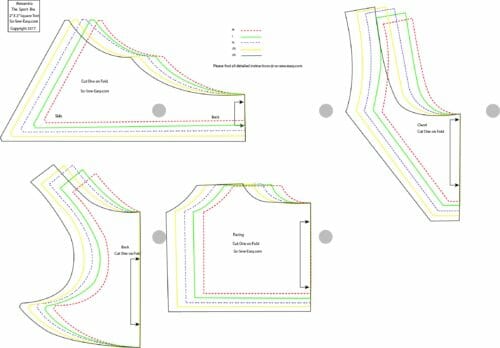
Finished Measurements
| Size | Finished Chest Measurement (inches) |
| M | 30-34 |
| L | 34-38 |
| XL | 38-42 |
| 2XL | 42-46 |
| 3XL | 46-50 |
Pattern Download
You can download the pattern for the Ultimate Sports Bra from our account at Payhip.
For help downloading and printing PDF patterns, please CLICK HERE.
Step One: Sew the back
The back has a curve and if you have never sewn on a curve before, you need to take your time with this. There are no special considerations with it, just do not pull any of the pieces at all. Let the pattern slowly take its shape.
Place both the back/side (piece #3/4) and the back (piece #2/4) right side down. Pin and sew at 1/4″.
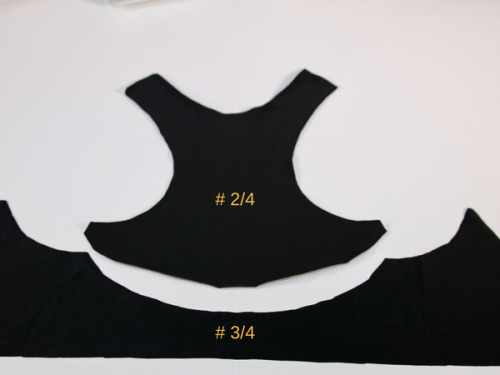
This is showing the 80% cotton/Lycra 20%.
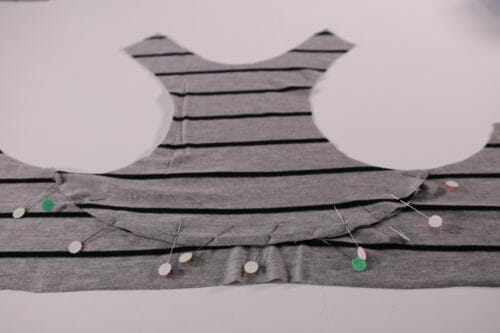
In the picture, it appears gathered but it is the nature of the zigzag and the normal needle. I actually did not like the look, so I ripped it out and sewed it with the ballpoint needle. See the picture below for the look of the small zigzag with a ballpoint.
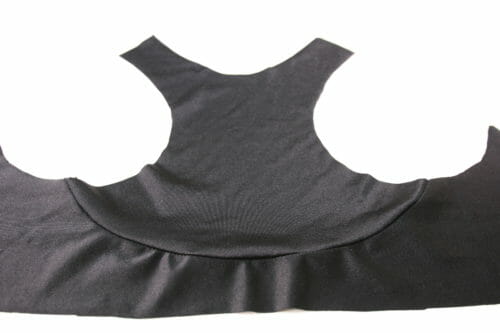
Step Two: Sew the front and sides
Sew the front and the sides. You could use your serger straight into it, but I found the fabric moving too much so I sewed a tiny zigzag first.
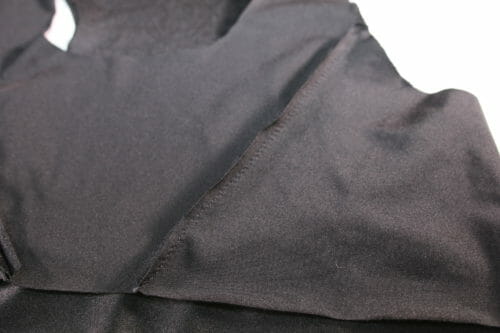
I used the serger because I want to improve the durability of the sports bra and increase the support.
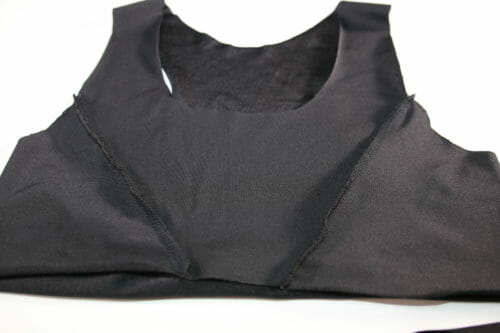
Step Three: Apply the facing
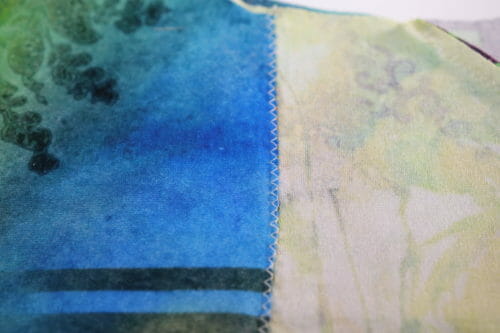
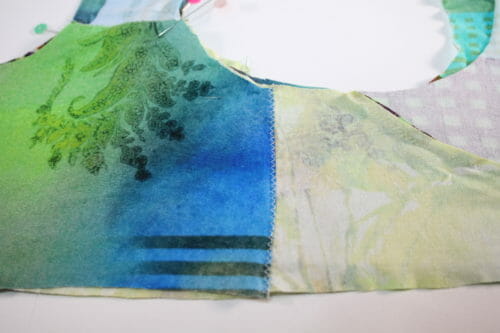
Place the facing wrong side down. The right side of the facing will face out aligning with the scooped neck and the armhole. Then use a small zigzag about number 2.5 to 3 to sew the sides.
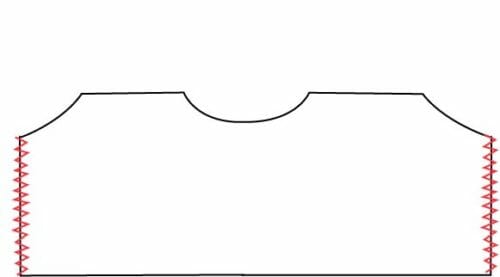
Align the edge of the facing with the needle so the zigzag will attach it without leaving a space.
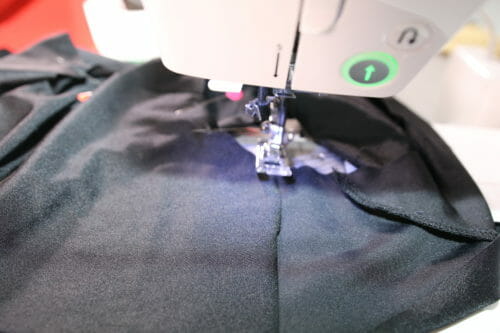
Here it is in a different fabric for you to see how the facing is placed. This particular fabric is Rayon 60% / Lycra 20% / bamboo 20%.
Step Four: Sew the elastic and the shoulder seams
It is important to remember to stretch the elastic while sewing. To be successful at applying the elastic, the key is to divide both the opening and the elastic in four equal parts. Pin at these four points and stretch in between the points.
Sew the shoulders at 1/4″ or use your serger/overlocker. I apologized for my picture as is it rather dark. I will use a different color thread when making the video.
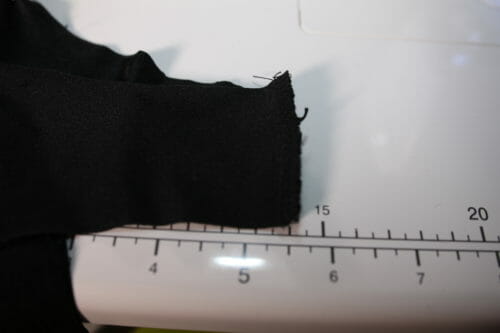
The amount of elastic will depend on your size. Measure the armhole and cut the elastic 1″ shorter. Sew the elastic ends at 1/4″. You now have a band. Divide the band into four equal parts. Pin the elastic to the armhole which you would have to divide as well into four equal parts. Match the points and pin the elastic. Stretching in between the four points. You want to stretch evenly while sewing or it will buckle and it will not look good. Make sure you catch the facing. Repeat the same procedure on the other armhole and on the neckline.
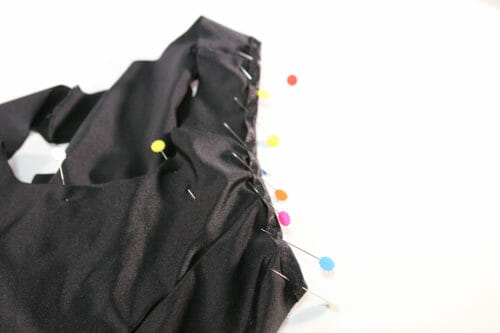
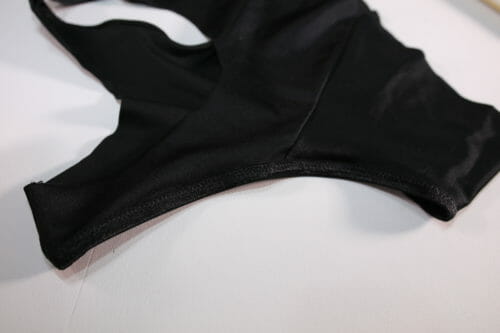
Here is a shot of the facing where you need to leave the hole open to be able to insert the pad if you plan to do that.
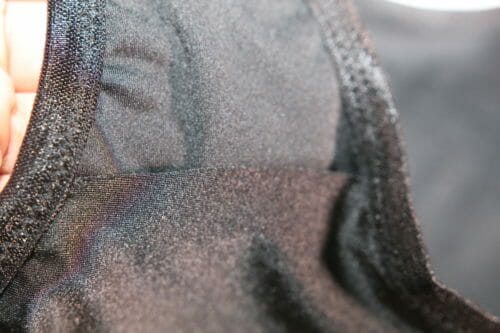
Step Five: Making and sewing the band
Measure the hem (the circumference) and cut a rectangle that is the width(circumference) of the hem minus 1″ by 2.5″ height. Sew the ends of the rectangle at 1/4″. You have a band now. Divide this band into four equal parts.
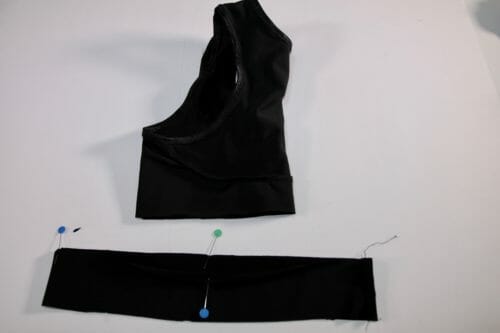
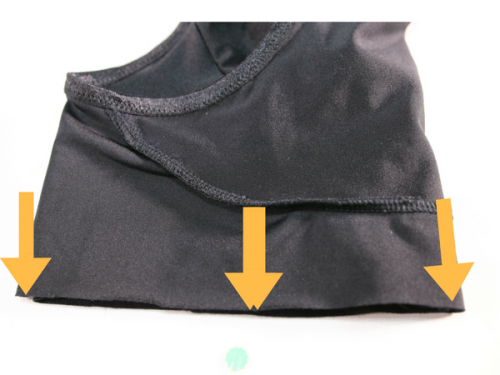
Pin the seam of the band to the zigzag that attaches the facing. Align and pin the remaining three points of the band with the three points of the bra and sew at 1/4″.
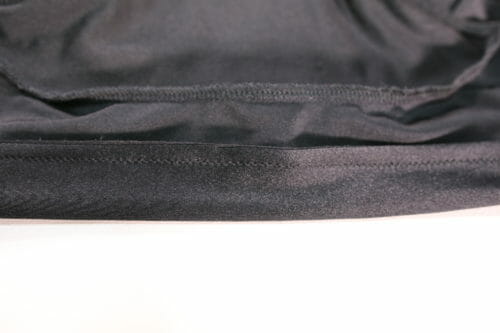
I have to admit to you that I have not sewn this sports bra pattern in any other size than medium and large. So when trying this pattern, make a sample first to test the fit. I find it very comfortable because of the facing and where I would not go running a marathon with it, I think I have a great multitasking garment. I must say a prefer the cotton/lycra so far since in the tropics the use of 100% lycra is rather uncomfortable.
Please send me your comments. I always look forward to reading them.































Mayra, i would dearly love a golf outfit – pullover polo-style shirt and skort with at least two pockets, but a third pocket in back would be a bonus! I’m a new golfer and can’t stand paying over a $100 dollars on a golf outfit! I’m an experienced sewer, so the project sounds fun!
How do I print pattern so it is correct size please?
Thank you a lot for this pattern, clear instructions and video.
I’m French lady, and could easily understand it.
I realized it in size M and it’s perfect for me.
Very confortable to wear !!!!!! I love it
🙏😍
Thank you Renata! I am very happy you are happy! Cheers!
hi trying to make a bra for someone thats bed ridden, how would you size this up for a 84 underbust and a b cup?
A sports bra I would want to wear in cotton jersey. Thank you for updating your videos. Now there is no blocking the sewing machine from view such as hands, and the angle is now better, not to mention your nice manicure Mayra . One criticism: using black material as a background which is difficult for clear viewing. – a common problem; otherwise a very high quality tutorial. My recurrent issue is with downloading the pattern. I waste so much paper and ink and struggling to print out the right size. Thanks again
you can purchase supplex at discovery fabrics in BC
I’ve made this bra countless times! It’s easy, fun, a great scrapbuster, I’ve swam in it, worked out in the gym, and worn it to work. Its one of my most favorite patterns. Thanks for offering it.
How do you print the pattern so it is correct size please? X
You can buy Supplex in several different colors from Bra-makers Supply. They are in Canada. They are a wonderful company for all manner of bra supplies.
This is an interesting design, but with a 28″ underbust and 39″ fullbust (H/I cup) I need high bust and underbust measurement on size chart to choose correct size and have a go at doing FBA to have a chance of getting a wearable fit..
The pattern prints all the sizes, so you can just measure the pattern pieces. Allowing for subtracting 1″ for the band, I got finished band sizes of 25.25, 27.5, 29.5, 31.5, 33 for the respective sizes. Since the angled front/side seam is basically an armsceye princess seam, you will need to add (alot!) of length to the front piece and add a convex curve to the side/back piece at the seam. You will have to redraft the facing piece too.
I have trouble getting bras overhead so I put a zipper in front in sports bra. Works nice!
So when you say “chest” size is that underneath the breast? That reference is not what I’m used to. Bust, or above bust, or below the bust rib cage are terms I’m used to for bra making.
Just confused as to what I should be measuring.
Thank you for this pattern. I have trouble fitting bras.
I am interested in making one with a zipper in the front. Would this pattern work? I find it too difficult to remove sweat damp clothes over my head.
Wouldn’t you measure and mark/notch the quarter marks on the pattern and then use a washout pen to transfer the markings?
Could someone please tell me if it is possible to save or better still print these instructions.
Click on the three horizontal dots at top right of page then click on print
[…] einmal im Jahr zu Curvy Shapes in Winterhude und kaufe dort ein neues BH-Modell. Seit ich aber den Ultimate Sports Bra als Bikini Oberteil für mich entdeckt und dann auch als Unterwäsche genäht habe, trage ich kaum […]
It looks like a great pattern.
Thanks Mayra, it’s a great pattern!! I loved following the video and the style lines you included.
Where would I use my coverstitch machine on this pattern?
I would have to show you with a video, and make an entire new tutorial.
I used a two-needle coverstitch to apply the fold-over elastic. I also use it to “top stitch” over the seams and to apply the facing.
I am trying to download the pattern, but bluprint says it isn’t possible anymore. Can I get it somewhere else from you? I really would like to make this pattern.
Yes you need to download from the site the patterns are no longer available on Bluprint
[…] Ultimate Sports Bra by So Sew Easy […]
ive been trying to do my own and came across your channel. I can’t download the pattern though any
suggestions
Use Adobe Reader it is the only thing that works well.
hello even though i havent made this yet i am looking forward to making one or more. I live on a farm so often a bra with too much underwire or the 18 hour ones i have just are too darn much sometimes when you have to move alot and lift alot often its just too much for me to deal with i bought a sports bra but they wear out so fast when you wear it often so when i found this pattern i thought hmmm perhaps this will be far easier and better then always spending money on something that wont last long given what i do. so i will post again when i get it done to share my thoughts on the feel and how i works for me.
Lorrie (farmers wife)
Hi Lorrie, I completely understand you, I too am a farmer’s wife and underwire especially in the heat is just awful. The larger sizes depending con your cup might need more length, just so you know. Otherwise, this is a very easy make. If you can find bamboo knit make for a great top for sleeping in summer.
What to do if one is a 2XL in bust bust a size 4 in RTW? She has 5” difference in her upper and full bust.
Hi Chris, you will have to compare the difference between the body and pattern measurements, taking into consideration the stretch % of the fabric you are using to avoid tightness on the upper bust.
Olá sou do Brasil e gostaria de lhe perguntar como faço com a parte # 4/4 ,não entendi no molde por favor poeque esta´escuro desde já obrigada
HOla Cleide, hay un video en YouTube y las instrctiones estan en la ultima pagina.
Really good looking pattern and completed project. May I ask what fabric you used for the lining? Is it just another piece of the main fabric? thank you.
Hi Diane, there is no lining on this bra.
What type of fabric did you use for the sports bra??
I used nylon spandex 4-way stretch fabric.
Thank you for this pattern!
Hi. How should I do with the pattern. If I download it to pdf and print on A4 paper then it will not be full size. So how should I do to get full size paper? I live in sweden and we do not have the same sizes as you. How do I measure in the best way to get the right size and how do I get full size of paper from your pattern.
Hi Melinda, you need to use Adobe Reader, there will be many pages then you need to paste them together. Here are some articles that can help you with that https://so-sew-easy.com/download-print-pdf-sewing-patterns/ https://so-sew-easy.com/print-a-layered-pdf-file/ https://so-sew-easy.com/print-assemble-pdf-pattern/
If you read about how to make these types of stretchy garments, I have had great success in just layering the inner and outer layers and then applying the elastic on the wrong side, and folding it over. Both times zig zag and stretching to match the elastic/fabric. The zig zag will pack in extra thread so you don’t need to stretching the whole thing unless it really has to stretch a LOT. Maybe the band… so much easier, even though your patterns are great, it hurts to see the struggle to sew with knits instead of taking advantage of the knowledge already out there for the past few generations of sewers. I started sewing the Stretch N Sew way at 15 and am 63 now… the principles really work. You can go so much farther so much easier with great professional looking results.
Hello All,
Here are some good sources for sewing athletic wear:
Surge Fabrics ( Wisconsin , USA)
The Fabric Fairy ( Wisconsin , USA)
Phee Fabrics ( Boca Raton , USA
I have purchased from them all and would do so again.Great customer service..
.
Also if you really want a lot of support, you can add a layer of powernet to front and front straps of your bra
Be sure to read the fabric description carefully as there is also something called powermesh which is not as supportive .
Have fun making your own custom gym clothes!
Ruth
Thank you for this awesome pattern!
Thank you so much for this pattern! You guys are a godsend!
Thank you very much for the pattern and the directions. This is a very generous gift.
I can’t thank you enough for this free pattern!!!! Because I have extremely sensitive skin and I perspire too much, most bras (and panties) are uncomfortable for me. So except when wearing something dressy, I always wear this type of bra and I make my own panties. But these can be difficult to find in a good quality cotton or cotton blend. The ones I can buy are poorly made and just wear out too fast. I can repair them, but often the extra stitching thickens them and irritates me (which obviously defeats the purpose). Now I can make my own. You are a gem!
I’ve sewn many things with stretchy knitted fabric from underwear to bathing suits so I’m familiar with it’s idiosyncrasies, but I can always learn something new – your tutorial was wonderful and yes, I DID learn something new.
It’s time to order some fabric and take my serger down off the shelf. Thank you again! I am very grateful.
p.s. I almost forgot – you have a lovely voice and a darling accent.
It looks like a great pattern. What about putting a zipper down the front for those of that have trouble pulling it off and on?
Try pulling it up instead of pulling it down. If you put your feet in first, then pull it up it’s so easy. As for getting it off, pull one side down your arm, pull your arm out then pull it off over your head and off th either side. My shoulder still are painful and this is ho wi get in and out.
Will look for fabric to make. While this exact pattern is ok for my daughter I will cut and face the centre front seam then buttonhole and spiral lace. I do this to all my bras as I can no longer find front fadtefast Brad and restricted mobility means I otherwise need help dressing. Will let you know how it goes if I manage to find a fabric supplier. Problem is most don’t ship to Ireland but I think Minerva Crafts in the UK sell specialist fabrics like those mentioned here. They also ship to most places with very good shipping costs.