


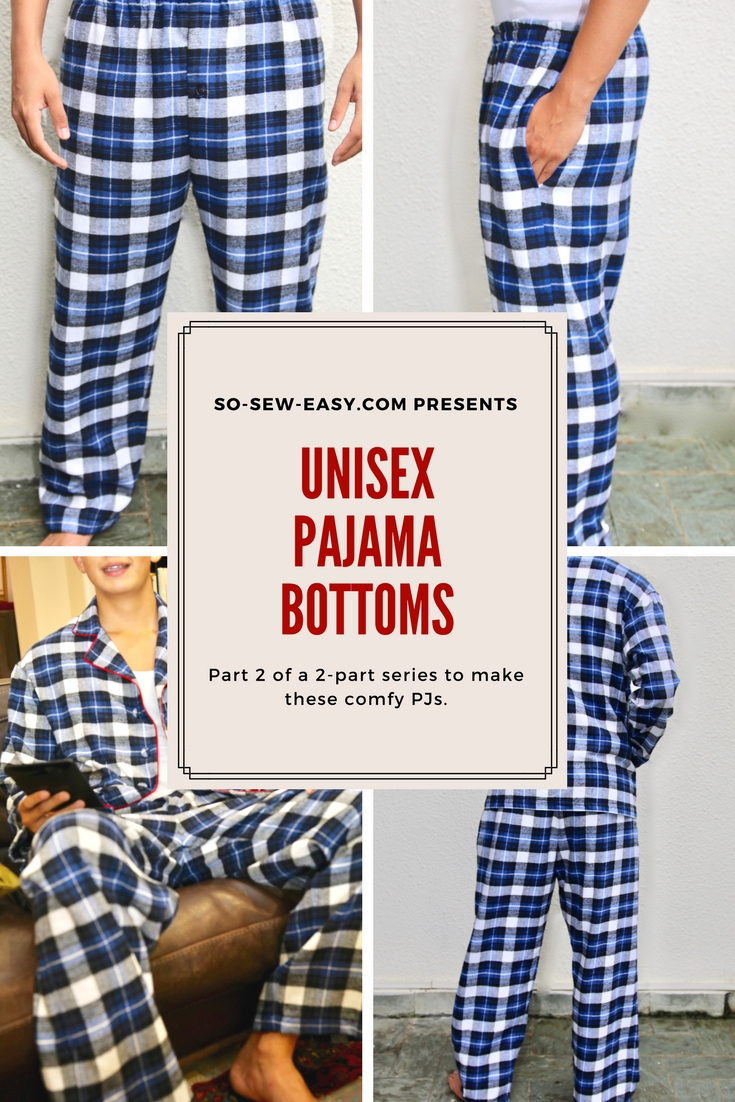
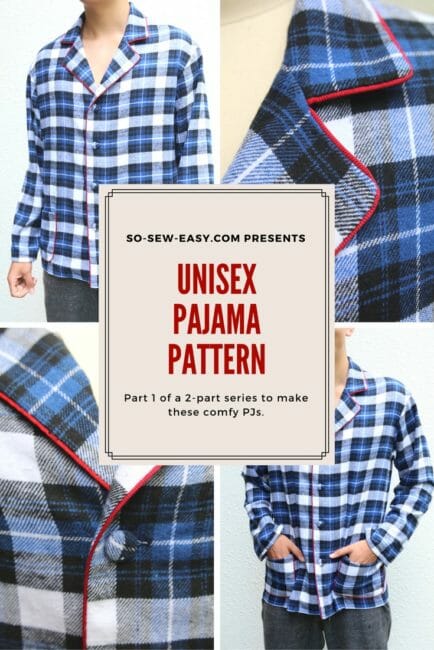
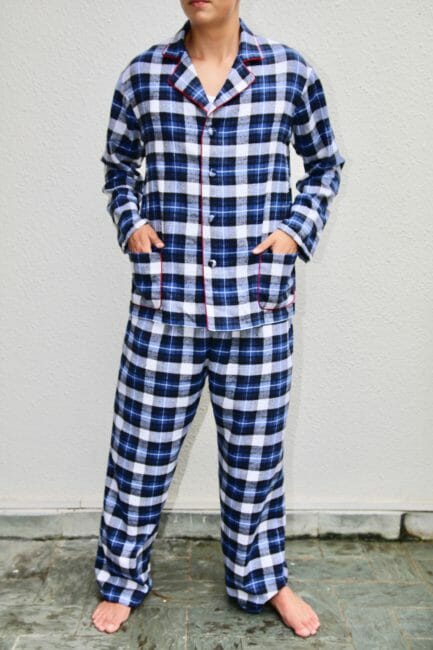
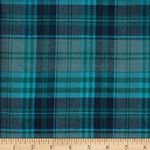
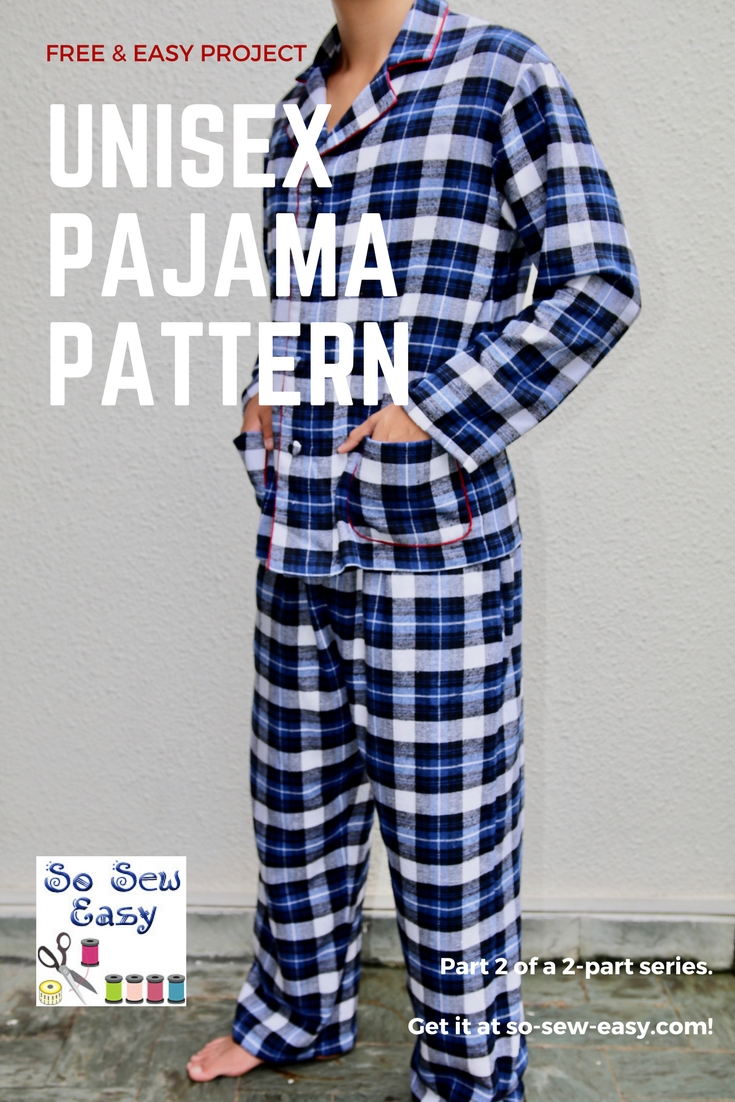
This is the second part of the unisex pajama pattern. These are the pajama bottoms to match the top that we did last week. I am using the rest of my flannel which is already washed and preshrunk in the dryer.
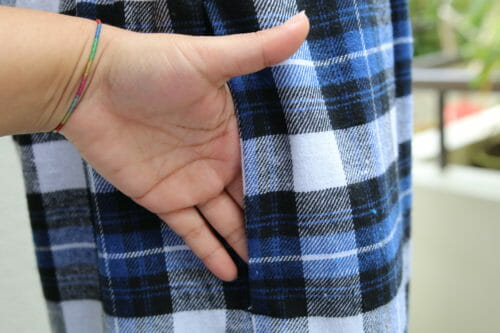
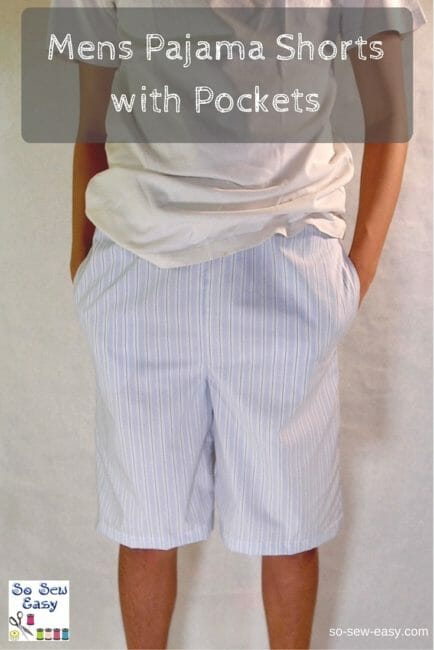
I have added pockets to the pants, for whatever reason I can not explain I prefer pockets on my pajama bottom even though I hardly use them.
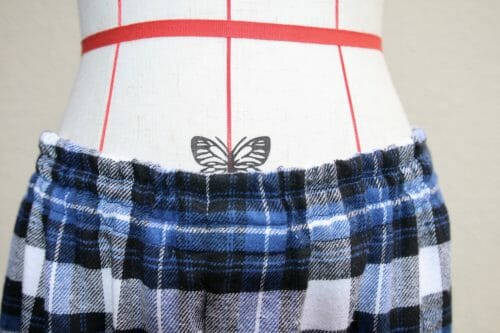
The elastic waistband on this pajama bottom is made differently than you are probably used to seeing. The reason is that I hate a wide elastic in my pajamas, the three rows of thin elastic make it a lot more comfortable for sleeping.
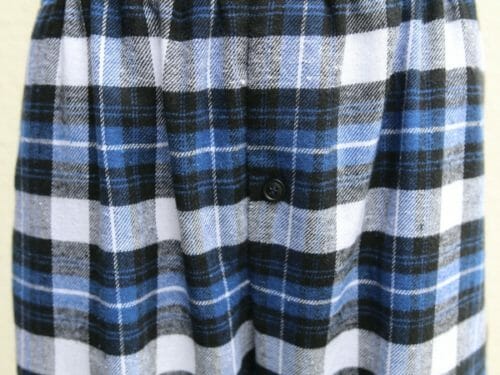
For the gentleman, there is a fly front for an easy escape. The fly front closes with a buttonhole on the outside and a button in the inside away from the skin.
Materials
- 2 to 2.5 yards of flannel, cotton or silk. Allow extra fabric if matching stripes or large print.
- Thread to match
- 3 yards of 1/4″ elastic or a 2″ elastic the sizes of your waist.
- One 14 mm button
Tools
- Sewing machine
- Buttonhole foot
- Scissors
- Measuring tape
- Pins
- Iron

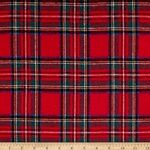
Fabric Suggestions Available on Amazon
I always think that flannel makes the best pajama fabric. Here are some I think you might really like.
 |
 |
 |
 |
Pattern Download
Print your pattern on Landscape Mode and Actual Size. Do not scale the pattern at all you will only need Adobe Reader to print. As before the pattern does have a seam allowance of 5/8″.
The FREE sewing pattern along with detailed PDF instructions are available on Payhip.
You can download it FREE there or donate a small price to keep us going. It's completely up to you.
How to print the pattern
We do not ask you to download any additional program other than Adobe Reader which is completely FREE.
Use Adobe Reader to download and open the patterns, to print your pattern size, print on Actual Size and Orientation set to Auto. Do not scale the pattern.
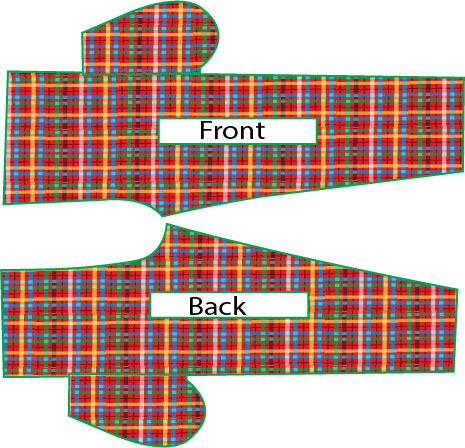
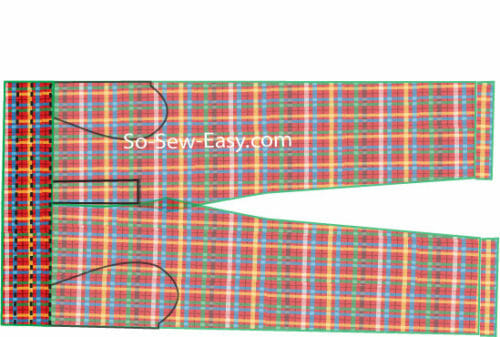
Pattern Layout

Unisex Pajama Pattern Finished Measurements
The measurements given below are indicated without an elastic. Allow 6″ for ease.
The first thing you will notice is that small size (S) is rather large. I made a small size for myself since I like my pajama pants rather roomie.
It is slightly difficult to grade a unisex pattern, however, I found that most women with a waist size between 34 to 37″ with an hourglass figure (10″ more on the hips) will be able to use the small and medium-size.
For men, you will have to add length to the pattern. I added two inches using large and I found where my son uses his pajamas was one inch too short.
In hindsight, I should have added an XS to accommodate a woman who is size 6-8.
I strongly recommend making a muslin before cutting your pajama bottoms especially if you are using silk.
| Size | Waist | Hips | Length |
| S | 40 | 50 | 36 |
| M | 42 1/2 | 52 | 38 |
| L | 43 1/2 | 54 | 39 |
| XL | 46 1/2 | 56 | 40 |
| 2XL | 50 1/2 | 60 | 41 |
How To Sew Your Pajamas
This pattern style is the same as the Men's shorts pajama pattern I released in June 2016.
It is not the same pattern, but the same style. The pockets are sewn the same way, and there is even a video of it. Please do have a look at the video and the tutorial on this site to be able to follow along. I will release a video on this pattern soon, with subtitles and a better microphone.
Sewing The Pockets
You will have four sides of the pockets and four sides of the pants. You will have to sew each side to the front and back of the pajama bottom.
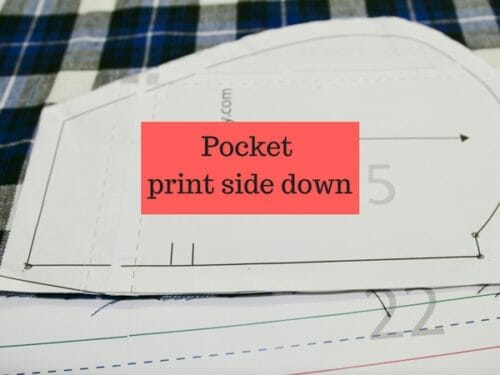
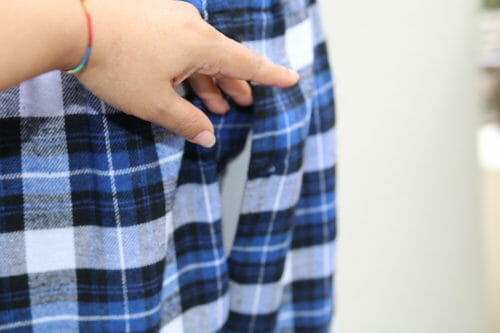
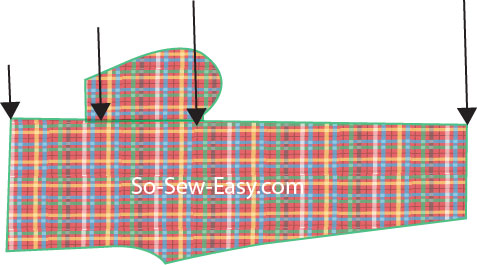
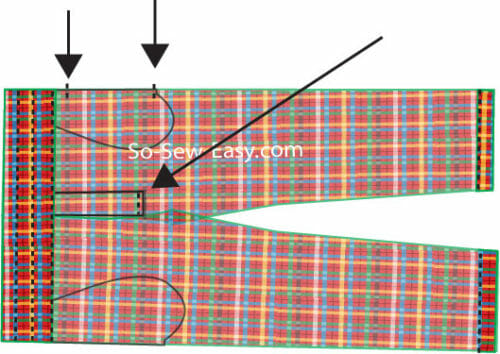
Place the front of the pajama bottom right side up on your table. Place one of the pockets print side down, 4.5″ from the waist edge. I am showing you with the pattern since I have to match the print you will not be able to see what I mean.
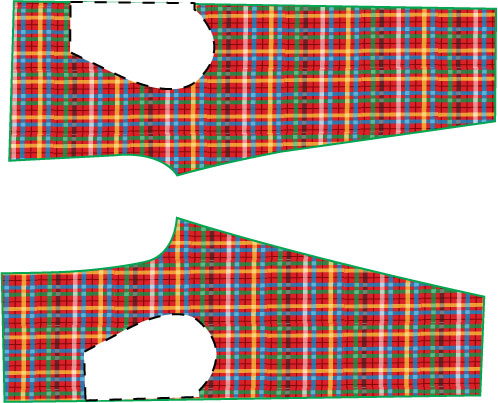
Sew the pocket opening from one dot to the next marked on your pattern. Fold away from the fabric and Iron. Repeat the same procedure for the three remaining sides of the pockets.
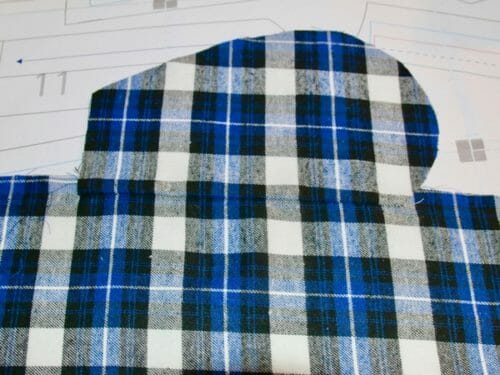
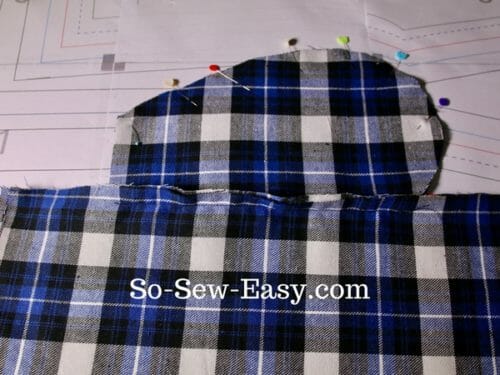
Place the front and back print sides together with the pockets pin together.
Attaching The Fly
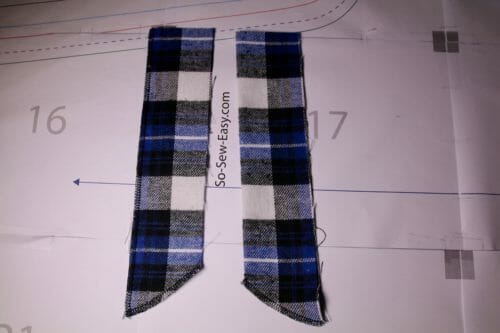
There are two pieces for the fly. Apply fusible interfacing to both pieces. Originally I had made a curve at the bottom but realized it would be easier if I just made the end straight. So your pattern will not have a curve, however, you still have to serge the bottom.
The biggest side will be folded in half and serge at the bottom. The thinner fly will be serged on three sides. The side that you sew to the pajama bottom does not have to be serged.
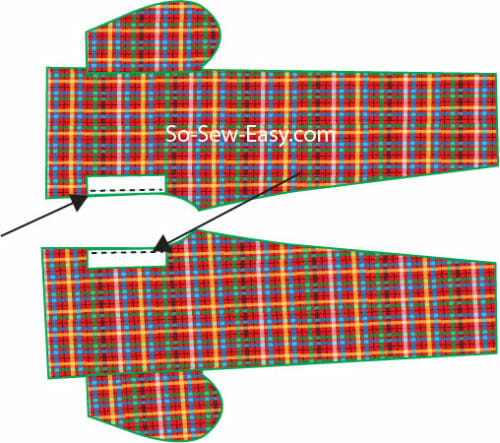
Place the double-sided fly on the left front side of the front. Pin the thin side on the right side of the front of the pajamas. Pin both 4″ front the waist at the same height as the pockets. Sew the fly at 5/8″
Sew at 5/8″ fold to bring the print of the fly face up and iron. Topstitch from the top, leaving 5/8″gap at the bottom of the fly.
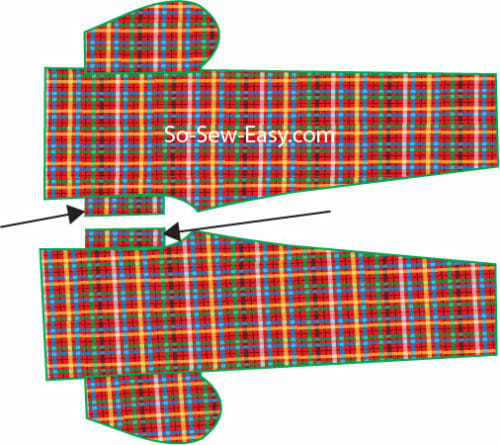
Sew the folded fly at 5/8″, iron and fold as you did previously.
Assembling Your Pajama Bottoms
You will assemble one leg at a time. We will first join the pockets, then we will sew the crotch, make the waist, add the elastic, tack the pockets and fly, and hem the pajama bottom.
1. Joining the pockets
Place the front and back of the pajamas print sides together with the pockets away from the pants and pin the pockets. Print sides facing each other. Sew the pockets at 5/8″. Serge the pockets.
 2. Sewing the sides
 2. Sewing the sides
Sew the side at 5/8″ and serge the seams open. This allows you to be able to place your hands inside the pockets.
Sew the inner thigh seams at 5/8″ and serge together. This is the only seam you will serge close, all other seams you will need to leave open.
Repeat the same procedure on the other leg.
3. Sewing the crotch
Use your serger to neaten the crotch on each leg.
Pin the legs at the crotch and sew front the waist to 1.5″ past the beginning of the fly and from the bottom of the fly all the way around the crotch and the back of the pajamas.
Working with the pajamas right side. Pin the pockets towards the front, this will enable you to work faster. Iron the single fly to the side fold the double fly over it and sew the bottom. Sew across the bottom. You will at the end sew again but this time over the front of the pajamas to secure the fly to the front.
4. Sewing the waistband
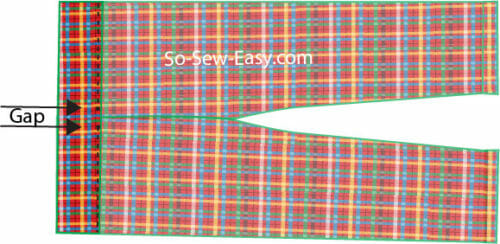
Fold the waist 1/2″ and fold it again 2″ pin and sew at 1/8″ from the edge. Leave a gap at the back too insert the elastic.
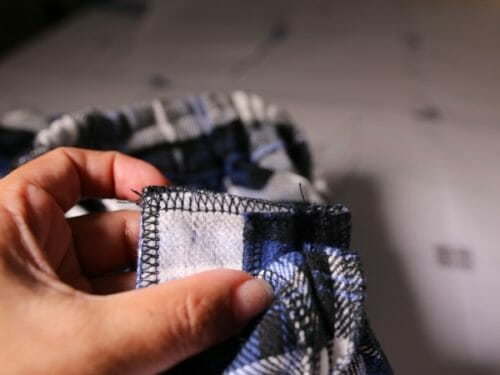
Sew two rows of stitches. Leaving a gap at the back to insert the elastic. In my case, I am making the L size and need a waist of 32″. I will have 3 channels to insert elastic. In my case, I cut 32″ of elastic times 3. Using a bodkin I thread the elastic through the rows and close the gap of the waistband. As you will notice the top of the fly and the pockets are covered by the waistband and the raw edges cannot be seen.
5. Hemming
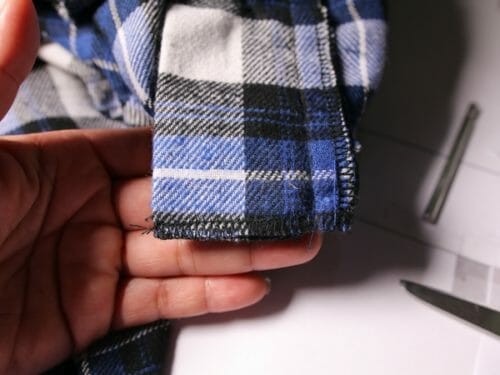
Fold the hem 1/2″ then again 1″ and sew close to the edge at 1/8″.
6. Reinforcing the fly and pockets
Working on the front, sew the fly straight across the bottom so the fly does not move.
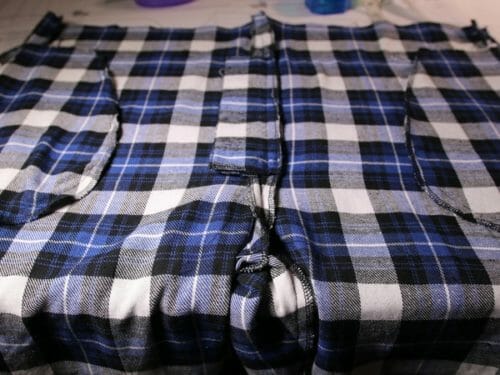
Reinforce the end and top of the pockets with a straight stitching of no larger than 1/2″. Do this back and forth about 3 times.Finally, add a button to the inside fly and a buttonhole to the outside. See the fourth picture from the top.
It is time to iron these pajamas and fold them neatly in a box along with the top. Ready to send to a loved one.
As always, I hope you enjoyed this tutorial. For a closer look at how to sew the pockets, have a look at the video I have mentioned above and linked here below. Let me know if you have any questions and if you need any help fitting this pattern to your needs.
Subscribe to the YouTube channel:
I will be traveling next week so I will be sharing with you a small project that is super easy to make. Until Next Time, happy sewing!
If You'd Like To Support Our Site
If you want to help us continue to bring you a wide selection of free sewing patterns and projects, please consider buying us a coffee. We'd really, really appreciate it.


Just love your video tutorials. They are right on and so easy to follow. Love your patterns. I want to get the Vest with the deep pockets that shows up every so often in a sidebar. I keep missing it and I can’t find it in your patterns, it’s $10.00. Where can I get it?
I’m a bit confused about the pattern, maybe someone can help me? Why is the front so much bigger than the back pieces? they dont match together and I don’t really understand how front and back should be sewn together
I matched the pieces to a purchased pair as I sew quite a bit and was concerned about that issue. The back piece and front piece are mislabeled as the back rise is always longer than the front.
Thank you for this pattern. I always appreciate you sharing your patterns. I may have missed it in the text, but I can’t work out how you sew these pajama bottoms for a woman, i.e. without the fly. Do you ignore the fly pattern piece and just sew straight along the seam?
Hi Christine, Yes That would be the easiest.
Made these pants out of my old cotton white baby bedding( recycling !!!!). Turned out wonderful, thank you so much for the pattern and the instructions.
Do you have a link to a video on how to sew the fly? I’m having a hard time understanding how it comes together
Hi, if i want to make the trousers without the fly, do i just sew the crotch together?
Hi there, i dont want to add the fly. Do i just sew the inside legs together instead?
Amazing! Last year I made Christmas pijamas for my husband and kids and I didn’t add pockets. The first thing my husband asked me was : where are the pockets? Lol ????
I can relate! I like pockets on pajamas!
I tried to download the bottoms pattern but it only gave me the top.
Just in time for Christmas gifting. Thanks.
I found out that to successfully print out the PDF for the pajama pants, I had to:
1. Use current Adobe Acrobat Reader (free version)
2. Page size: Set to “Actual Size”
3. Orientation: Set to “Auto”
DO NOT select “Landscape” because it will not print out correctly.
(ask me how I know!)
[…] Patterns for Pirates – Walk the Plank PJ Bottoms So Sew Easy – Unisex Pajama Bottom […]
I too found the instructions easy to follow and a very beginner sewist 🙂 with just a question regarding sizing – are the measurements given in the size table including the 6” ease or actual body measurements? My waist is 36” and hip 42” and I made the S but too tight across hip and tummy. What have I missed?!
Many thanks for yr help
Hi can I use velvet fabric?
Yes, you can. Use a jersey needle. This is a very difficult fabric to cut maintain strictly the grainline.
These instructions are terrible! I wish I had never started following them and used something else.
“Working with the pants right side…” right side WHAT?! Ride side up or down or together?!
Description says the fly closes with a button and ZERO mention of making a buttonhole, now that it’s all sewn up I need one…
You can still make a buttonhole by hand, or attach a snap. Let me know if you need the links to do either one. When I say right side, in sewing normally means the print side. Print side up or right side up. This is not a beginners project so I congratulate you on finishing the pajamas. Kind Regards,
The pattern I downloaded still had the curved fly pieces, and it was hard to follow the directions for that part. Thanks
Wonderful pattern and directions. I have one question, do you have to make the fly in the pants? I’m a woman and have no need for one and I find them to be a nuisance in pants. Thanks.
I would like to know it you think I could make these in cotton knit, as lounge pants?
yes you can, let me know how you like them.
I think there is an error in labeling. The pants front pattern looks like a back pants pattern as it has a much longer crotch hook and the back looks like a front pattern piece. Also, when I measured out the hip circumference on the small it measured out at about 44″. Word of caution, measure before you cut.
Theresa in Tucson
That is the same issue that I noticed with the pants front and back pattern was confusing. The front looks like the back and the back looks like the front??? I need to know if this is a typo error or not, definitely before starting on the pants.
It is possible that i made a mistake labelling the pieces, the back crotch is longer than the front that is how you can tell the front from the back in a pair of pants.
I agree. The pattern is mislabeled. I just relabeled and am making these now. I matched everything up to a purchased pair to be sure all will work. 🥸
On each tile the cut/match line eliminates a bit of the ends of the size lines. Is that correct? I don’t want to cut away anything that’s needed.
Hi Kathy, make sure you make the grey squares match.
Hm… for those of us that haven’t got a serger, what’s the best alternative? French seams?
French seams might be tricky when applying pockets, how about you zigzag the seams open and turn the seams under then stitch it down, you will not see the zigzag just a nice neat finish. Another way is the HongKong finish, a favorite of mine.
Can you clarify if the measurements given are body measurements or finished garment measurements?Thanks for sharing your post keep sharing good and informative post.
I am giving you finished garment measurements.
I have a question, too:
“The measurements given below are indicted without an elastic. Allow 6″ for ease.”
What does indicted mean in this sentence? I only know it as deciding that someone should be out on trial for a crime – clearly not what is meant here… 😉
Can you please help?
My bad, it is a typo. English is my second language and I do make many mistakes. The measurements I am giving you do not include the gathering using an elastic. So if you think the waist is too large, you need to apply the elastic. Hope that is better, let me know and I will try to use other words. Kind Regards, Mayra
Oh, how silly of me. English is not my native language either, in mine, I probably would have automatically “autocorrected”. 😉
I have started the project already, but haven’t put the two legs together yet. I’ll send you a picture once I’m done. 😉 Rebekka
Love this. Thank you for posting the bottoms so quickly. I need to make a pair for my husband ASAP. 😉
Thank you for these, I LOVE pockets in my PJ’s. I think it’s more for tissue or a lip balm than anything.
I second Agathe’s comment about the elastic.
Two pockets in the top AND two pockets in the bottoms! A design after my own heart. I will be using the bottoms around the house and I ALWAYS need pockets!
Thank you. Thank you. Thank you. Now I can get them made in time for Valentines Day. You are so thoughtful. Have a wonderful Valentine’s day and may the love of your life show extra love on that day. ♡♡♡♡♡♡♡
Cheryl
thank you. Can you clarify if the measurements given are body measurements or finished garment measurements?
HI Sona, they are Finished garment measurements.
Thanks so much for the free pattern!!
I cant see a legend on the pattern or here for which cutting line is which size. Am I just missing it?
Yes sorry, I forgot that S, M L XL, and 2XL from inside line to the outside.
Thank you for these wonderful patterns. I’ve already bought and preshrunk the flannel to make a cozy pair of PJs for my husband.
Please clarify…this pattern says there is a seam allowance of ⅝” and suggests the top has the seam allowance too, but I was sure the pattern for the top said there was NOT any seam allowance. Please clarify this for me before I start cutting. Thanks
Hi Linda, you are correct. There is no seam allowance for the top but there is a 5/8″ seam allowance for the bottom.
Thanks!
Thank you very much for these patterns you share with us.
Thanks! Now I can get cracking 🙂
I love that you use three narrow elastics rather than one broad piece. I too dislike that in ready-to-wear ones…
Fantastic! Thanks for publishing the bottoms so quickly. Now I can make the whole set of pajamas at once.