


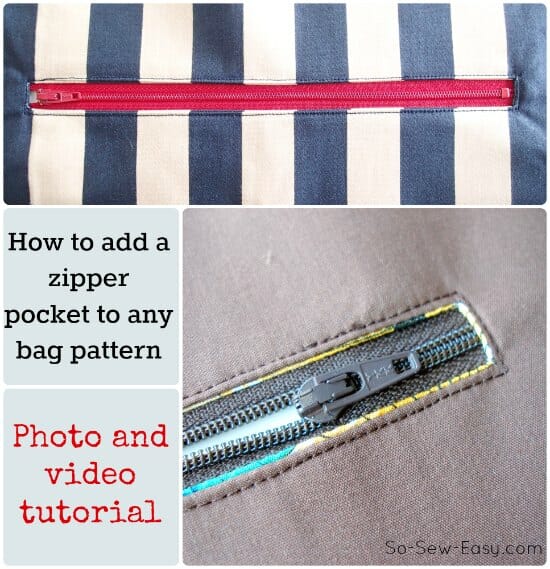
So you have a basic purse pattern or have a pattern that includes a basic slip pocket and you would like a zipper pocket. Not a problem – this sort of thing can usually be added to any bag. You can add them on the outside like in the Nautical Expanding Tote Bag, or on the inside of the bag in the lining like this example from the Carry All Bag. Or both if you want lots of pockets and storage. The exposed zipper can really add a nice pop of color and an interesting design feature to any bag.
Here are a few of my tips and tricks to help you insert your first zipper pocket, as part of the My First Bag series of patterns and tutorials.
Watch the video
Here is an extract from the Nautical Tote Bag video which shows step-by-step how to do this. You could start here first.
Subscribe to the YouTube channel:
Step by step photos – how to add a zipper pocket
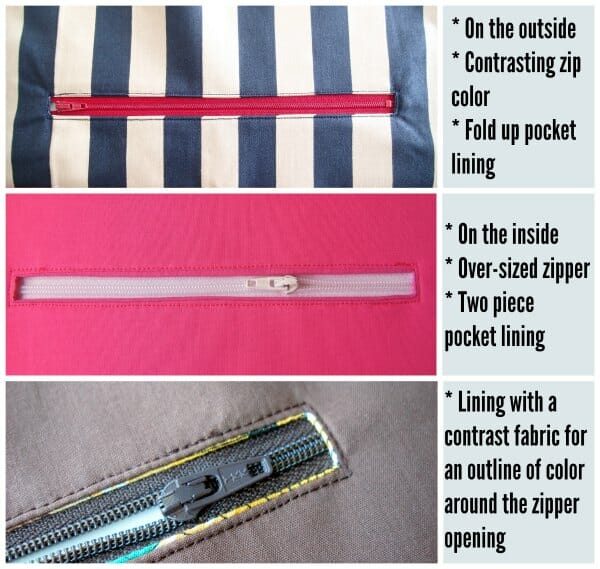
Prefer to see it in words and pictures? No problem, I've got that too. These are a combination of photos from the Nautical Tote Bag and the Carry All Bag to show you some of the variations you might use to get the job done or get a different look.
Start by imagining how the finished pocket is going to look. Where on the bag will the zipper come? How deep will the pocket be inside? What colors or fabrics do you want to use?

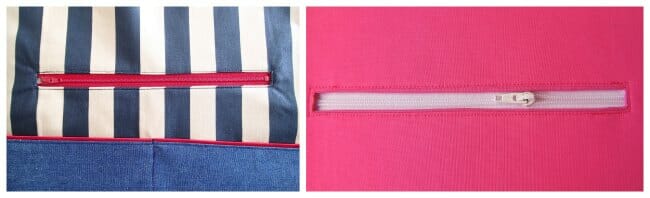
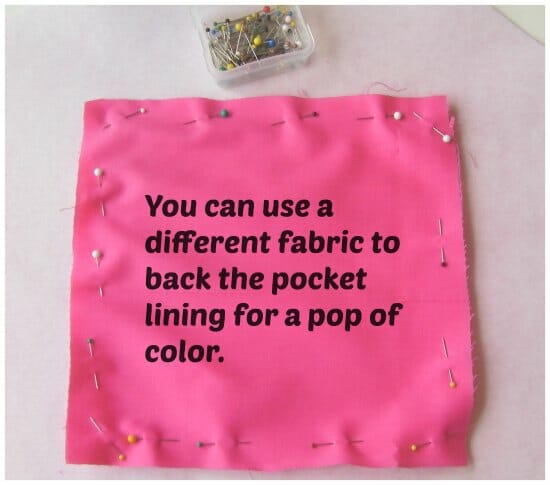
TIP – The fabric used to directly back the pocket will inevitably just peak through to the front side around the opening. You have two choices – go with it and use a nice bright contrast to outline your zip, or use a matching fabric to blend in and disappear. The back of the pocket can be a separate piece for a pop of color, or the same – again, it's up to you.
Consider which fabrics to use where. You have two choices. You can either use a single piece for your pocket lining and fold it in half, or you can use two different pieces if you prefer to use contrasting fabrics.
TIP – your pocket lining should ideally be at least 2 inches wider than your zipper. 3 inches wider is even better. Give yourself plenty of room to work.
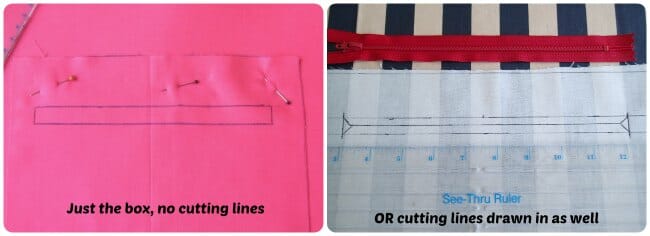
Place the piece of fabric for your pocket lining face down, right sides together over your outer piece. Decide where the pocket opening will go. From the top of your pocket lining draw a line across which is 1.5 inches down from the top. Draw another line underneath which is 2 inches down from the top, making 1/2 inch between them.
Find the center and draw two small vertical lines to mark the length of your zipper from the end of the teeth to the outside of the zipper stop at the other end. You have a long rectangular box in which the teeth of your zipper will fit inside.
Position the lining fabric correctly on the outer fabric and pin it in place to stop it from shifting. Shorten the stitch length a little on your machine (I take mine from a 2.5 down to a 2) and then stitch exactly around the rectangle you just drew.
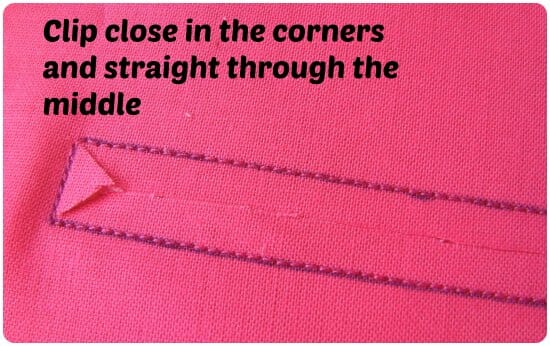
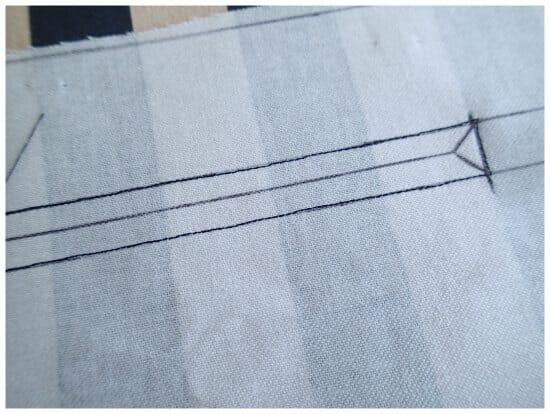
If you haven't already done so, draw another line through the center of the rectangle right across. This is your cutting line. At each end, draw a triangle from the corners to that center line. Carefully cut along the center line until your reach the triangle, and then snip into the corners, close to, but not through, your line of stitching.
Turn the lining fabric through the hole you just cut and out to the back. Press the opening neatly. Concentrate on getting the front neat. The inside may be a little puckered at the corners, but don't worry, no one will ever see that part.
TIP – pinning the zip can create ripples and puckers. Use double-sided adhesive tape to keep the zipper flat while sewing.
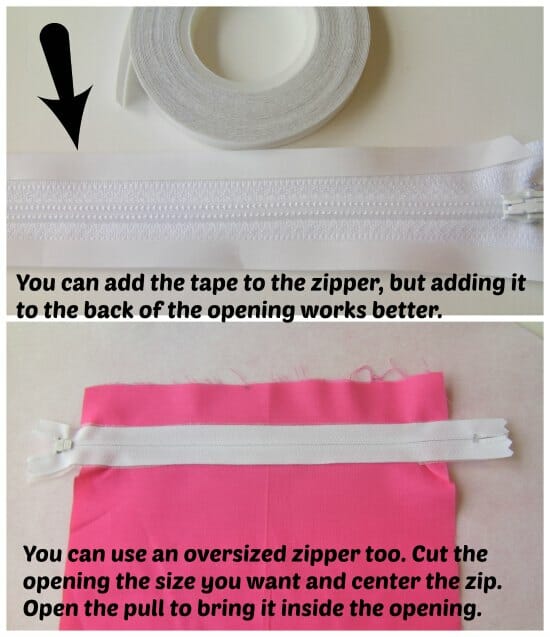
Time now to place our zipper. You can use pins at this point, but I find it hard to get everything to lie flat that way, so I like to temporarily ‘glue' the zipper in place before I sew. I use a product called Wonder Tape, which is a double-sided temporary adhesive specially designed for sewing. Add some strips of the Wonder Tape to the reverse of the pocket opening and then pop your zipper over the top and press it in place. Check placement from the front and you can easily reposition it if you need to.
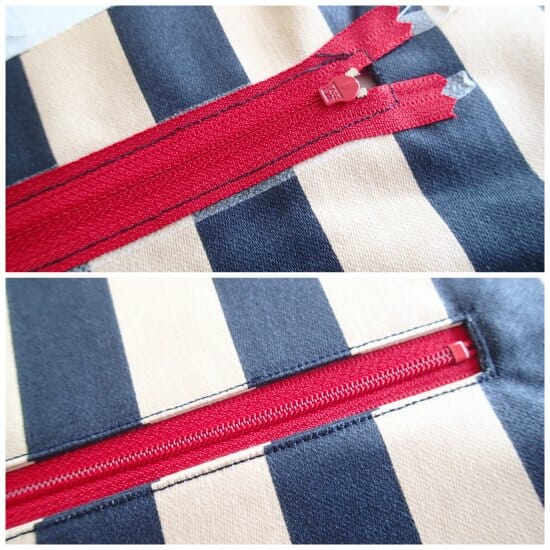
Sewing with the front uppermost, stitch around the opening to secure the zipper in place.
If using a single-piece pocket lining, fold up the pocket lining and pin along the 3 open sides. This is where having plenty of space to work will be important. Stitch the 3 sides of the pocket lining, making sure to only sew the lining, not through the outer fabric as well.
If using a two-piece lining to showcase a different fabric inside the pocket, pin and stitch this on all 4 sides.
And you are done. Congratulations, you did it! That's another bag-making skill you've got under your belt. Check out some of the options again.


This is fantastic! Thank you for putting the video together.
Thank you…instructions are great and I know I will use this one…when the time comes.
It is my pleasure, I am very happy you found it useful.
Thank you so much! By far the best tutorial for adding a zipper pocket ! I so appreciate the video and the written instructions -very clear and helpful! Thank you for taking the time to put this together !
This is the best tutorial I have found for zippers!! Maybe it’s just me but I haven’t seen any that put them together this way and I love it!! Thank you!!
P.S. Mine puckered a tiny bit but I know why and how to fix for all future ones!
[…] Please follow it here. […]
Easy to follow instructions. I wish everyone’s tutorials were as clear as yours. Thank you for the detailed, yet simple lesson. Now I’m off to add an inside pocket!
Great Instructions! But I’m still having problems finding instructions on how to add a exposed lacy zipper to outside purse pocket! I would love to see a tutorial on how add an outside pocket so the Lace Zipper will show! I guess I’m going to have to Experiment! Thanks a Million 4 all the information you provided…
Yes, a separate tutorial would be best to illustrate how to do it. Do experiment and let me know how it turned out!
Love it. Thanks sew much. It was very helpfull.
What brand are your black tailor scissors.
Thank you! Haven’t done one of these in a while and needed a refresher! Great tutorial!
THANK YOU! I have been trying to figure out how to add a zipper pocket to a tote bag and now I know how to do it! THANK YOU!!!!!!!!!!
I love your tutorial. Every time I haven’t done one of these pockets for awhile, I come back and view it again. It’s something I revisit a couple of times each year, so thanks for the good work!
I love that tutorial.it is so easy.thank you very much
Excellent tutorial for inserting the zipper for an inside pocket.
This is a fantastic tutorial! Thank you. Last year I used this to put in my very first zipper and it was so clear and easy to follow.
this site is awesome – easy to follow instructions, my first ever bag is made and has zip pockets inside and outside – thank you soooo much 🙂
Hi.the video ain’t working for adding a zip for back of wallet and wondering if u still have it as I Don’t understand tutorials without them..
Thx
Hi Roxane, I have checked the video and all seems fine. Can you please try again? Thanks and regards.
I’m looking for a pattern for a purse named
Mary Jane. Do you have that pattern?
Hi Maggi, unfortunately we’ve not come across that one before so we don’t have that particular pattern. We do certainly have many others here: https://so-sew-easy.com/category/sewing/bags/ You might also be interested in our Sew Along tutorial for the Conference Tote Bag which you can find here: https://so-sew-easy.com/conference-tote-bag-pattern/
Thank you so much. Great tutorial, I’ve managed to fit a pocket into a bag with pleated lining!
Yay I’ve just completed my first inside pocket with a zip! Thanks to your tutorial it worked like a dream. Thanks Deby
Love this tutorial thank you so very much for taking the time to make it.
Love this tutorial, this is how I’ve been doing my pockets. That Wonder Tape is a miracle – can’t sew without it or my 1/2″ and 1/4″ wide fusibles. Thanks.
Que tal alinhavar com a agulha?
Sim, você pode fazer isso também . Eu só estou com preguiça de costurar à mão!
I’ll have to look for that tape. I currently use a glue stick. 🙂
I tried the glue stick but never had any success with it. It might be the heat here, I don’t know.
Thank you! It makes so much sense.