


This is a long overdue project, the artist apron pattern. I promised a childhood friend a very long time ago, about 2 years ago, more or less, that I would make this tutorial. Every artist from amateur to professional should have their very own artist apron.
Typical of me, I have had the project in the back of my head along with so many other projects. Either my head is too large or I have a bad case of procrastination. I am in leaning towards the latter..
Three years ago, I was in my second year of a print design program, which I left to become the Creative Director for So-Sew-Easy.com. And let's face it, three years is a long time and I have decided to retake my original path of becoming a print designer in addition to my work at So Sew Easy.
Before So Sew Easy, I was involved in jewelry design, interior design, charcoal, oil painting, drawing, beading, embroidery, and weaving. The truth is, you could show me any kind of creative outlet and I would try it. Being around creative people and making friends in the creative field is what makes settling in a new city relatively easy. I guess this is why I like to join as many schools and ateliers around the world as possible.
What I've learned is that no matter the race, age, or nationality, creative people all live the same way. We surround with the things that bring us joy and inspiration; fabric, threads, buttons or sequence, paintings, pencils, brushes or chisels, books, photographs, drawings or prints, it all mixes in our space with color and texture to make our daily routine an adventure every day. Because we creatives know that inspiration can strike us at any moment.

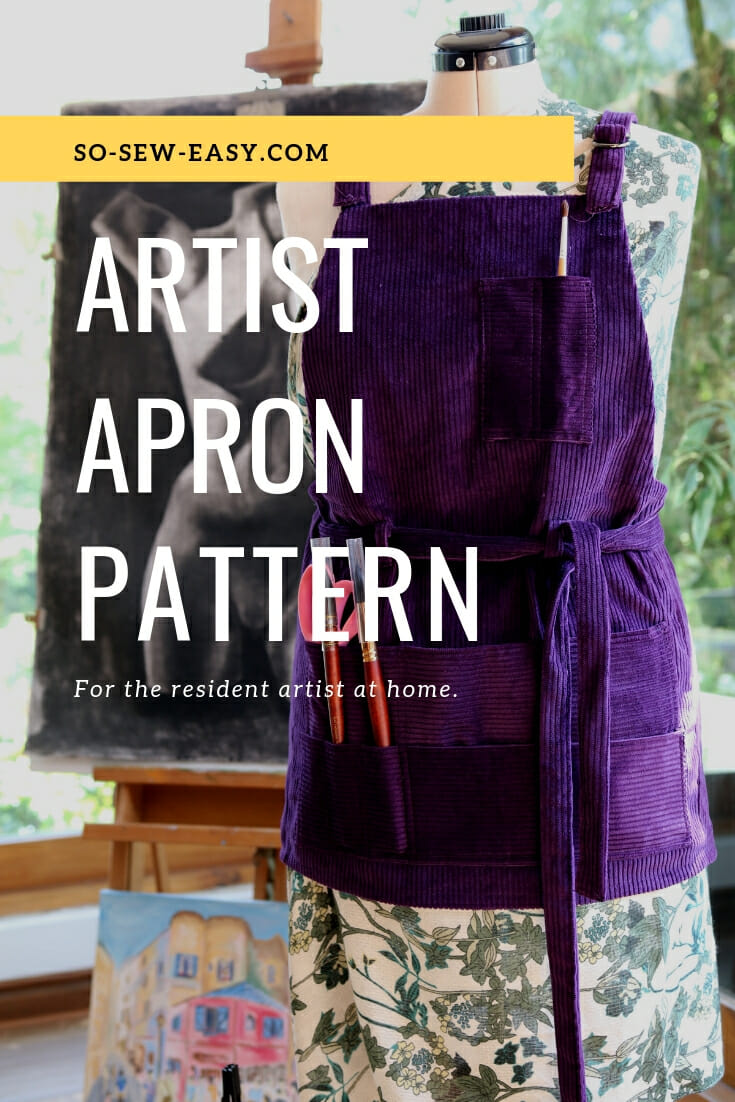
So this apron is for the artist in you or someone you know. It has enough pockets for brushes or tools, handy while still being stylish and protecting your clothing at the same time.
Warning: this artist apron is so comfortable that you might forget to remove it should you decide to go grocery shopping in the middle of a creative wave.
Skill Level: Beginner
You will need a couple of yards of bias tape. If you wish to make your own here is a great tutorial.
Materials
- 1 – 1 1/2 yards of 60″ canvas, thick corduroy (THIS is exactly what I'm using in this tutorial and it's on sale on Amazon..)
- Thread to match
- Size 16 Schmetz sewing needle
- 4 d-rings 1″ wide
- 2 1/4 to 2 1/2 yards of 1″ bias tape
Tools
- Sewing Machine (I am using the Bernina 350 Patchwork edition and I do not need the walking foot.
- Walking foot (optional)
- Iron and ironing board
- https://www.inches-to-cm.com/
- Serger: ideal, but optional
Fabric Recommendations From Amazon.com
I strongly recommend leather for this project if you are into tiling or welding. Make one in the fabrics below to check fitting first, then use the leather.
Pattern Download
Our patterns are still free, but now you now have the option of making a small contribution if you like our work! We'd really appreciate it and it will help is keep going with new and fun designs like this. Even a dollar or two would really help.
Thanks so much in advance for helping us out. You can use any credit card and you don't need a Paypal account, although you can use one if you have one.
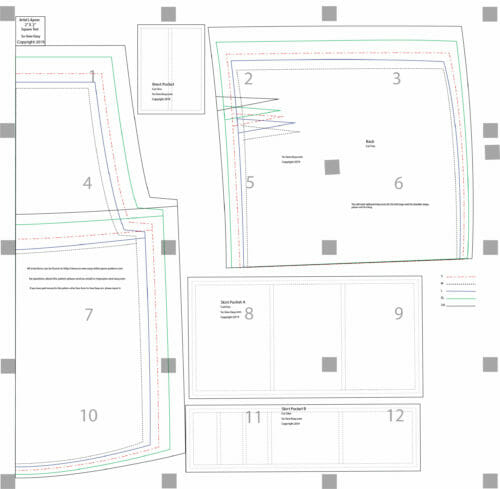
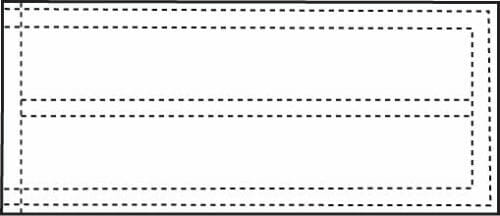
Pattern Layout
How To Sew Your Artist Apron
Please note, this is not a pinafore dress. It will not cover your buttocks completely.
I have placed two darts in the back of this artist apron pattern to make the back drape better.
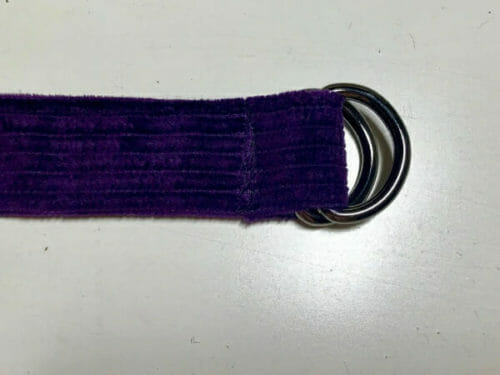
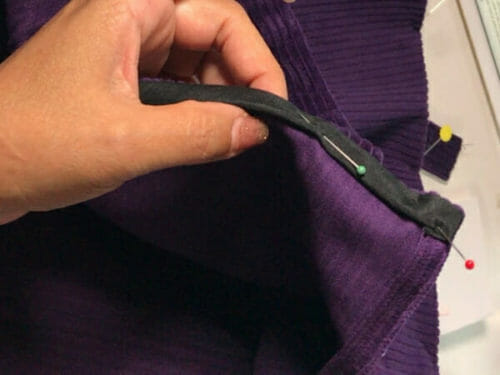
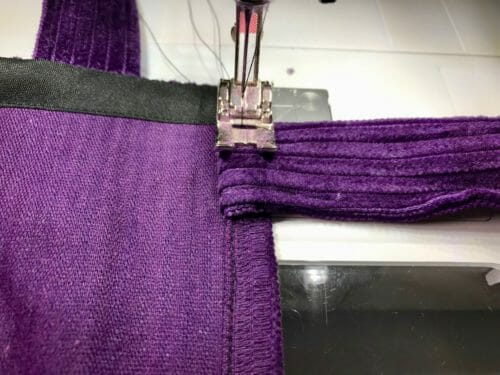
We will start by making the belt loops and the straps. It will be the same technique for both because we are looking to hide the raw edge of the fabric.
Making The Belt Loops And Straps
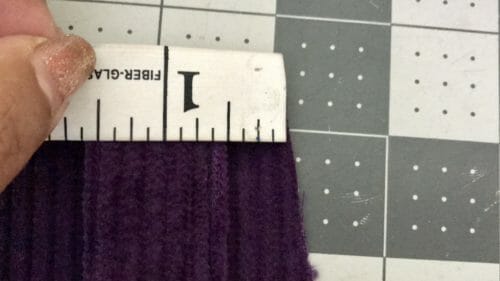
Cut two rectangles that are 2 3/4″ in length and 1 1/2″ wide.
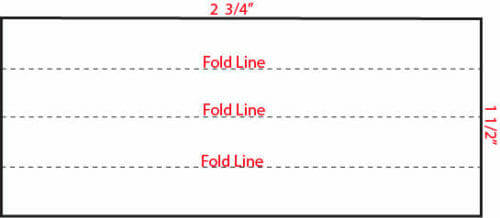
Use your iron to fold the rectangle in the middle marking the center.

Fold the bottom half in, use the crease left by the iron to place the edge at the center.
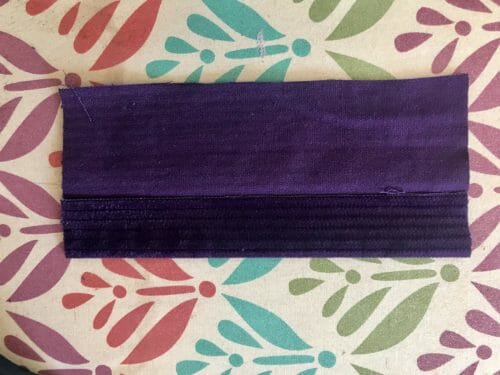
Fold the top down to meet the other edge at the center.
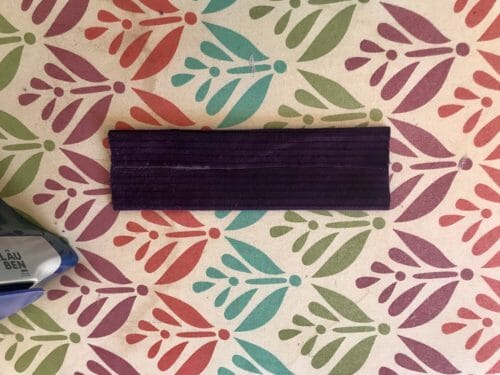
Fold these strips in half to hide the edges. Iron
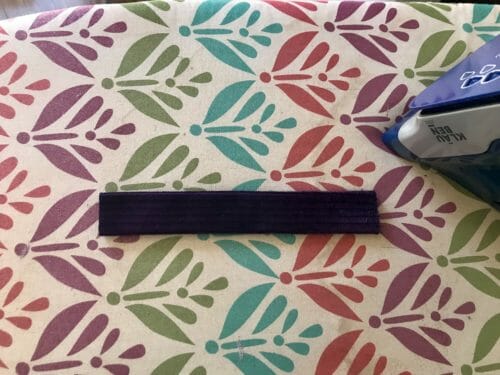
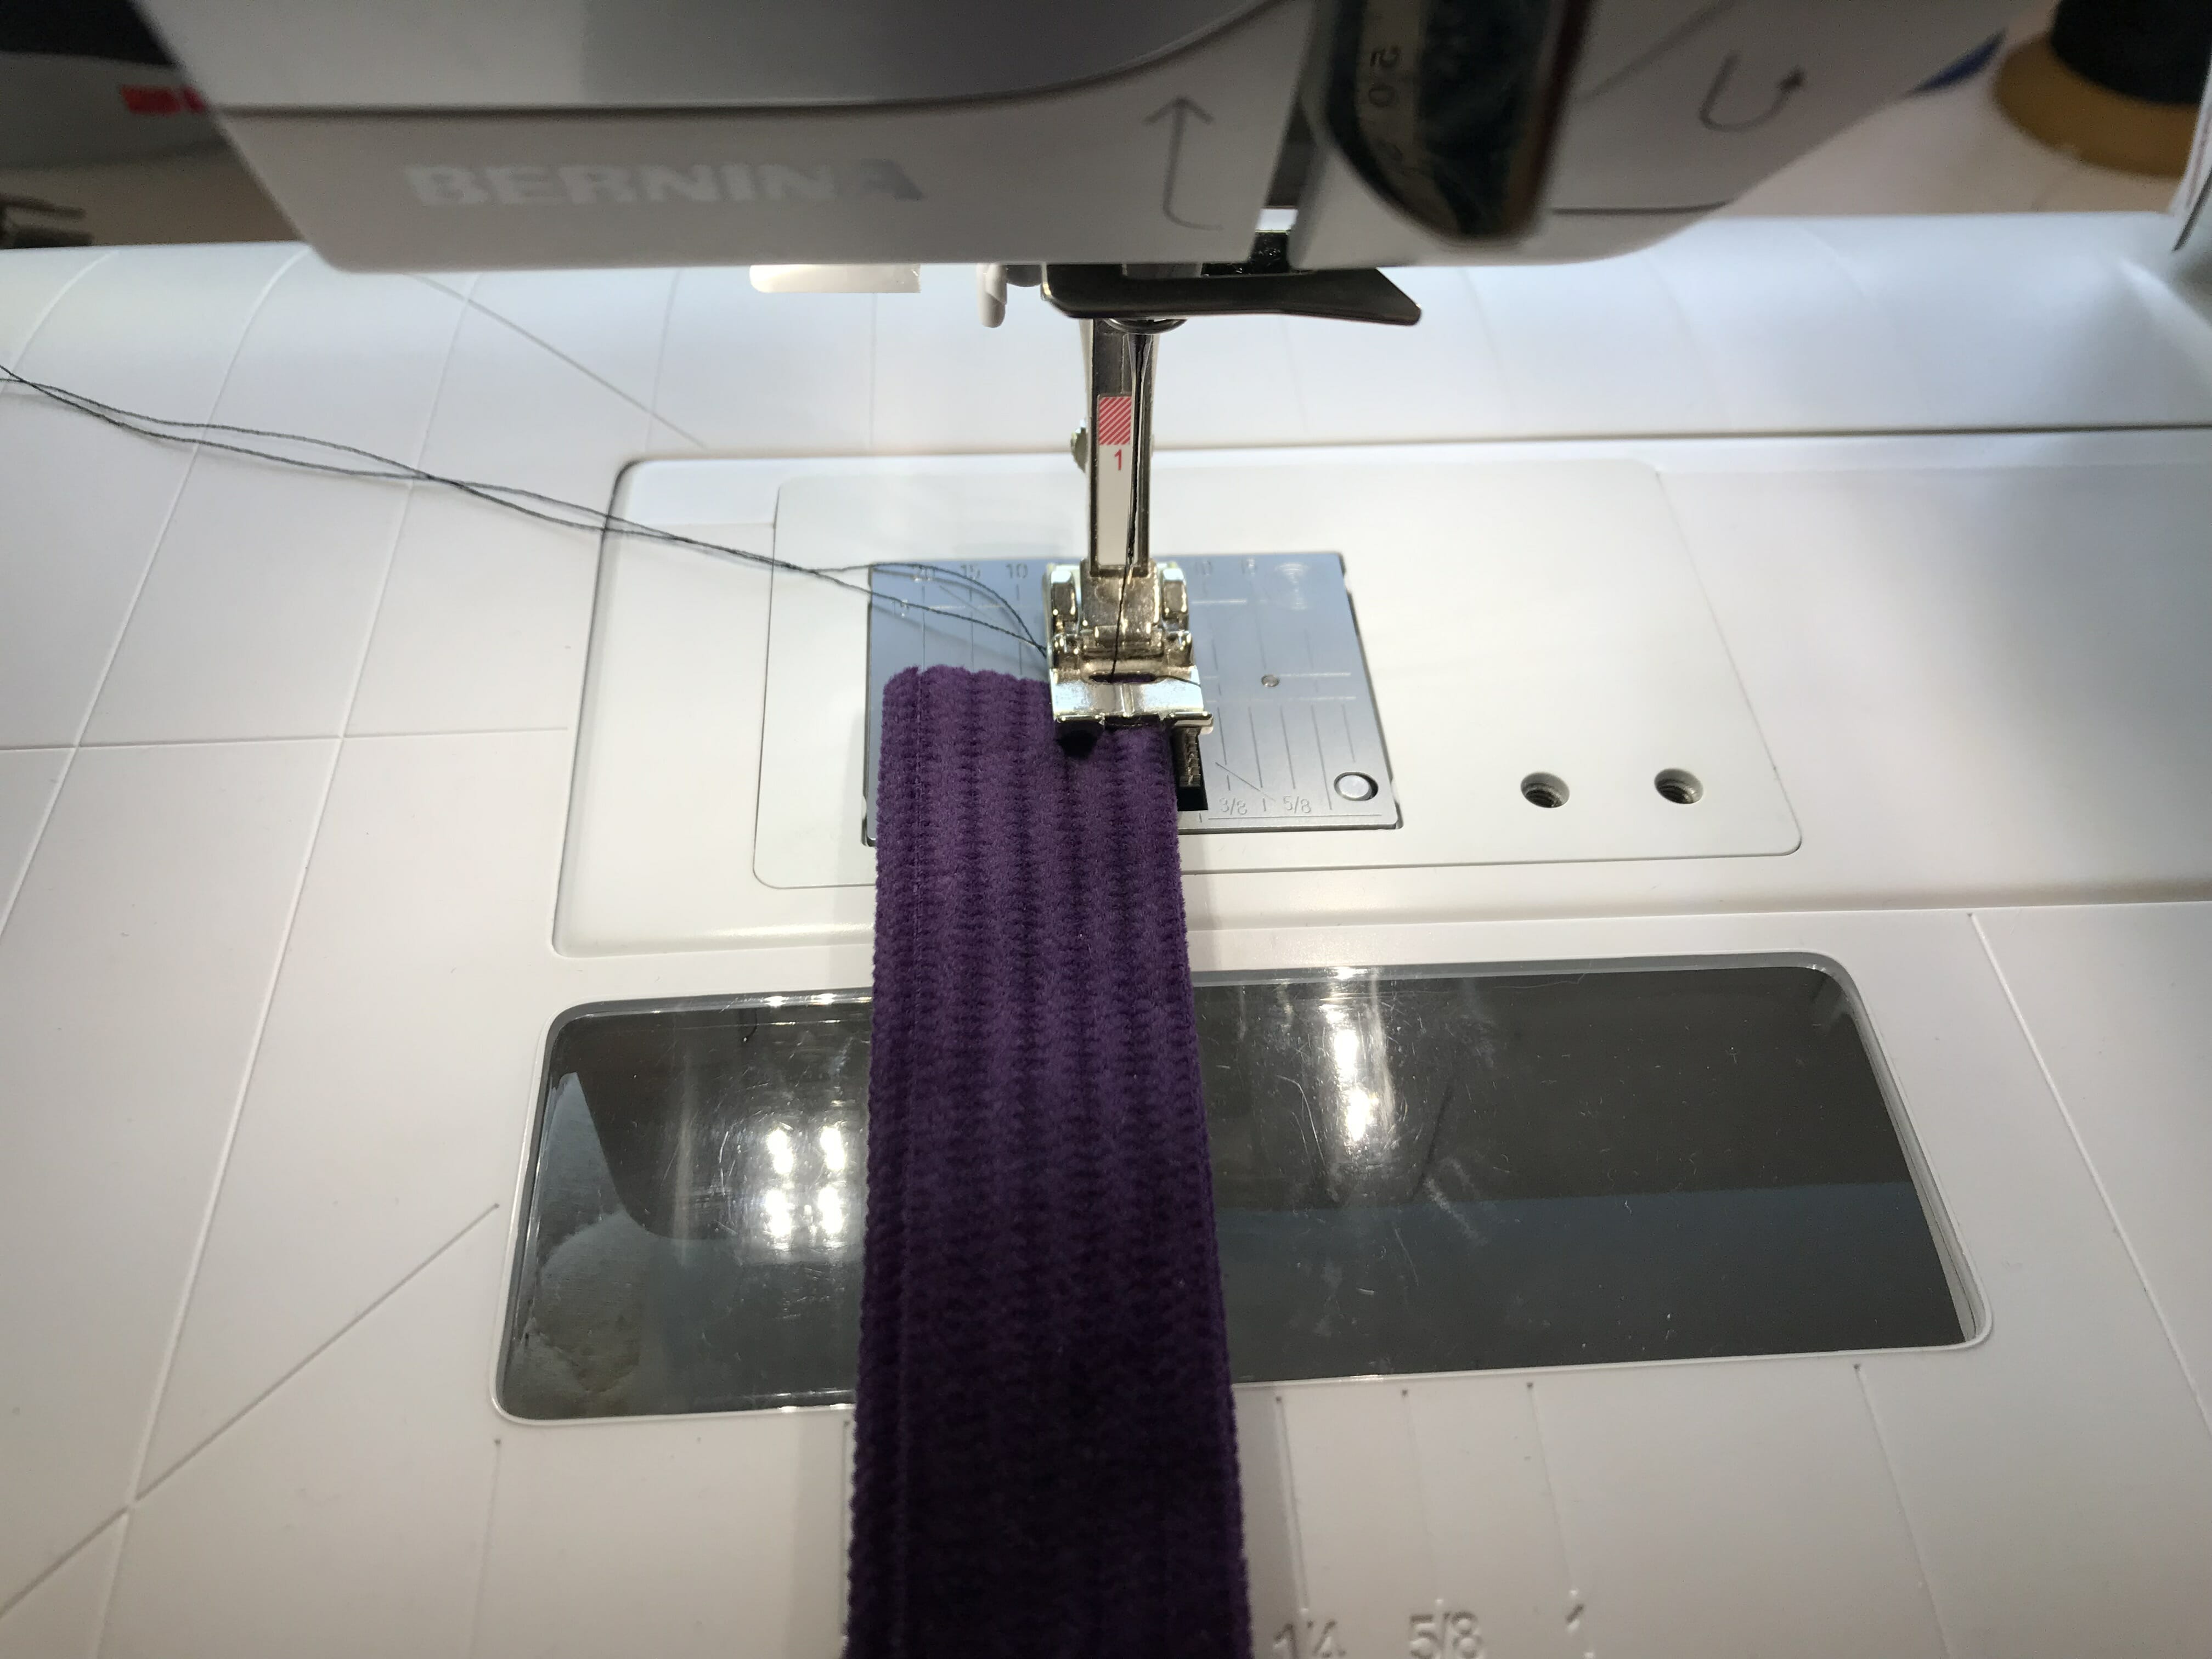
Sew at 1/8″.
Making The Shoulder Straps
The straps are the same that I used in the iPad Backpack I shared with you recently. Use the directions above to make the straps.
Cut a strip of fabric that is 22″ in length by 4″ wide. This is for the strap that is attached from the back of the apron and ends up with the d-rings attached to the other end.
Cut one more strip that is at least 10″ in length. I am size 10 and am 5 feet nothing so I only needed 7″ in length.
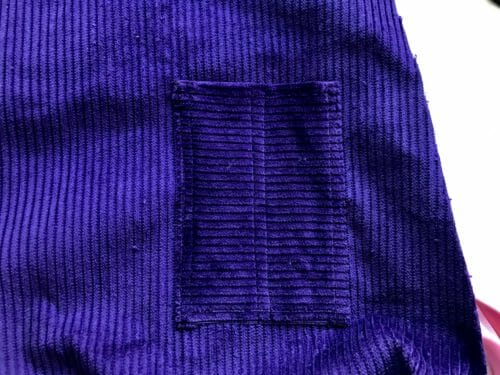
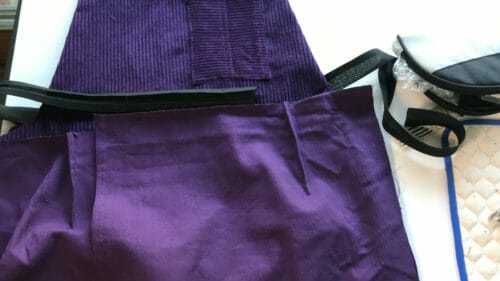
Adding The Breast Pocket
Zigzag or serge one of the narrow sides of the rectangle.
Then turn 3/8″ the serged side and stitch down at 1/4″.
Turn the other three sides around and iron.
Place it on the left side of the breast area 4″ from the top and 1 3/4″ from the side.
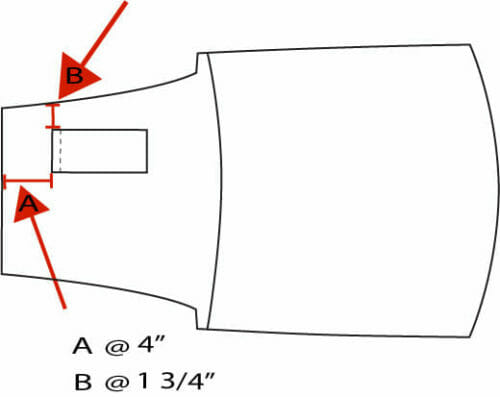
Stitch the pocket down at 1/4″ again at less than 1/8″. Divide the pocket in the middle as shown in your pattern and in the drawing and picture below.
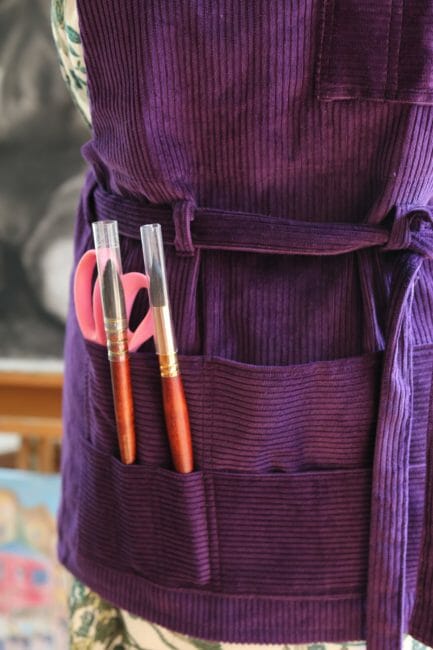
Adding Skirt Pocket A and B
This is an easy pocket to place since you have already sewn the first one and the procedure is basically the same.
Zigzag the pocket opening. Turn the other sides at 3/8″ three sides using your iron. Stitch down making a double stitch.
For the division of the pockets, you can use your artist apron pattern now as a guide or wait to place pocket B on top of the pocket and then divide the pockets up all at once.
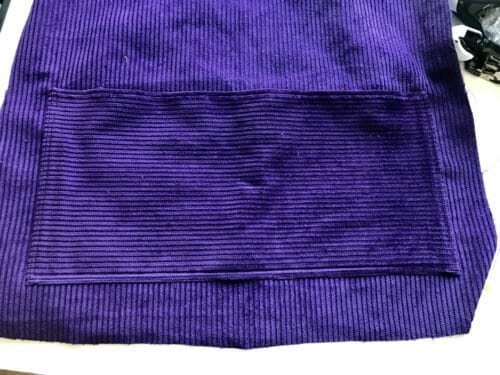
Place Pocket B on top of Pocket A. You will notice that Pocket B is wider than Pocket A.
Zigzag or serge one of the longer sides of the pocket, turn, and stitch. Place on top of Pocket A and sew close to the edge. To reduce bulk, place Pocket B lower than Pocket A
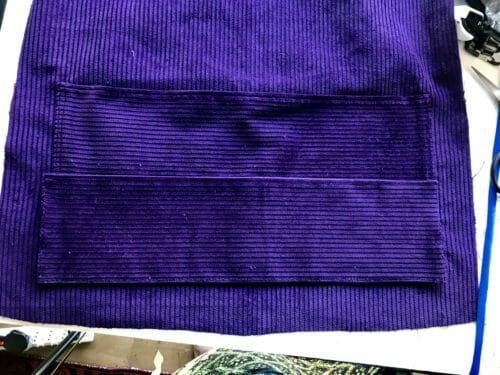
To reduce bulk, place Pocket B lower than Pocket A. Use your pattern to divide the pocket.
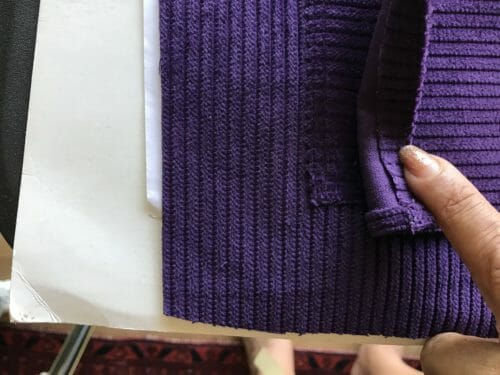
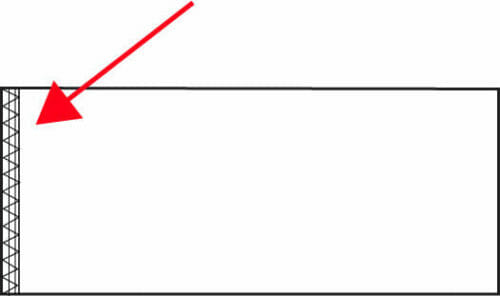
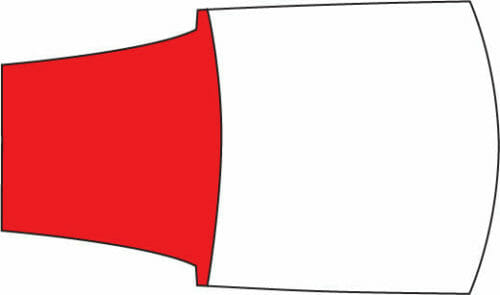
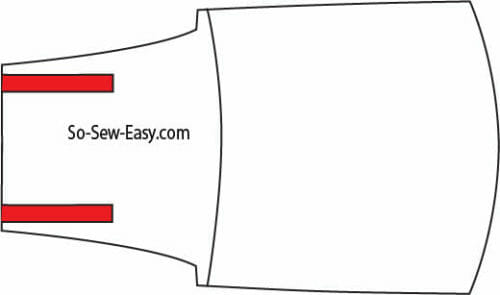
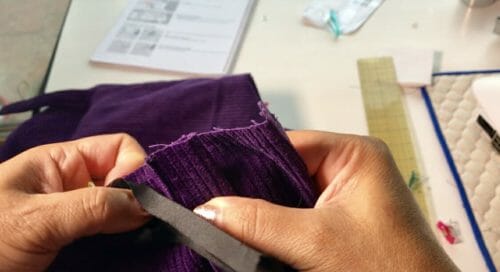
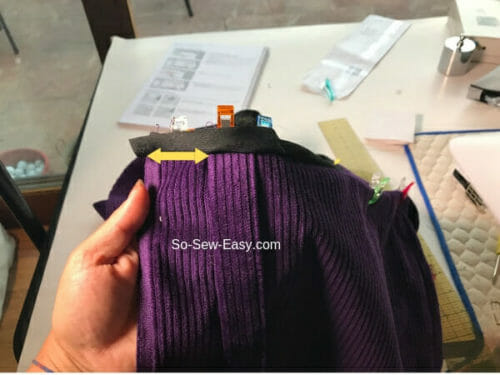
Sewing The Facing
Retrace the facing marked in your artist apron pattern shown in red below, then cut it in fabric.
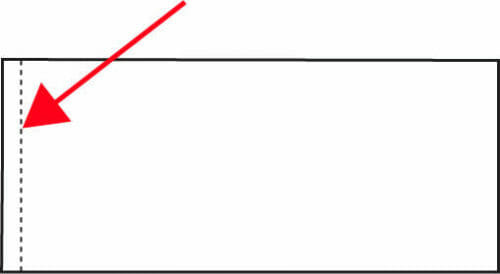
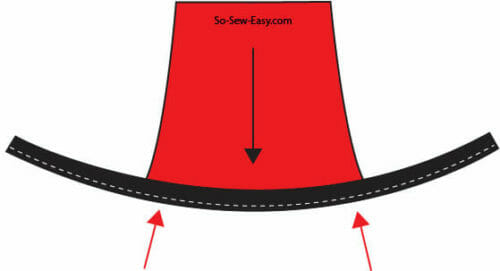
Cut your bias tape in half, take one of the half and mark the middle. Place the right side of the facing up and align the middle of the bias tale with the middle of the facing. Sew using the crease of the bias tape. Leaving 2″ free on each side of the facing.
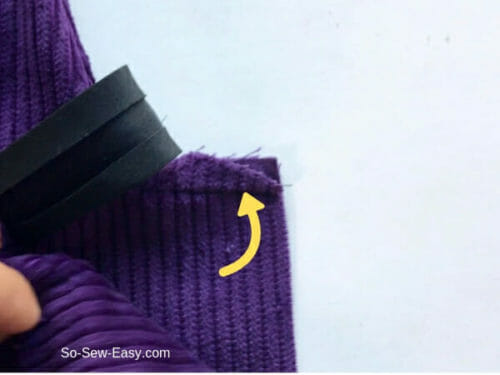
Adding The Short Straps
Lay the front of the apron right side facing up, place the smaller straps 1/2″ from the side and align them with the top edge of the chest area.
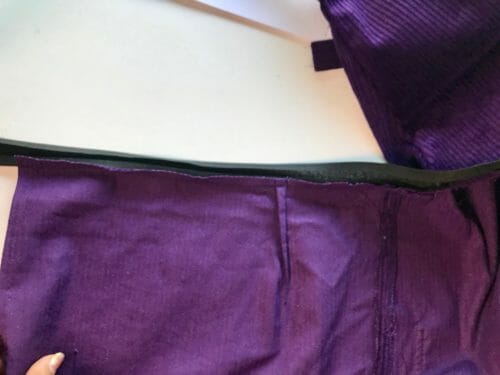
Place the facing print right side down on top and sew at 3/8″. All around the facing. Clip the corners.
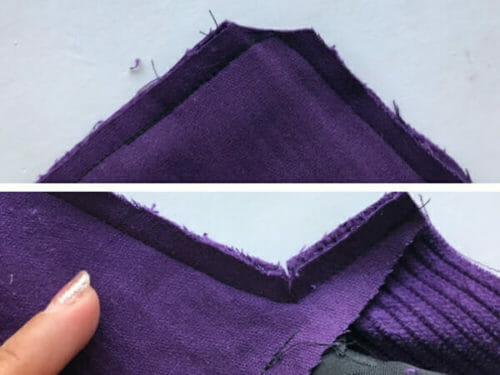
Turn the apron inside out and iron.
Sewing The Skirt
The first thing you need to do is to sew the dart in the back of the skirt.
If you are a beginner you might want to check this easy tutorial on how to sew a dart.
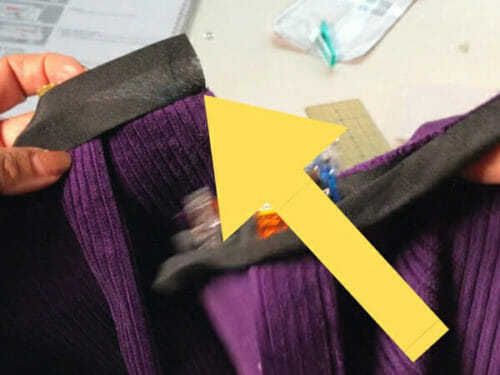
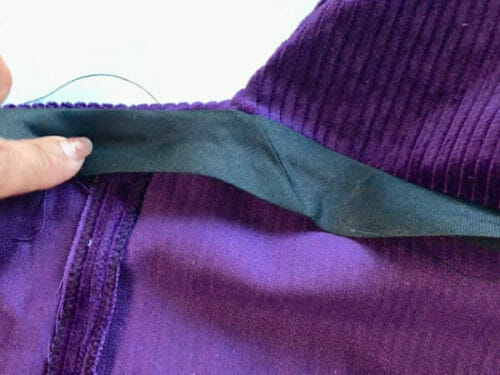
Before sewing the skirt, make sure the facing of the apron is folded upwards. This detail is important because we will need it to be up to be able to able to sew the bias tape later.
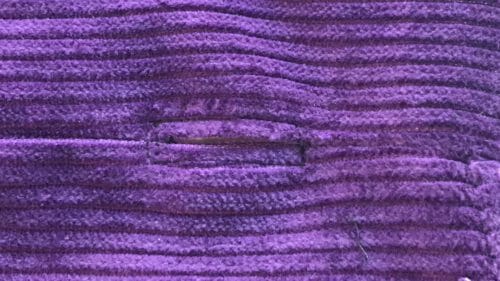
Sew the skirt back at 3/8″ from the waist to about 1″. Leave a gap of 1″ open then continue sewing all the way to the hem of the apron. This gap is where you will be threading the belt to be able to tie the apron.
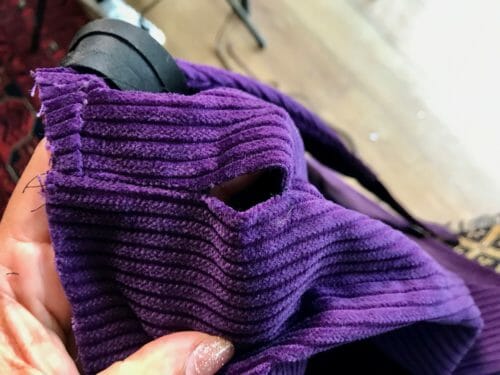
Zigzag or serge the seam allowance open. Repeat on the other side. After you have serge the seam allowance sew around the opening of the hole to make the seam allowance lay flat.
Finishing The Apron
Once you have sewn the back of the skirt it is time to pin the shoulder straps. Pin the straps 1 3/4″ from the center back with the raw edge align with the waistline and the d-rings hanging towards the hem.
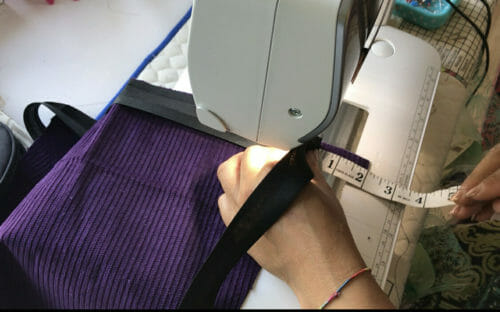
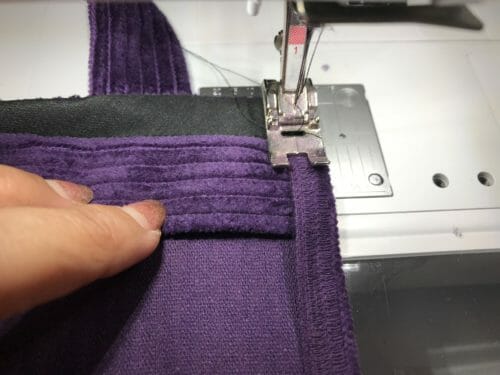
Sew the tape all the way to the end.
Cut off the excess at the end.
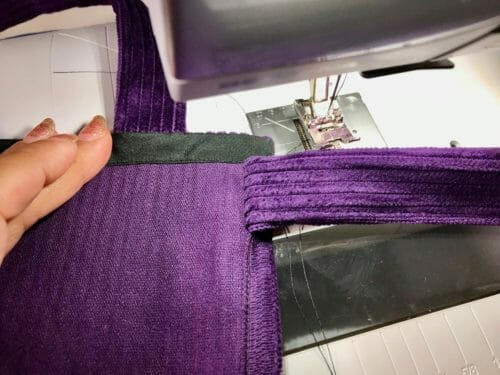
Fold the center back side in by 3/8″ then Fold the tape down and fold the tape in half once again, pin around the skirt.
We need to sew the center back but before we do so need to slide the waist ties and attach the loop belts.
To make the ties you will need a rectangle that is S: 32″, Medium 34″, Large 36″, XL 38″, 2XL40″ X 4″.
So if you are using large cut a rectangle that is 36″ X 4″
Fold the belt tie to the right and sew it down.
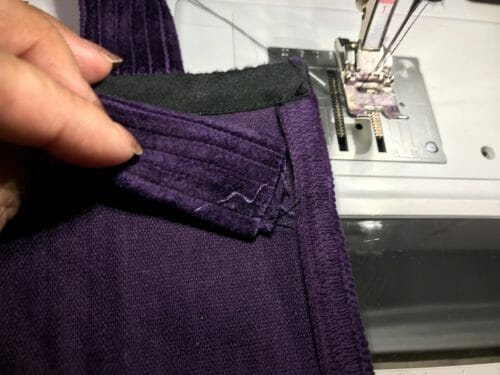
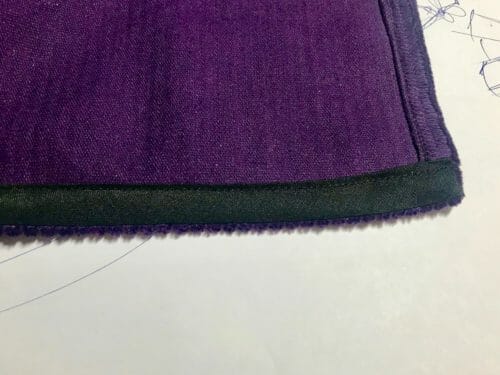
Add bias tape to the hem, sew the small side of the bias tape to the right side of the print and turn to the inside. Fold the bias tape again then sew.
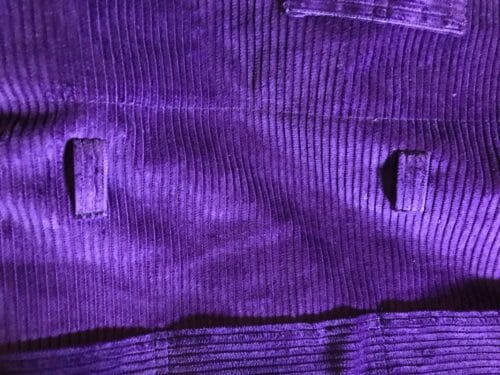
Finally, sew the loops at the front of the apron.
It took me three hours to make this apron but a few days to write down the tutorial.
I hope that you can use this artist apron pattern to make a few gifts for the artist at home or a special someone in your life. Will this apron answer your needs in your workshop or art room? What would you add if it does not? let me know in the comments section below. Until next time! Happy sewing!
If you'd like another fun-to-make apron pattern, please check out the Darth Vader Apron pattern below:


I have found this pattern confusing, lacking pictures of the back and I have spent hours going from the web site and directions to my sewing machine. After adding the back pieces, the apron is huge. I looked & hoped a tutorial would be on You Tube, so I could see the actual construction. Any suggestions of how to reduce the giant size would be appreciated without starting over. It is good to realize lots of other sewers are confused too.
The instructions are missing a lot of information. The pattern is not clear on where to tape the pages together resulting in pieces that do not fit together. The dark fabric makes it very hard to figure out the steps. The part about the binding on the facing and the skirt top is very confusing. I am halfway finished with this and have no idea where to go to make this work. The side seams on the skirt are different sizes and don’t match up. If i make them match at the top then the pockets are right at the hemline. If I make them match at the bottom, there is no way I can put a binding along the entire top of the skirt. I’m sad as this was a gift I was going to send to a friend and now I will probably have to go buy more fabric and recut the back pieces to make them match. Thanks for all the free patterns, I just wish this one had been more clear.
This looks really cute! But without a picture, I’m have trouble imagining what the back looks like and how it’s worn–where the straps are attached, how far around the skirt goes, etc. Thanks, I love your patterns!
This looks like a very useful pattern. Thankyou. However I can’t figure out how it’s supposed to be worn from your frontal and close up photos. Would it be possible to add full side and back photos or sketches of it worn or on your dummy
Instructions for the Artist Apron were incomplete and confusing. After “filling in the blanks” i have completed two, Would love to send pics but can’t figure out exactly where or how.
Thank you for your feedback, every project has a skill level, I do mention this on every project.
The directions for the skirt are a bit light. I don’t feel like I have enough information to join the skirt to the apron or add the ties. Can you please give me a little bit more. Do you hem the sides and the bottom? Where do you add the ties? HOw long do you make the ties?
I am afraid I can’t. English is my second language and as it is it is very difficult to make it clearer. I think I video would be the only way to show you.
l loved the apron that resulted, and think your pattern would be fine if it were marked an intermediate level. Since I have lots of experience, it was great, and I love it!
Thank you Shannon for your feedback, I would love to know why do you think it should be intermediate?
The pattern was very confusing, I have been sewing for many years and it was hard to follow. I think some of the instructions were missing.
Like what part Mary so I can change it, thanks for letting me know I would like to improve this.
Hi, would you clarify the dimensions of the belt loops? I have a hard time believing that the width of the fabric for the belt loop is 1/5“.
Thanks.
I am having such a hard time with this pattern. I can’t figure out where the extra 2 d-rings are for and I don’t see where it said to cut two short straps. I saw directions for one 10 inch strap and the 1 belt, but that’s it. I have been sewing since I was a child and I am normally not so confused. Perhaps someone can help me out?
I, too, have been sewing a long, long time (50+ years) and I find this pattern confusing and the instructions somewhat incomplete. The photos are kind of dark. A photo of the back might be helpful. I paid some money for this pattern, but it doesn’t seem likely that I’ll make it. Sorry!
I have return your USD 5.00.
Thank you, Mayra. Best wishes to you.
Thank you, Elizabeth. I was just confused as to why no one responded to my question. I think I figured things out with the apron, but I have no idea if it is is anything like the pattern creator intended.
It would have been nice to show/include a back of the garment view.
You can see many more picture on my Instagram https://www.instagram.com/p/BuRyTXPHdRR/
Hi Mayra, I purchased the pattern for the Apron and have received the PDF pattern but how do I get the instructions, without having to cut & paste from the above? Thank you, Angela
Hi Angela, the instructions are free on the site. Thank you:)
Thank you for offering this free pattern. I love it. After reading another comment about not being able to open the file from a kindle, I held off paying anything before I tried downloading this to my kindle Fire tablet. Unfortunately although it downloaded the file okay. I can’t open it either. Just thought you’d like to know. No problem for me as I can use my husband’s laptop later. Fabulous pattern! Looking forward to making it when I have more time. 🙂
Hi there
Thank you so much for this free pattern. I am really looking forward to creating the apron as I know it will have so many uses. Great design.
It is my pleasure!
That is Amazing, I luv the pockets, especially for the brushes
Yes they are handy.
Just to let you know- I had no problem printing out the original pattern-thanks for helping me!
Excellent, so happy you got it!
I tried 2x to print your revised pattern-but the test square isn’t 2 by 2 either time. i have checked my printer settings and they are set as you directed can you help me?
I tried copying the revised pattern and now my test square is to small-how can I fix this?
Thank you for the pattern! I sent a small payment in appreciation for what you do!
I have one question, however, you do not mention any sizes, yet the PDF has multiple lines in different colors and some are dotted and some are solid. Is that different sizes? If so, what are the sizes? Thank you.
Hi terry, first of all thank you for your appreciation. Yes the sizes are Small to 2XL.
I have a French print broadcloth that would look so cute here. Thanks for your design. God bless…
I would love to see your apron when you are done. Do send in your pictures I would load them in this post with your permission of course.
I made a small contribution and printed out the apron pattern but can’t figure out how to print out instructions. Please help!
Hi Chris, the instructions are free on the site.
Thank you, I now know what my daughter will get for her birthday, 1 for her studio and one for home xx ?
Indeed, so happy for her and happy birthday.
I deeply appreciate your generosity in sharing your patterns so freely. I hope many blessing come back to you . I have not started making any yet, but plan to soon and really wanted to let you know I have so much gratitude for you. I will start with “easy” patterns first and I just know that I will feel quite accomplished when I get the first one done. Thank you so much.
Hi Collenn, thank you for your appreciation. Your words brought tears to my eyes, many blessings to you!
Really like your patterns! I’ve downloaded several of your patterns with no issues whatsoever, been receiving your Sunday free patterns for a long time with no issues. I have not been able to do so with this one, I ‘ve downloaded it numerous times, it appears to be successful but when I try to open the file it get the message “can’t open file”. I’ve downloaded items from a couple different sites in this same timeframe so don’t believe that’s the issue unless your new provider (I believe this is first time I’ve tried to open file from their site) does not support interaction with kindle??? Don’t know what to do, really would like to continue to receive your patterns but at this point it’s just taking up space as I can’t get file to open. Any suggestions? Thanks so much for your wonderful work!
Hello Mary, I will have to look into this further, because you just taught me something knew. That you can open a PDF file on a Kindle. I had no idea, I don’t have one but my son does so I will have a look at how This can be done. As far as I know you need Adobe Reader to open the file. It is night time here, so I will try tomorrow when my son is up. Kind Regards,
I had the same issue, went to my files and opened there with Adobe no problem.
Hi! Thank you so much for the pattern. I’m a bit confused by the cutting lines and how they are identified on section 9 of the pattern. The small size (red dashed lines) seems like it would be larger than the medium and large – or is this an illusion and the pattern goes together to end up with a small? Thank you again!
Hi Donna, you have the old pattern, please download the revised version, thank you!
Mayra, Thank you for your quick response. I did download the revised version and it is the same. I’ll just go ahead and cut on the lines that appear the smallest. Thank you.
Thank you for the pattern. I sent a small payment. I look forward to making this for my artist sister (Vicki Petrosky)!
Thanks Colleen. I really appreciate the support. Please enjoy the pattern.
I am almost there but aren’t sure what size to cut the waiste ties – can you help me with this? thanks kindly – maybe I just missed a step
Hi Mary depends on the size you are making, but check your waist to make sure you will have enough to tie around. You will need a rectangle that is 4″ wide by 32″,34″, 36″, 38″ or 40″ in length.
Thank you so much for this pattern. Just reading through the instructions. Kind of confused right now but think once I do step by step I should be fine. Think the confusing part is where to put 2,3 5 and 6 of the pattern pieces. Will let you know how I do. Thanks again appreciate your kindness as also on a very fixed income
Hi Mary, I have loaded a pattern layout for you to follow. Have a look so you can work out how to paste the pattern together.
Thank you so much for this pattern and the generosity of offering it gratis. With a small income, this is greatly appreciated. God bless.
Hello M, I get revenue from the advertising in this page, making the big companies pay for my time makes it so people who have small incomes can use the patterns for free. It is my pleasure. I do what I do because I love it. So thank you for appreciating what I offer. Kind regards and many blessings.
Thank you so much … FIESTA 🙂
It is my pleasure:)
This looks interesting, but I am confused by the step that says, “We need to sew the centre back but before we do so need to slide the waist ties. and attach the loop belts. You have finished!” I don’t understand the sentence and it appears we are not finished.
I took out the phrase because yes we have not finished at that point. Thank you for pointing it out.
could you post a sizing guide- bust measurements would be helpful! sorry if it’s here somewhere and i overlooked it!
No it is not, it is an apron, not a pinafore dress. It is for covering your chest so you do not get your clothing underneath soiled. If it is not big enough for our chest then you need to increase at the fold line the inches that you required. Hope that helps, Happy sewing.
Fantastic, love the pattern.
Thank you! Barb hope ou enjoy the apron.
Nice pattern, looks like a good sturdy work apron. From the old lady corner though…was it necessary to have a nude painting in the background of the first photo? At least here it’s covered up some by words but on Facebook it was really glaringly obvious.
Hi Laura, it is a charcoal drawing of a mannequin with no arms and no legs, from a class I took ages ago. No one involved in the drawing was naked nor human, I can assure you.
Thank you so much for the free pattern, it is greatly appreciated, much more than you realise K x
Thank you so much for the pattern, especially for the free option, it is much appreciated Kxx
Terrific pattern.
I love the way it looks and think it would be very functional as well. I do have one question. What kind of bias tape did you use? Single fold, wide single fold, double, or? And how wide is the bias tape when unfolded?
HI Jacki I used double fold. I made my own since I need a fair amount and it is a color I will be using in a PVC tote bag. The bias tape unfolded is 1.5″ wide.
Thank you For the free patterns, especially for old beginner’s..old as in previously have sewn!!!! before children,which are grown now..Thank you soooo much??