


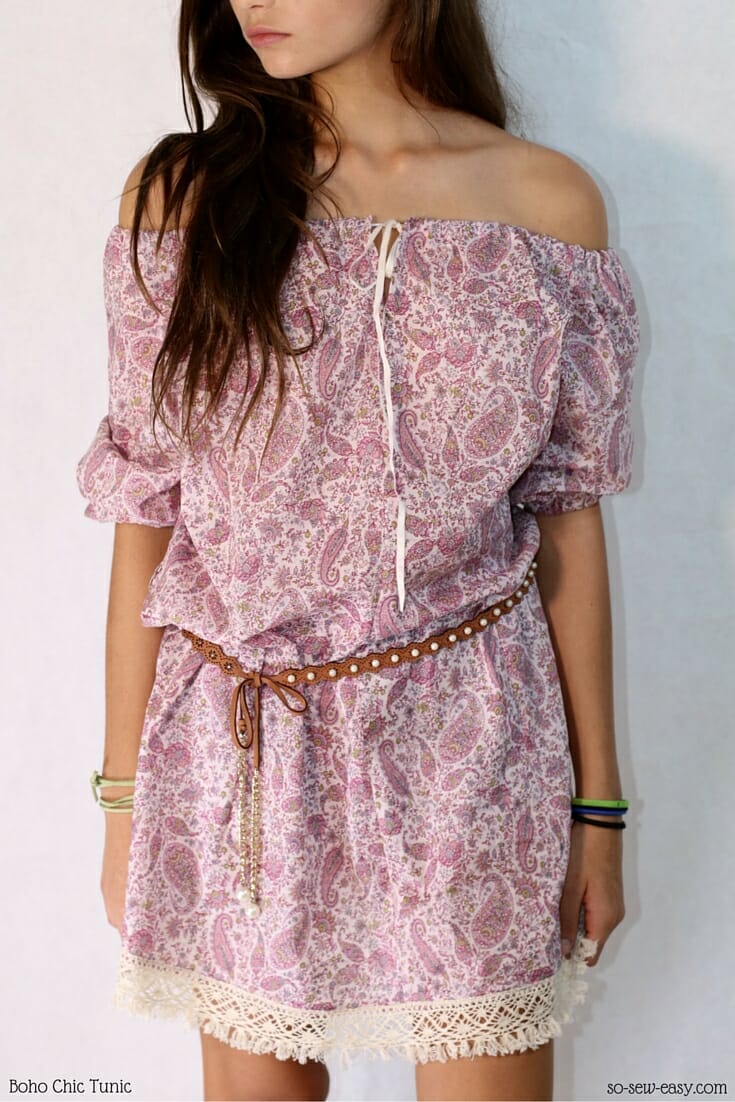
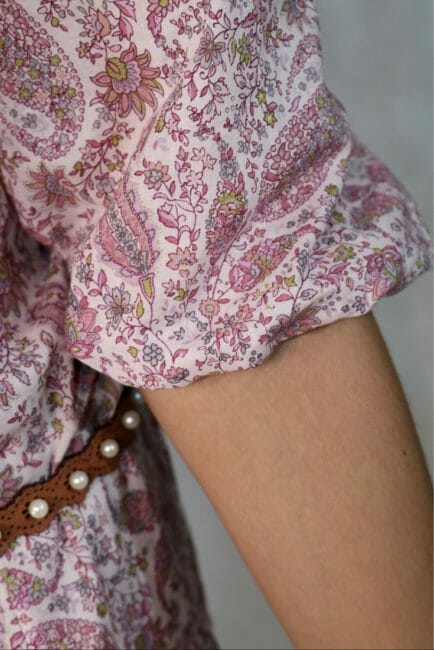
The first time I made this Easy Summer Boho Chic Tunic pattern, I had just turned 15 years old. Originally a dress, I decided to remake and share it with you. For me, it represents freedom which is why I wanted you to have it.
Long ago, at a time when my parents were not getting along, my father worked far from home and would only come every three months. My mother was in charge of a household and five kids and a very small business, so you can imagine her day. I wanted to go to a school party and my sister wanted to come with me. Needless to say, money for new outfits to go to school parties was not in the budget. My mother always happy to help said: “I can only give you five dollars, see what you can do for you and your sister with that.” I ran to the closest shop on our side of our small town and I purchased four meters of fabric. I already had little thread, elastic, and lace at home.
I made a tunic for my sister and a dress for myself with the same pattern, two different fabrics, 2 different outfits no one ever noticed. By the time I finished the outfits my father had come home. He was not supposed to be back that weekend and he was none too pleased to learn about the school dance and he said we couldn't go. Instead, he said please make a big pot of coffee as someone is coming to see about buying a horse. If by any chance you grew up in a small farming town, you would know that it is not a thing that happens fast –it takes a few hours of coffee, conversation and much observation of the horse before the transaction is concluded.
So my sister and I decided to escape through the window. We jumped on our bicycles and went to the dance. When I close my eyes, I can still remember the cool air through my hair and the excitement of showing up with a new outfit and potentially getting caught. We had a great time at the dance. On our return home, Alas! the window was locked, so we had no choice but to use the front door. Needless to say, we were grounded for a month. But it was so worth it.
I have made the tunic a few times here and there, but I still remember the first time I wore it. I felt free! This is a super easy boho chic tunic, I recommend this project for a first-time sewer, young or mature, it doesn't really matter.
So what is Boho Chic anyway? Please check out our background article from earlier this week.
Materials
- 2 to 3 yards of Japanese lawn, voile or silk
- 3/8″ to 1/4″ elastic, enough to go around the shoulders and the sleeves
- thread
- 1 3/4″ lace for the bottom
- 2 yards of cotton cord or a belt
- sewing machine
- serger (optional)
Pattern layout
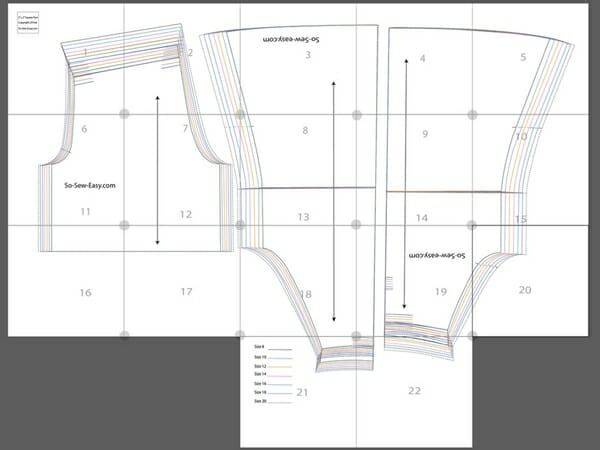
I have tried to save you paper, hence the weird layout that might cause some confusion.
Download the Pattern
You can download the pattern for this Boho Chic Tunic from our account at Payhip.
For help downloading and printing PDF patterns, please CLICK HERE.
Cutting the Pattern
- Prepare the fabric by washing it and drying it before you cut it. For more tips on mistakes to avoid when cutting fabric, please check out our tutorial on the topic.
- There are 21 pages to the pattern.
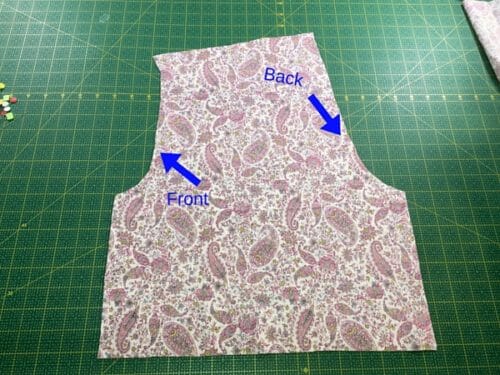
- Please cut the back on a fold. Cut 2 fronts. There will be a seam on the front.
- Cut 2 sleeves
Finished Garment Measurements
Making your Boho Chic Tunic
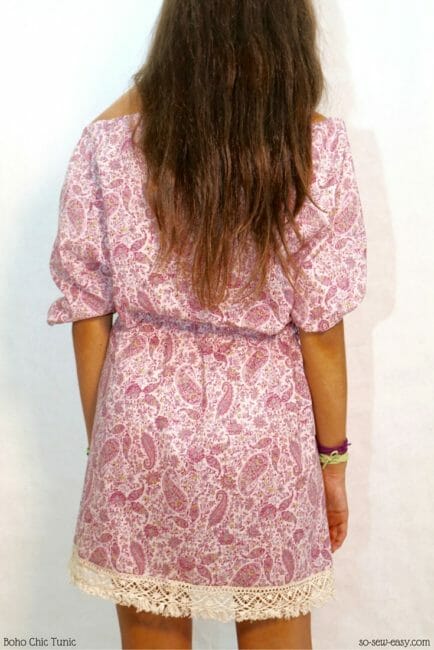
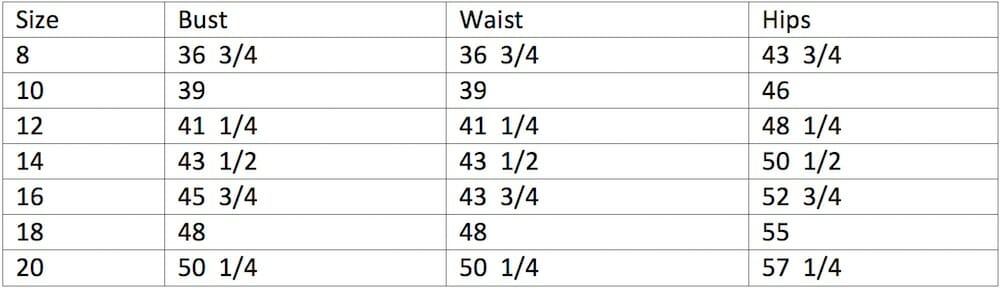
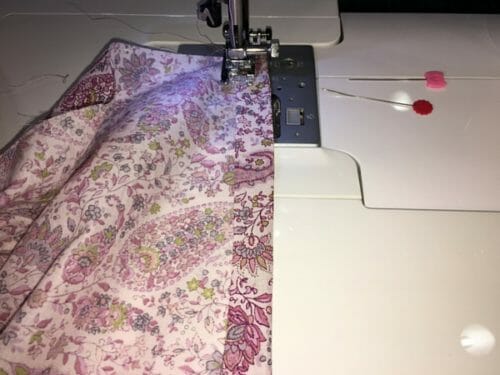
This a very easy tunic to make, the pattern has only three pieces and we will start by sewing the sides.

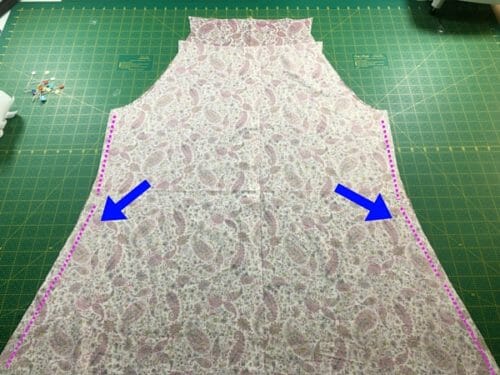
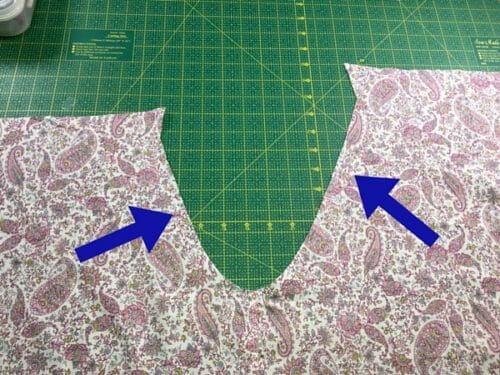
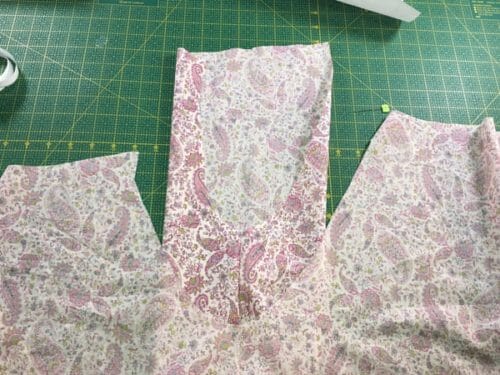
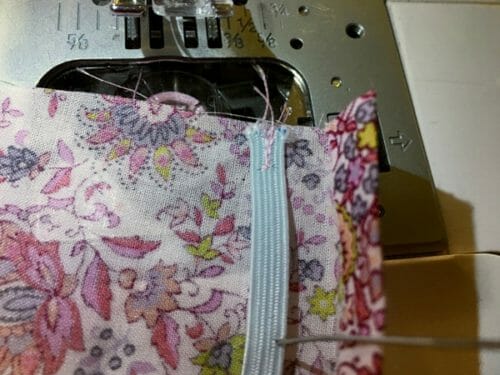
Take the back piece, print side up.Place the 2 front parts and sew the sides, use the serger or zig-zag to clean the seams and iron the sides. Before we can continue, we have to work on the sleeves. The short side is the front and the high side is back. Sew the sides of the sleeves and use the serger or zigzag. Iron the seams. Lay the back and front of the blouse and observe the shape of the armhole one side is higher than the other. Place the sleeve print side together and pin the sleeves.
Use the serger or zigzag and iron the seams. Next, we will work on the neck.
Making the neck of your Boho Chic Tunic

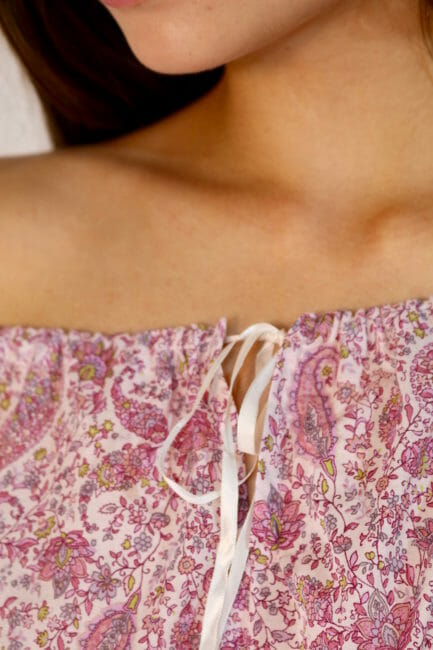
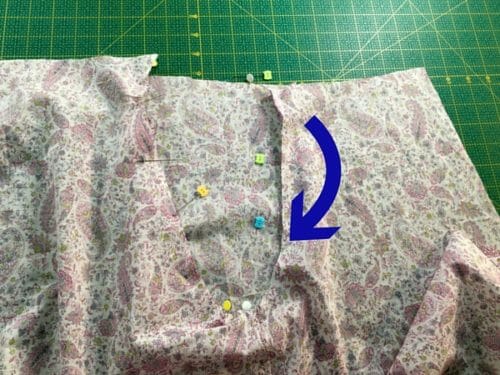
Fold the edge of the neckline to 1/4″ and iron, fold again 1/2″ and iron.
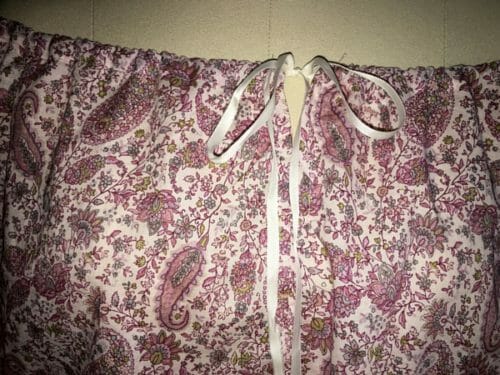
Fold again 1/2″ and iron. Cut a piece of elastic the size of your shoulders tight enough to hold the tunic up but not so tight that when you lift your arms that the tunic rides up. Pin the elastic to the neckline. This is the quickest way to attach the elastic. Fold the edge over the elastic and topstitch the edge. Pull the elastic as you sew. For a better understanding of this technique watch our video on sewing pajama shorts for men where I explain and demonstrate how to do this. Sew the fronts together and iron the seams open. Leave a small opening to attach a string or ribbon as a closer.
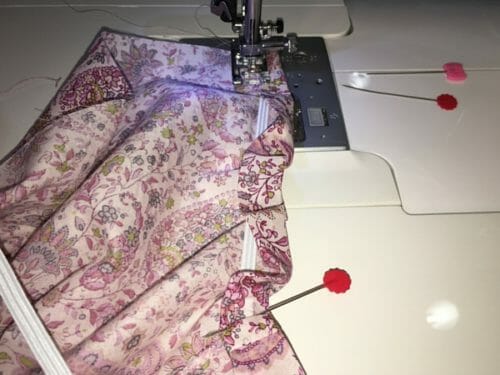
Making the waist

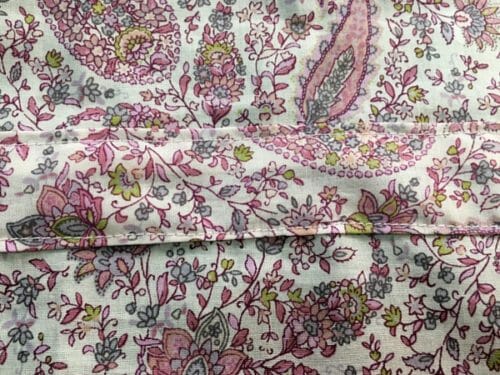

The next step is making a casing for the belt or cord for the tunic and it is optional. However, I would suggest doing it to stop the belt or cord of the tunic from riding up. Cut a strip that will become the casing of 2″x 18″, fold the edges 1/4″ and iron. Pin the casing to the back where the waist is and sew at 1/8″ seam from the edge.
Finishing the sleeves
Lastly, attach the elastic to the sleeves in the same manner you did the neck. Fold the edge of the sleeve at 3/8″ and iron.
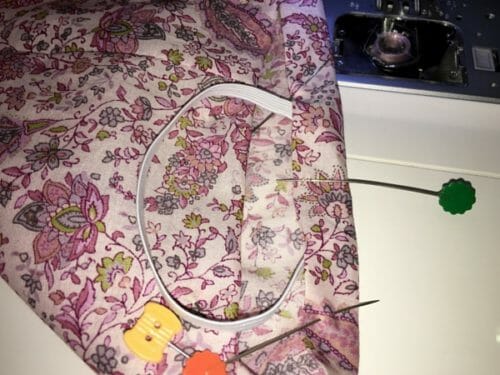
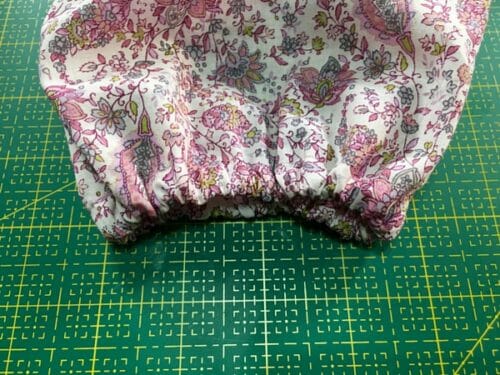
Pin the elastic and fold another 1/2″, and sew very close to the edge.
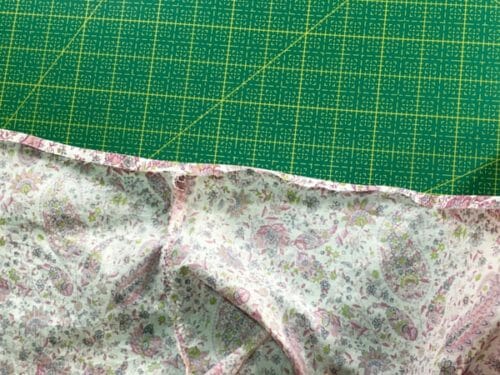
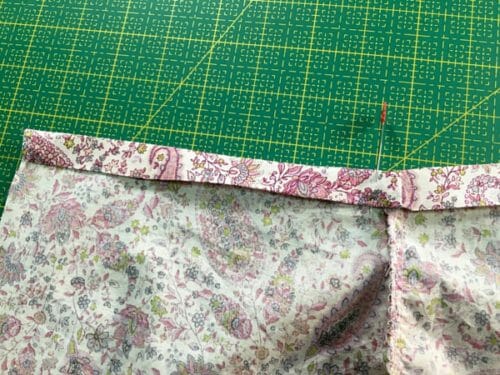
Finishing the hem and lace of your boho chic tunic
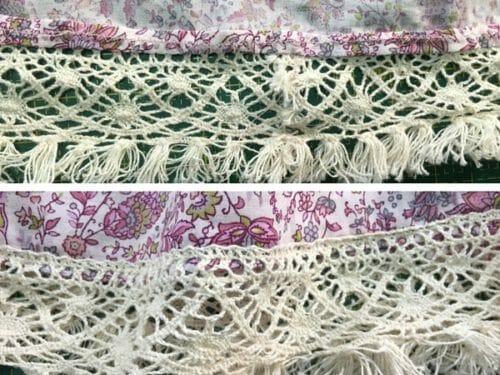
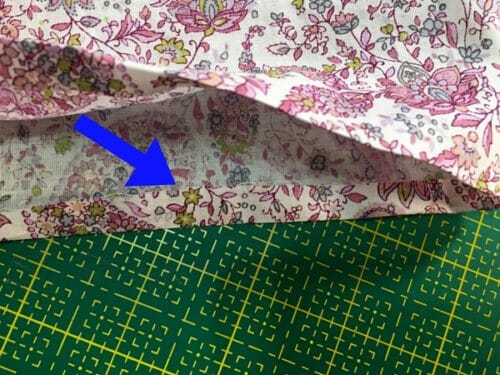
All that remains is to fold 1/4″ and iron. Pin and sew the lace to the hem and ready to iron the entire tunic.
So do you think Boho Chic is a good style for you? If you're not sure, give it a try and let us know how you go in the comments below.
A reader's take on this pattern…doesn't she looks awesome!


Hi. Thank you for the pattern. I loved your story. I grew up with a very strict father also.
I am confused by the back or front (I don’t have it near me so I can’t remember which one is taller). When you fold it under for the neck, how do you deal with the extra material at the top? It won’t fold at the same place. I have looked at the pictures, read the tutorial, and read all the comments and I still can’t figure it out.
Please advise. Thank you
What incredible writing! You had character development and feelings that reached out to us, in just a few paragraphs. Bravo! I will definitely be looking forward to your next email. Yes
I can appreciate rebelling when so much work had gone into making a new outfit! I have a question. I’m an “older” woman and nice shoulders are long gone! I’m wondering if this could be changed a bit to have it cover the shoulders — would I have to add length to the top part of the pattern? Any other changes that you think I would have to make? Less elastic for sure …… I love the “Boho” style and have no issues wearing such clothing even though I am 72!
Is this pattern designed to only be worn off-the-shoulder or can the top of the sleeves be worn on top of the shoulders so a bra can be worn?
Hi Pami, off shoulders only.
Simply add an inch or so at the top of the pattern pieces and you should be able to wear it on shoulder with no problems.
I made a top at the same age, it was a favourite. Some years later my mum wore it as part of her costume in her show group.
You say its free but i can never get the pattern download why?
Hi Molla, I don’t really know what problem you may be having. Many, many readers have downloaded this pattern. Perhaps you have some sort of blocker running. Are you getting to our Payhip page here? https://payhip.com/b/n8Q7
merci pour le patron et j’ai aussi sortie par la fenetre pour aller danser et je me suis faites prendre par mon pere lolllll
Such a touching story! I was right there with you riding along to the dance. I love the pink paisley fabric, is it available online? I hope you have your original dress still, it is a time treasured piece. Thank you for your generosity. Love your website!
Lovely outfit! I will have to put this on my to-do list. But mostly I wanted to tell you that I love reading about your loving family and your youthful escapades! Keep them coming!
Thanks for sharing…..pattern and story. I was reminded of my younger years also 🙂
I’ll be making this for my niece.
Can this be worn on the shoulder? I didn’t see any pictures or suggestions…
No, it is not for wearing on the shoulders.
OMG, ???????????????????????????????? that story!!!!
Was really looking forward to making myself one of these beautiful dresses! However i printed it out and am super confused because it doesnt match together at all. The print out looks completely different than the layout picture you’ve posted. I have checked multiple times to make sure it wasnt ME making the mistake ( I totally do that sometimes) but in this case thats not what it is
The printout, You are referring to the pattern. Let me see if I understand correctly, you are saying the picture does not match the pattern. Is that correct?
I’ve just finished printing and putting the pattern together and look forward to sewing this blouse. BUT – the printed sheets were completely different from the picture above and the pattern got rather complicated to put together. The numbers for the sleeve alone were 18-21, 17-20, 16-19 not 1-2, 6-7 etc. Got there in the end, though!
Thanks for letting me know.
I love the story even more than the pattern!!!!!!!!!! It reminds me of my own girlhood.
A year later my father put up window bars, there was no more escaping:(
Hi Mayra,
I’m new to sewing clothes, trying out this pattern for my teenage girl. I have transfer the pattern to fabric, and leave 5/8 inch seam allowance all around the pattern as its not mention on pattern or any where in your notes. Before I move on to next step, could you advise should it be just cut along the pattern provided or seam allowance have to consider?
Thank you.
Hello Jennifer, the seam allowance is 5/8”, please read the instructions troughtly. Kind Regads,
Thanks Mayra for speed response. I mean to ask should it be leaving 5/8 inch allowance around outside of cut out pattern then cut fabric?or cut fabric right on pattern boundary?
The seam allowance is already included.Good luck with the project.
Hi Mayra, I think I cut the front wrongly..instead of 2 fronts I have cut it like the back piece..so now I have one front instead. I have sew the sleeves on, if I proceed further to add elastic to shoulder, will it affect the overall design?
Hi Jennifer, it will be slightly different but I don’t think it will be that important as long as you do not need the extra space in the front to put the Tunic on. Share a picture with me and I will added to the post for all to see your adaptacion of this pattern. Kind Regards,
Hi Mayra,
I think I have cut the front wrongly, instead of 2 pieces of front I have did a fold and cut front in 1 piece. I have sew sleeves on already. Will the error of 1 piece front affect the final outlook on the pattern? Should i do a cut in the middle of front piece and make front to 2 pieces?
Ye sit will, since you will not be able to add the tie ribbon on the chest. But not to worry just cut a slit (straight not curved) and add a bias tape to be able to replicate the look. It is sort of a keyhole look as in this top. https://so-sew-easy.com/peek-boo-free-easy-t-shirt-pattern/#_a5y_p=5334069
How would you make this smaller? I am a size 0 and it is super hard to find clothes in stores or patterns…… Please any tips would be greatly appreciated!
HI Jenn, I would have to grade it for you, it is not hard to do but very difficult to explain in a comment.
I’ve tried to make this out of muslin with no luck. What is the shoulder measurement? I made the size to match my bust but it will not go around my shoulders. I really want to make this!
Hi Cathy, are you using the pattern? What size are you normally?
I’m an avid sewer but usually don’t make clothes for myself because I can’t get them to turn out. I’m 5’7” and wear a size 4 in pants. Usually in shirts I go to a M because of the shoulders. I’m small busted so girth otherwise is not a problem.
I started with a size 8. I tried it in a larger size but then the arm holes are too low and I wouldn’t be able to lift my arms at all. I did try cutting off the top (neckline) a couple of inches on the size 8 and think that may work. I would love the hear your suggestions.
.
Hi kathy if you can not lift your arms the top is too low on your armpits. remember you still need to add the elastic around. I sugest you try the top on and lift the top so the armpit area is closer to yours and see if you still need to cut it.
I thought I responded to this but don’t see the post. I’m a size 4 except when it comes to shirts. Then I usually go for an 8 but only for the shoulder width. I’m tall and thin and small busted.
Hi Cathy, I have the same issue as you! I went with my measurements and there is absolutely no way I can wear it off the shoulder. If I do, it’s waaaaay too small in the bust.
Thanks for sharing the story behind this great pattern. This is a style I remember well from the 60’s and 70’s. I always swore I would never wear a style I wore in an earlier decade but this may change my mind:)
Question: Can this be made so it is not off the shoulder? Would I need to hack the pattern or simply pull it closer on the shoulders? Thanks!
Hi Barbara, you will need to hack the pattern, it is tempting to try to make a pattern work for what we have in mind. However, unless the pattern gives you the option it is best to make a muck up and try if you like the fit. I do have an idea in mind for this pattern so I will be sharing it with you soon. Stay tune 🙂
I’m interested in the same thing. I don’t want it off the shoulders. You are so generous to share. Thank you!
Hi Mayra did you ever do an “on the shoulder” version?
Hi Sonia, I have published a few tunics, coming soon the Christmas version in lurex. Stay tuned.
Oh the good ole days… Amazing dresses, shirts! Thanks for sharing!!!
Hi there,
I really like the tunic.
Can it be worn with on the shoulders, not just off the shoulders?
How should I determine where to place the waist, I am sewing it for my daughter and she is very tall.
Do you have any length measurements for back to waist and top to bottom hem?
thanks, I am ordering fabric and am excited to sew it.
Hello Gail, the pattern is for off shoulder only I would recommend to wear it any higher if you want to use a bra with the top you can add a strap to it so it can hide the bra. Hope that helps.
Mother made my first as a blouse with long sleeves and a ribbon through the neckline. It was made of white dotted swiss, cotton, and I loved that garment! I am now 87 and still remember wearing it.
Thank you so much for this. It is so similar to my favorite pattern for a peasant blouse and dress my early adulthood.
Hi! Have you made this as a shirt ever?!
Thank you for sharing!
Lisa
yes, I have, I wear it with skinny jeans and high heel sandals. All I did is shorten it a bit.
how can the back be cut on the fold? if the fabric is being laid out in two layers right sides together there has to be a seam down the center back.
You fold the fabric in half lengthwise. Selvage to the left and fold to right and lay the pattern on the fold.
bedankt voor het mooie patroon
It is my pleasure 🙂
What a great story! Thank you for sharing it and the pattern with us. Have a great weekend.