


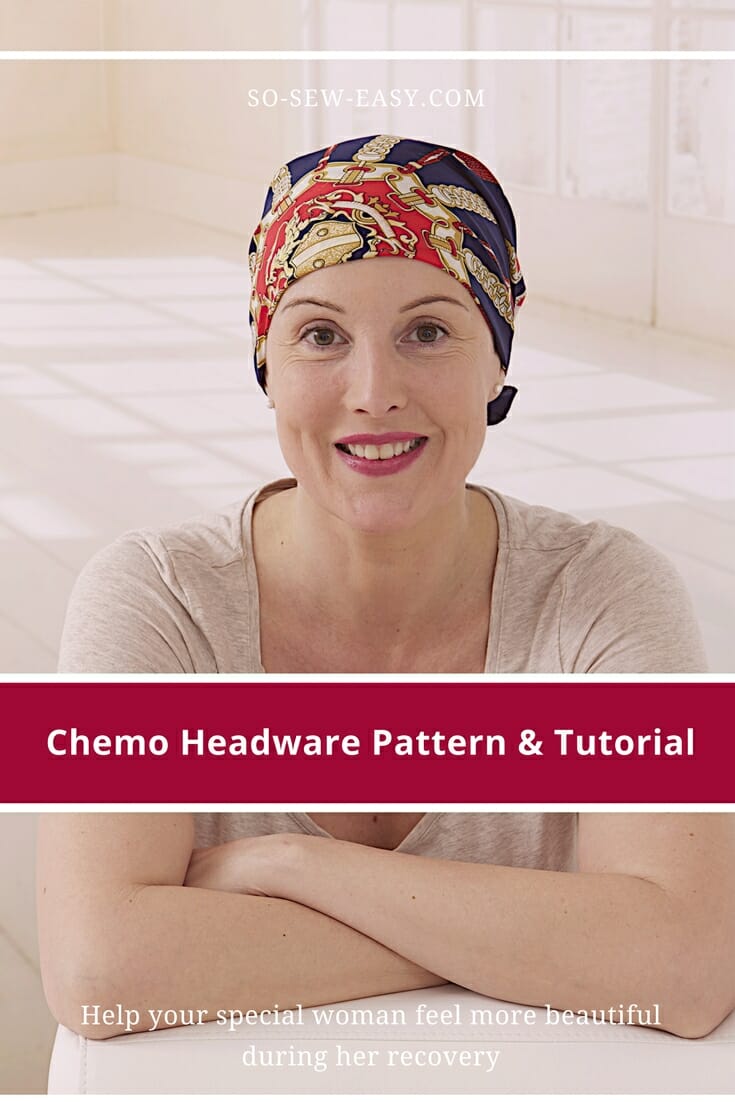
 Here’s a chemo headwear pattern and tutorial so you can make that essential accessory to help her feel more beautiful during recovery.
Today is Mother’s Day in most parts of the world, so Happy Mothers Day! To all of you that have experienced the privilege of raising children and the immense love and fear of being responsible for a little one, I salute you and my wish for you is that you are remembered today.
Today is also the beginning of a few styles I will be dedicating to the woman that I admire the most. I should start with my mother and grandmother, but this is not in a particular order. These are the woman that for some reason or another have touched my heart because their resilience, strength, dedication, sacrifice, and love for the people around them and themselves have let them take the “road less traveled”, the one thing they have in common: they are strong.
I begin with the story of my Aunt Rossi. My Aunt was diagnosed with breast cancer at the age of 61. She thought she would never have to worry about checking her breast anymore, but one morning she rolled on her bed and felt a sharp pain on her side. She touched the source of the pain and discovered a lump. Worried booked an appointment and was found to have stage 3 breast cancer.
Recently at her hospital, she rang the bell for those that have finished the treatment and are free from cancer cells. The amazing part about my Aunt is that no one can say she was upset, depressed or that she complained about the treatment or her bad luck –not even once. She got out of bed and went about her day as usual working when the treatment allowed her and never giving up.
When I asked her what kept her going, she said it was her children. “I can’t give up. I want to see them married with children of their own”. Below is a picture of my aunt ringing the bell and with her children. 
Her hair is not out yet, so she is wearing a wig, but wigs are quite warm. So here is a headscarf to make the wait for her hair to re-grow less difficult. This headscarf pattern is also been requested by a few other readers that are going through chemo. We’ve also seen a lot of readers make these as part of their sewing for charity initiatives. We hope this free pattern and tutorial will help.
Materials:
- 1 rectangle of fabric (18″ X 22″), one bandana or 1/2 a yard (60″ wide) of cotton/silk, Cashmere, 100% Cotton or Rayon Plus a 12″X 4″ rectangle in a contrasting fabric.
- 6″ of 3/4″ elastic or 1″ elastic
- thread to match
- 9″ of thin elastic (1/4″ or 3/8“)
- rotary cutter or scissors
Tools:
- sewing machine
- scissors
- size 70 needle
- serger or overlocker (optional)
- loop turner
Pattern download:
We’re going to continue to use the new Payhip webstore to distribute our patterns. As most readers know, Craftsy is changing a lot and they have stopped designers like us from publishing new patterns on their site, so we’ve had to move to another service.
Our patterns are still free, but now you now have the option of making a small contribution if you like our work! We’d really appreciate it and it will help is keep going with new and fun designs like this. Even a dollar or two really goes a long way.
Thanks so much in advance for helping us out. You can use any credit card and you don’t need a Paypal account, although you can use one if you have one.
[button link=”https://payhip.com/b/iElD” type=”big” color=”teal” newwindow=”yes”] Download the Pattern HERE[/button]
Layout of the easy headscarf pattern:
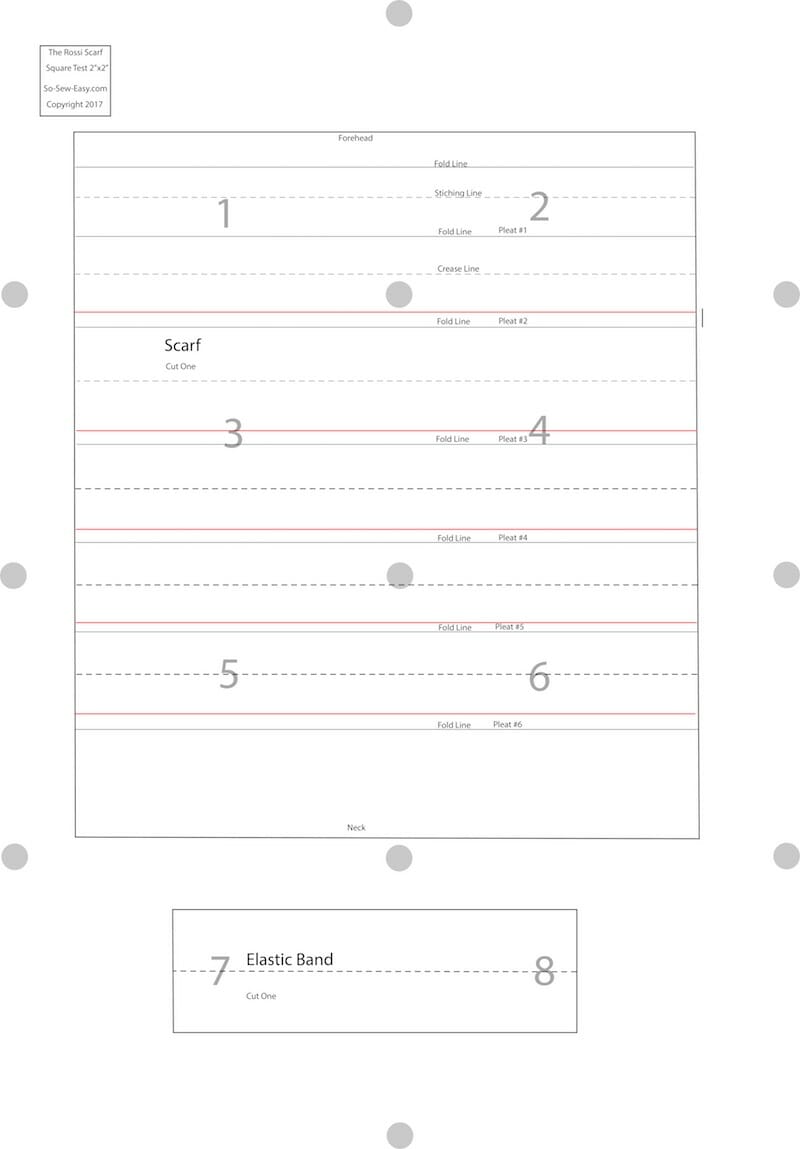
How to print your chemo headwear pattern
Print the pattern in Actual Size and Landscape format using the latest Adobe Reader version.
Skill Level: Intermediate
Although this is a simple chemo headwear pattern, a thorough understanding of pleats is essential and necessary. IF you have never worked with pleats, and do not know how to follow instructions this is not the project for you. Read all the instructions and watch the video before attempting this project.
Video tutorial:
Cutting the fabric
If you are using silk, the best way is to lay a piece of cotton fabric on your work table then lay out the silk and place the pattern on the silk fabric. The cotton underneath will prevent the silk fabric from moving around too much. You can also spray a thin coat of hairspray over the silk, but test this first! The hairspray will make it easier to hem. Pin the pattern and cut while marking the pleats with tailor’s chalk. If using cotton or rayon you can mark using a notch.
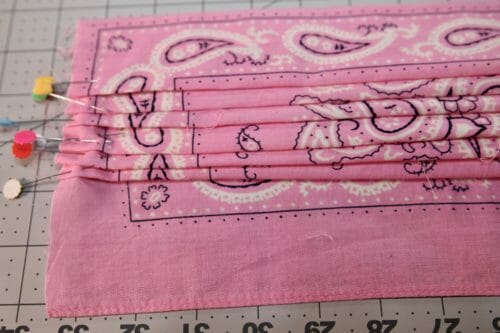
Step One: Making the pleats
Following the pattern make the pleats from the top to the bottom. The pleats are very close to each other. Topstitch on the sides at 1/4″ to keep the pleats from coming apart.
 Zigzag or use your serger on both left and right sides of the chemo headwear.
If you are using silk or voile hemming might be a bit more difficult. Here is a tutorial that will show you a few ways to hem delicates fabrics.
Step Two: Making the elastic band
Cut the rectangle and sew on the longest side at 3/8″. I am using a different fabric because it will be easier for you to see but I think it is better to use the same fabric. 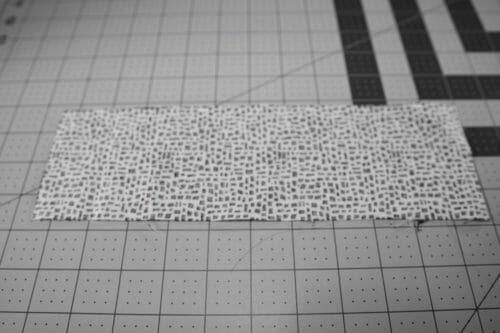 Turn the rectangle inside out using your loop turner. Iron.
Insert the elastic and sew at 1/4″. Pin the elastic on the other side and sew at 1/4″. 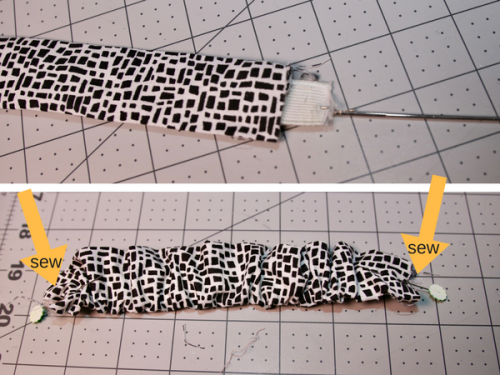 You should now have an elastic band.
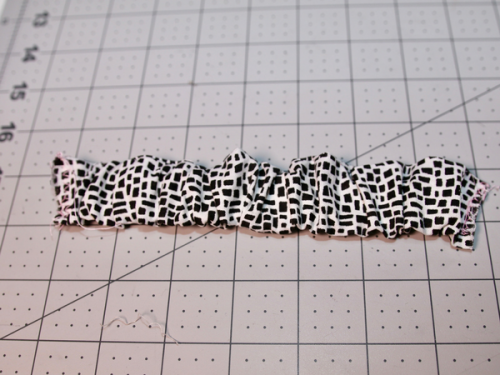
Step Three: Attaching the band and thin elastic
Pin this elastic band 2 1/4″ from the 1″ hem side.  Fold over the band until the edge is at the end of the pleats.
  Sew at the 1/2″.
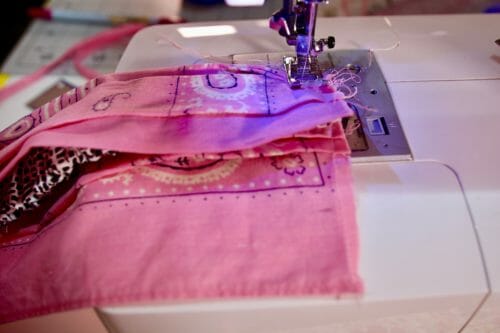 Pull the band across to the other side and line it up in the same spot.
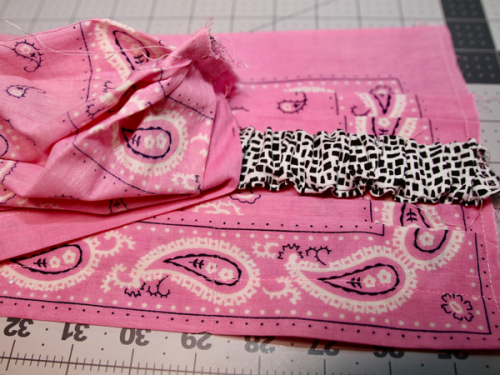
Fold over the band and sew at 1/2″.
Step Four: Sewing the top and bottom edge
Make a small zigzag on the hem fold and iron. 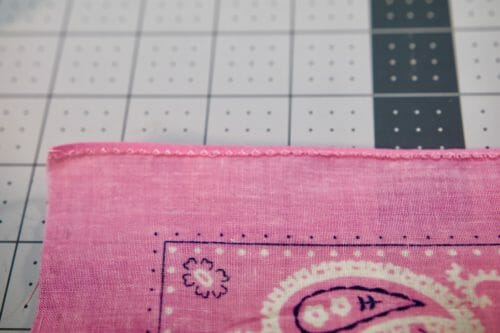
Fold the hem 1″.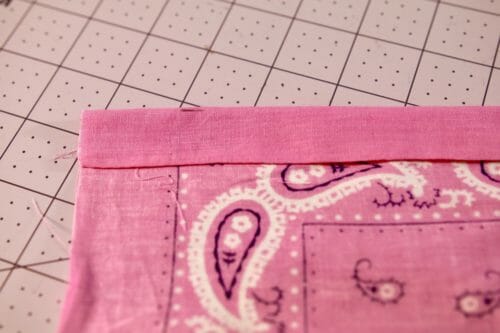
Sew at 1/8″. Iron.
Repeat the zigzag on the lower edge, fold 1/8″ and fold again then sew. 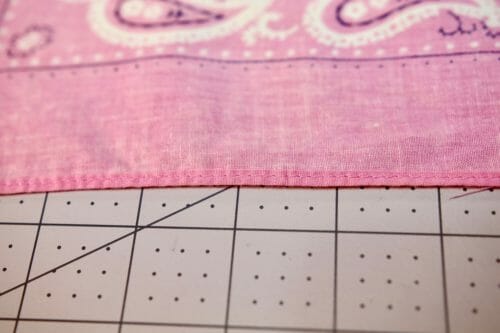
If you are using silk or voile hemming might be a bit more difficult. Here is a tutorial that will show you a few ways to hem delicates fabrics.
Pin the elastic under the last pleat on both sides about 1/4″ from the stitching line. 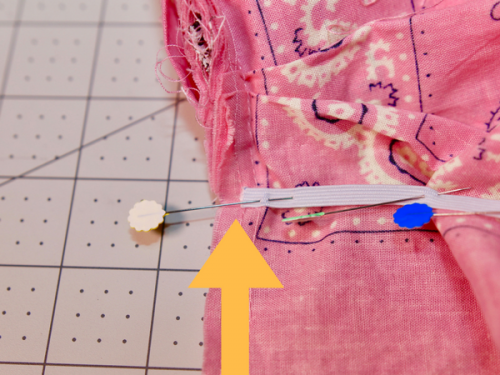 Do the same on the other side.
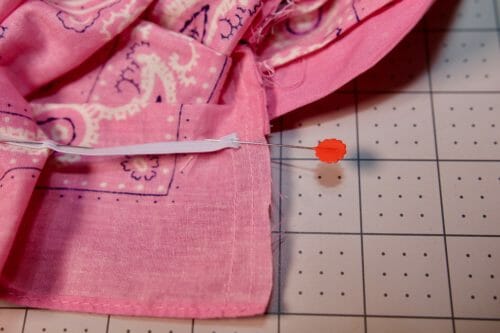 Pin and pull the elastic in a few places.
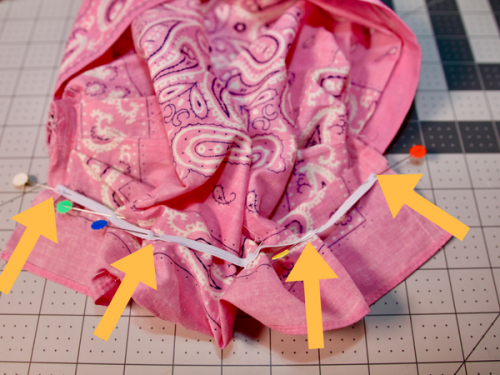 Sew the elastic using a medium zigzag. Match the top thread to the elastic, in my case it is white.
 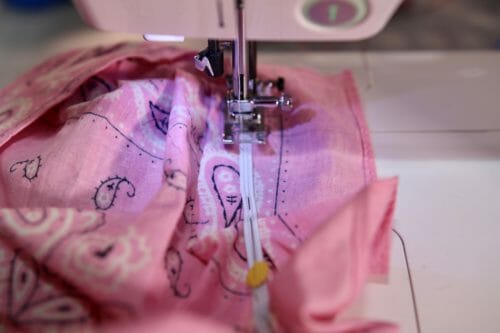 Zigzag or use the serger on the sides. Turn and sew the sides at 1/4″.
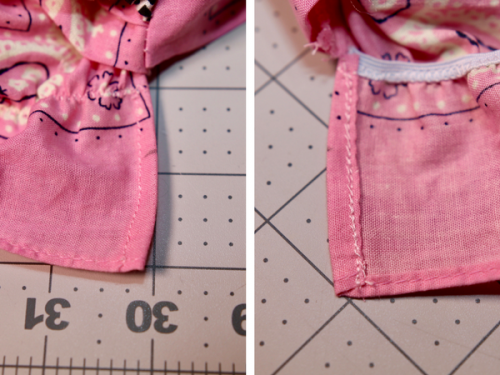
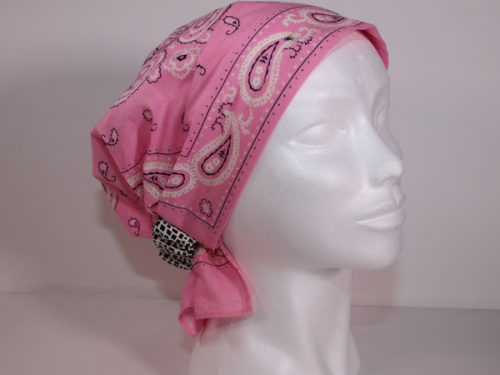
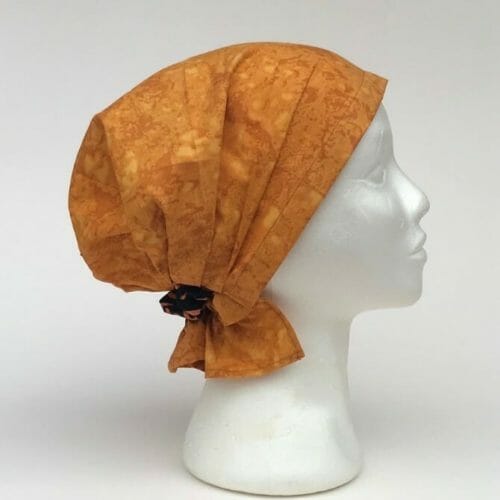
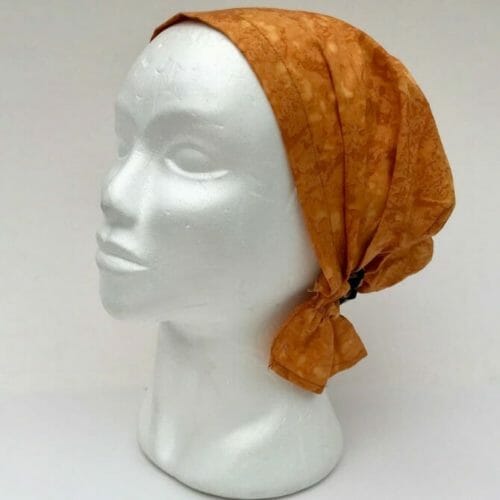
And you’re done! This is a very easy and functional chemo headwear pattern. Used with a different type of fabric will become a great accent for any wardrobe and will ease the wait for the hair to come out after chemo and most importantly make her feel more beautiful during recovery.
Hope you make a few for a special someone or make many for charity and donate to hospitals and churches. Do send me a copy of your take on this Chemo headwear pattern I would love to see what fabrics you have chosen. Until next time, happy sewing!
P.S. IF you pattern pdf sais to cut a 2X22″ strip of fabric that was a typo and what you can do with that is:
I am printing with actual size and landscape. The test box measures EXACTLY 2″by2″ – but then the grey 1/4 circles are cut off and I’m missing part of the pattern width and length…my printer cannot print all the way to the edge of the paper. I watched the video and it looks like you lay the pattern onto an 18″x22″ piece of fabric then cut some off…what are the dimensions of the piece once it’s cut? I should be able to piece together the pattern with spacers if I know the outer dimensions… The pattern makes perfect sense once I can figure out the sizing!!
Can not get pattern to down load after paying for it. Any help appreciated
Hi Pam, do not worry I can always refund you if there is a problem, or send the link to your email. You need to use Adobe Reader to be able to print. The file is found where ever your device stores download files, if using a MAC device, Recent Files, Download folder or Desktop is where you can find the file. Let me know if I you need any further help. Kind Regards, MC
Hello, I am making these for my sister in law, do i have to have her head measurement or are these one size fits all? Thank you and prayers to all that are battling with this horrible disease.
Hi Ann, yes, but you can always use a slightly shorter elastic. It is the feedback I am getting for petite ladies. I am sending you my prayers and hope your sister will recover soon, stay strong.
I found it a bit confusing as to which was the right side and the wrong side the 1st one I made was back to front are the pleats going front to back or facing the front.?? Perhaps a note saying this is the wrong side or sew the head band on the front?? Love the pattern though.
Im using it for my sewing class ladies to make for the local oncology ward. Some arent experienced sewers so need to make sure all instructions are clear thankyou. Mayra
Linda, it took me 2 days of rewatching the video to figure out that the pattern was cut on the WRONG side of the fabric, then worked from the front once the pleats were pressed and the pattern removed…hope this helps
Can a brim be attached to this head piece? If not, do you have a free pattern that I can use.
I also need to make one for my seven year old grandaughter. Did you ever resize this for a younger child? see Marjet SeyferthJUNE 24, 2019 AT 4:44 AM
almost like the statement around the head measures 48 cm or 18.9 inches. Over the head measures 40 cm or 15,75 inches.
Would really appreciate
those measurements. Startingr her third round of chemo soon and has lost most all her hair, but Grandma is going to try to make some fashionable headwear for her. Jan
Oh, and one other thing – I added buttons to the side, so I can hook my mask to the hat instead of over my ears.
I love this pattern. Thank you so much for making it available. I am starting chemo next week and I need something bright and cheerful for my head. I made a few minor alterations. I had a dickens of a time with the paper pattern, so I just use my heat erasable pen, and draw the lines from the pattern on to the fat quarter. Also, Instead of sewing the elastic right on the fabric, I use 1/2 single fold bias tape to make a casing. I am allergic to latex, so this puts a slight barrier between the elastic and my skin.
Thank you again for this pattern!
Good Luck with your treatment, let me know how your headwear turned out.
thank you very much for my mum
You are welcome.
I have a question regarding the elastic on top and underneath. Are they place at the spot or is one above the order. I added a little more fabric at the bottom and used a price of contrast fabric to make a long tie I love it. And thank you so much. I am going to use the other lady’s idea and attach bottoms to whole my mask on as well.
Than you everyone for sharing.
Quite frankly the placement of the elastic is not that important, especially If you have attached some ties.
INstead of an elastic band can I just sew on wide ties so it can tie to fit? Thanks
It will be hard to keep the shape. It will make it even harder to wrap around your head. My ant suggested the elastic because some days lifting the arms to her head was an ordeal.
Thanks 🙂
My printer only prints the red lines, none of the black lines. Is there a pattern with the actual dimensions on it? That would help greatly. Thank you.
I just made the headscarf (and a matching face mask) for my sister who starts chemo on Tuesday. I struggled a little, but by watching the video and comparing with your directions in this post, I was able to make a headscarf I’m happy with and proud of. Thanks so much!
Thank you very much for this pattern and instructions. My neighbor will start chemo next week and i want her to feel beautiful, as she is a very beautiful and special person. The directions and video were great and easy to follow.
It is my pleasure! Please send your neighbour my blessings and wishes for a speedy recovery.
Has anyone made these a bit longer in the back? I see a lot of scarves made that way, but can’t find a pattern.
Hi Joan – I am no expert, but it seems as though using a piece of fabric that would be longer at the neck (see the pattern above to see what I mean) would allow this to be a longer scarf… you could experiment by making a head wrap as is, then figuring out how long you would want to make the scarf portion.. then you could figure out what width and length of fabric you will need for the finished prodjuct
Great directions. thank you for posting.
My Pleasure, Martha!
LOVE IT! Fast and Easy. I think some of the beautiful women here are trying to hard. Keep it simple. Easiest Chemo Cap I have ever made~! THANK YOU
I am a member of a non profit who make things for charities. We are making chemo caps now and your pattern is wonderful. May I share it with our group? Thank you, Rhonda C. Mending Souls founding member
Thank you for this pattern! I have a friend undergoing chemo now, and want to make some for her. My problem is that I don’t know how to fit the pages of the pattern together correctly. Do the small marks in the corners of each page need to be overlapped, or should the pages just butt up against one another? Without this info, I’m not sure that the pattern will be the correct size.
Thank you so much for your help and, again, for this great pattern!!
Hi Sherry the pattern is drafted on an A4 page, because that is what I use since I am outside the USA. Please match the circles, but before that you have to make sure the 2″ X 2″ is the right size. You also might have to trim the paper a bit to be able to take the pattern together.
Kind Regards,
Thank you for your prompt response. The 2″ square is 2″on my prints, but the circles are 1/4 circles. I’ll try matching the quarter circles. Can you give me the dimensions of the pattern? I believe that information will be helpful. Thanks again for this pattern!
Hi. Thank you so much for the pattern. I plan on making some hats to donate . Would you please give the dimensions of the actual pattern pieces (The hat pattern and the Elastic band). I want to make sure my printer provided accurately. Also, Where are the guidelines for placing the elastic band. Thank you.
Thank you for sharing this. While going through chemo, I did not have any idea how to make one and could not afford the $20 stores around here charged. If approved by you I would like to share with the ladies of my daughters church, they have a sewing circle and this is something they would do to help others.
Hi Rosetta, absolutely, please share the post with the ladies at your daughter’s church. Sounds like a great opportunity to help others. Kind regards, Mayra
Thank you I have been crocheting hats to give this will be great too
Thank you so much for making this! My sister had cancer and lost all her hair and I bought her a bunch of things to wear and they made her feel so much better, I’d love to donate a bunch of these in her honor to the local cancer center!! Thank you again!!
Thank you for this pattern! It is exactly what I wanted to try and make. I am to begin chemo in a week and a half for breast cancer.
Our thoughts are with you throughout your treatment.
Hugs from New Zealand
Thank you! I appreciate that.
Myra, thank you for the video! That helps alot. I was a bit confused as well.
Yes, you were not the only one, wishing a speedy recovery in your treatment, sending you an electronic hug, lots of courage and strength. Kind Regards,
Be sure to have mint essential oil on hand to smell while going through chemo. It really helps to push back the nausea and headaches. Also, check out Dr. Walter Luongo who has a great book out about intermittent fasting. It really has helped me and many others.
I am a breast cancer survivor.
I have some peppermint oil. I will add it to my chemo bag. Thanks!
Also, a large cup of ice water to sip during the infusion. It really does help to prevent the blisters in the mouth. I was diagnosed with the most aggressive form of breast cancer last August. Thankfully, it did not spread and I had a wonderful doctor/team. Lots of prayers and support to get me through. I am now healed and cancer free. You and everyone are in my prayers for healing.
don’t drink ice water unless it’s approved to do so. My mom wen into shock because her chemo you couldn’t touch cold things, check first! Best wishes for a speedy recovery. Strength to you~
You mention that there is a video to watch for this pattern. Where can I find it?
Hi Cloe, here you go: https://www.youtube.com/watch?v=qrJApCXXGAo&t=
I made two for a friend : one with regular cotton from my stash and one using a Levi’s bandana someone gave me long time ago. Both fit her very well and she is very happy. She doesn’t have treatment anymore and her hair just began to grow. As she’s going on vacation in Mexico, it will be appropriate on the beach and she will wear her wig at night. Thanks a lot for this pattern!
Thank you for using the pattern, with so many negative feedback I am happy to find one person that has been able to make the scarf.
I am finding these instructions very confusing. Where are you suppose to place the
4 x 22 bands? And what is the correct size of the square? Thank you.
Is the video coming soon? I understand most of the instructions,, but start to get confused after looking at attaching the band and the thin elastic. I’m planning on making these for my mum who has just begun her treatment recently.
Can you give the measurements of all the fabric needed?
Hi Suzi, here’s the video: https://www.youtube.com/watch?v=qrJApCXXGAo&t=
Is there a video? Got a little confused on adding the elastic covered band. Making it for a dear sweet lady with breast cancer. Thank you!!
Hi Susan, here’s the video: https://www.youtube.com/watch?v=qrJApCXXGAo&t=
I don’t know what I did wrong, but mine looks like a nightcap. Do you have a video of you making it?
Would like to see video.
Hi D, here’s the video: https://www.youtube.com/watch?v=qrJApCXXGAo&t=
When I went through cancer treatment and lost my hair, I used head wraps my sister made for me. I was wearing them so others would not be nervous about my baldness. The up side was I got to let them know how awesome my sister is! My journey taught me more about what is more important in life and it is not hair or the lack of it.
HI Gwyneth, only one who has gone through it could write these words, I thank you for your comment and indeed you are very lucky you have someone who cared. So many are not so lucky. When my Aunt was going through the same, she too did not want pity or make people uncomfortable hence the scarf. In a way, the headwrap is really for us who watch feeling unqualified and unable to do more.
Thank you so much for the pattern! Sadly I need to make this for a six year old. Can you give me a tip on how to adjust the size?
HI Marjet, can you send me the head measurement, please? Measure above eyebrow level al around the head, and form the eyebrow level over the head to where the hair stops. Then I can tell you how much you need to reduce the pattern by.
Hi Mayra, thank you so much for your reply. It took a while, but here are the head measurements. Al around the head measures 48 cm or 18.9 inches. Over the head measures 40 cm or 15,75 inches.
The girl is starting chemo this week, so she might need them in a week or two. Do you think you could find a moment this week to look at it? I know it’s short term, but the partents were waiting for the right time to tell her she’s going to lose her hair, so I only got the measerments just now.
Hope to hear from you!
I’ve looked out for a long time for a pattern somthank you for sharing!
I have too! I can find a lot of knit or crochet patterns but it is way too hot in TN right now for those. I am so greatful for this pattern.
Do you think it could be made out of jersey fabric as well?
Thanks again!
Yes it can be but I would reduce the side one to two inch, also be mindful that it will not drape the same way. Bamboo fabric would be the perfect fabric for it because of the ability to handle humidity and it is very soft to the touch.
Thank you! Happy Mother’s Day and healing thoughts for loved ones in recovery.