


 This Christmas table runner is a good project for those trying to learn quilting and it is also my way of getting to know my new sewing machine. Many of you have followed my battles with my Juki. Well, those days are over, I'm happy to say, thanks to a birthday present from my husband. I'll tell you more about the new machine in a subsequent post but suffice it to say, the Juki has seen its last days.
 But for now, I have decided to make a project that will allow me to get to know the machine while practicing my quilting skills. If you're interested in learning more about quilting, don't miss our article about Beginner Quilting.

This Christmas table runner is a simple design I got from last summer trip to Eastern Europe in the lovely country of Lithuania. I saw the table runner in a shop dedicated to Santa Claus and all things Christmas. The owner of the shop was sewing a table center with a very old mechanical machine. I asked her how she made it and she was very happy to explain. She said it was an old pattern that her grandmother had taught her and so it was a common thing to sew if you are just starting at quilting.
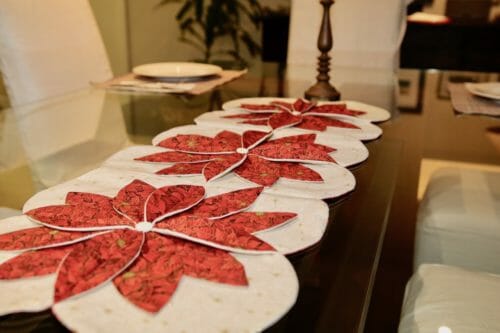
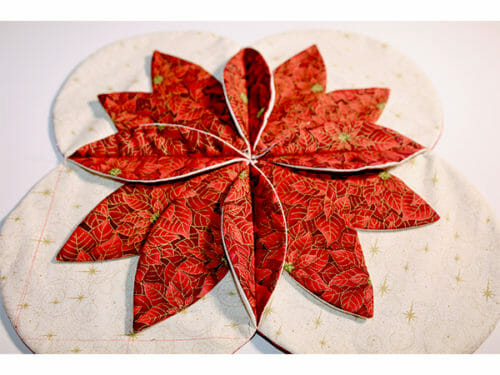
 The table runner has three flowers. I have used two different colors of fabric, golden white on one side and red on the other.
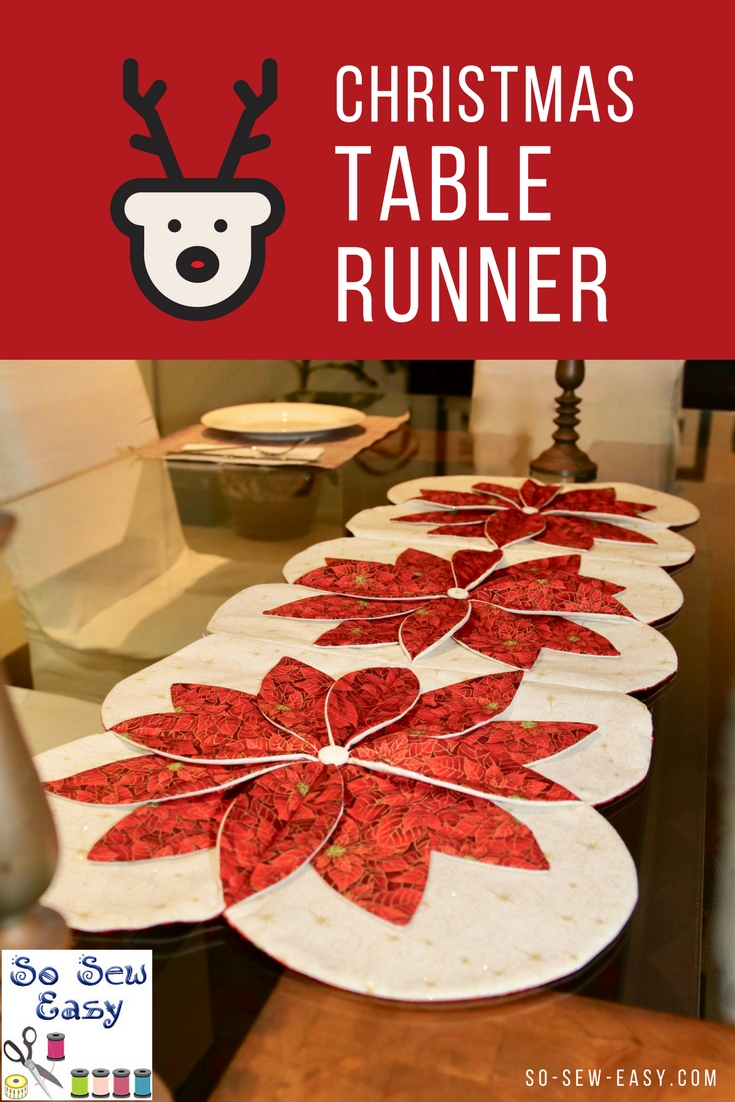
The measurement of this Christmas table runner is 41″ X 15″.
Materials
- 2 yards of quilting cotton for the primary color
- 2 yards of quilting cotton to contrast
- Light cotton cover polyester thread to match
- Lightweight batting
- 3 cover buttons on white
Tools
- Rotary cutter
- Ruler
- Fabric pen (Please read our detailed review of Frixion pens.)
- Sewing machine (optional)
Fabric Recommendations for the Christmas table runner
Pattern Layout
Pattern Download
The FREE sewing pattern along with detailed PDF instructions are available on Payhip.
You can download it FREE there.
How to print the pattern
We do not ask you to download any additional program other than Adobe Reader which is completely FREE.
Use Adobe Reader to download and open the patterns, to print your pattern size, print on Actual Size and Landscape form. Do not scale the pattern.
How to make the Christmas table runner
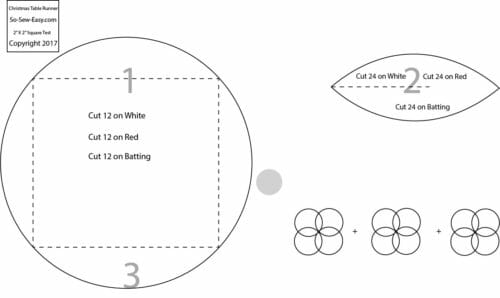
The table runner is laid out in three parts that I will call flowers. Each flower is composed of 12 petals. Four of the petals are going to be made by sewing the circles together while the other 8 are sewn separately.
Step One: Cutting the pieces
You will have to cut the following amount of pieces:
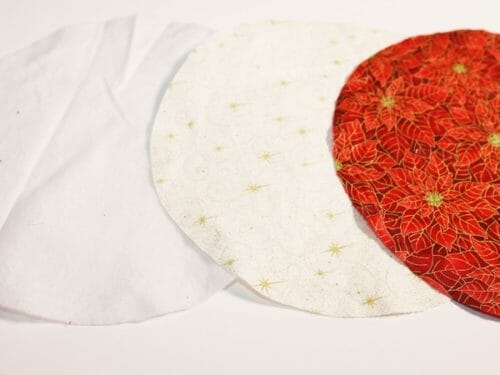
- 12 round circles in red
- 12 round circles in white
- 12 round circles in light batting
- 24 red petals
- 24 white petals
- 24 light batting petals
Step Two: Assembling the petals and circles
The assembling of the petals and the circles is the same. To expedite this project I suggest you assemble all components before starting to sew them together into the runner.
You will need three pieces per petal shown below. 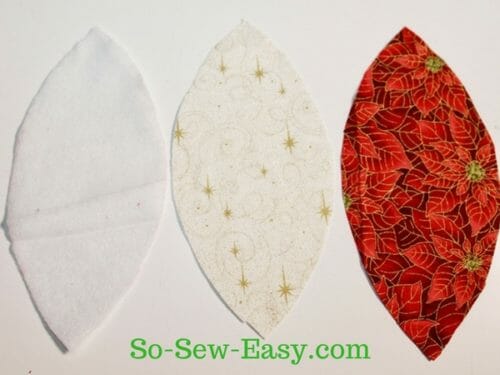
- Place one piece of batting on the table.
- On top of the batting, place a light color petal print side up.
- Place a red petal print side down on top of the white petal.
- Repeat the same procedure on all 24 petals.
The order of the layers is important as you'll see when we turn the components leaving the batting inside.
The procedure is the same for the circles and you will also need three pieces
 Step Three: Assembling and sewing the flowers.
 Step Three: Assembling and sewing the flowers.
The seam allowance for all pieces is 3/8″ (1cm). Leave a 1.5″ (4 cm) on the circles and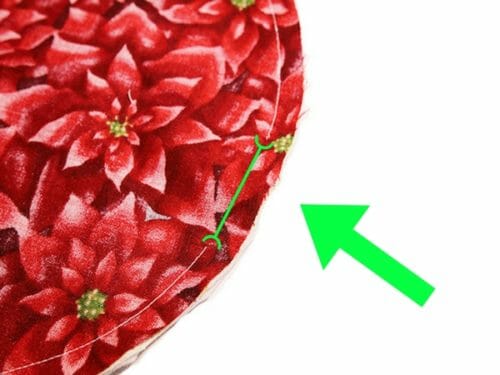 1″ (2.5 to 3cm) gap on the petals to turn print side out.
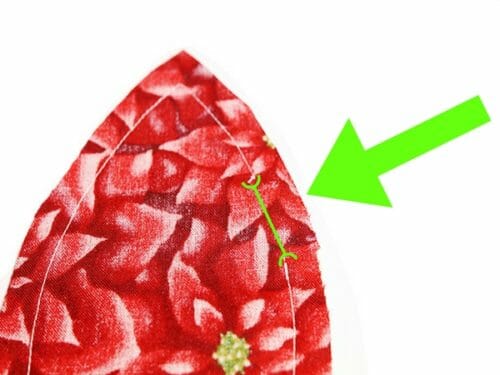 Trim the seam allowance by half.
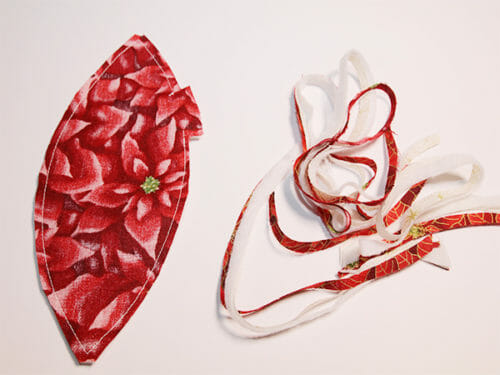 Turn print side out and pin and sew using a hand needle and thread close the gap.
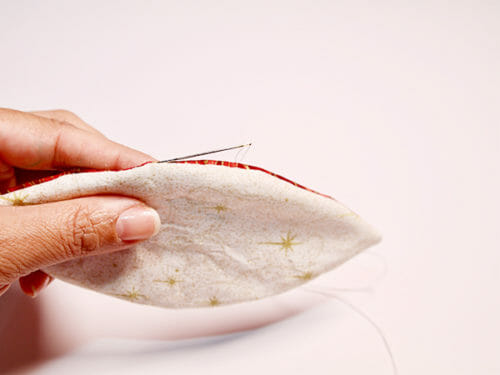 You will need 12 circles and 24 petals to make a 3-flower Christmas table runner.
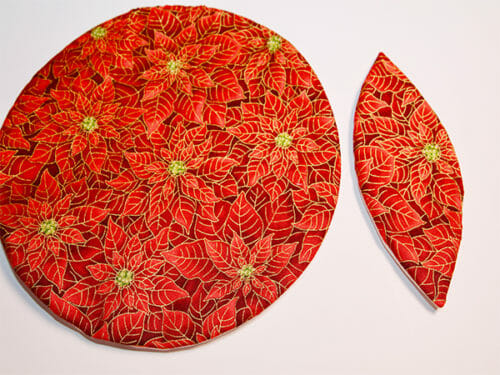
Step Four: How to sew the flowers
The flower is made by sewing together four circles and 8 petals.
Following your pattern, you will see a square in the middle. The square is the stitching line. Transfer the square to the circles with a washable fabric marker or tailor's chalk.
Take two circles red sides together, sew on side of the square. 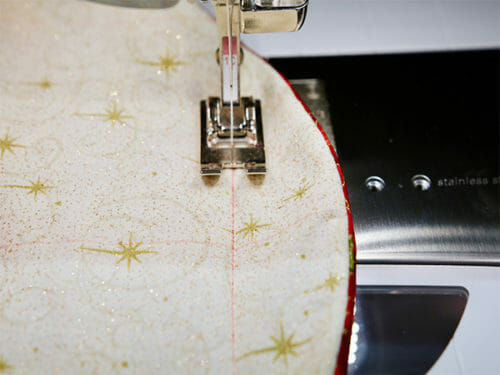 Repeat with all the 12 circles, you should have 6 pairs.
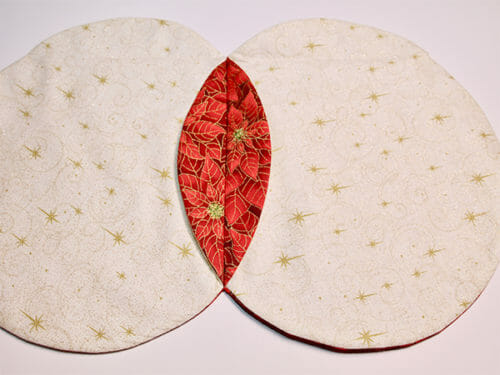
Take two pairs, pin and sew the bottom of the square. 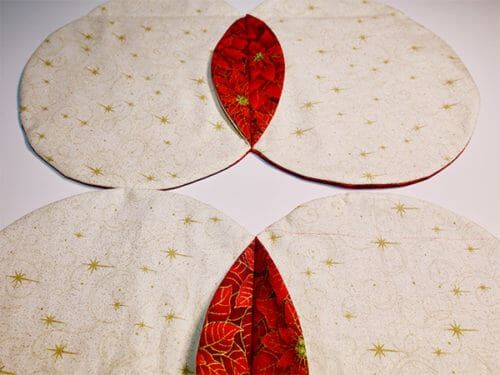
 Make three clusters of flowers.
 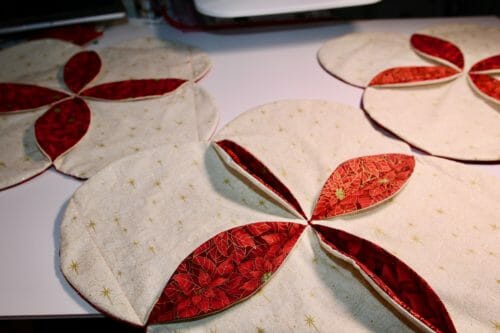 White sides together, sew on the red side joining two clusters.
  The table runner should look like this.
 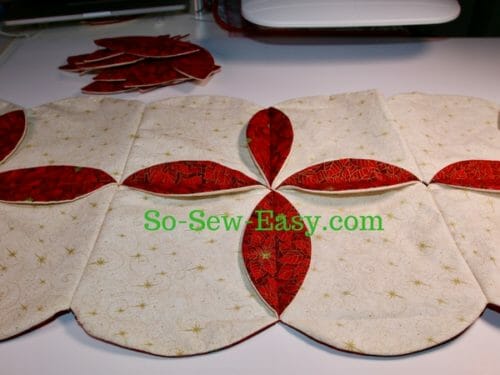 Add the last cluster the same way as above by joining white sides together and sewing on the red side.
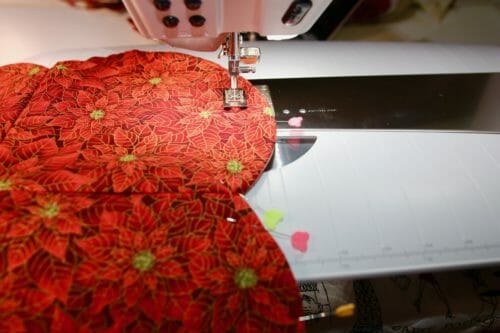
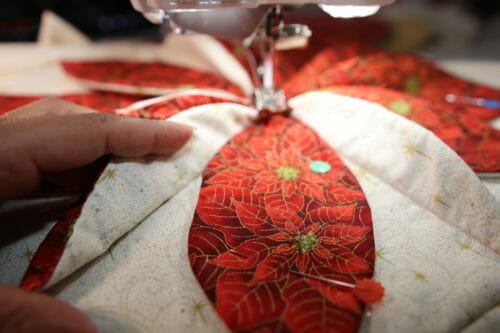
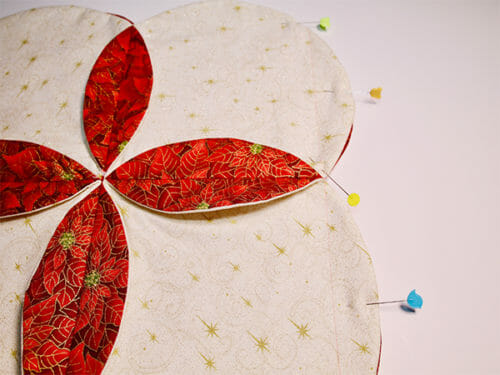
Step Five: Add the petals
Add eight petal for every flower, two on each side. You can sew the petals using a hand needle or your machine. 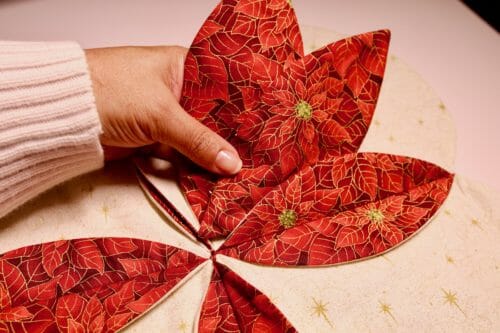 Sew petal leaving space for the other one.
 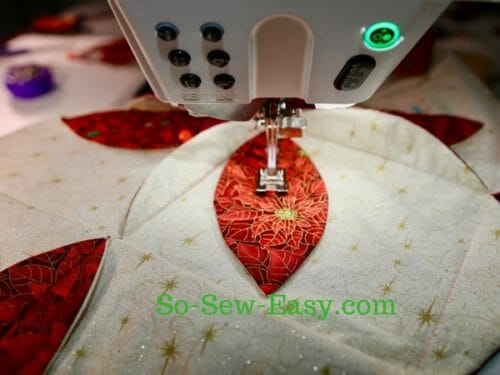 Sew the other petal next to it. Fold back the first petal to be able to sew the next one.
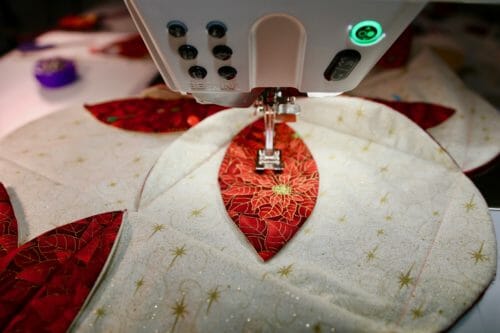
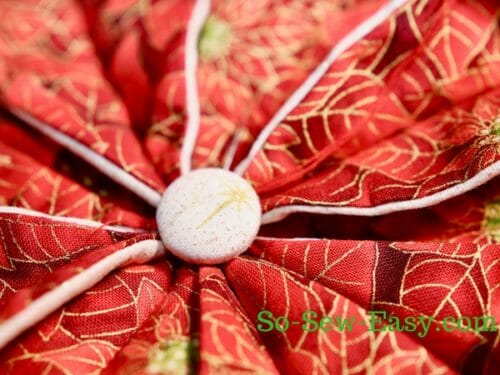
Step Six: Add the cover buttons
I have covered the buttons with the white fabric, but you can choose any other kind of fabric. If you want to learn how to make fabric covered buttons this tutorial is very easy to follow.
 I have taken my time with this project because I have a new sewing machine that I need to learn to use and the only way I can do that is by having a reason to use it. It is a very complicated machine and I will be showing you when I unboxed it in a future post.
Until next time! Please feel free to share your comments below!


this is beautiful!! I’ll have to make one for next year!