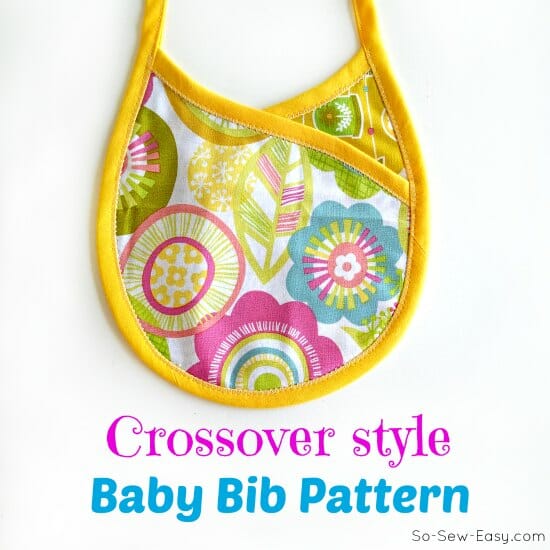
The Baby Showers are fast approaching and I'm sewing madly to get the bundles together. Today, I'm making bibs. Not the most glamorous of items, but an everyday essential and no one wants a grotty one when you can have a really nice homemade one instead.
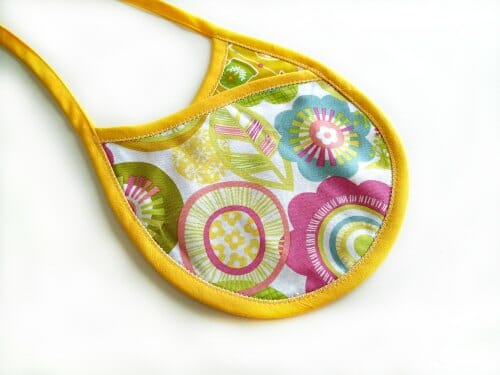
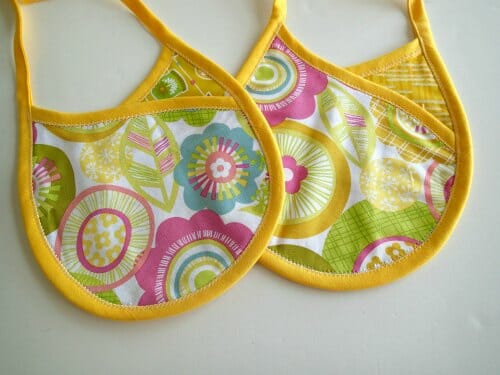
I've tried several styles, and depending on time might share some of the others later, but here is the crossover style that I've been making in batches today.
It has a cross over front with the option to have two different fabrics, plus, it's fully reversible so you can have another two different fabrics on the back if you want to. The perfect way to use up 4 smaller leftover pieces of fabric from other projects.
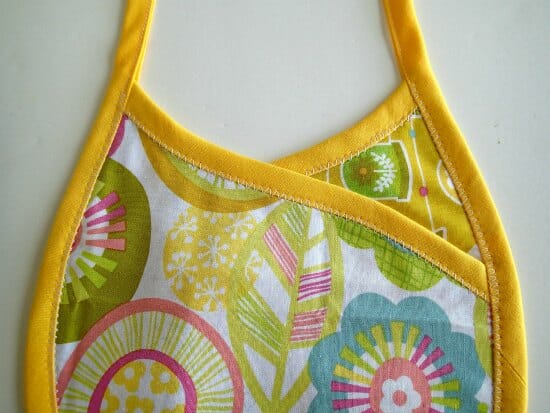

With the 4 layers of fabric, this is going to be long-lasting, hard-wearing in the wash time after time and won't be likely to leak mess through to any nice clothes underneath.
Materials list (to make 1 bib finished size approx 7.75 inches wide by 8.5 inches tall):
- 4 pieces of fabric 9 inches tall by 8 inches wide
- Bias tape – about 2 yards
- Pattern download (see box below)


You can download the pattern and instructions for the Crossover Baby Bib from my design account at Payhip. It's a PDF file containing both instructions and pattern pieces all in the same file. Enjoy!
How to make up the crossover baby bib pattern
Subscribe to the YouTube channel:
Step by step
Layer up your fabrics first of all as follows:
- reverse contrast fabric – face down
- reverse main fabric – face up
- front contrast fabric – face down
- front main fabric – face up
Now we can cut all of the pieces at once and save some time and make sure we have them cut out correctly. I'm using a rotary cutter but you could just pin your pattern piece through all the layers and cut with scissors too.
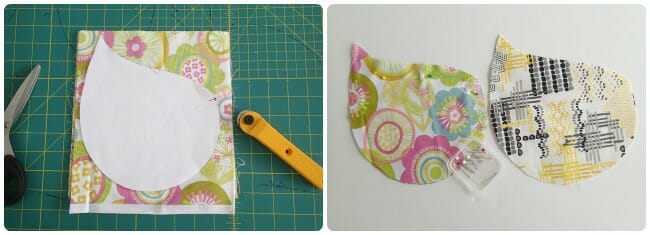

Match up the pieces of fabric with wrong sides together. You'll have two that ‘point' one way and two that point the opposite way (assuming you cut them correctly.)
Add a few pins to keep them together without shifting.
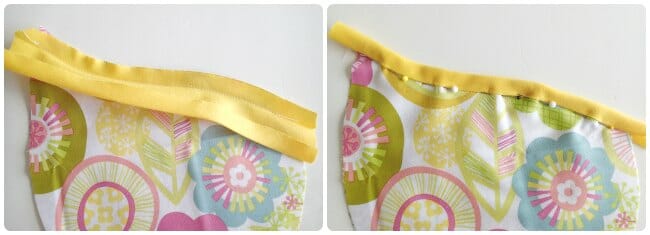

Add bias tape along the top edge until you get to the marked area on the pattern piece. Depending on how experienced you are in working with bias tape for edging, you could use one of two methods.
- The same for each. Sew with a straight stitch along the first fold of the tape, keeping the raw edge of the tape level with the raw edge of the bib pieces. Trim the ends.
- More experienced method – fold tape to the reverse side, pin and then stitch in the ditch from the front, catching the edge evenly on the reverse side – OR –
- Easier method – fold the tape to the reverse side, pin in place and then stitch with a zig zag stitch or decorative stitch through all layers to make sure to catch both sides.
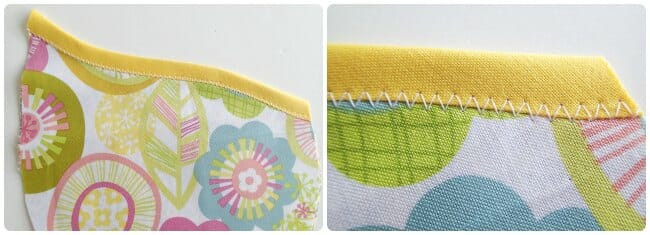

Repeat the bias tape trim to both pieces.
Layer one piece on top of the other and open the points at the top until you get the shape you are looking for. Pop some pins through all layers to keep them still.
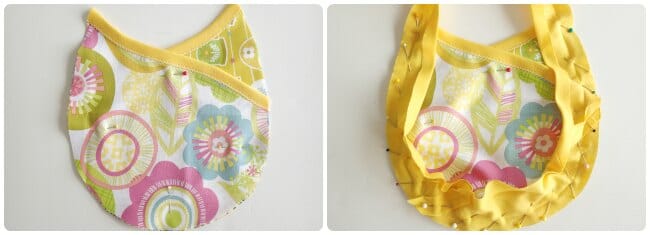

Take your remaining bias tape, find the center and match it to the center bottom of the bib. Pin in place on the front side all around the curve. Stitch the bias tape around the curve on the front side.
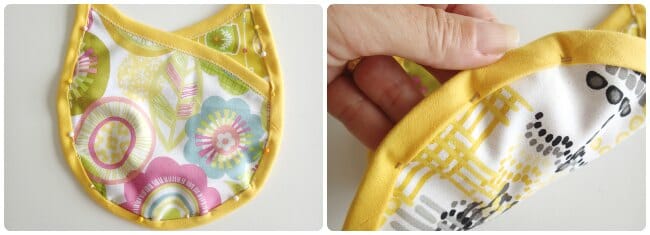

Turn the bias tape to the back of the curve and pin around. The overhanging tape is folded into 4 and pinned too. Check the length of the neck ties. I suggest about 12 inches long, so trim if necessary. Fold in the small ends neatly and press, then repress the folds at the ends.
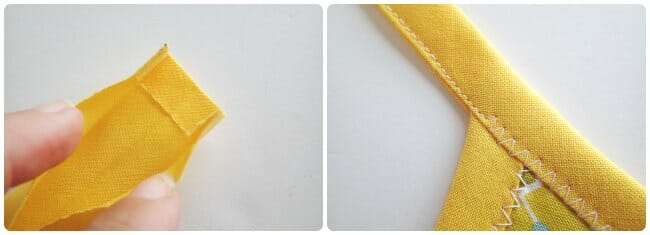

Then stitch from one end of the tape right round to the other, keeping close to the open edge, to form the neck ties and secure the bias tape to the bib. If you feel confident, use a straight stitch, if not so confident, switch to a zig zag when you get to the bib part to make sure you catch the reverse of the tape.
Give it a final press and you are done. The second, third, and forth you make will be so much faster now.



You can download the pattern and instructions for the Crossover Baby Bib from my design account at Payhip. It's a PDF file containing both instructions and pattern pieces all in the same file. Enjoy!
My bundles are coming together now. So far I've made:
- My first ever quilt
- Insulated baby bottle covers
- The perfect burp cloths
- Crossover baby bibs
- Owl applique nursery cushion
- Sunshine softie toys
- Faux chenille baby blanket
Still on the cutting table:
- Crinkle toy
- Travel changing mat
- Diaper bag
But I'm fast running out of time – who knew these things grew so fast! With 3 to sew for and each of them needing several of some of these projects, I'm over-run…


I’ve been able to download and print out the directions for the bib, but no matter what I do, I can’t get the pattern. I used up all my chances, it was extended, but still nothing. Help! I have my first three great grand babies being born this year and want to get a head start!
I tried to download the pattern PDF on blueprint and it said that it was sold out and unavailable. It’s there any way you could add the pattern piece image to your tutorial here?
So, the top of the four bob layers are left open? Or did I miss something?
Love your bib but I have one concern—– The straps are a nice easy idea as long as the bow tied in the back is loose. I am afraid if it turns into a knot it would be hard to remove and possibly a danger for a cranky or sleeping infant. Wouldn’t shorter straps and a snap on the end be better? Snaps break apart if pulled.
Could someone please tell me why I have to join Blueprint to download free patterns. I cannot afford to join them as I really do not use them often enough to justify the price.
You don’t have to I will be moving it to Payhip soon, stay tuned.
WOW!!!!! Busy person !!!!!
I love this pattern. I did make a change on my bib. I took old blue jean material and made the strips about an inch wide. Then I folded both sides at the same time and stitched using a zig zag stitch.
Love this! I think it’s great that it’s reversible.
Hi Deb. I just downloaded the directions via craftsy and watched most of the video (I like to watch if there’s a vid at least one entire time before tackling a project). Maybe I’m missing something, but I’m not seeing an actual template in the instructions for the bib. I just printed the instructions. I’m not seeing how we even measure it (or didn’t hear that part in the video).
Please advise. Maybe I missed it. Thanks. 🙂
Hi JC, I just downloaded to check myself and it all seems to be working. The download is 7 pages. Page 1-6 are the instructions and the template is right at the back on page 7. Please double check and let me know if for some reason that page doesn’t work for you.
Were you ever able to download the pattern? Mine goes to Craftsy but then I can’t download. I just keep going around in circles.
Thanks,
Gail
Hi Gail. I’m going to get my assistant, Frankie to write to you and see what’s going wrong there. It should be an easy process, add it to the cart, check out, its gets added to your pattern library. Hit the download button and it downloads. Not sure why yours isn’t working. Frankie is my downloading guru and really good at explaining it. You’ll hear from her soon.
Great idea, I have scraps coming out my ears
Featured today, Deby…
Great shape, Deby and love the fact that it can be made from small pieces of contrasting fabric.
I love the shape!! Very cool! I’ve got a Craft Gossip post scheduled for tomorrow evening that links to your tutorial:
http://sewing.craftgossip.com/free-pattern-crossover-style-baby-bib/2014/09/27/
–Anne