This pattern is a reprint it was first published in 2014 .
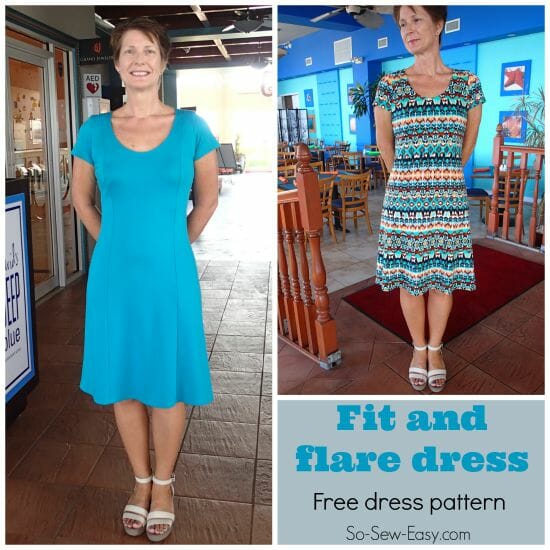
I have another free dress pattern for you this month. I managed to pick up a couple of nice ponte knits in my local fabric store – shock – and wanted to use them right away so I drafted this simple fit and flare dress pattern.
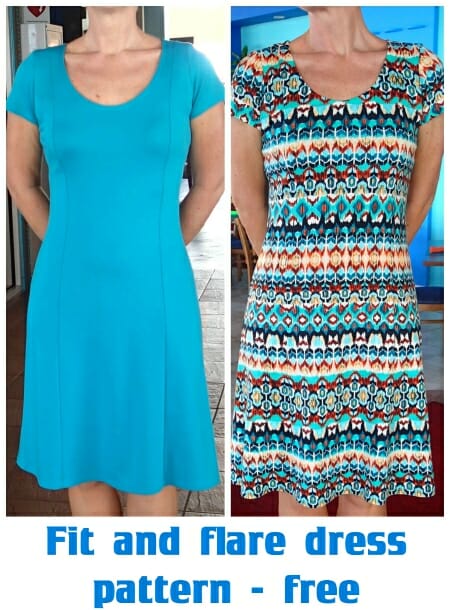
It's got a scooped neck, short sleeves, and design lines front and back for a negative ease fitting in the bust, close fit in the body and then softly flared-out skirt from the hips down. Those design lines front and back can really help you to get a nice fit.
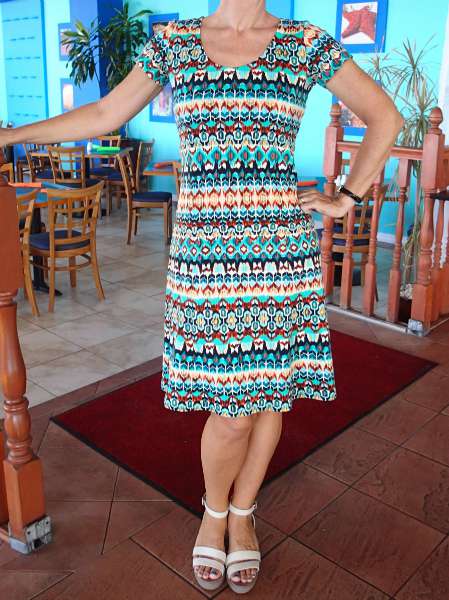

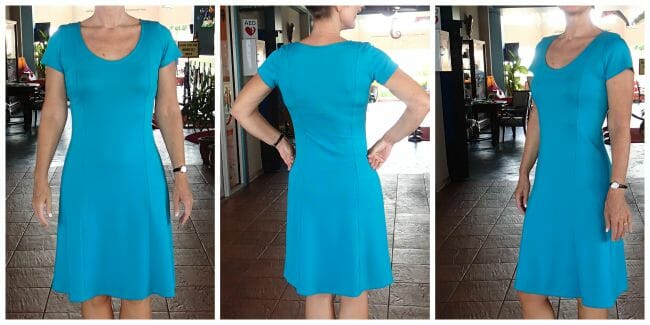
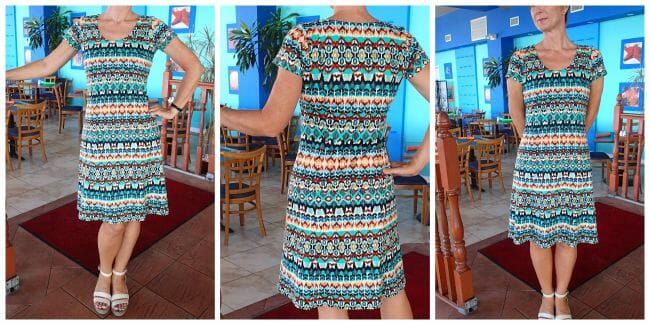
My first was in this plain blue ponte and you can see the design lines much better in this one. For the second I used the tribal/striped print. Although it has the same seams, they really disappear in the print and for once my pattern matching was pretty darned good! Interesting though how different knits can alter the feel of the fit. I cut and sewed both patterns exactly the same, but the blue one appears to fit closer to the body.

I love an easy pull-on-and-go knit dress and I have a feeling I'll have more of these in my wardrobe by the end of the year. There's a free pattern for you too. Enjoy!
Features:
- Designed for a heavier weight knit such as a ponte, double knit, or thicker jersey
- Design lines front and back for a great fit
- Scoop neckline with facings front and back
- Short sleeves
- Video and photo instructions
- Available in sizes 31-48 inch bust

Materials needed:
- Knit fabric – try JoAnn or Fabric Mart or check out our Amazon recommendations below
- Thread
- Optional – knit stay tape
- Optional – serger / overcasting foot / walking foot
- The pattern download – below
Fabric recommendations
Pattern download
We're going to continue to use the new Payhip webstore to distribute our patterns.
Our patterns are still free, but now you now have the option of making a small contribution if you like our work! We'd really appreciate it and it will help is keep going with new and fun designs like this. Even a dollar or two really goes a long way.
Thanks so much in advance for helping us out. You can use any credit card and you don't need a Paypal account, although you can use one if you have one.
Download the FREE Pattern HERE
Fabric requirements:
Assuming fabric 54 inches wide, you will need approximately 2.5 yards of fabric. If your fabric is 60 inches wide, smaller sizes A and B can fit onto 1.75 yards.
More may be needed if you have a large-scale pattern to match
How to sew the Fit and Flare Dress
Subscribe to the YouTube channel:
Step-by-step Fit and Flare Dress Sewing Instructions
Use your pattern pieces to cut out all of your fabric. Remember to cut mirror images for the side panels, so you will need two facing one way and 2 facing the other, not 4 all the same.
Starting with the back, match and pin the two side panels to the center back panel RST (right sides together). Sew the two long seams to join the pieces – tip, start at the top, and sew to the bottom for both seams. Use a 1/2 inch seam allowance throughout unless mentioned otherwise.
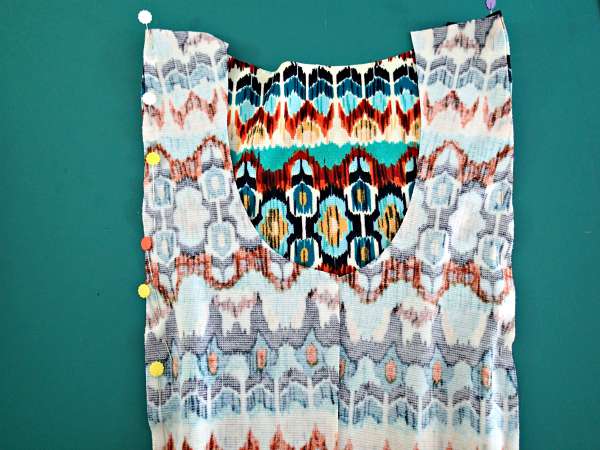

Trim and neaten your seams with an overcasting stitch, if you aren't using a serger. Press your seams towards the center.
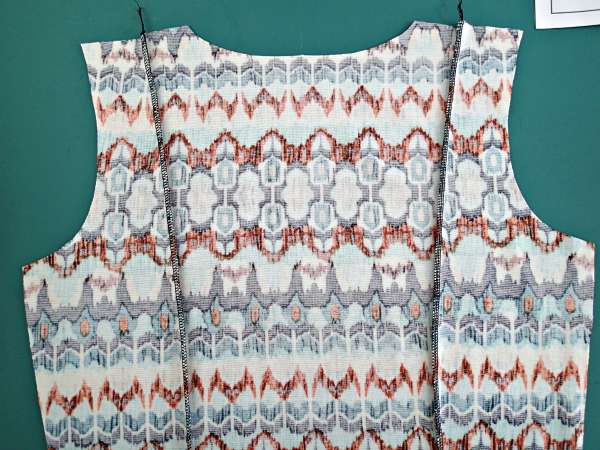

Repeat for the front of the dress. Match and pin the two side panels to the center front panel RST (right sides together). Sew the two long seams to join the pieces. Trim and neaten your seams and press towards the center.
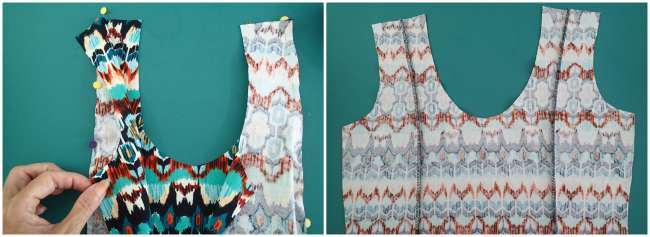

Optional – fuse a knit stay tape around both the front and back neckline to prevent stretching when you sew the facing and during wear. Read more about the magic of knit stay tape here.

Join the dress at the shoulders RST and stitch at 1/2 inch. Press seams towards the back.
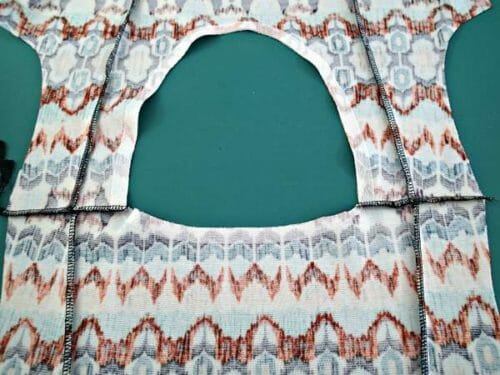

Optional – you may add a line of the knit stay tape to the bottom of the sleeve edge too. This prevents too much stretching and gives a really nice crisp hemline later on. Do this now before sewing in the sleeves.
Pin the sleeve to the armscye (also known as the armhole..). Match the center top of the sleeve with the shoulder seam and ease the sleeve to fit as needed. Pin RST and stitch.
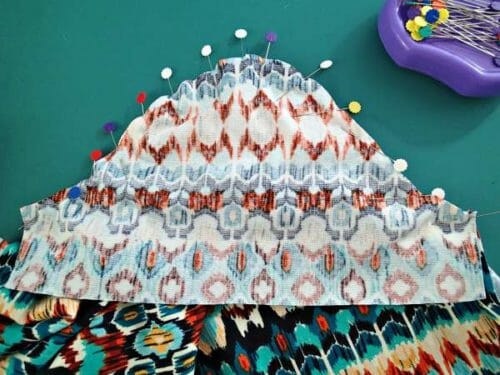

Repeat to add the other sleeve and then press seams towards the sleeve.
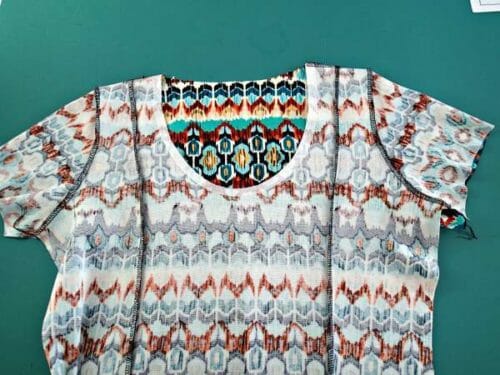

Join the front and back neckline facings together at the shoulder RST and stitch with the same seam you used for the shoulders of the dress, to make sure it matches perfectly. You may serger or finish around the bottom edge of the facing or leave it raw.
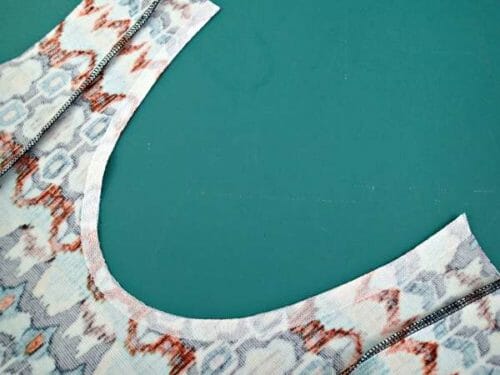
Match the facing to the dress neckline, RST, and matching shoulder seams. Pin well in place and then stitch with a 1/2 inch seam allowance.
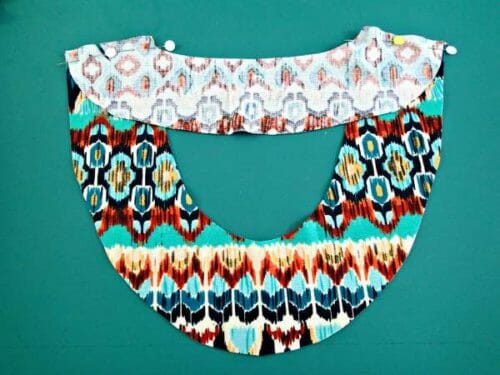

Optional – you may choose to understitch the neckline facing to the seam allowance to prevent the facing popping up, or you may also decide to sew the facing down from the outside edge of the neckline too. I've understitched the facing to the seam allowances here. Understitching can't be seen from the outside of the dress.
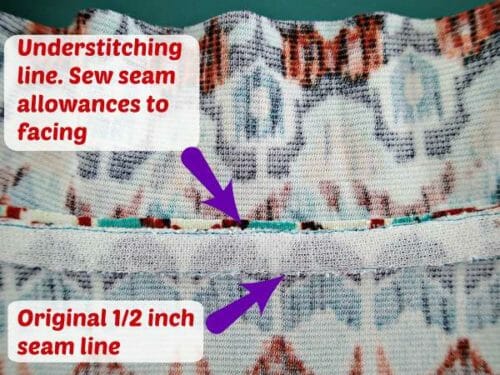

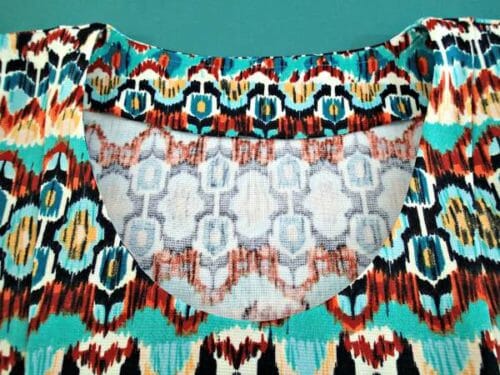
Give the neckline a nice press and that part of our dress is now finished.

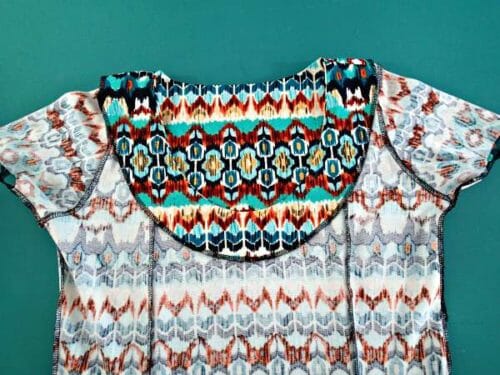
Pin or baste your side seams and try on your dress. Make any fitting adjustments you need. Sew down the side seams of the dress, from the bottom of the sleeve to the bottom of the skirt.

Try on your dress once again and mark or pin your hemline. Trim the fabric if necessary and turn up a hem and stitch. You can also use the knit stay tape to stop wavy hems too. Press the hemline.
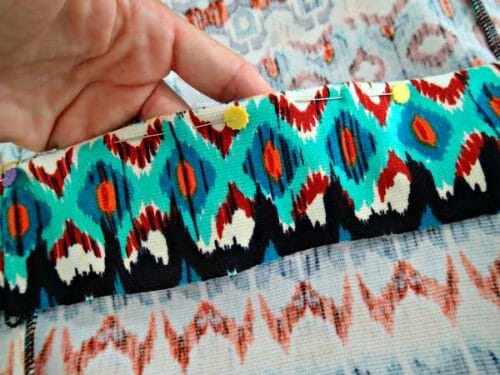

Turn up 1/2 inch seam on the bottom of the sleeves and stitch. Give these a good press too.
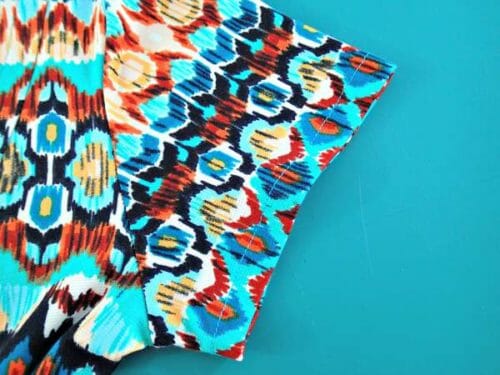

That's it, your Fit and Flare Dress is finished. I hope you like yours as much as I do. Come and share what you've sewn, this dress, any dress, or any sewing project in our sewing chat group.


You can download the pattern from my design account on Payhip. Add it to your cart and check out - its FREE. The pattern will be saved in your Pattern Library safely until you are ready to sew, then you can download and print it at any time.




Hi there. Can I just leave the sleeves off for a tank look? how would I finish the arm holes?
I love this pattern except for the sleeves. I am an older woman with ‘tuck shop arms’ and find the armhole way too small. My dress now has no sleeves which suits me rather well as we live in a very humid climate. Maybe you could make those armholes a bit larger. I have found this problem on many pattern sites.
Thank you for your patterns.
Hi Robin, there are so many different types of bodies out there it would be tough to make a pattern that includes all the different adjustments. The only way is to approach just as you did and alter the pattern to accommodate your needs.
Is this available in AO format?
Hi Cristal, no it is not….sadly
Hi. How does the sizing correspond to actual measurements
dank je wel
Is this available for sale as a paper pattern?
Hi Linda, unfortunately not at this point. We’re looking into that but haven’t yet found the best way to do it. We will certainly announce it if we can do it. Please say tuned.
Hi ladies,
I just downloaded this beautiful pattern. One question, is it made to fit a B cup? If so, I need to do a FBA with my D/E cup. Unsure what size to pick!
Hello, it all depends on your shoulders; if you have small narrow ones, please make a full-bust adjustment by choosing the size you usually use. If you, however, have strong shoulders, a wide waist, and accumulated weight on the top of your body, choose the size you usually wear but please use a 4-way stretch fabric. However, if you are still unsure, measure yourselves and compare it to the size you wear and see whether you can use that size.
Hi does anyone know what kind of stitch is used here in the first step of sewing the back panel and two side panels together? I am new to sewing and have only sewn a tote bag with a regular straight seam but perhaps this is a stretch stitch being used here or something else.
I would use either a stretch stitch or a small zig zag. I prefer the zig zag as it’s easier to pick out if I make a mistake.
I love this dress. I have a question about the neckline. I used the stay tape and understitched, but the neckline still rolls. What can I do the fix it?
You can tack the facing at the sides, to the shoulder seams. That always works for me.
Thank you for providing a professional looking pattern & such detailed instructions for the world. I wish there were more people like you in the world…
Anyone try this dress in a lighter knit?
Hello, do you think this pattern could be made into a long dress? And could the sleeves be made longer – about 3/4 length?
Thank you
Hi! I was wondering what fabric i should use for this dress? Thanks!
Can you sew this with a regular sewing machine or only a serger?
Indeed you can!
Hi, I want to try this as my first big sewing project (only made cushions and face masks so far). But the one thing that I’m not sure about: is the 1/2 inch seam already included in the pattern, so that I can cut the fabric on the lines of the pattern, or do I have to cut 1/2 inch extra around the pattern? I hear multiple people say different things and it doesn’t really say anywhere in here. Thank you very much already! It looks amazing and not too difficult, so I hope I will succeed 🙂
Cut on the line of the pattern and sew a 1/2″ seam allowance. This is an old pattern from 2014 it is very easy and it has been tried many times. any questions do not hesitate to contact me mayra@so-sew-easy.com
Well, it is finished and seems ok! Going to ship it to my mother and then we’ll know. Thank you for your response, I’m sure she’ll love it!
Fantastic! let me know who it turns out!
It turned out perfect! I am so happy, thank you for the pattern and the help! Added the link to my instagram if you’re interested in the result ????
Of course, I am, that is my favourite part!
I’ve just made this. I love the dress and was almost a perfect fit. The neck was a bit too low for me but easily altered. Thank you for the pattern, it will be one of my faves.
So nice to read your comment.
This is also a perfect nightgown pattern. Once you figure out the pattern to fit your body, add ease to the side seams and sleeves and ta da its a comfy nightgown. I always add pockets to the side seam in my nightgowns to add function and use up scraps.
Hi – I tested the size C and it’s come out way too small . I reprinted the first page and the test square is the correct size ! Where did I go wrong ?
Hi ! I tested the ‘C’ size but it is way too small . I have reprinted page one with the 2 inch test square and it is all correct . Please tell me where I have gone wrong x
Hi ? I have not tried to make this dress yet. I looked over the pattern and it doesn’t look like the ones I was used to a long time ago (Simplicity, etc.). I’m not sure I am going to understand it if I try to do one. Any suggestions from you or anyone out therethere? I did download the pattern onto my Tablet first. Would it look any different on the Desktop Computer? Thank You for any advice.
Hi Cynthia, it will look the same, just need to print using adobe reader (free software from Adobe) using actual size, do not scale at all. If you need further help here are two articles that can help you.https://so-sew-easy.com/print-assemble-pdf-pattern/
https://so-sew-easy.com/print-a-layered-pdf-file/
Thank You so much for the info and suggestions. I will look into all youyou have talked about. Appreciate it all. It’s been a lot of years since I last tried making anything from a pattern.
My pleasure Cynthia, welcome back to wonderful world of sewing.
Thank you for this lovely pattern. It fits perfectly. Have you tried it with a non stretch fabric and with a zip in the side seam? Roanne
Hi Roanne, no, this pattern is for stretch fabric only.
How long did this take you to make?
Preparing and cutting the knit takes longer than sewing the dress.
to receive free pattern, am I required to buy something first?
Hi Kim, absolutely not. The pattern is free. Also, just use Adobe Acrobat Reader to open and print the file, which is free too.
I love this dress. Do you think it would like nice on someone who is narrow shoulder, pear shaped, and back side is a treble cliff? thanks
I think so but you need to make the required alterations for your back. Choose the size according to your bust size. Remember it is easier to adjust up than down.
For those of us who are “chubby” in the middle, do you suggest to alter the pattern any?
Depends on your measurements and the pattern’s. Please measure both and choose your closest size, then you can make the appropriate transformation.
Thank you for the pattern. Question why didn’t you clip and grade the neckline before stay stitches?
merci beaucoup pour ce modèle pratique pour cette rentrée
Hi, and thank you for the pattern, it looks so slim-line and easy.
Much appreciated