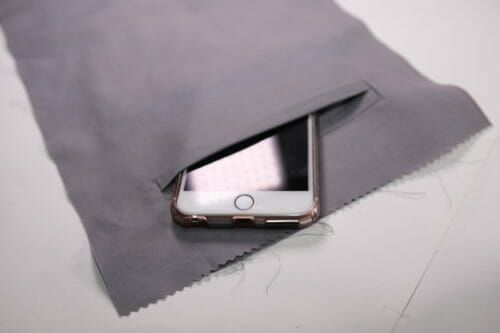
 I am going to show you how to make a double welt pocket using the traditional, but simplified, tailoring method called “five lines”. There are a few ways to make a double welt pockets, this is just one of them. Before we get started, let's make sure to define our terms. So what is a “welt” anyway? According to the dictionary, a welt is:
Our double welt pocket has “welts” on both sides of the opening. You'll be very familiar with this style of pocket since it is commonly used on men's and women's tailored jackets, light weight hoodies, light coats, slacks back pockets or the inside of pockets in the lining of jackets. Unfortunately, this technique isn't suitable for very heavy fabrics or situations where you have to match a design such as stripes.
There are a few ways to make this type of pocket which we'll run through below. I've written this up as a mini tutorial and workshop with a practice project on making this sort of pocket. The materials and instructions below will guide you through the technique. The hope is that you will then be able to integrate these sorts of attractive pockets in your future projects.



Materials:
- Soft non woven fusible interfacing
- Muslin or any scrap of fabric for practice
- Fabric for lining. I am using satin.
Tools:
- Iron
- Scissors
- Sewing machine
- erasable pen or tailors chalk.
- Clippers
Pocket Pattern
The following are the finished measurements for a ladies double welt pocket. Pocket opening is a rectangle measuring 5″ to 5 1/2″ by 1/2″. Each welt is 5″ to 5 1/2″ by 1/4″. 

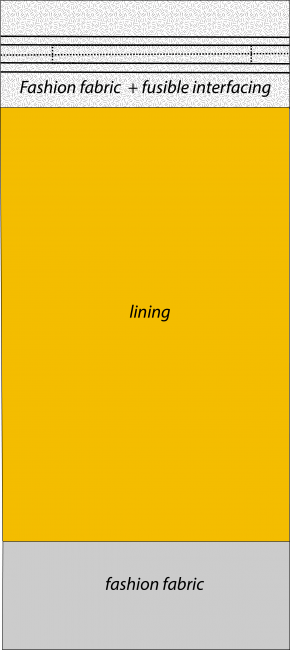
For the purpose of this tutorial on double welt pockets, I am using grey in cotton for the main or fashion fabric and yellow satin for the pocket bag. This should provide a good contrast so you can see what is going on. The pocket bag should be 8″ (20cm) wide and 15 to 18″ deep (38 to 46cm). The pocket bag will be made of the following pieces.
- Two rectangles made of the fashion fabric and two of thin fusible interfacing 3″x 8″ wide plus 1/4″.
- One rectangle made with the lining fabric 8″ x 12 to 15″ in length plus 1/2″.
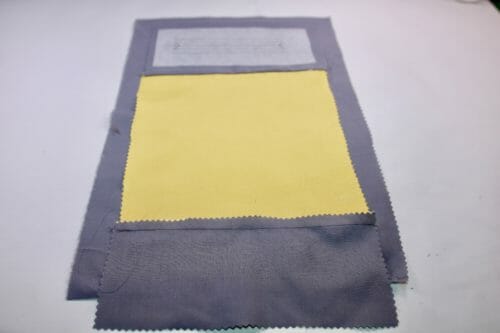
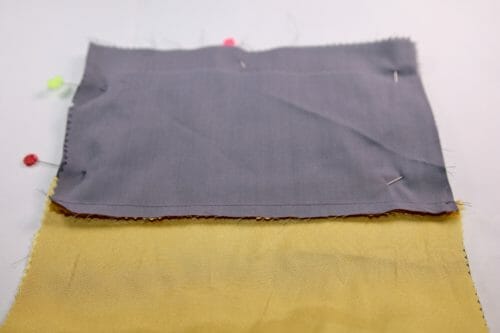
Take one of the rectangles 3″x 8″ and fuse one of the fusible interfacing rectangles to the wrong side of the fabric. Sew this rectangle to lining rectangle right sides together.
Sew the other rectangle made of the fashion fabric to the bottom of the pocket lining wrong sides facing each other. Zigzag the seam allowance so the seam allowance lies flat. Draw the pocket with the five lines to the interfaced side. Your pocket bag should look like this.

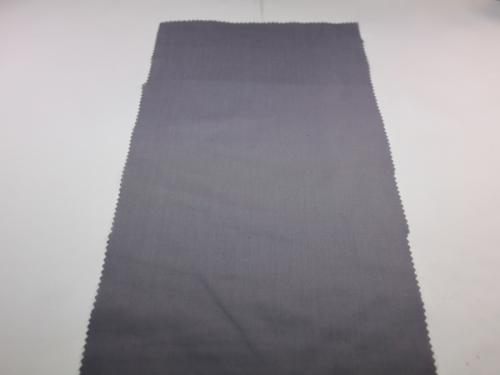

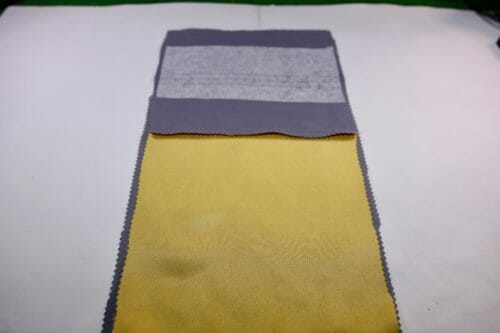

Start by fusing the interfacing to the wrong side of the main fabric and the pocket fabric. The fusible interfacing should be at least 1″ bigger than the pocket opening on all sides.
Draw on the interfacing of the pocket, the stitching lines and the cutting lines the rectangle should be 1/2″ by 5 to 5 1/2″. Mark the notches on the sides aligning them with the cutting line. Each line is 1/4″ apart. A woman's jacket welt pocket opening can be between 5″ to 5 1/2″. For a man's jacket, the pocket opening should be 6″ to 6 1/2″ wide. These are the standard measurements for double welt pockets, but of course you are the designer and the pockets can be any size you want them to be depending on the proportions of your design. 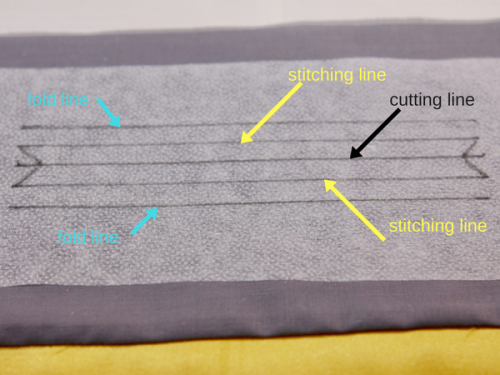

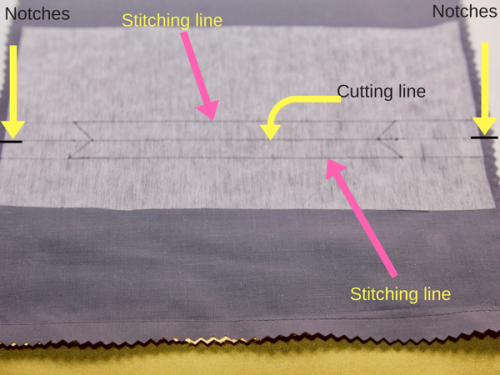

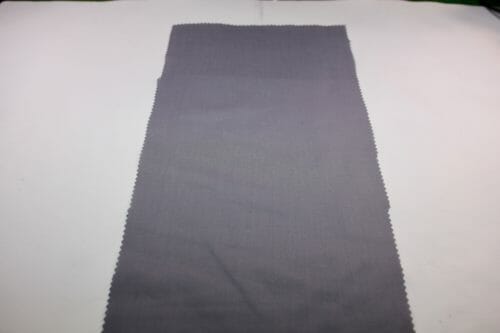
Place the right side of your fashion fabric facing up.


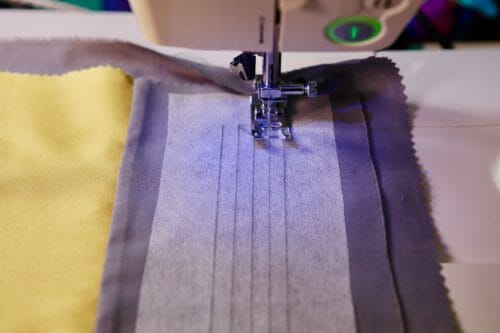

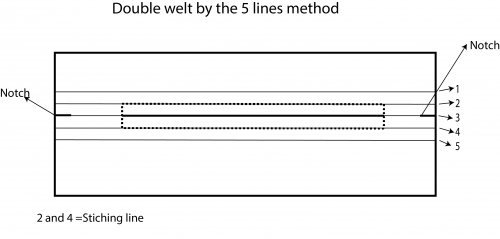

Sewing the double welt pocket
Sew the top and bottom of the rectangle ending exactly at the corner. Using the cutting line use your scissors to open the pocket.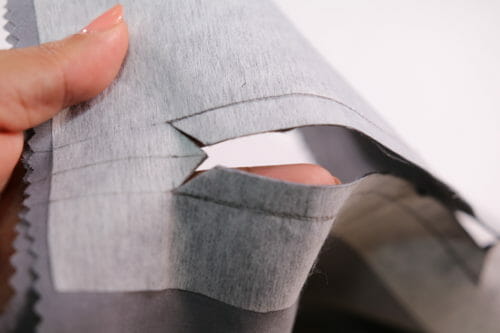

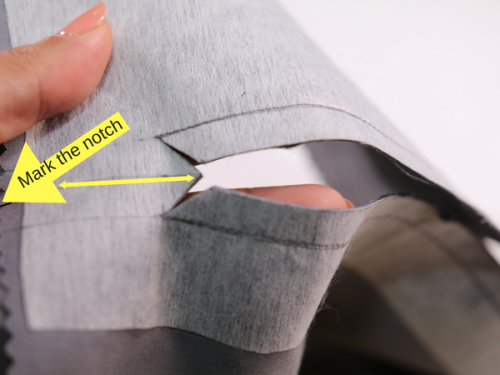

Tip: It is imperative that the line start and end in perfect alignment. Alternatively, you can sew a perfect rectangle to avoid any mistakes. The way to sew a rectangle is to start away from the corner then pivot the work at every corner, making sure your stitching is straight specially on the sides.
Pull the pocket bag through the opening of the pocket.
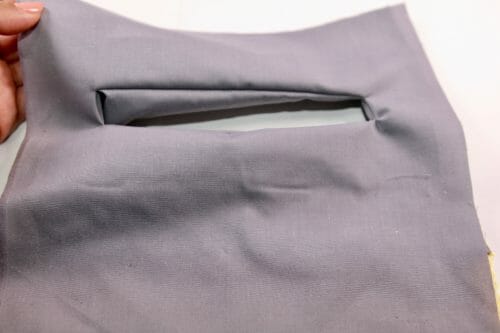

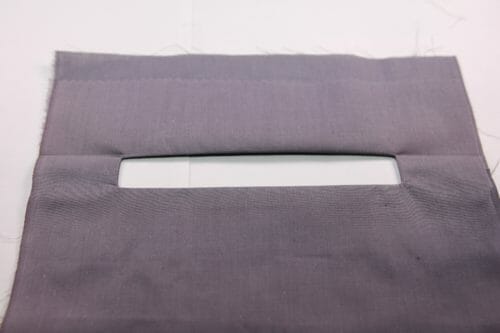

Making the double welt
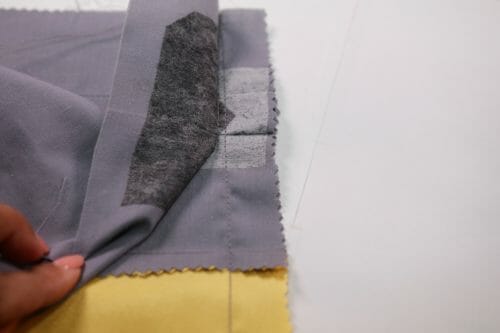
Fold the top side of the pocket down using the line top line to guide you to know how much you need to fold. 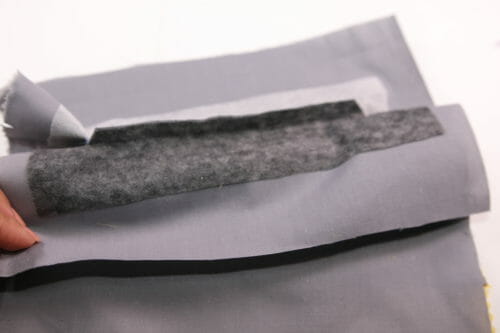

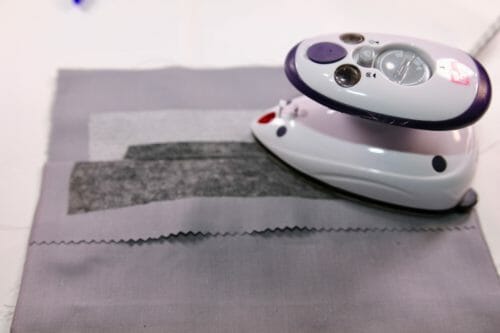

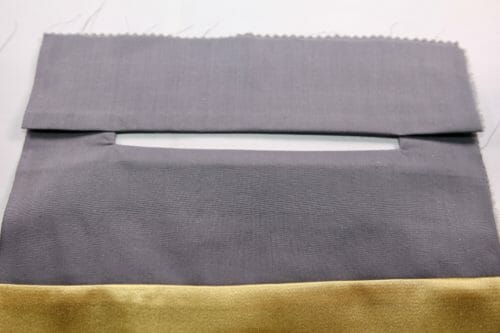

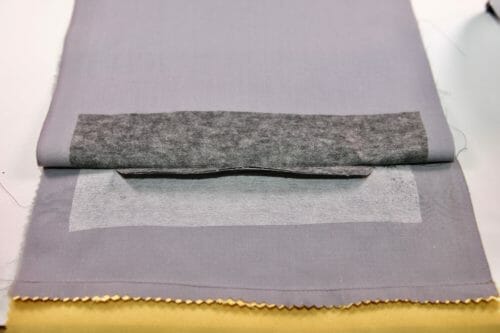

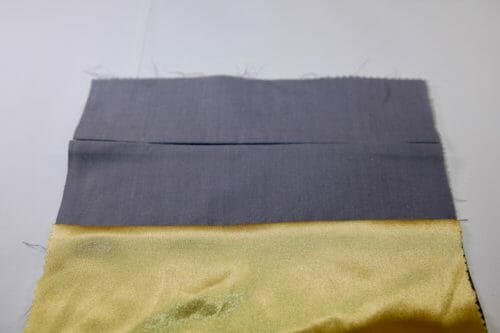

Turn and look at your work. There should not be any puckers or pleats. Iron once again making sure all the puckers disappear. Use an iron cloth to prevent the fabric from becoming shiny. 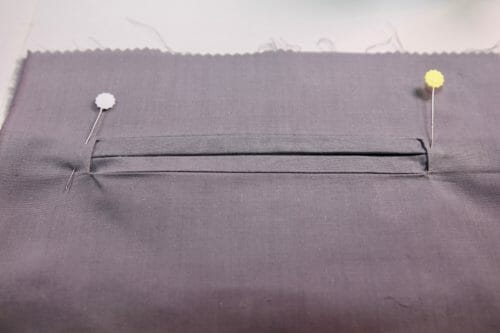

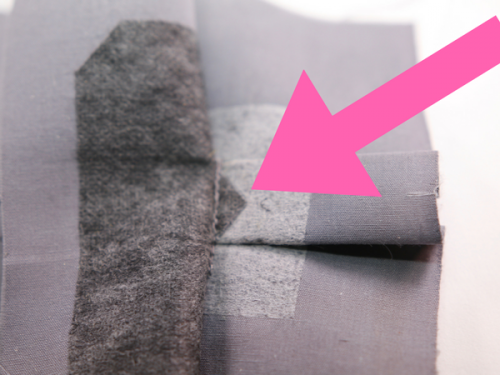

Finishing the double welt pocket
There are a couple of ways to finish the pocket. You can topstitch around the rectangle using a very small stitch, or use stitch in the ditch on just three sides. Start on the left side then sew the top of the pocket and finish on the right side.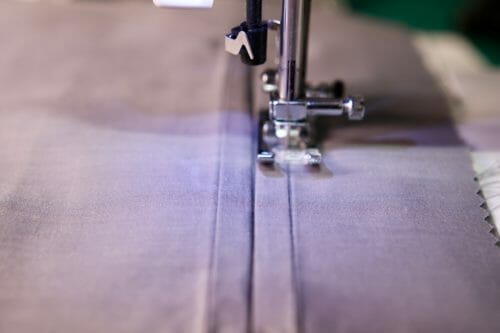

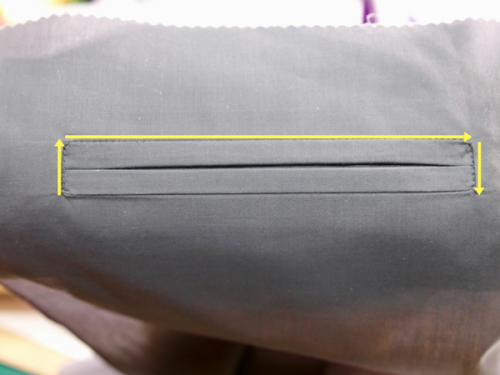



This is a double welt pocket using the “5 lines” method. This is one of the most difficult pockets to make, but we have simplified it here to make it easier for you. I will be sharing with you other types of pockets for you to improve your sewing skills. While simplified, this is still a relatively complicated project. Please let me know if you have questions in the comments below, and yes you will be asking for a video which I will be making with a few different type of pockets. It takes me a few days to make a video so please be patient.
In the coming weeks, we will be using this type of pocket in a project. I encourage you to practice before you consider making the super cool hoodie, cape and dress we will be making in the not too distant future. Until next time!


Why doesn’t anyone show how to do this vertically , for instance on slacks, with an appropriate pocket lining? It seems the pocket lining would have to be different and finished a bit differently
The reason is that the pocket lining would fall and not lay flat(gravity) and make a lump. YOu would have to secure the pocket lining by sewing it to the lining of the garment either so the stitching will not be visible, however, if the garment has no lining the stitching will look like a square next to the pocket on a garment. Not common to see it but not impossible either to work this in a design I suggest drawing it first to see how it might look.
I have been a beginner sewer 45 yrs. & have always avoided this style pocket – not any longer thanks to your detailed & simplified directions! Thank You! Dottie/in Ohio
Thank you so much for this tutorial on making this pocket. Always love your tutorials, as you always include photos and easy to understand instructions.
Thank you Gail, glad you found it easy to understand.
Great tutorial, Mayra, but I don’t see a “Print” option, or am I missing it? I wanted to print out the instructions so I can bring them to my machine, and give this a practice try. Thanks!
Thank you Patty, you will have to refer back to the post for now.
[…] How to make a double welt pocket using the 5 lines method, by So Sew Easy […]
What kind of iron is that?
I use it in my craft http://amzn.to/2eEOvcQ
Thanks for your speedy response as to how far about the lines are, So I see this can change, depending on the garment, so as long as all 5 lines are of equal distance, it will all work out.
[…] How to make a double welt pocket using the 5 lines method – 1 freebie(s)? […]
I did see a video on how to do this and it makes sense,but the 5-line method was not used. However, neither the videos I saw or this tutorial states clearly how far apart is each line. Each line looks equally the same distance from the other, but again, how far apart is each line marked?
It is always a pleasure to read a comment that make the article better, indeed I did forget to mentioned how far apart the lines are. In the case above 1/4″, however as I mentioned before, this measurement can change depending on the proportion of the design which is why the video did not mention a specific measurement.
the distance between the lines is mentioned in the directions above the illustration showing the 5 lines. Look in the paragraph with the pocket dimessions for men and women.
I just added one of these pockets to a RTW vest and it was a bugger. I had to read and reread the directions. Your tutorial is much clearer than the one I used! Of course my project was complicated by the fact that I was altering something rather than starting from scratch, I always say that I would rather make a new one than alter something already made.
You are right about altering is harder than starting again, I do hope people can appreciate your efforts.