


Proteus? ….eye roll here… what is she thinking?… Well, exactly what the title says. This is the cardigan pattern for many occasions. One pattern and many ways to use it.
I don't know about you but I need clothes that I can convert into many outfits. The same goes for the patterns. One pattern that I can alter to make many outfits, especially now with Halloween and the rest of the seasonal holidays just around the corner. There are plays, Thanksgiving meals, Christmas parties, birthdays, work meetings, all of which will probably require a slightly different dress. There are not enough hours in the day to accomplish all the things I need to get done. Including the million ideas I have for all the fabric, I have collected.
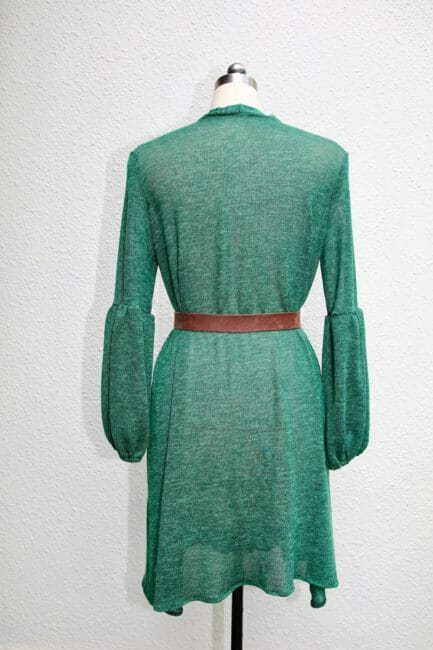
You might recall this fabric from my recent fabric hunting in Estonia –a lovely linen jersey knit. It is bottle green and I am loving the lines. I can't find this exact fabric anywhere now but I've left you a few similar suggestions below from Amazon.com. Please check them out.

So-Sew-Easy.com
I know the name of the pattern, Proteus, sounds a bit “manly”, but allow me to explain.
According to Greek mythology, Proteus was a sea god that could foretell the future, but would only do so for those that were strong enough. Proteus would change shape to avoid doing so and engage only with the deserving ones. He was often described as the god of “elusive sea change”. Like Proteus, this cardigan is versatile, adaptable, and flexible.
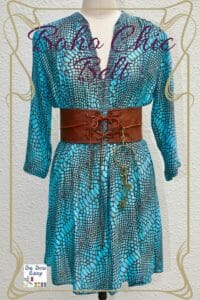
Yes, I guess you already see where I am going with this. This is another sew-along. We will be using one pattern for many looks and will be going over pattern transformation to change the sleeves, shorten and add a fur collar, and a zipper in the front. This pattern and tutorial will allow you to make the full, complete garment while future editions of the sew-along will allow you to modify and customize the pattern to your own preferences.
How to make use of your cardigan pattern
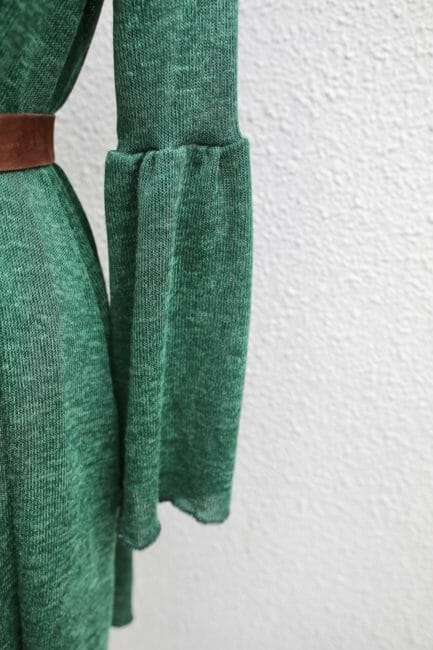
On this first occasion, we are going to make a two-piece bishop sleeve. It is my favorite sleeve, it adds elegance without hanging so low that the sleeve goes into your soup. You will see this sleeve a lot in the next few seasons since 1940's fashion is the “it” look of next season.
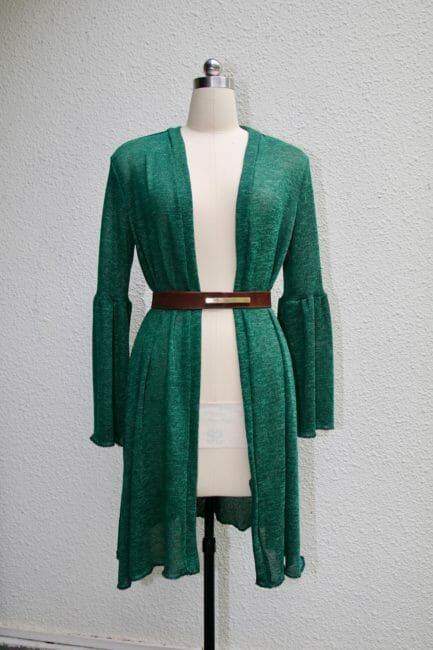
The cardigan pattern is an A-line shape meant to be worn crossed with a belt or over loose on the hips. Perfect for concealing a few kilos without being frumpy.
This pattern is most suited to an hourglass, rectangle, and inverted triangle shapes and oval shape. However, inverted triangles and ovals may have to make the sleeves on muslin and see if the proportions do not make you wider at the lower end of your body. If you require a bigger size please wait for the appropriate article on how to increase this pattern. If you're not familiar with some of these body shape terms, please refer back to this article:

Pay special attention to the finished garment measurements shown below, and make sure you fall within no less than 2″ from your chosen size.
There is an additional piece you need to trace on paper for the neckline. It is the same technique I used on the easy long cardigan so please refer back to this tutorial if you need more guidance.

The Proteus Cardigan is meant to drape loosely around your body but will follow the curves of your body if you choose to wear a belt. For an example of a great accessory to add to this look, have a go at this tutorial and pattern a belt with grommets and a bonus secret pocket.
I am showing you a size Large on a medium mannequin to give you an idea. Use it belted but open in the front for a color block look. Very slimming on a curvy girl.
Materials
- 1 3/4″ yards 60″ inches wide of Linen or Cotton Jersey Knit, bamboo or Rayon knit (four-way stretch only) no fleece, please
- Thread to match
- 8 to 12 inches of 1/4″ elastic
Tools:
- Scissors or rotary cutter
- Overlocker
- Jersey needle
Fabric Recommendation from Amazon.com
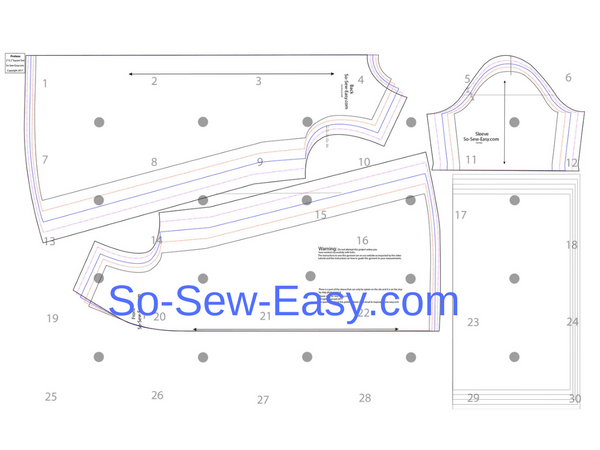
Pattern Layout
Pattern Download

You can download the pattern for this Cardigan Pattern from our account at Payhip.
For help downloading and printing PDF patterns, please CLICK HERE.
How to print the Proteus cardigan pattern:
Use Adobe Reader to download and open the pattern, to print your cardigan pattern size, print on Actual Size, and Landscape form. Do not scale the pattern.
Notice that page 25-26-27 and 28 are empty, there is no need to print them.
Finished Measurements
| S | M | L | XL | 2XL | |
| Bust | 33″ | 37″ | 41″ | 44″ | 48″ |
| Waist | 39″ | 43″ | 47″ | 51″ | 55″ |
| Hem Width | 63″ | 67″ | 71″ | 73″ | 77″ |
Step One: Sewing the shoulder
Sew the shoulders at 3/8″. 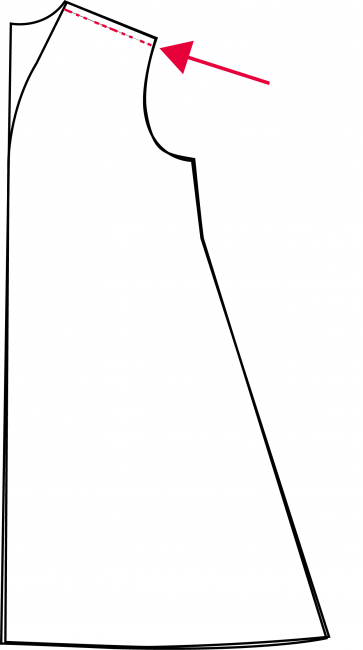 Put the cardigan on to test the shoulder length. There should be 3/4″ to one inch from your neck base to the raw edge of the cardigan. The shoulder seam should fall directly on top of your shoulder bone, where the arm meets the shoulder.
Step Two: Sew the top of the sleeve
Remember when I said we would be making a two-piece bishop sleeve. You will be sewing the top part of the two pieces of the sleeve. Use a 3/8″ seam to sew the top of the sleeve. 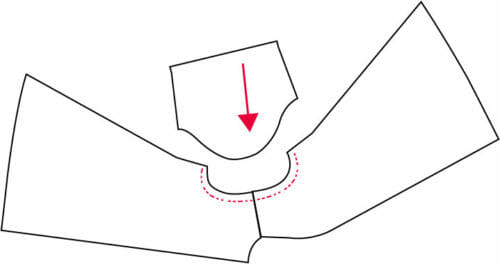 Once again try on the cardigan to see how the sleeve looks on you.
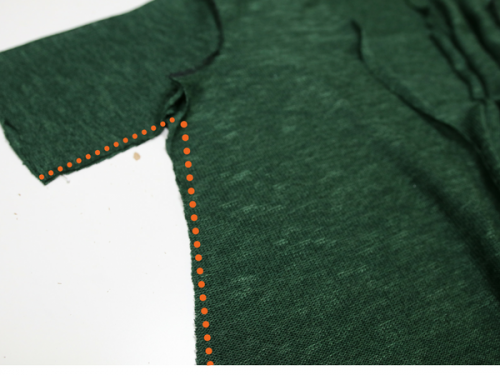
Step Three: Sew the sides
Pin from the sleeves all the way to the hem, sew at 3/8″.
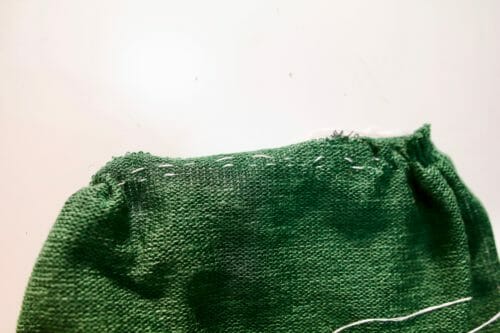
Step Four: Making the neck binding
Measure the front length of your cardigan including the neck. It will be between 40 to 45 inches plus two inches.
Sew the strips together. 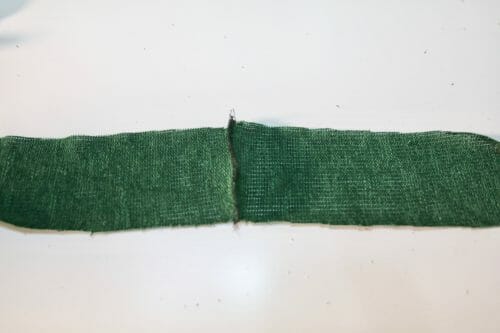 Fold them in half to make a very long strip.
  Align the center stitch in the middle of the back neck and pin.
 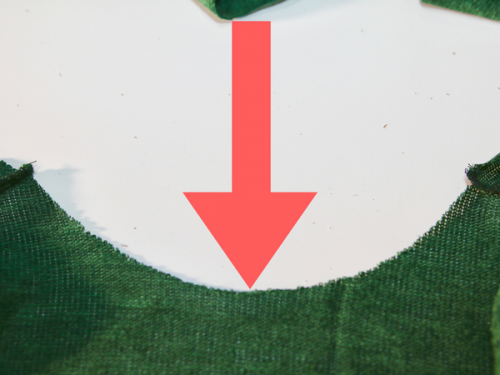 Using your serger or overlocker start sewing from one side passing along the neckline to the other side.
Cut off the surplus material.
Step Five: Sew the bottom of the sleeve
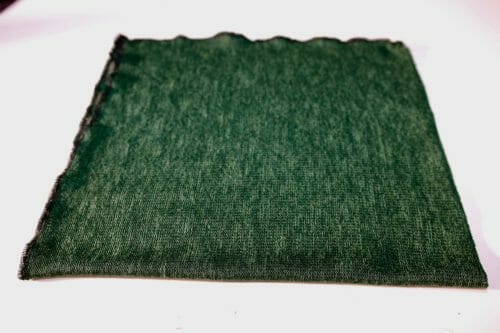
Take one of the rectangles and sew on the shortest side to create a tube.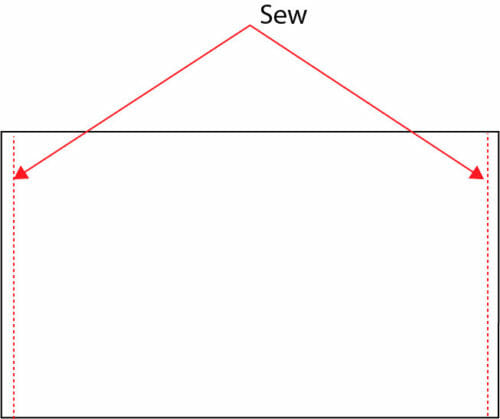
Gather one of the sides of the that will become the bottom of the sleeve and sew at 5/8″. For now, and since you are using a cheap fabric use the dental floss technique. Very fast and good for this purpose.
Working with the cardigan sleeve with the print side out insert the sleeve, print facing each other pin and sew at 5/8″. Reduce the seam allowance to 3/8″ with your overlocker.
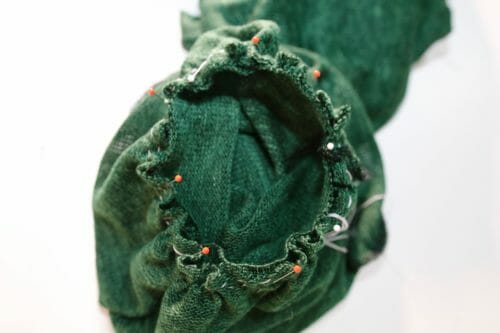
At this point do notice you have a gathered bell sleeve. Serge the raw edge of the side where you will be placing the elastic turn and sew at 3/8″ or leave it as it is. If you like this look proceed to Step five.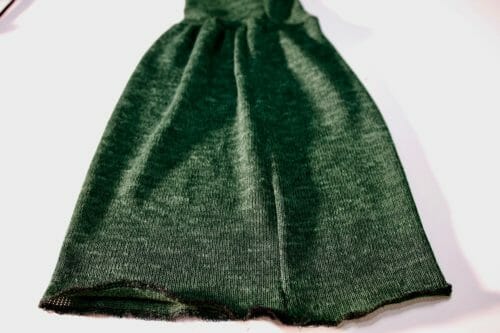
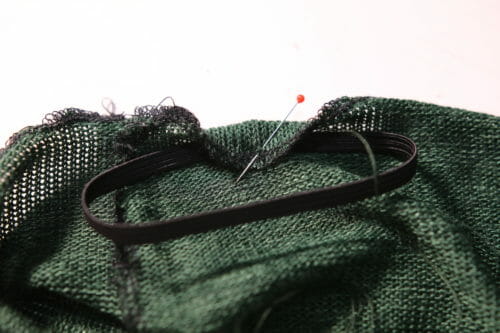
Take your elastic and cut it 10 to 14 inches depending on the size of your wrist. If you want the sleeve a bit wider, then allow more elastic. Sew the elastic to make a loop. Then place the loop at 3/8″ from the edge/hem of the sleeve. Fold the edge/hem over the elastic and sew the hem down, be careful not to catch the elastic. The way to avoid this is to pull the elastic while you sew.
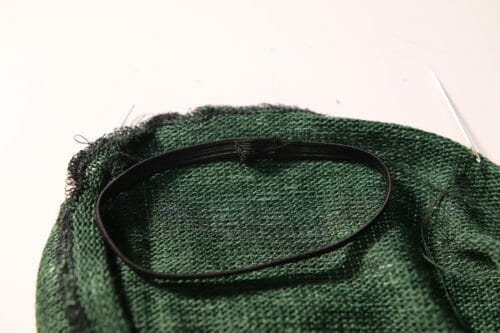
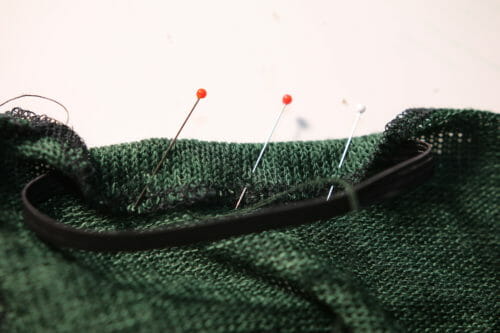
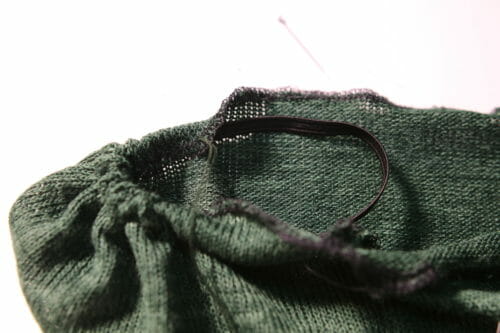
Continue to sew the hem while encasing the elastic.
Step Six: Hem your cardigan
Serge the bottom of the cardigan then fold the hem and sew at 3/8″. Try not to pull the fabric while you are sewing or the hem will become wavy.
If you do not have an overlocker, use a small three-step zigzag. All basic sewing machines should have this stitch.
As you can see, however, I have chosen not to hem my cardigan. I have found the fabric buckles a lot and if I use a strip of stretchable fusible interfacing will make the hem rather thick. In any case, I like the way the rough edge looks.
It is that easy to finish!
Next week I will be showing you how to alter this cardigan pattern and will be showing you another look for your autumn wardrobe.
As always, leave in the comment below of what type of alterations you would like to see for this pattern and a photo of your creation. If you get stuck anywhere, just snap a pic on your iPhone and attach it to your comment. That will make it easy for me to help guide you.


I really like this. I need to make myself a “fall” jacket. It is now too cool for a lined raincoat and too warm for my winter coat. I have a lovely piece of teal wool that I could line and make a fall coat. Not quite sure how I would put some kind of fastening on it but that can be figured out. I am definitely a “rectangle” so will need to make some adjustments to the waist size. Thank you for this pattern. I will not make the bishop sleeve obviously, that would be a nightmare with my intention of lining the sleeves. It is easy enough to widen the sleeve gradually and put elastic in the lining and just use a button loop to pull the wool sleeve into a nice width. I love your patterns — they can be adjusted in so many ways! Thank you for yet another useable pattern!
Thank you for sharing your patterns. This is a lovely cardigan/sweater/dress. I can’t wait to make it.
Holy cow! Thank you so very much for taking the time to do this! I love the pattern and look forward to the hooded sweater. I have my knit ready…… Thank you again, I love your web site❤
This is a lovely pattern–thank you!
I would like to note that I find it easier to add elastic by: 1) sew the casing itself (sans elastic), leaving ~1″ gap; 2) using a bodkin, safety pin, or bobby pin, thread elastic into the casing, making sure not to twist elastic; 3) mark the proper length–pin & try if needed–then cut elastic to fit; 4) scrunch all the fabric to the middle of the elastic band and sew the elastic ends together; 5) stitch the gap closed; 6) distribute gathers evenly. Done!
This way, it’s super fast & easy to sew a straight seam without puckers or worrying about catching the elastic, and you can easily modify the elastic length by pinning and trying on before you commit and close the seam. 🙂
yes, this is another easy way. Thanks for sharing.
LOVE this versatile and doable style! Was dreaming of just such a garment coming in to my life soon. Just a few of these can be the foundation for a complete winter wardrobe, just change accessories! Thank you so much, saved me HOURS of shopping hoping to find such a cardigan. May Blessings come your way!
Thank you Dallas, you are very kind!
Would love to see larger sizes. You refer to a later article on how to make it larger but I can’t see this.
I can’t decide which size to make! My bust is 38″, waist 32″, and hips are 42″. Advice? I can’t wait to get started on this gorgeous pattern!
Hi Lisa, go with your bust. You can always increase the bottom if you have to. Too large and it will not fit on the shoulders. Do notice you need a belt to get the same look.
Hi! On my page there is a heading for Fabric Recommendations but no link…..
Hi Charmaine, click on the pictures and it will take you to the fabric.
Hi Mayra! I just love this cardigan! At the end of the tutorial you say “Next week I will be showing you how to alter this cardigan pattern and will be showing you another look for your autumn wardrobe.” Have you posted this yet? I keep checking back because I am so interested to see what other things can be done with the pattern. Thanks in advance!
HI Mary, I have made the next look, but I have not written the tutorial yet. Hang in there a bit longer. It is a compound tutorial meaning there are two parts to it, it takes me forever to get 4 posts done a week, but I am getting better.
Great cardigan, thank you for your pattern sharing.
Looking forward to find nice fabrics here in Germany and start with it
Thank you so very much. I look forward to receiving your patterns.
Hi Helen, you are most welcome!
What happened to step five of the instructions?
Great catch Barbara, it was a typo seems when I work all night I forget to count. The good thing is that now is even easier to make it! Cheers!
Tank you for your patterns ! I rally like them a lot!
Thank you, Monica, enjoy 🙂
Lovely! And I love your site and all the inspiration it gives. My one question is this: How do you go about shopping on Amazon. I find when I just ask for fabric, I get so much info it’s tiring. How do you go make a selection when there is sooooo much to choose from? Love, from Canada.
HI, MItch! I am very happy when I read a comment like yours, the site provides inspiration, yes this is what I aim for. Regarding Amazon, I always place a link to a fabric store within Amazon that will go well with the current pattern. I was very happy to find the same type, if you look in the materials you will see Fabric Recommendations if you click on the link it will take you to the fabric directly without wasting your time. Normally the vendor will have other colors and types, should you decide to purchase a different fabric stay within the recommended type, for example, I am asking you for Jersey Knit that is the type since Jersey knit stretches 4 ways you can also purchase any other 4-way stretch knit fabric. Hope that helps.
Mayra, Thanks so much for your quick response – it’s so appreciated. I see what you’re getting at. If I just search a specific and/or recommended fabric, as you suggest, I should have success. All the best. Mitch
You are welcome Mitch 🙂
So excited to get this pattern and sew! Been looking for one like this.
Lovely pattern. But I need to increase the bust, with 5 inches in total, thus 2.5 inches for each front piece. That will probably add a dart, but I don’t mind that. I have done this on patterns with a dart already, but I am not sure how to do it with this pattern.
Hi, Elli, I will follow up with bust adjustment and grade up for this pattern although I do not suggest a dart since it is a jersey knit and it clings to the bust very well. If you are using ITY fabric then yes a dart can be placed there. I will cover that in the tutorial. Stay tuned, please:)
Love this pattern…very versatile…and free yet??? Thank you so much!
Love it! Be sure to go over the alteration to make a straight sleeve — the “bell bottoms” will not work with my figure. Looking forward to working on this, Thank you.
One I’ve been looking for…and FREE!!! Thanks so much.
I’ve been looking for this pattern for-what seems like-ever!! And FREE!! Squeee! BTW, not a squee-er…at all.
Thank you. Perfect name.
“Perfect for concealing a few kilos without looking frumpy.”
Thank you so much for this. At 5’2, so many things can look frumpy. I have the hardest time finding cardis that are short enough. I love the lines of this pattern–very simple–and I can make it at any length. Thanks, too, for the fabric details and the sew-along! Just made my day. (What can I say; I’m easy to please.)