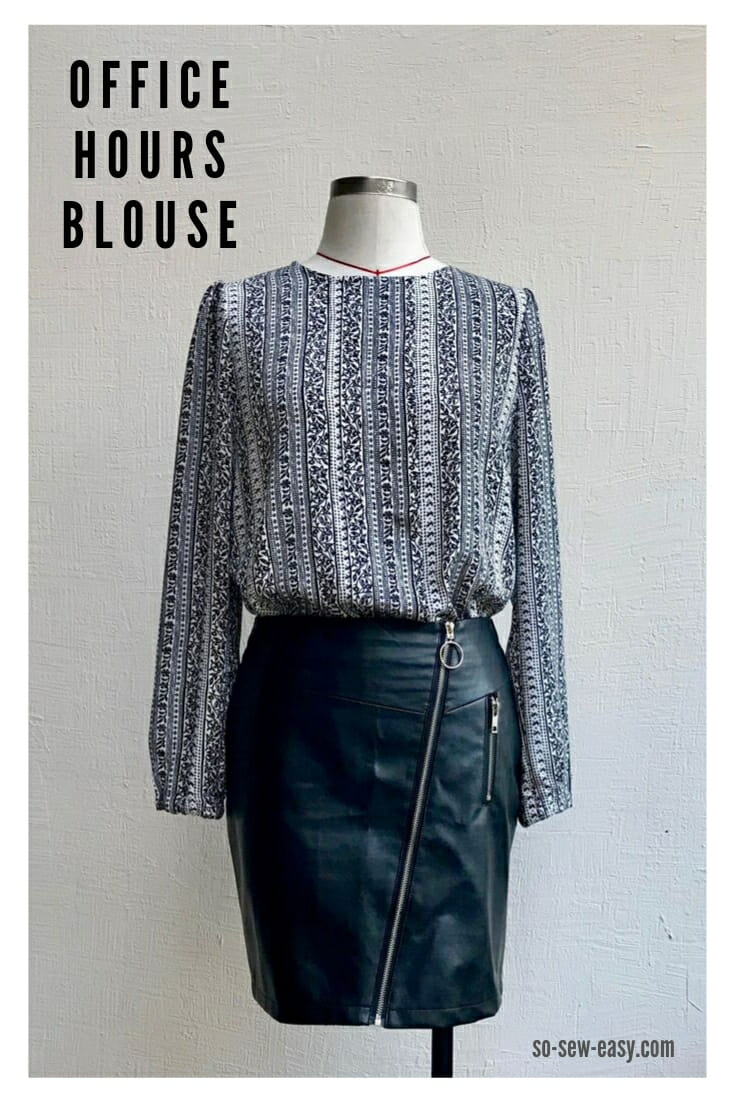
This is the office hours blouse pattern — for when elegance, femininity, and sophistication call. This type of blouse has many variations but the same beginning. More on that in a later post where I will write about the history of this blouse design.
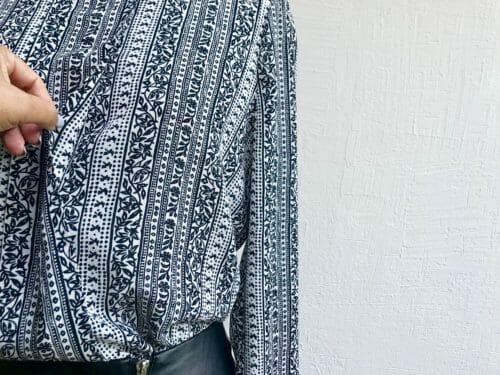

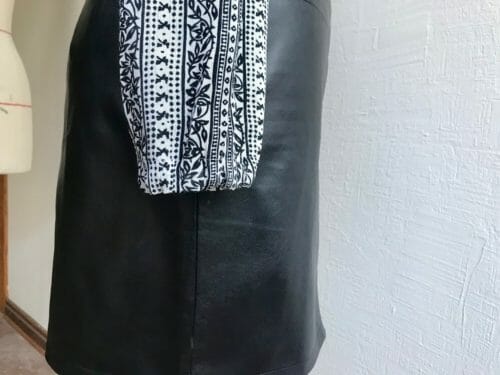

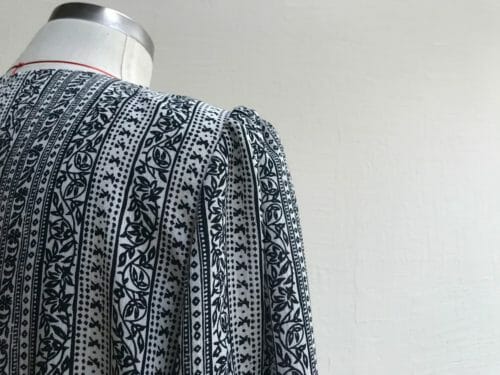

The blouse has a pleat in the front for added interest. Elastic at the cuffs to make it easier to fit and roll the sleeves when washing hands. After all, you are supposed to be a busy girl when wearing this blouse. Gathers at the shoulders to stylize your shoulders are an added elegance. And a scoop neckline with a hook and eye closure. I opened the blouse a bit so you can see the slit where you will be able to fit your head through, but it really lays closed.
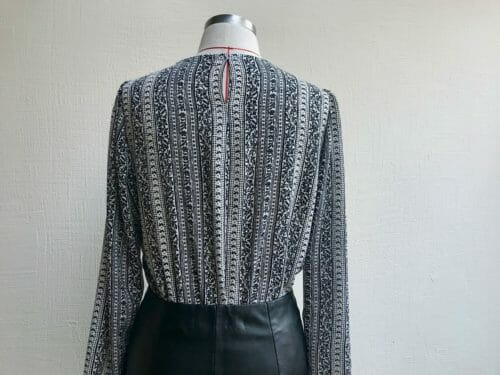

This style of blouse has been very popular since the '50s and every decade after that. This is the perfect blouse under a cardigan, jacket or by itself. Wear it with a pair of palazzo pants, culottes, skinny jeans, a pencil skirt, a leather skirt or a pair of shorts. You will find yourself wearing this little number for many years to come.
Materials
- 1 1/2 yards of lightweight woven fabric (satin, rayon, charmeuse, printed batiste, silk back crepe)
- Thread to match
- 18″ to 21″ of 3/8″ or 1/2″ wide elastic
- 24 to 28″ of 1 3/8″ wide bias tape (depends on size)
- Hook and eye closure
Tools
- Sewing machine
- Overlocker
- Scissors
- Pins
Fabric Suggestions from Amazon
I am using a crinkled rayon to test my pattern. I will be making a size medium. Crinkled rayon is a tricky fabric to choose from for most projects. The fabric tends to expand as the crinkles begin to smooth out, this makes your outfit feel and look wider than when you first put it on. To avoid that here, I have washed and ironed the fabric completely smooth free of wrinkles and only then I will proceed to cut it.
I love this fabric because when the piece is done I can just wash and hand dry without needing to bother with ironing. It is a great fabric to wear throughout the year, it tends to be nice and cool in summer, yet warm in winter. I will write a separate article on this fabric finish since we already have an article on rayon or is it viscose, why don't you find out for yourselves.
How To Download Our Office Hours Blouse Pattern?
We're going to continue to use the new Payhip web store to distribute our patterns. As most readers know, Craftsy has changed a lot and they have stopped designers like us from publishing new patterns on their site, so we've had to move to another service.
Our patterns are still free, but now you now have the option of making a small contribution if you like our work! We'd really appreciate it and it will help us keep going with new and fun designs like this. Even a dollar or two really goes a long way.
Thanks so much in advance for helping us out. You can use any credit card and you don't need a Paypal account, although you can use one if you have one.
Pattern Layout
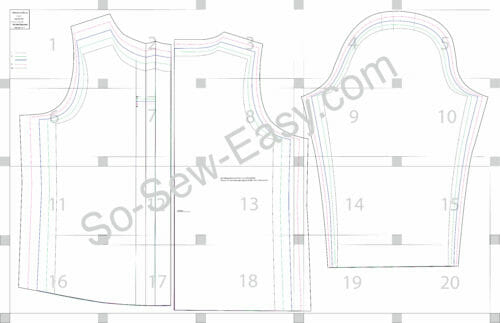

Cutting Layout
Place the fabric on a fold. Use the picture below as a guide.
The seam allowances are not included but I suggest you use a 5/8″ seam allowance.
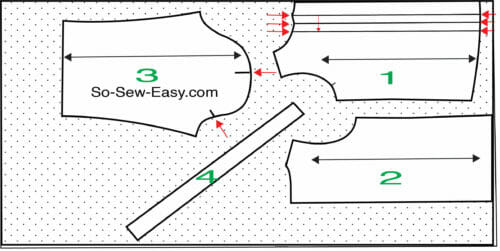

This pattern does not include the bias tape for the neckline.
Sewing Skill: Advanced Beginner/Intermediate
There are twelve seams in this Office Hour Blouse pattern, three pieces of the pattern, one bias tape that doubles as a tie at the back, two pieces of elastic and that is it. I guess what I am trying to say is that this blouse is very easy to make.
You will need to make your own bias tape. I suggest you do this before starting the blouse. Here are the step-by-step instructions on how to make it.
Fitting Your Office Hours Blouse Pattern
The first thing you should understand about pattern making is that there are seven different sizing tables in use at the moment around the world. So the chances of you not having to make adjustments to your patterns are very small.
This blog is read in 144 different countries so S M L XL 2XL differs from country to country. I have done my best to share with you patterns that you can use, however, you may need to make adjustments to the pattern as you see fit.
This office hours blouse pattern is a semi-fitted blouse, meaning there should be 2 to 4 inches of room to move around, and it is best for the hourglass figure, rectangle and inverted triangle figure. You will find that the bust and the hip measurements are the same.
Measure the length of the pattern to see if you will be happy with the length.
Measure your bust, and compare it with the finished garment measurements leaving room for ease.
For Sizes XL and 2XL measure your bicep and compare it to the sleeve to make sure you have enough room for your arm.
The most important detail in this blouse is that the shoulder seam is actually at your shoulder. So before you cut the fabric measure your shoulder and compare it with the pattern and make sure you choose the right size for your body.
Finished Measurements
| S | M | L | XL | 2XL | |
| Bust | 39″ | 43″ | 46 1/2″ | 50″ | 54″ |
| Length | 25 1/2″ | 26 1/4″ | 27″ | 27 3/4″ | 28 1/2″ |
| Hips | 39″ | 43″ | 46 1/2″ | 50″ | 54″ |
How To Make Your Office Hours Blouse
Step One: Fold and Sew the Front Pleat
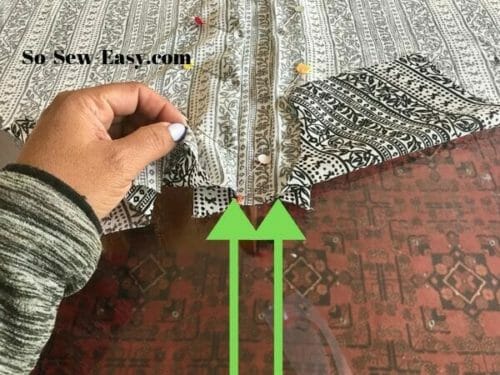
The following picture is going to show you how the pleats should be folded.
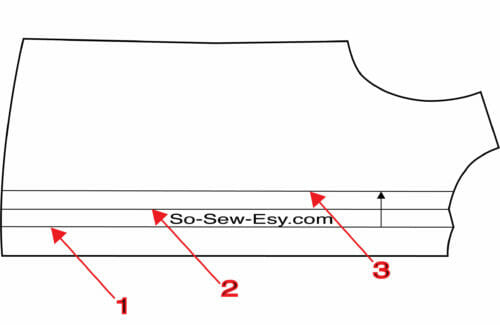

Fold lines 1 and 2. The line closest to my thumb is line 1, then 2 and 3. Line 1 and 2 are fold lines and 3 is where you will place the pleat then sew right on the crease to keep the pleat down.
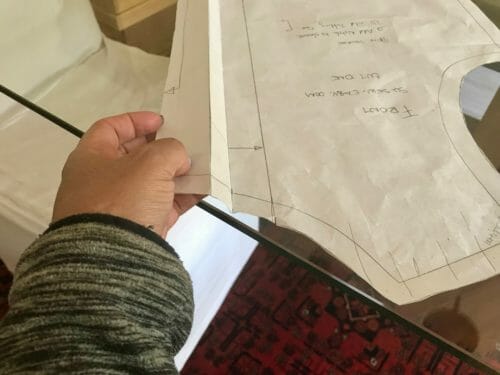

Place on line number 3. You will have to sew on line number three. Where the pleat is folded is where you will stitch.
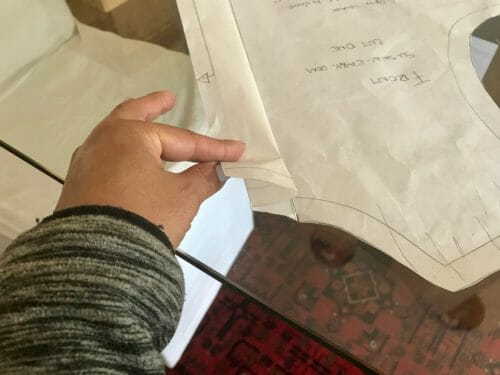

The confusion you might encounter is that the pattern is to be cut on a fold. That means you will have to cut the front, unfold it on the table and then make the pleat. To help you do this you need to make notches on the fabric when you are cutting it.
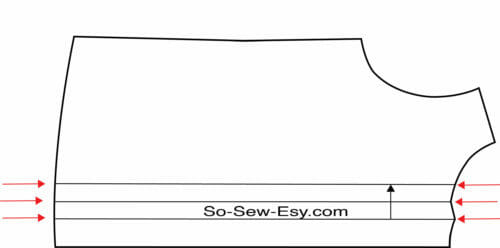

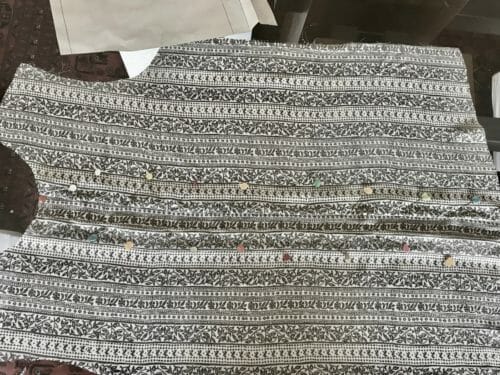

But, these pleats need to be sewn from the wrong side of the fabric, which means you need to move the pins to the back. Iron the front using a cloth and then move the pins. Sew the inner fold lines (#3) using a medium stitch.

With my Bernina, I am using the 3mm stitch length.
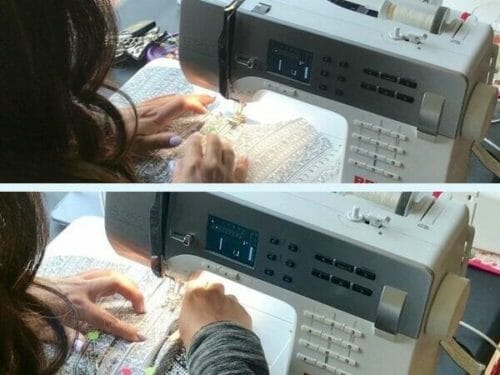

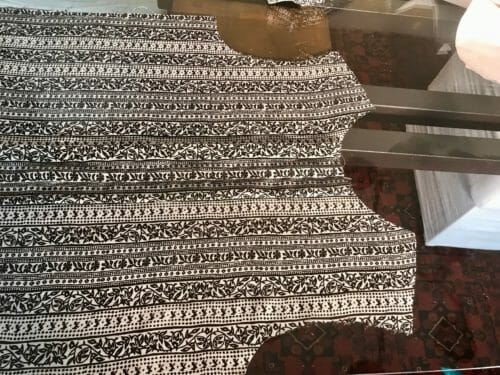
Once you have sewn the pleat, iron once again and put aside.

Step Two: Sew the back
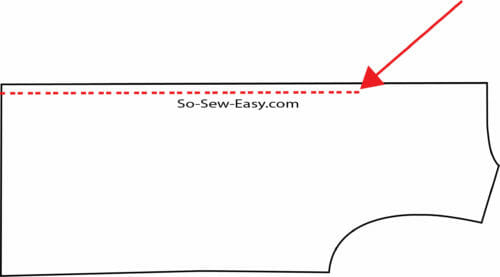

This is very simple sew the back at 5/8″ starting 5″ from the neckline, overlock the seam allowance separately and iron the seam open.
Step Three: Sew the Shoulder Seam
Print sides together, sew the front to the back at the shoulders at 5/8″. Serge the seams together and iron the seam allowance towards the back.
Step Four: Sewing the Sleeve
I have designed the sleeve in this office hours blouse pattern with a sleeve that is technically considered a puff sleeve. The first thing we need to do is to make the gathers at the shoulder.
Sew a row of stitches at 1/4″ from the edge and another one again at 1/4″.
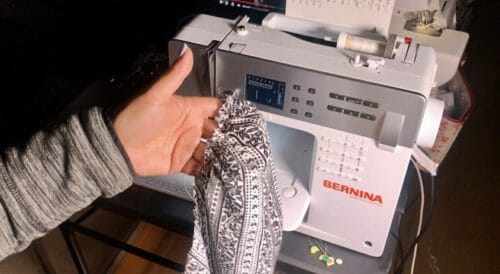

Pull both threads on one side and then in the other gathering in the middle. You will need to gather approximately 1.5″ from the shoulder seam on either side or three inches in total.
Pin the sleeve to the bodice. Sew the sleeves at 5/8″. Then serge the seam allowance reducing it to 3/8″.
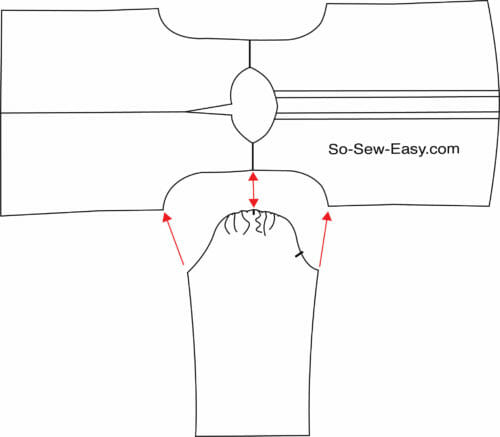

Place the gathers side to the plate of the sewing machine. The teeth of the plate will help the gathers stay the same way you gathered them. Serge the seam allowance reducing it to 3/8″.
Step Five: Sewing the Neckline
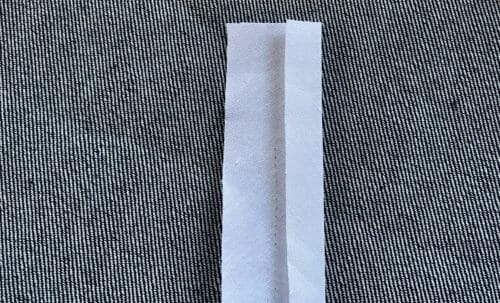

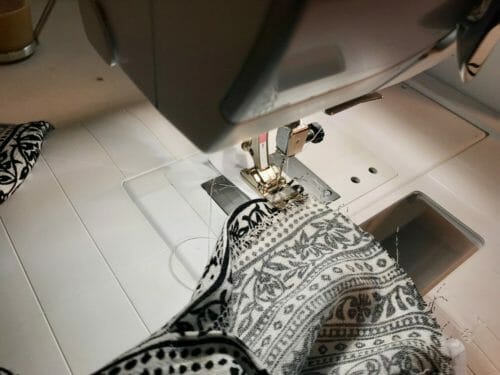

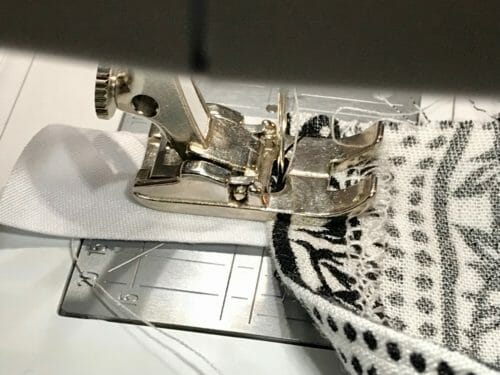

Iron the bias tape folding wrong sides together at 1/2″.Pin the tape to the neckline leaving one inch free. The seam allowance should be folded. I like to place the bias tape under the fabric, I know most people would do the opposite but this way I make sure I keep the 1/2″ seam allowance all around the neckline. Start sewing about 2mm from the fold of the seam allowance, this detail will become clearer when you turn the bias tape under.
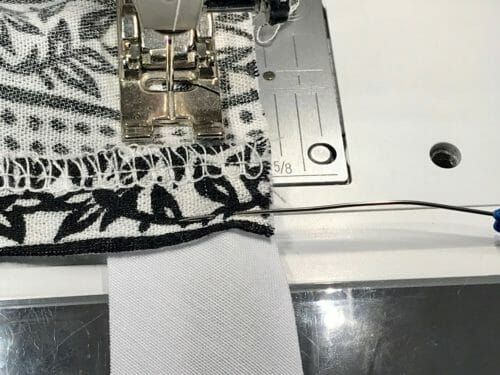

Sew all around the neckline at 1/2″ and stop at the end of the center back 2mm from the folded seam allowance indicated below with the pin.
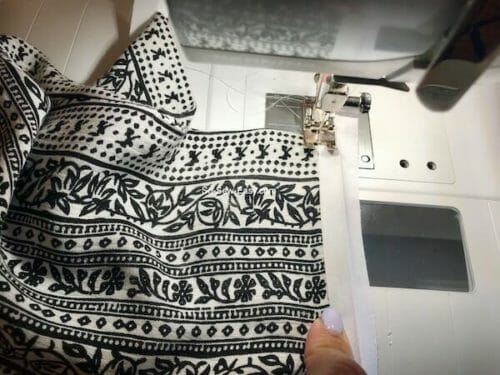

Turn the seam allowance away from the blouse and understitch very close to the edge of the tape.
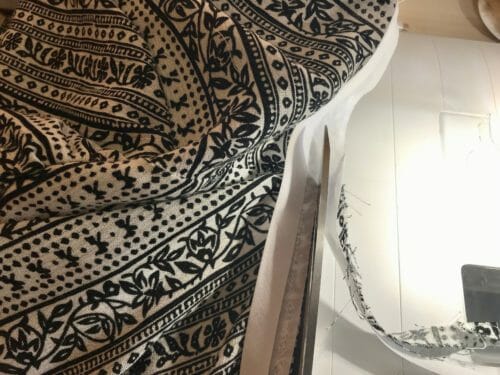

Cut the seam allowance by half.
Open the tape and fold the end of the bias tape in,
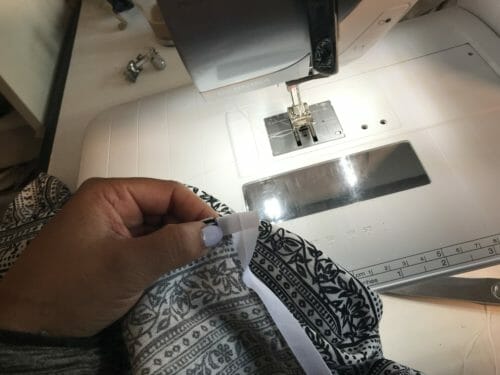

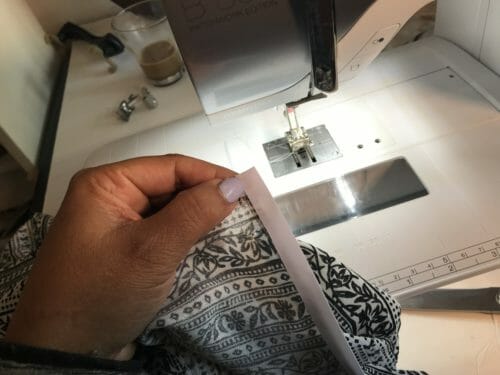

fold the edge you ironed.
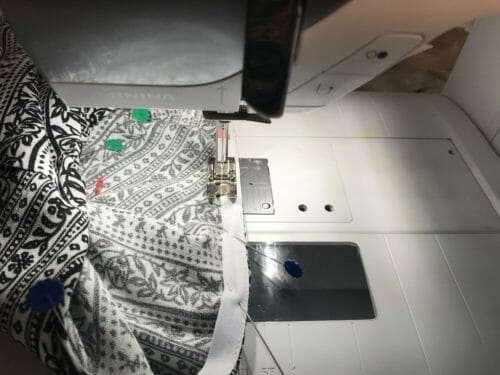

then fold the bias tape under the neckline. Stitch the bias tape down. Sew at 1/2″. Iron the neckline.
Step Six: Sewing the Side
Sew the blouse from the wrist all the way to the hemline. Serge each side and iron the seam allowance open.
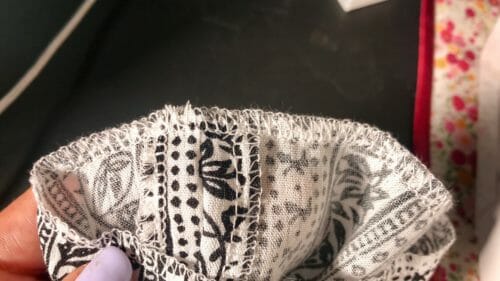

Step Seven: Adding the Elastic to the Sleeve
Measure your wrist and add 3″ to the measurement. Mine is 6″ so I will add 3″, which means my elastic will be 9″ X 2 = (one for each arm) 18″ of elastic.
Cut the elastic in half and sew the elastic at 1/2″ making a band.
Serge the hem of the wrist. Fold the wrist hem by 1/2″ and iron, do this on both sleeves.
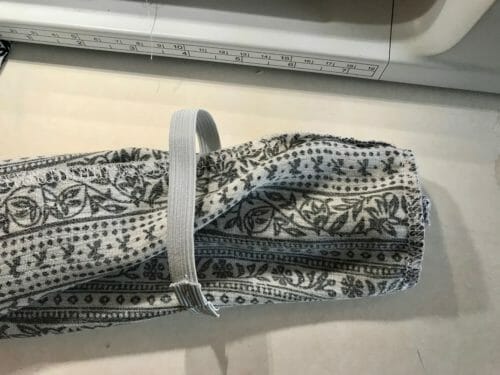

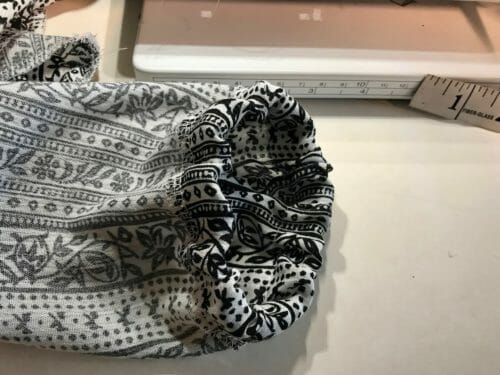

Turn the blouse wrong side out. Insert the elastic on the sleeve,fold the fabric over the elastic 3/4″. Sew at 5/8. Don't catch the elastic.
Step Eight: Hemming the Blouse
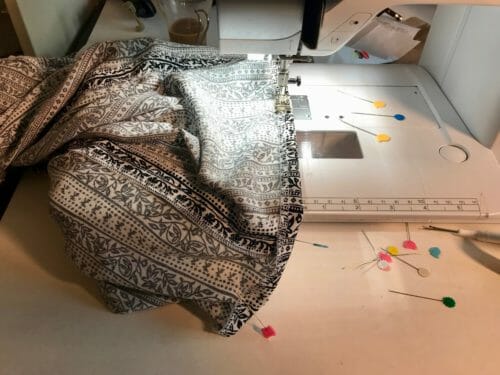

I am working with rayon I will let the blouse hang on the mannequin overnight. Then serge the hemline and then fold 5/8″ and sew. Iron the entire blouse and you are ready to wear your blouse.
Need Another Office Hours Blouse Pattern?
Why not try this one?
Do you need an adjustment to this office hours blouse pattern? Here is how to make it longer or shorter. I know I will have to make it shorter since I am only 157cm tall.
Let me know in the comments below, what other adjustments would you like to learn using this office hours blouse pattern. Until next time, Happy Sewing!


Hi,
I thought that this would be an easy project but I can’t understand what the pleat or pleats should look like or why they are sewn on the back and where exactly. Do the pleats mirror each other and be done differently away or towards the centre on each side of the front? It is very difficult to see the pleats on the patterned fabric that you chose. I also couldn’t see the back where you were sewing at the sewing machine. Please help.I want to finish this project.
Thanks!
Susan
I am going to like this pattern! How do I tell which side of the sleeve to attach the front to and which side to the back? The sleeve has 2 notches, one at the very top and one on the side of the top but neither front nor back has a notch on the armscye?
Can you please create a pattern for the skirt pictured with the blouse?
I agree! Love the blouse, but LOVE that skirt as well! Can’t wait to make both.
I love the skirt you have it paired with! Is there a oattern for that also? ????
Is there a way to make this blouse slightly more casual using a different fabric? If so, what might that fabric be?
Thank you!
Thank you for this pretty blouse. I will finish therapy on my hand next week. I hope to be able to sew soon. I will buy you a coffee then!
what is the bust size this top was drafted for? I like it but I gotta do an FBA and that will help me bunches 🙂
Hi, Malinda the top is drafted from S to M for a bust that is 35 to 50 inches, S-2Xl. Please have a look at the finished garment measurements so you can find the right size for you.
[…] going to copy the same instructions that I gave in the office hours blouse pattern since the same things apply […]
Hi Mayra,
I have the same problem as Shari in November 2019. Please can you clarify which bit of the pleat is sewn to what? Should the stitches be visible on the right side?
Also, is there a pleat on both the left and right of the blouse, or just one? I completely understand that the demo version was made up in fabric you had to hand, and in no way is this a criticism, but the fine detail is undeniably hard to spot. Having never sewn pleats before, a video would have helped, but if you could just spell it out in simple terms, I will do my very best to follow. Perhaps following on from having numbered the lines 1, 2 and 3, could you confirm which lines are stitched and which just folded?
I am sorry to labour the point, but your designs are so appealing for the beginner and improver among us un-trained sewists, I really do want to stick with it and produce a finished garment. (Besides, the culottes went so well, I have to have a top now!)
[…] The Office Hours Blouse Pattern – Elegance Made Easy […]
I love the look of the blouse and I want to try it out (a muslin first, of course) but unfortunately I don’t have a machine at the moment. Do you think it would be possible to hand stitch this for a beginner?
Absolutely, use a backstitch. I hand stitch all my cloths for about 2 years before I was gifted a machine.
Can someone make a video? I’m not all that skilled. I practiced with a curtain I found at the thrift store. I was confused about the pleats since the front pattern was on a fold. Also I didn’t understand the 1/4″ gathering in the sleeves. She says 1/4″ and 1/4″ from edge. What edge? The top? The side? Also, I found the bias tape and neck line instructions to be confusing. Thanks for the pattern though. I am going to make it again with my own modifications. I’ll probably replace the pleat with two bust darts.
Hi Afia you should wait for a video, this is not a complete beginners top.
How does it close at the back neckline after the bias tape is sewn all around the neckline?
Indeed it does, attach a hook and eye closure or extend the bias tape to make a bow as a closer.
Thank you. I thought somewhere it said there was a tie at the back but the instructions bias tape stops at the edge.
I have made it up in small as I am petite but it is very tight under the arms. The sleeve is quite narrow too so I won’t put elastic in. I’ll just hem the edge. The sleeve is too puffy for me as well so if I make it again I would alter the sleeve at the top.
Hi Ingrid, I encourage you to always make a muslin in a cheap fabric similar to the one you will be using to test and alter the pattern to your body. Even though you are petite it may not mean you wear an XS as you may already know this depends on the brand of clothing. As a rule the more upscale the clothing the smaller the sizing. I use a collapsible shoulder haute couture mannequin from which I base my patterns not a ready to wear one so the sizing tends to be more narrow than the average person.
I hope that reducing the puff and increasing the width of the sleeve is not difficult for you. Do let me know if this is the case so I can help you.
Thank you Mayra.
I luckily did make it in cheap material to test out before I was going to use some really nice material that I have so it’s ok. The measurements seemed to be appropriate for me so I went ahead.
I also practiced doing french seams inside too.
Rather than making this one again I think I will look for a long sleeve blouse pattern that has a plain inset sleeve and probably not worry about a pleat in the front. I prefer darts.
Thank you for your offer but I think the tightness under the arms will be difficult for me to adjust.
Ingrid
Thank you for your feedback, i will write a tutorial on the subject because this is a very easy adjustment to make.
Thanks for the free pattern! Not sure I am understanding the pleats because I can’t see how you’ve pinned and I’m not clear on exactly where I sewing. Will I have 2 sewn seams straight down the front that will show, or do I sew on the fold on the wrong side? Thanks again!
Lovely blouse. I have found some fabric to try this with but I am not sure if the front pleats are sewn all the way down from neck to hem? From the photos not clear as fabric has linear pattern.
yes it is but you can stop below the bust if you need more room on the hips.
I love, love, this blouses design. I had a double mastectomy and haven’t sewed since. I wear a bra with false implants. The size would be equivalent to a 40 42. I want to make this blouse but so afraid it won’t fit so I’ll use a muslin first. My question is what size should I use. The large or extra large is my problem I’m a size 12 but because of the false implants it’s really throwing me off and I’m placed in position of “Oh forget it I’ll just go buy a blouse”. Off the rack fits fine (Large) but when I hold up the patterns from computer print out they are too small but is xlarge too big? Just another annoyance of having cancer, I realize it’s a small one but it is frustrating. I want to get back to my love of sewing instead of over priced, not worth the price clothing. Can you advise me? Thank you in advance for your consideration.
Hi SusanAnn, I am sorry you had to go through the big scary C. So if there is anything I can do to help you and get back to sewing and making beautiful cloths for yourself, I am here and happy to help you. I think Large will be fine, just remember that there is no seam allowance included. Measure your bust and compare it to the Size L( chart is above), allow in your case 3 to 4 inches or more for ease. I would use 5/8″. If you find you need more room you can take out the sides and leave 3/8″ (1cm) that would give you an extra inch of ease. Leaving just a 1/4″ of seam-allowance will give you an extra 1.5″ of ease. If you are going to leave just 1/4″ for seam allowance make sure you use a small stitch. Hope that helps, I am interested in doing a whole line of clothing just for woman that have gone trough mastectomy, so any ideas I will welcome as well as pattern testing for this designs. Would you consider becoming a pattern tester? Send me an email at mayra@so-sew-easy or just let me know how you are doing. Kind Regards,
Mayra! what is that fantastic looking tool in the image below this text? “Sew all around the neckline at 1/2″ and stop at the end of the center back 2mm from the folded seam allowance indicated below with the pin.” It looks like a long, angled pin on a handle.
Hi Ivonne, you made laugh when I read this message. This is exactly why insist on having a manicure when shooting a photo or video, the attention to details of some of the readers like you is nothing short of amazing. It is an extra long pin that the head had fallen off i made new heads with acrylic . Where I leave those pins can cost 18.00 to 24 dollars for a box but the heads tend to fall off. I like the length not so much the quality and price.
Great Blouse! Thanks for sharing your pattern. But I can’t see the image that should be after “You will need to gather approximately 1.5″ from the shoulder seam on either side or three inches in total.” Is it just me or is it not available to all?
Pin the sleeve at either side of the armhole then align the notch in the middle with the shoulder seam, then gather all the excess. The gathered area will be around 3″ wide.
Beautiful blouse but am unable to download the Pdf pattern. Help
Hi Ellie, hope you are well! have finished the Chemo headwear, the artist apron and the gardening tool bag yet? You only get three tries at downloading.
I love your patterns Mayra but PLEASE could you use plain fabrics for your instruction photos as it would be so much easier to see the different steps. Thanks
Hi Julie, I will make some drawings in the computer and make the instructions clearer. You make the lights stay on for a bit longer, so thank you very much for your donation.
Thank you so much for your continuing generosity for in giving us such beautiful free patterns. I always appreciate it.
Love it. Not only is the pattern beautiful, but the tutorial is perfect. There are so many times when I don’t use a pattern because the tutorial is atrocious. That’s why I keep coming back!
Such a lovely comment, Becca, you made day!
Is there a way to get the directions in with the pattern pieces PDF as well?
Thank you for another amazing free pattern and tutorial! Have a super day ?
Thank you Tracy, wishing you the same!
Beautiful and functional blouse. I will definitely make it. For purposes of your tutorial, using a solid color fabric would have made the details a bit easier to see. Is there a reason you didn’t serge the seam allowances before starting construction?
You are welcome Sally, I used the fabric I had in hand. Now, I have a blouse I can use, if I was charging you for the pattern, yes I would make the extra expense because I would recover my investment. I never serge the seam before construction, if you are not careful you can change the size and fitting of a garment doing that, and this is my sample to test the pattern. Piece work in factories do this, ateliers and haute couture would never serge before working on a garment.
I am rather rounder in the middle than at the bust. I love this top, but need more of a tunic width at the bottom. How would I modify your pattern? Garments are new to me.
I would have to write up a separate tutorial, I am keeping your question at hand to address it on it. Thanks for your comment, Kind Regards,
If you lay the pattern out flat on a bigger piece of tracing paper, look at where the lines are for the bust. Look at a shirt that you feel fits you well, and measure around your waist on that shirt, and around the bottom, then try to draw those measurements onto the paper beneath your original pattern. Always you can go bigger and then sew more and trim but if you cut it too small, that’s it!! Draw with a pencil and try to even out the curves and distance between one size at the bust and the larger size at the bottom. If you lay a shirt that you like down next to your pattern, folded in half like the pattern is folded in half, that will give you a good guide for what the hem should look like. Do you want it scooping down in front? Raising up in front? scooping down at the side seams? Play with it on paper, and maybe even make one up with a cheap fabric first to see how you like it. I would think something with soft drape will flow better than a stiff fabric, like a knit print. Look at tops you see in catalogs or online, to see what looks cute… try on tops in a store and if worst comes to worst, buy one, take it home and measure it to see how big it is, then return it!
Great explanation!
Thank you for the tutorial, it was so hard to find it after I had purchased the pattern, the link from the pattern page does not work so I found it eventually by making a general search using the name of the pattern
First of all, thank you for your donation, You are forever in my heart, second I am sorry that it was hard for you to find the pattern, I am not sure why is that once you donate the file downloads immediately and you can find it in the Download folder or Recent Files of your computer. If there is anything else I can do for you just let me know. Kind Regards,
Sorry for confusing you, I downloaded the pattern with no problem, it was the link to the tutorial that I had problems locating, the link did not work from the pattern page but I did eventually find it , thank you again, I look forward to sewing the blouse very soon
Not at all, Jayne. Looking forward to a seeing your blouse.
I have been looking for a blouse like this! Thank you so much.
Beautiful, thank you. I came across a silk shirt that I wore years ago and it is huge, lots of blouson going on. Now I’ll repurpose it into this lovely blouse. I love the skirt too, is that one of your patterns/designs?
yes Linda, it is made with leather, not shared that because not sure the audience of the blog likes it. But By all means let me know if you do and if there is enough interest I will share.
I LOVe the skirt – care to share?
Sure, stay tuned.
Yes! I really like the skirt and I bet others do too!
One suggestion – for those of us who don’t like scotch taping PDF patterns together, make a pdf version we can take to a copy shop and have printed.
Hi Penny, thank you for your donation, I will certainly keep you suggestion in mind an work on making a version for copy shop only. Kind Regards,
Bust measurements look very large do they include the 2-4 ease or are they actual body measurements
Hi Barbara this are finished measurements of the blouse. Include ease does not include seam allowance.
Looks lovely, it is a style which would be terrific for me to wear to work. I am looking forward to trying it out. Thanks.
Beautiful, and finally a use for some of the soft fabric in my stash that I loved but couldn’t find a use for.