


I've been working on some new bag ideas and one of the areas of bag-making that has been a bit of a puzzle to me until recently is how to close the top of the bag. Of course, not all bags need to be closed. Some simple tote bags are left open, and that's just fine.
With these examples of the Expanding Nautical Tote Bag and the Turning Japanese Purse, in each case simply holding the handles keeps the bag closed.

The Zipper Top Tote bag as a zipper right across the top and isn't very deep. Other bags I've made have either had magnetic closures and snaps or zippers at the top, like the Easy Cosmetics Bag. So I was up for a challenge and looking forward to learning something new so I've got a video for you today on how to add a recessed zipper to a bag.
You can pretty much add this to the top of any bag which has a lining, so even if the pattern doesn't call for it, you can split the lining and add in the recessed zipper. Just remember to place any inside pockets accordingly.
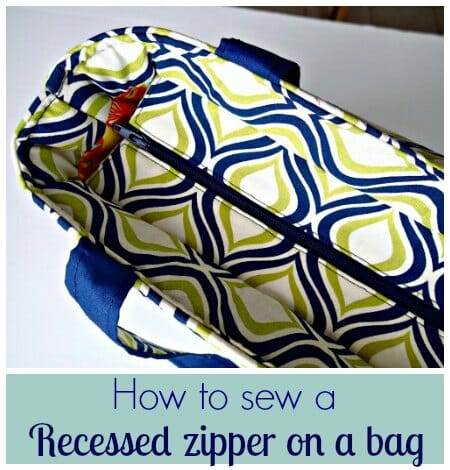
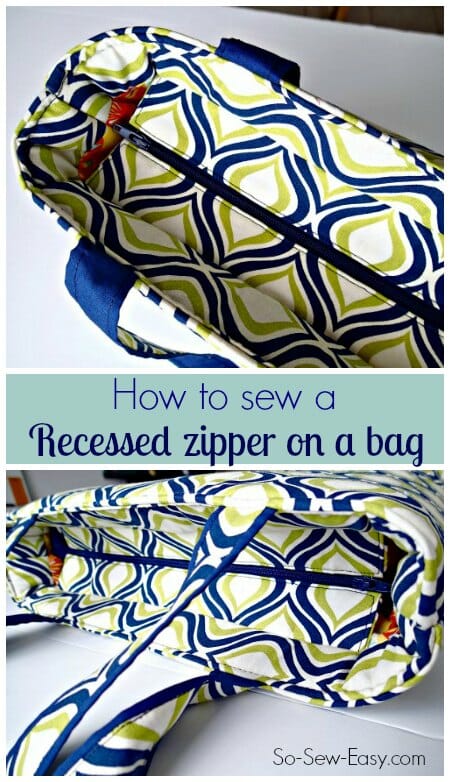
Here's how to sew a recessed zipper on a bag
In the video, I show how to sew the recessed zipper and then add it to a simple tote bag. At the same time, I'm trying out supporting the bag with headliner fabric too. It's all of a bit of an experiment, and not everything goes to plan!
Subscribe to the YouTube channel:
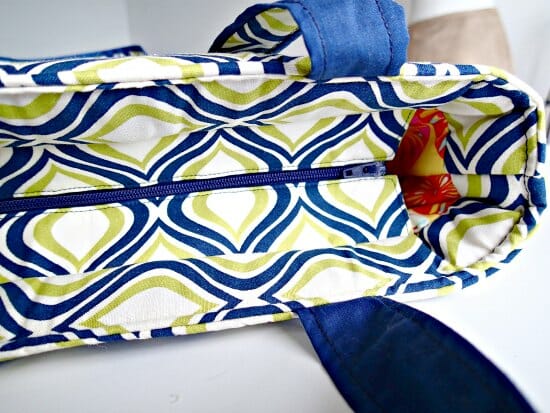
And here's what it looks like – pretty easy and it gives a very nice result. This would work on any bag that has a lining and space to slightly drop the zipper down inside.
Step by step
(See all these steps demonstrated in the video.)
- Look at your bag pattern and see where and how volume is added to the bag. Are the bottom corners cut out or boxed? What is the finished width and depth of the bag? In this example, I'm just working on a small tote bag and assume that it's 3 inches deep and 12 inches wide when finished.
- Use a zipper a couple of inches longer than the finished width of the bag. You can always use a longer zipper and shorten it if needed.
- Neaten the end of the zipper with a fabric tab.
- Cut 4 pieces of fabric. My length will be 12 inches. For the width, take the finished depth of the bag, divide it in half and then add on 1/2 of an inch. My bag is 3 inches deep, so divide that in half to get 1.5 inches, add on 1/2 of an inch to get 2 inches. So I cut 4 pieces each 12 inches long by 2 inches wide. Apply interfacing to all 4 strips.
- Fold under the ends of the zip tape and pin them or hold in place. Turn under 1/2 inch on each end of the long pieces and press. Layer the zipper between two of the long pieces with right sides facing in. Turn the end of the upper piece back over to the underside, and then stitch using a zipper foot from one end of the fabric to the other, keeping everything even. Repeat the same on the other edge of the zipper tape.

- Fold the fabric right sides out and push out the corners. Press the fabric top and bottom away from the zipper and topstitch on all 3 sewn edges.
- Your recessed zipper is now completed. Now we just have to add it to the lining of the bag.
- If your lining is already split into an upper and lower section, then you are good to go. If not, split your lining a couple of inches down from the top and remember to add in a half-inch seam allowance to each pattern section.
- Mark the middle of the lining pieces and the middle of the zipper section and match them up. Make sure the zipper is facing the right way up, towards the top of the bag. Stitch the zipper section in between the lining pieces and press.
- Then add the lining pieces to the bag in the usual way, and sit back and enjoy your recessed zipper.


Try using tissue paper strips above and below the headliner fabric for smooth feeding. The paper pulls neatly away. I have not tried this with headliner fabric, but the strips work great with stretchy, slick, and other fabrics that are difficult to feed.
If you use a Teflon/nylon foot it seems to sew better. Also i use tissue paper to sew over the feed dogs. thank you for this tutorial
Thank you! I like bags that close, especially when they are not in your hands! So easy for them to tip over and the contents spill out!
I hear you, happens to me all the time!
An even-feed or walking foot works great when using headliner fabric. The other thing I’ve done is place a piece paper between the presser foot and the foam. Or place the headliner fabric such that the “flannel” side is against the machine parts, not the foam.
Love your inset zipper bag tutorial. You can use tear away stabilizer, top and bottom when working with the foamy headliner fabric.
Great tutorial! Something I have always wanted to do. I think the stable foam may be easier to work with, or so I have heard. It came out very nice, in my opinion. Thanks.
Lucy
The problem I have had is with the length of the panels, when I make it to the size of the bag it bunches at the ends. How do you decide the length of the zipper panels?
HI Michelle the tabs do not go all the way to the end of bag. have you watch the video yet?
Re; HEADLINER, you cut it larger than pattern, stitch 1/4” from edge then zigzag close to Stitches . Then cut headliner close to zigzag stitches. That makes seams FLAT so haven’t got all that bulk.
Hi.. I just chanced upon your tutorials. They are very simple to follow and understand. Can I ask how do you attach a zipper to a reversible tote bag?
HI Mary, this is done very easily but best to illustrate with photos and video. Let me put all that together, let you know.
Using lightweight paper or tear-away to cover the foam going through the feed dogs on the one side, and the teflon foot on the other side should solve the problem. Just tear-away the paper when finished sewing and before turning.
Thanks for a terrific tutorial!
LOVED your Tutorial. I love your FUN attitude. While watching I was confused on the actual size of the 4 strips for the zipper. You stated 12″ wide?? Thankfully you had written out 2″ wide by 12″ long. Either way you gave a great explanation on how to determine the length and width of the strips based on the size of your bag. I have my fabric out and ready to cut. I am also using spare fabric to Test this out for the first time. Thank you again. I will let ya know how it turns out. I am a true beginner. Everything I have made is just a “Little Crooked”. 🙂
a teflon sewing foot should just glide over that headliner foam! Loved your tutorial. Thank you for the share.
I haven’t read all of the comments. Great tutorial. A walking foot might solve the problem with the foam backing. Works with vinyl. Thanks for posting!!
I love this tutorial and cannot wait to make a bag. As a tip for using foam, try using a tear away such as old pattern pieces paper or wax paper under the foam and of course, tear it off when completed.
Donna
Hi Donna, thanks for your tip and kind regards.
Oh my goodness! Your tutorial was the best! Learned something new! First try and it came out perfect.
Thanks again,
Monique Edwards
Kickassbags-Hawaii
Thank you so much for the tutorial. I am a novice sewer, but have been doing research. My big project I am working toward is reupholstering our project vehicle. This includes seats and headliner with design. Other tutorials have suggested to place a simple sheet or piece of printer paper to help the foam or difficult fabric feed. good luck with that one. I love the bag and will be working on mine very soon.
Hi Deby, thank you so much for this tutorial. I’ve been struggling for ages to find a neat way to finish zipper ends in general. It had just occurred to me to try to fold back the zipper end when suddenly I found your tutorial! Thanks to you I use it all the time now for very neat ends on lots of bags and purses. I’ve made a couple of totes with your recessed zipper method and wristlets and pouches with the zipper folded back at both ends and it works great! No more bulky ends to zippers – this is the holy grail of sewing for me! Also I’ve used your exterior zipper method that you used on a beach bag. Thank you so much for the generous sharing of your skills. It is greatly appreciated by me here in Sydney, Australia. I’ve just joined a group who sew and sell to raise money for a children’s medical research charity, so having a more professional product will help with fund raising. Thanks again, Carol.
There is a product by Pellon called Flex-Foam that would give great results as well. Thanks for the tutorial!
LOVE this pattern! It is my favorite bag. I use it everyday to carry my stuff and have made a couple as gifts. THANK YOU!
Excellent tutorial. Many thanks for taking the time to put it together for us. When sewing sticky fabrics, I use tissue paper or tear-away stabilizer which allows the fabric to move through slowly, and is easy to remove when you’re finished. I often use the extra tissue that come with purchased patterns.
Sheraton tutorial I found a easy to so on vinyl, plastic and foam, I put a piece of tape sticky side touching the sewing foot it really helps glide over the fabric.
THANK YOU for the tutorial! I made one already (a large tote 16 x 17) and I am starting my second one. I added a pocket inside and also a matching change purse with a hook attachment inside for it to stay attached. I love the way the zipper turned out so neat with very little fusing with it.
That’s wonderful Jen, makes me happy to hear you had success with this.
Hi deby, great tutorial. I used car headliner in my bags, foam side to wrong side of fabric and I then had the fabric side of liner uppermost, I reduced foot pressure and used a longer stitch, plenty of pins and it seemed to go ok. I have also used Annies soft and stable though more expensive it is easier. I purchased this from USA cheaper than I could get it here in UK.
I think I’ve got it now. I need to keep the foam side away from the plastic of the sewing machine table, because it was sticking and not feeding through. I need to have the foamy side towards the fabric Duh!
I noticed how well you matched (fussy cut) the pieces. 🙂
Loved it – and I love listening to you. You sound like Louisa on Doc Martin 🙂 I have a bag all cut out, the pattern didn’t come with a recessed zipper (All-Weather Tote from Sew4Home). So now I know how to do it – and measure for it. Thanks Deby.
I was wondering if a walking foot would work a bit better with using the foam.. Hope it helps
Great tutorial! I have been using headliner fabric for several years. I put the foam against the “bad side” of the outer fabric and then quilt the two layers. The fabric side of the headliner doesn’t seem to drag that way. When stitching the layers togehter for sides and bottom I just use my walking foot.
Yes, I think this is the way to do it – foam against the fabric and quilt it before sewing.
Hi Deby, I’ve featured your fab tutorial today…
Thanks Pam, you’re the best!
I have never heard of headliner fabric before. Thanks for the great tutorial, Deby!
I learned a lot. Thanks for this video. I had the same problem woth headliner foam on a camera bag I made. Oh my…soooo difficult and frustrating. Thanks for the help with figuring out how to add a zippered top to my bags.
Yes, I was wondering if there is a pattern for this bag as well! (Or at least dimensions for the pieces. Thanks!
Seeing it was just a test and a zipper tutorial, I never really paid much attention to the sizes and thought about keeping a note. I’ll have to come back to this project and see if I can remember, then I’ll update this with measurements or add a pattern link. Sorry.
Hi, I saw that several people recommended a Teflon foot, which I think would work great, You might also consider a roller foot, which I have used on vinyl. and it helped to move the vinyl easily.. I have read about using strips of tissue paper on top of the project and on each of the feed dogs.The tissue paper is then easily torn away. . Recently, I read about using strips of transparent scotch tape on the bottom of the sewing foot and also on the needle plate to help the fabric move easily. I think this would be a great idea if one does not have a roller or Teflon foot or even to use on the needle plate with either foot. Loved your tutorial, and it was so easy to follow along with each step of your instructions.
Gail
Your tutorial came with perfect timing! I want to make a “custom” messenger bag for my everyday stuff and was wanting to include a recessed zipper to keep my belongings safe while travelling I’m definitely going to try your method…it looks logical and I really like the fact you showed us how to make the zipper closure for any sized bag. Thank you so much!
Excellent tutorial! Very easy to understand! Thank you!
I have used ‘headliner’ fabric and found that it was a bit of a struggle because the foot didn’t glide well. I only used it once and then I was introduced to Annie’s Soft and Stable which is similiar except that it has a covering on both sides. Well, now I am a believer. I love S and S and use it in all my bags because I do not like sloppy bags. It’s a joy to work with and I’ve never had a problem sewing with it. Superior Threads carries it and here is a link. https://www.superiorthreads.com/shop/product/byannie-s-white-soft-and-stable-1-2-yard-18-x-58/
Great tutorial. You went at a nice pace, not too fast and not too slow. I have found it very helpful and thank you for your time. I shall have a go whilst watching your tutorial as I am sure I can now do it.
Beautiful bag and great tutorial, thank you! Maybe you could try a non-stick teflon foot?
Loved the tutorial – try using baking parchment to mask the foam. It should stop the sticking 🙂
Yes, someone else left a comment on the video on YouTube to try freezer paper. Sounds like t might work if I used it top and bottom – I’ll report back.
I love that you show difficulties as well as successes! Would a walking foot help at all with this? I recently worked with a pretty heavy stretch denim, and it using the walking foot helped immensely. I don’t think I could have done my project without it.
I love the bag but did you use a walking foot for the foam. Or just a regular foot. I would think you would get better results with a walking foot.
I did use a regular foot, but actually the foam was just sticking everywhere, top and bottom, sticking to the plastic of the machine bed, and the walking foot didn’t help when I tried that. It was like the foam just squashed and then rebounded when the feed dogs tried to pull on it, rather than fed through like fabric does. Someone suggested sheets of freezer paper top and bottom to stop the sticking. I had no idea it was going to be so difficult!
hi – You can use a teflon foot and a teflon sheet that sticks to the sewing machine. It is reusable and can be removed easily. Quilters use it when machine quilting. I have sewn on head liner often using this. Are there dimensions for the purse project?