


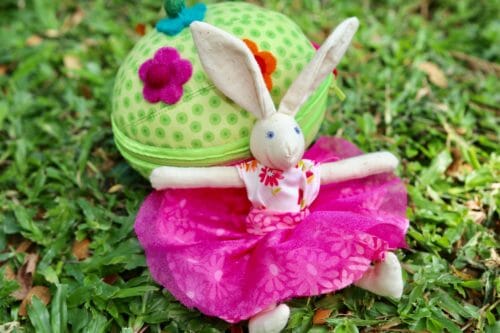
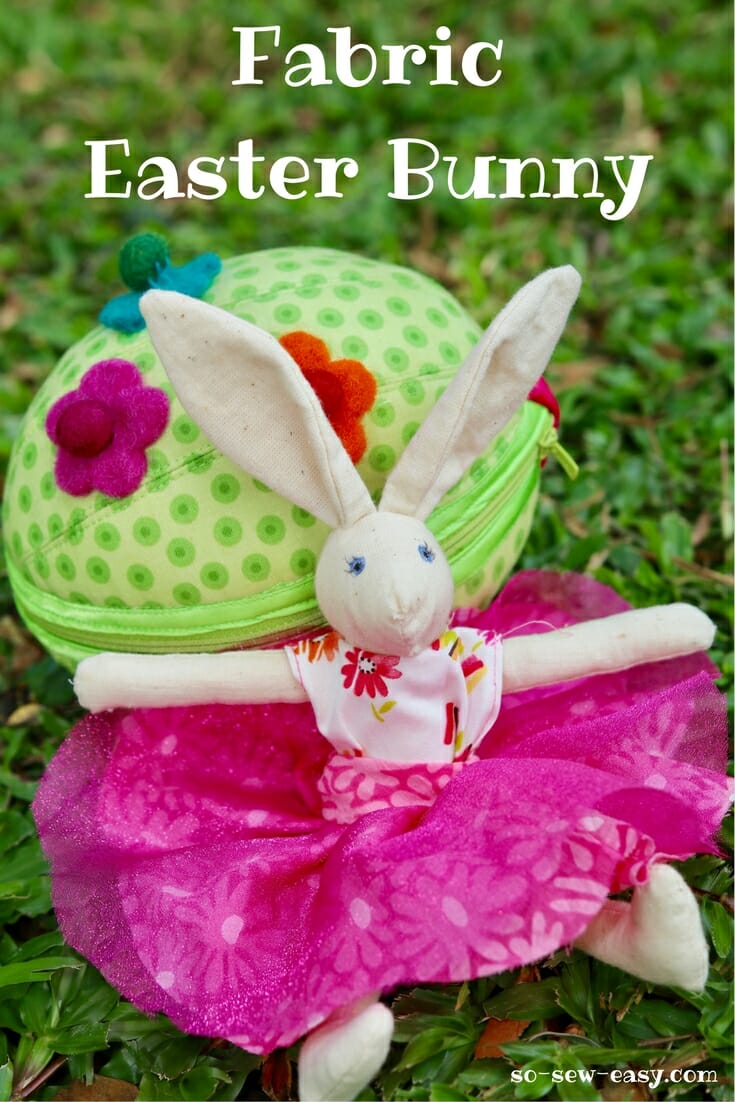
I call her “Daisy” the fabric Easter bunny because the daisy flower she represents brings a smile when you stumble upon a hill full of them. Now imagine the face of your child or grandchild when the Easter eggs open and here comes Daisy out ready to play. That would be worth a good Easter egg hunt I'd say. I don't yet have a name for the male bunny, so feel free to come up with one.
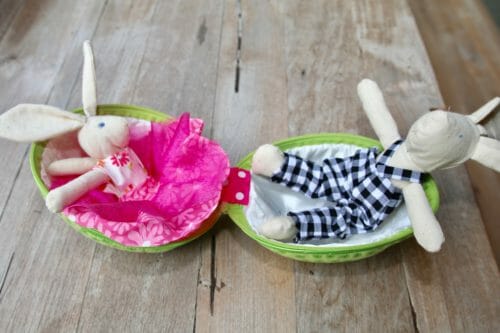
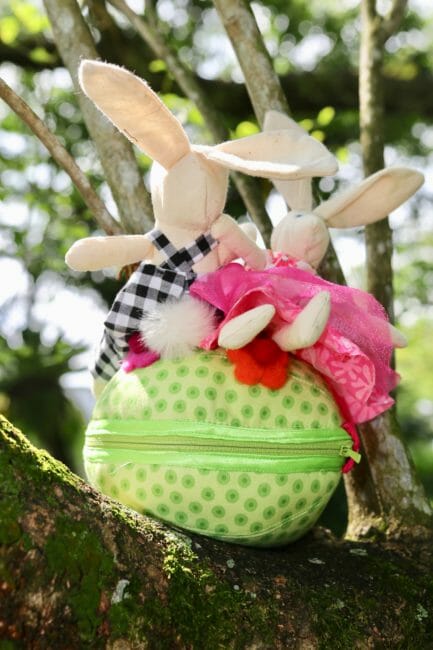
If you read my last post on how to make an Easter egg that doubles as a bag from fabric scraps then you will want to make this little toy and place it inside the egg to hide in the garden or in the house if the weather is not cooperating for the annual Easter egg hunt.
I recommend using a fat quarter and make two bunnies at the same time. Why you ask? This is something that only mothers can really answer. When your child gets attached to a toy and then she loses track of it, your child spends many nights crying about it. Some people would argue that loss is something kids need to learn to deal with, but I argue that life is much too short to introduce sadness into a child's world. Plus, you are making an Easter bunny made with fabric, not buying it. Sell the other one to recoup your material expenditure. That's how I used to sponsor my sewing habit.
This is a great little project for beginners just learning to sew. It requires little in materials and can be done in about an hour. But your child will play with it and cherish the memories for a long, long time.
Materials:
- 1/2 fat quarter for the body (full fat quarter makes two bunnies)
- thin fusible interfacing about the same size of the fabric
- thread to match
- polyester stuffing
Tools
- hand needle
- sewing machine (optional)
Pattern Download
You can download the pattern for Daisy the Fabric Easter Bunny from our account at Payhip.
For help downloading and printing PDF patterns, please CLICK HERE.
Skill Level: DIFFICULT
How to Make Your Fabric Easter Bunny
If you have never made a toy before, arm yourself with a bit of patience and in no time you will have a beautiful little toy.
Step One: Cutting Out the Pieces
Fuse the interfacing to the fabric, then trace the pieces onto the fabric. If the fabric is thick, there is no need for interfacing.
Cut out only the piece you are going to sew. This is to keep track of the work since it is so small. I spent 1/2 hour looking for one arm that fell into my fabric scrap catcher.
Mark all the notches. They will help you when piecing the fabric Easter bunny together.

Optional and very helpful for those just starting to sew: Trace the seam allowance, which is 3/8″, on the piece with an erasable pen or even a pencil. (This will be inside anyway so the markings don't matter that much.) This might seem like extra work but it will save a lot but it will save you time when sewing all those curves.
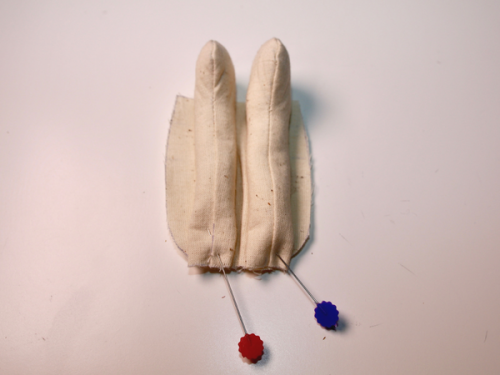
Step Two: Sew the Legs and Arms
Sew the legs and arms at 3/8″. Turn the pieces right side out and iron.

Stuff the legs and arms leaving about 1/2″ at the top. Put aside.
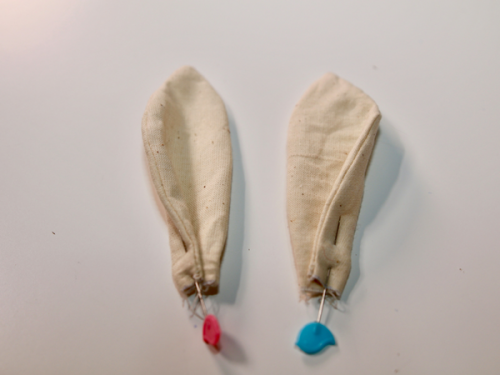
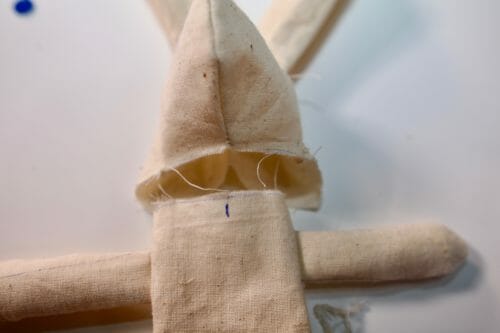
Step Three: Sew the Head and the Ears.
Sew the ears at 3/8″. Fold the curved side in about 1/2″, pin and put aside.
Mark the middle of the head. Fold in half and sew starting at 3/8″ and ending at 1/4″ then trim the seam allowance to 1/4″ as shown in the picture below.
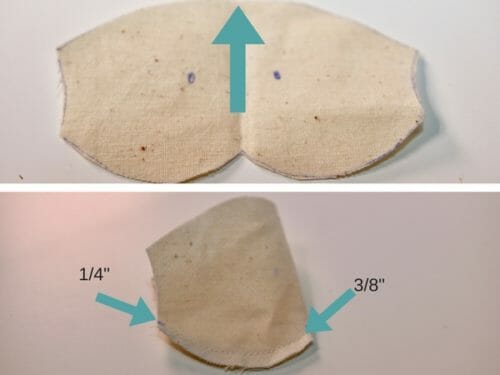
Turn right side out.
Pin the ears to the middle of the head. The folded part of the ear should be facing the right side of the bunny's face.
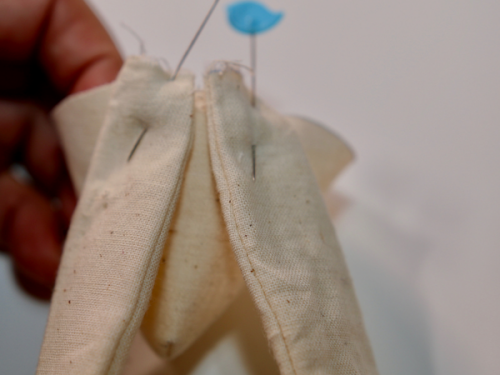
Pin the back side of the head and sew at 3/8″.
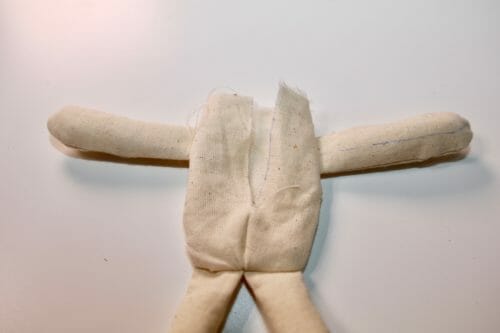
Step Four: Attaching the Legs to the Body
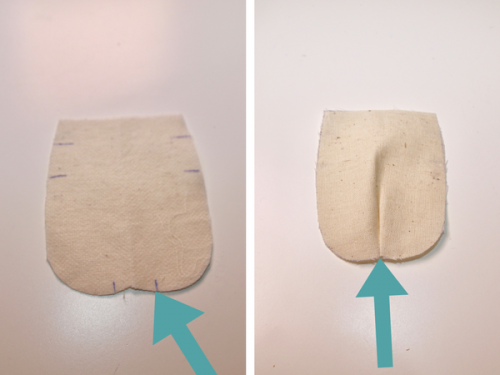
Sew the dart on the back of the body.
Place the back of the body right side up. Pin the legs feet side up.
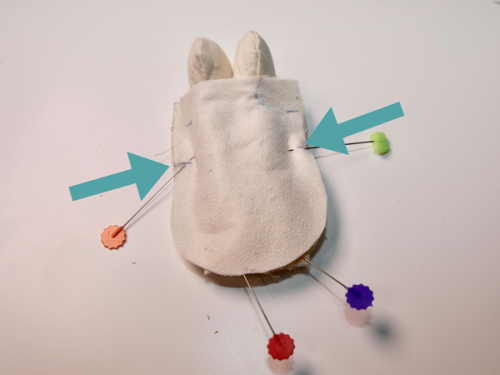
Place the front of the body on top and sew this part until the first notch. Do not sew past this notch because that is where the arms will go. Pull the legs out to turn to the right side.
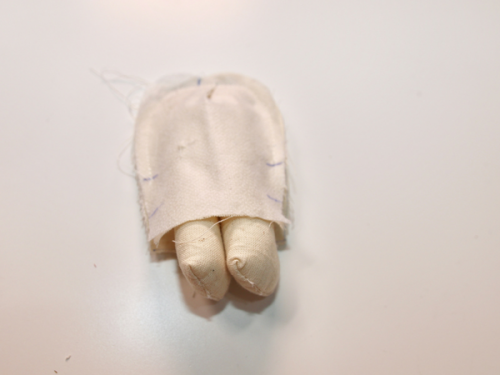
Make a line on the back of the bunny and cut to be able to work through this new opening. Insert the arms and pin. Sew the arm on the inside.
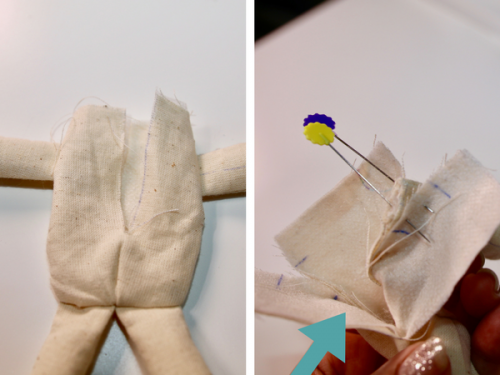
Step Five: Finishing your Easter Bunny Made With Fabric
Arm yourself with needle and thread because this part is the trickiest and it will require nimble fingers or an outstanding ability to control your sewing machine –which sometimes I lack depending on the time of the day. I say this because the parts are so small it can be frustrating to work at such small scale. Just take your time and be patient.

Using your sewing machine, attach the front side of the bunny body to the front side of the bunny head using a straight stitch. Then sew by hand the back of the head to the back of the bunny using the slit on the back of the bunny. Stuff the head, then the body and close up your fabric Easter bunny by sewing with a needle and thread using a running stitch. I have attached a fur pompom for a tail. If you want to make one like this, just follow step six in this tutorial where I used the same technique on the fur scarf.
The good thing about a fabric Easter bunny is that you can clean it just by placing it in your laundry pile. Also by making two with just one fat quarter, you have the ability to replace, gift or sell the other one.
Please enjoy and let me know if you would like to have the pattern for the clothes for the bunny. I am happy to do a post with these next week. Until next time, have fun sewing this little number.
PS: Join me next week on a tutorial where I will be showing you how to make a super simple yet stylish top to wear with leggings, pencil skirts or jeans. I think you will like this one a lot. Until next time!


Love it. It wasn’t easy though. Hope my granddaughter likes it!
So very cute. Thanks Please do clothes.
Thank for this adorable bunny pattern. I would love instructions for clothes. Do you have any instructions for boy bunny clothes?
They will be out on Tuesday.
Can’t wait to get these wee bunnies started hope you will have clothes pattern ready soon
So adorable… waiting for parts to make eggs, but started bunnies! Thanks so much!
When can we get the clothes patterns?
Thank you for bunny and egg pattern. Great instructions . Will post my bunny when done. Have to finish the sewing up back.
Would LOVE to have the pattern for the clothes! I bought the ‘egg’ pattern, appreciate so much the ‘bunny’ pattern. Thank you so very much for your generosity and talent!
where can I find the pattern for the egg? and love the bunnies will definitely make 4, 2 for each daughter.
Hi Genevieve, the egg pattern is here: https://so-sew-easy.com/fabric-easter-egg-made-fabric-scraps/
Have to call the male bunny Dandalion, as they grow side by side with Daisy!! Great pattern , thanks
This is true, you do see them in the same field, Great idea!
Thank you so much for the adorable bunny patterns. I really appreciate your generosity and cant wait to get started. Anxiously awaiting the clothes patterns
Clothes are so easy, one strip twice around bunny, seam one long end and two short ones, run another one for the top to hold 1/4″ elastic and thread through and hey predator, one skirt. Top is simple, two pies of material, seam all around, join two long ends on both sides and leave opening for arms. Join short tops a bit by the shoulders
Yep, you got this!
Thank you so much for the adorable egg and bunny patterns! They are sew much fun! Clothing patterns would be great! You are so generous!
Hi Shelley, it is my pleasure!
I think these are adorable and I would love to have the clothes patterns.
This is amazing! Thank you for sharing. Would love the patterns for clothes as well.
is there a printable tutorial?
where would i find the clothing pattern for the bunnies?
I would love to have the patterns for the clothes. The bunny and the egg are adorable.
definately need the clothes, they make them so very cute. How about Harry the Hare?
How about naming him Dandy, as in dandelion.
Love the bunnies – girl & boy Thank you for sharing your talent!!!
I would love to have patterns for clothes. Thank you. My granddaughters will love them.
Bonsoir,
Ce tuto est très bien expliqué et Daisy, un chef d’oeuvre de simplicité.
Pour cela, il est évident que Daisy ne soit pas habillé, dans son oeuf de Pâques.
Tutos pour vêtements fille ou garçon, seront les bienvenus.
Merci beaucoup.
Merci Beaucoup! Le vêtements seront disponible très bientôt.
I’m planning on making both the girl and boy bunnies for my daughter. Thanks for the pattern for the bunny. I would like to have a pattern for the clothes.
How about ‘Duke’ for the boy? Daisy and Duke 😉
I’d like to add my request for the clothing patterns or, at least, the measurements for the pieces. I think I can figure out how to put it together but the cutting sizes would help.
Adorable. Please share the clothes!
I will very soon Gail.
Please send us the instructions and patterns for the clothes for the girl and boy bunnies. Thank you
How sweet. Thankyou very much for sharing. How about bugs for the boy bunny
So cute. Would love a pattern for clothes. Thanks for the egg too. These will make fantastic gifts.
What a delightful bunny! So glad you decided to share it and the fabric egg. I know of lots of children who will be delighted with this cute gift. Thank you so much for sharing your delightful patterns, your creativity and your talent. You are a pearl of great prize and are greatly appreciated. Would love to see clothes for the bunny that are girl/boy related. After all, can’t have a bunny running around in the all together! What would the neighbors think.
Ha, ha, ha, How about if you swaddle it? But, seriously it is coming soon!
thanks for the bunny pattern. I really don’t think you will need a pattern for clothes,It looks like a cut and sew project. simple
Thank you so much for the patterns! I love all of your patterns and I have gotten several on Craftsy. You are a wonderful designer. Thank you again and keep up the excellent work.
Thank you Janice, you are gem!
Would love the clothes pattern
How about Dogwood for the boy bunny.
Daisy and Dogwood
Sounds great! Dogwood it is!
Thank you for this cute pattern.
I would love the instructions for the clothes too, many thanx for the egg and rabbit patterns tho, I’m looking forward to giving it a go xx
i would be delighted if you were able to share patterns for the cloths, a bunny is for life, not just for Easter 🙂
I certainly hope to have time to make both, they are lovely.
How about TWIGS for the boy bunny ?
I love the name, I will be introducing other characters so there is time to use your name.
Thank you! I hope to do this soon. The link for the pattern download says “page not found” though… My daughter loves stuffed animals this will be great to do with her!
Thank you for your patience, I hope you manage to downloaded it.
There is no pattern download attached.
Hi Dee, this pattern has been super popular and our site got absolutely inundated today. Our servers were overloaded but I’m told everything will be back to normal shortly.
I was able to get it. Thank you so much. This will be great for my grandson and granddaughter.
Hi Dee, I would really appreciate a photo of one or both opening the egg.
It took a while and several tries. Eventually, I was taken to the Craftsy website where I was able to download the pattern.
Thank you Amy for your patience, that bunny got alot of traffic so it crammed the server.
Yes, please post the clothes for this darling bunny–can’t have a ‘bare bunny’ 😉
Yes of course…?
Please do instructions for the clothes. Thank you.