


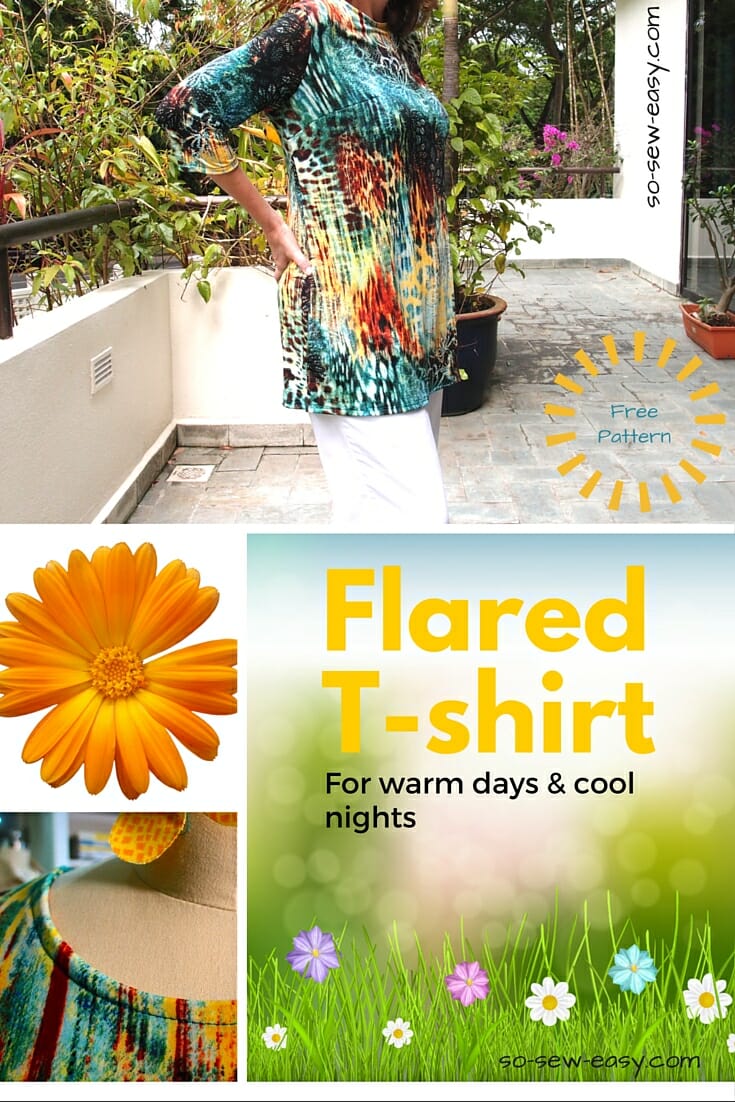
 Spring is the time to dress comfortably and in layers. A flared t-shirt is one of those pieces of clothing we can just throw on with a pair of jeans, leggings, capri pants or if the top is long enough, it can also be a short mod-style dress. Perfect for a quick run to the supermarket or picking up the kids! This is an incredibly easy pattern and I have added two sleeves lengths to give you some flexibility. If you want to, you can even eliminate the sleeves entirely and it becomes yet another top.
I am using a fabric from my stash because I am determined to reduce the amount of fabric in my sewing room. I realize it is spring after all and that you would want to see some flowers. I am not a flowery kind of person, but I gave it a try. I hope you like it:). For your flared t-shirt, you can select any lightweight and soft knit. It can be 100% cotton or a blend. As you get ready to start to project, it might be helpful to review our tutorial on mistakes to avoid when cutting fabric. It might save a little re-work.
Before you start, I strongly recommend you to take a scrap of your fabric and practice so you can achieve the right setting on your machine necessary to come up with the best looking stitch that you can. I am using a very basic machine –the equivalent of a tractor– but I know some of you have such fancy machines which the equivalent of a Lamborghini. I had a hard time finding the perfect stitch, my (tractor) machine kept skipping stitches, so I opted for a ballpoint needle and a walking foot.
While the pattern is easy to follow, this is probably an advanced beginner or intermediate level project. It's helpful if you've had some experience in sewing knits which can be a bit tricky to sew sometimes. If you run into any problems, please leave your questions in the comments after the post and we'll do your best to help you out. The pattern accommodates sizes 8, 10, 12, 14, 16, and 18 with corresponding bust sizes 36″, 38″, 40″, 42″, 44″ and 46″. The finished garment in the photo is size 18 and it will accommodate a 46″ bust without stretching the fabric. The ITY fabric I used has great “drappability” and terrific stretch.
A note: The dart seems higher because I had to pin it at the back for my friend Janice to wear it. She is not size 18, she is size 14 but her chest is 16. She kindly accepted to model the top for me. This is exactly the reason why if your bust is bigger you should always use the right size for your shoulder rather than going with your bust size. I explain this in this article on how to make a full bust adjustment.
This pattern and tutorial are completely FREE to you. The design and pattern are entirely original and, as you can imagine, they have taken some time to put together. All we ask is that you share this post with your friends and family using one of the social media buttons below.
For the 3/4 sleeve version, you will need the following materials.
- 1 1/2 yards of soft knit, I am using ITY that I got from Fabric.com a while ago.
- 1/2″ knit stay tape or stretch fusible interfacing strip of 5/8″
- a Schmetz ballpoint needle or a twin needle. Any brand should do but Schmetz is one of the best.
Fabric Recommendations from Fabric.com

You can download the pattern and instructions for the Flared T-shirt from our account at Payhip.
For help downloading and printing PDF patterns, please CLICK HERE.
Step 1: Print and place the pattern; cut to your size
If you have not used PDF patterns before, here is an article on how to download and print PDF sewing patterns that you might want to review.
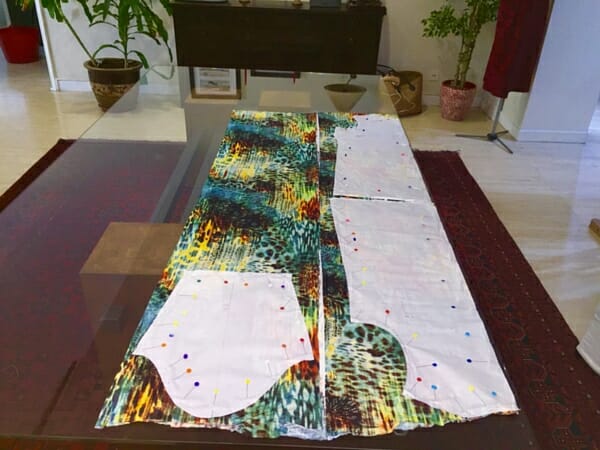
I have placed my pattern on the fold, you could trace the other side of the pattern and cut on the fabric on one layer. In addition to this pattern, you will need a strip of fabric to find the necessary measurements in the pattern.
Cut the fabric to the size of your pattern. All seam allowances are 5/8″ and are included with one exception which I will explain below.
Step 2: Apply stretch fusible interfacing or stay tape
Apply the stretched fusible interfacing to the armholes and neck seam allowance. If using the stay tape, please iron the tape 1/8′ from the edge. Make all the notches marked in the pattern. These are important.
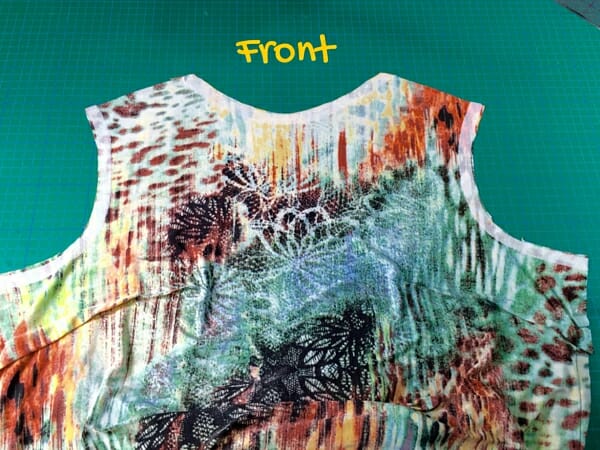
 For the back piece, apply the stretch interfacing or stay tape on the armhole, shoulder, and neck seam allowance. Make a notch the middle of the neck. You will need this notch to align the facing later on.
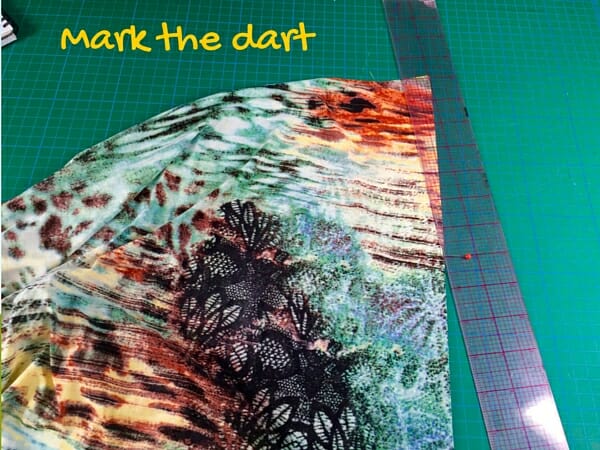
Step 3: Mark and sew the dart
Using a ruler and pencil or erasable pen mark the dart and place a pin on the end of the dart. (If you're asking “what's a dart?”, please review our tutorial on how to mark and sew double ended darts which is linked here.)
Step 4: Sew the shoulder
At this point, you can use your serger to finish the seams, but because I am using ITY Knit, this knit does not unravel so finishing the seams is entirely optional. Unfortunately, my serger has a dull blade and made a royal mess of the seams, so I am using an overcasting stitch with my regular sewing machine. You can learn more about how to use overcasting stitches in the tutorial linked here.
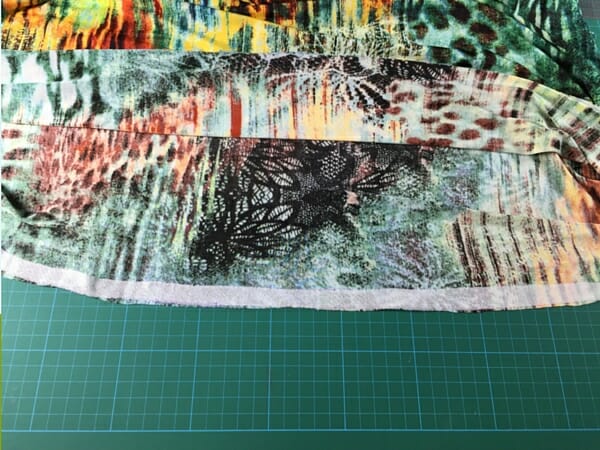
Step 5: Sew the sides of the top
Place the front and back with print side together and sew the sides.
Step 6: Attach the sleeves
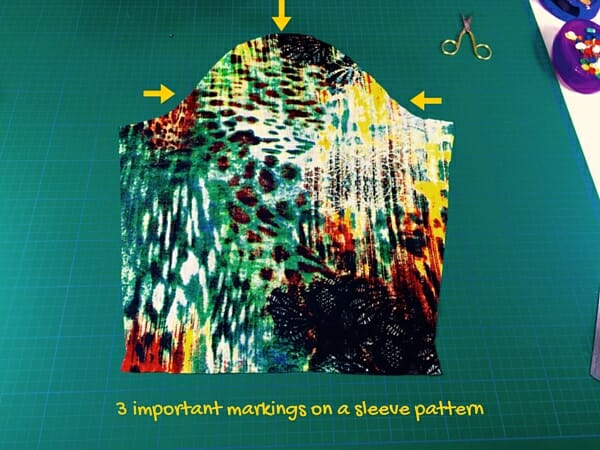
The sleeves pattern has 3 important markings. There are 2 notches that will tell you this is the back of the sleeve, 1 notch to show you the front and the center of the sleeve telling you where the shoulder seam is located.
There are 2 methods you can use to attach the sleeves. You can start sewing the sleeve to the armhole and then sew the arms straight with the side seams of the top. It is basically one continuous seam from the sleeves all the way to the hem of the top. I only recommend this way if your serger is at hand because it can create bulk in your armpits, and who wants that.?
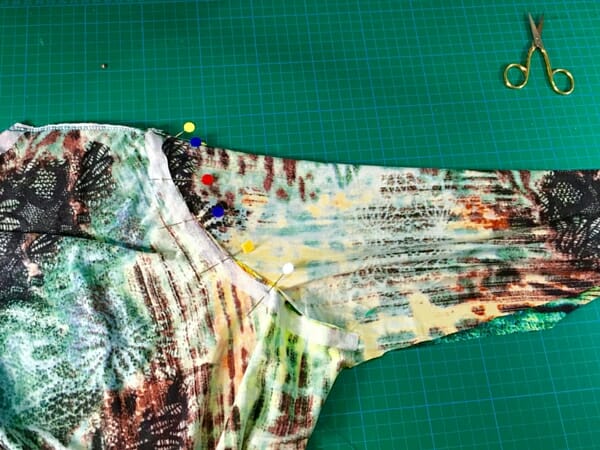 Instead, as another method, I am using the set-in technique: sewing the sides of the sleeves, then the side of the top, and lastly attaching the sleeves around the armhole, trim and zigzag to reduce bulk in this area.
Step 7: Sewing the facing to the neck
NOTE: Sad to say not all the sizes can out on the file, I dod not noticed this until Cindy Curwick wrote a comment pointing at the fact that one facing is thicker than the other, just trim the thicker one and keep going. Also there is just one size of the facing not all the sizes, I will be sending an email so you know that is going to happened.
This is the same technique you need to apply should you decide to make this t-shirt without sleeves.
Start by measuring the neckline, cut the strip the length of the measurement you have take minus one inch. Sew at 3/8″. With the print facing down, Start pinning at the shoulders, alight the stitches of the strip with the shoulder seams. Next, pin the facing to the front and back of the t-shirt. You will find the facing is shorter than neckline. This is fine because the fabric is very stretchable and this is necessary to maintain the shape of the neck.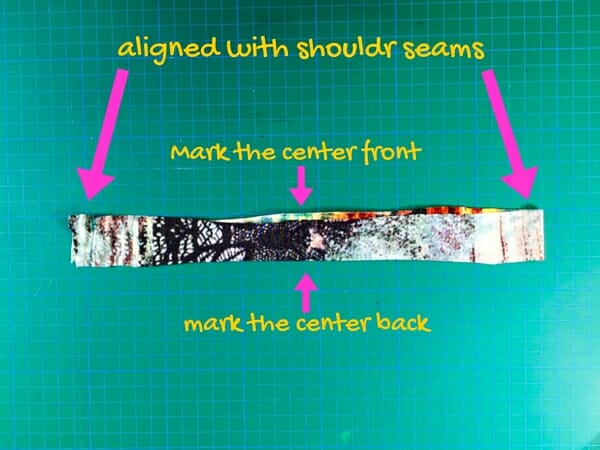 With the print facing down, start pinning at the shoulders, align the notches of the facing with the shoulder seams. Next, pin the facing to the front and back of the t-shirt. You will find the facing is shorter than neckline. This is fine because the fabric is very stretchable and necessary to maintain the shape of the neck. I have also added more fusible interfacing to the facing because my machine is not liking this fabric very much, this is optional. Sew the facing to 1/2″ seam allowance.
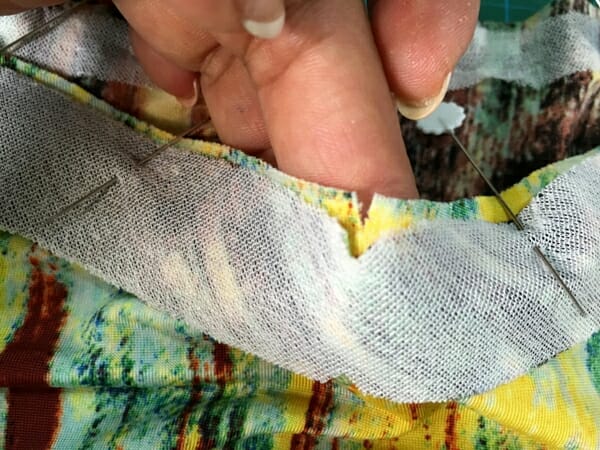 Trim the facing close to the seam.
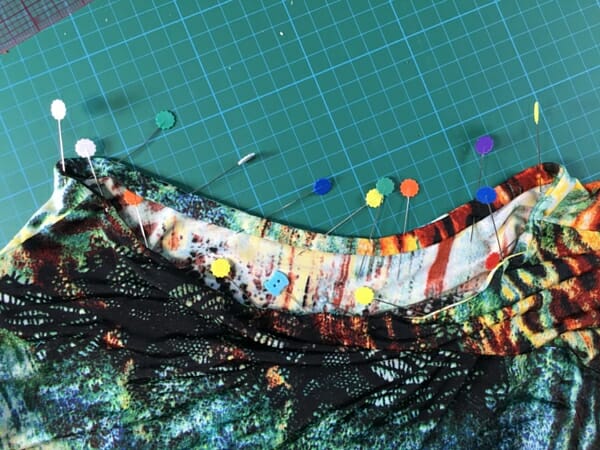
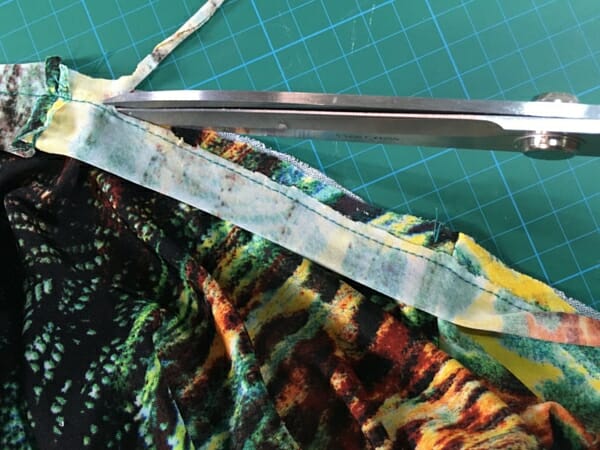 Fold the facing to the inside of the t-shirt 1/2″, pin all around and iron.
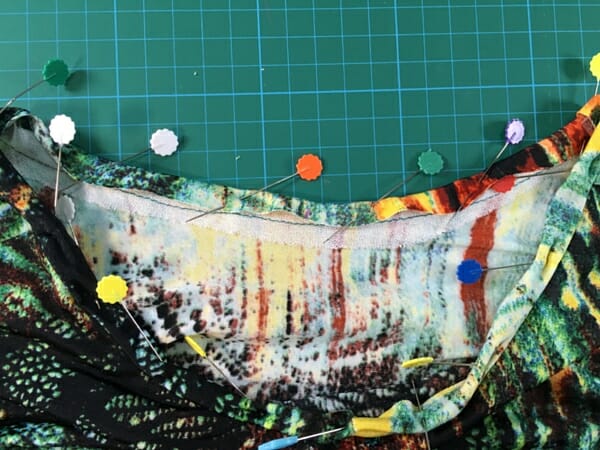 Fold another 3/8″ pin all around one more time.
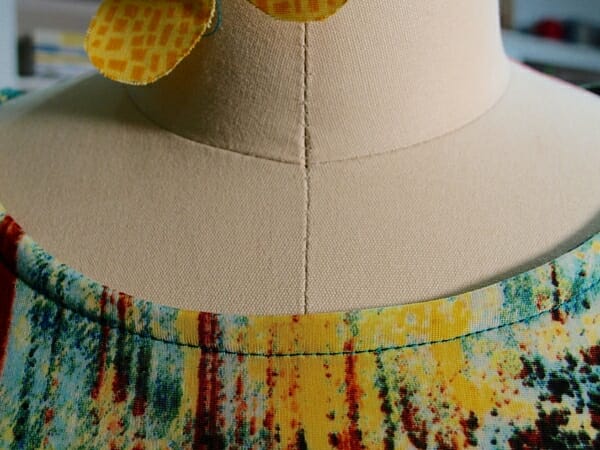 If you are a newbie and are not familiar with working with knits you could make a baste stitching all around the neck. The reason for that is that this kind of facing needs to be sewn on the right side of the fabric and it is very hard to do that if you are not experienced. You could also change your needle to a twin needle and sew the facing creating a nice double stitching detail. If you need some guidance on how to use a twin needle, please check out the tutorial linked here.
Step: 8 Hemming your flared t-shirt
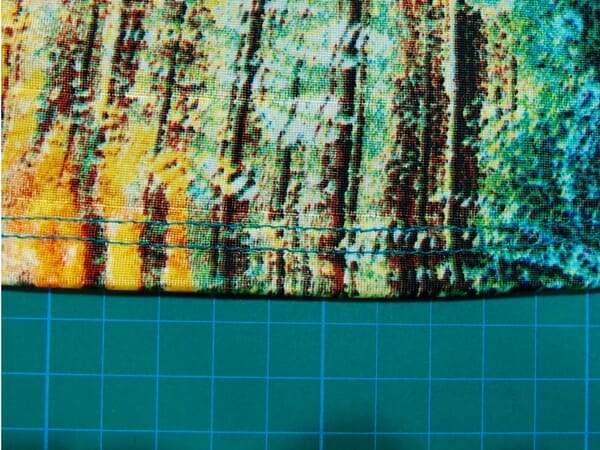
Apply the stay tape to the hems, both in the sleeves and on the bodice, and simply fold 5/8″ and hem your T-shirt.
I hope you enjoy this free flared t-shirt pattern. It is very easy to make and is a staple in any women's wardrobe. The flared t-shirt is the perfect top if you are not ready to bare all in the new season. Throw on a light coat on and a pair of jeans and you are ready to rush out of the house for just about anything.
What other pieces of clothing would you like to sew before summer? Please let us know if the comments below and we'll do our best to help!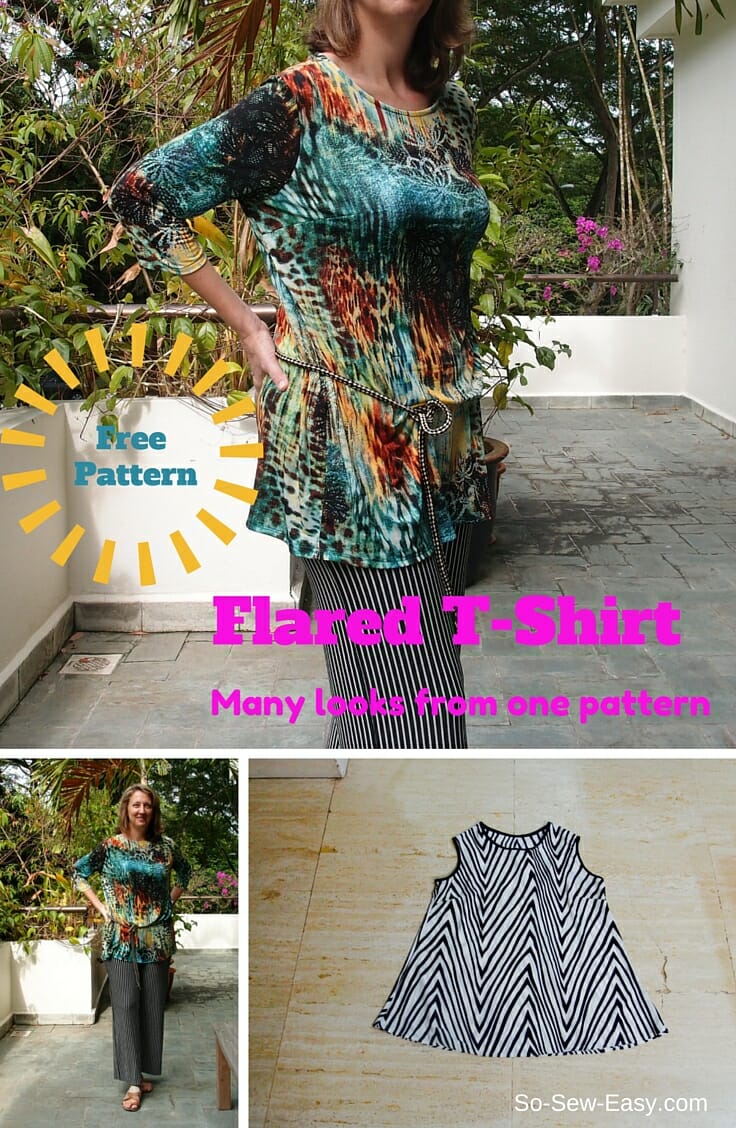


Love this top Mayra!
I loooove the model!!!! She was the glue that kept us together. Miss you dearest Canadian friend!
I miss you too wonderful lady! I love reading your posts every Sunday!
Thank you, Janice will catch up soon, we have moved and will send you our new address with a guestroom.
What a wonderful top! Thank you so much for sharing the pattern. And I LOVE the fabric–good for you for using up some of your stash! I’ve been on the same mission. Not that that’s stopped me from purchasing more! LOL
Same here! it seems the more I use the more I buy!
Had some difficulty with the scaling on this pattern. The test square comes out .75 X .75. I have adjusted my printer preferences to print full size and without borders, and it is still incorrect. Can you help? Anyone else have this problem?
HI, Mary, you are not supposed to scale the pattern at all. I hope you are using Adobe Reader, you need to print on “Actual Size” and portrait style. Do let me know if you are doing this.
Hi. Where can I buy the 5/8″ stretch fusible facing ? What is the brand name ? Thanks.
Hi Marianne sadly the contact I had is no longer in business, the only I have available is in the list of materials. You can also make your own as I do sometimes.
I am curious why you use stretch interfacing or stay tape with this knot pattern? I don’t usually do this.
Can this pattern be made from cotton fabrics?
Yes it can be, as long as it soft and drapes well, and you fit within the measurements given because it will not stretch. The neckline is large enough for any head size to go through. Let me know how it turn out. Happy sewing!
I’ve downloaded and printed the pattern ready to use. Looks great in that fabric. Featured today…
The white pants you have paired with the top look so comfortable. Any chance we can get a pattern for those?
Stay tuned Cindy, very soon. Thank you!
I just wanted to say thank you soooo much for this awesome pattern and tutorial! It’s beautiful! I am trying to figure how I can put a cowl neckline to it…(I’ve watched many videos but this would be my first actual pattern to complete). This tutorial is very clear and I feel I can do it! Thanks again…You guys are amazing and I love your work and appreciate you so much~!
Thanks Elysia! Glad to hear it’s going well. Stay tuned. We have some other similar projects coming soon.
How about some nice shorts patterns for summer (always optimistic that we will be getting some sun in the UK!)
Thanks
Yes Sylvia, optimism is what keep us looking forward. I will work on it, I think it will be a great add to the pattern collection that we already have. Thank you for your suggestion.
Love your fabric for this top. I’m a pear shaped lady and was wondering what the waist and hip measurements are for the size 18 top? Can hardly wait to make this.
Hi Catherine, the top starts to flares from the bust dart, so at the waist is 45″ and the hips are 56″. Happy sewing!
I would like to sew a tennis skirt I cant find a pattern anywhere.
thanks for the new top I look forward to sewing this one.
Hi Carmen, I hope you enjoy the pattern and the design. Please let us know how you go!
Loving your pattern…I am going to make one for myself…thank you!!
Hi Karin, thanks for your kind works and please enjoy the pattern. Let us know how you go!
I am not able to print the tutorial for the flared t-shirt
Hi Shirley, I’m sorry you’re having difficulties. I’ve checked the link and can’t find any issues. The PDF will download directly from our site which is very reliable. The pattern itself is a multi-page .PDF file so should print our like any other PDF file using US Letter or A4 paper. Please give it another go and let me know if you’re still having issues.
Love the material,and the pattern is great. Looking forward to making the top up.
This is a cute top! I plan to make few. Have a great week.
Thank you, Ann. You too!
thank you so much for the pattern, Is there a video to watch?? I have many patterns from So Sew Easy and they all have video tutorials. I am a visual learner and find it much easier this way. I”ve looked but can’t seem to find it.
Hi Debbie, we haven’t yet produced a video for this one yet. We probably will at some point soon, but hopefully you can follow the images and instructions in the post in the mean time.
Thank you so much for sharing your pattern. I have just the fabric for this. So cute.
You are welcome Anne! Enjoy!
Would love to see you create a basic t-shirt pattern for plus sizes.
I will keep it in mind, thank you Jana!
This is Avery nice too but why are there no small sizes? I wear no more than a 6 and usually a 4 fits the shoulders better. Size 34 bust and narrow shoulders makes finding patterns difficult.
Hi Irene, I hear you, we normally have requests from busty girls, who like sewing, love the control of making their own cloths and are frustrated with what the stores offer. Stay tuned for the smaller sizes.
Just the shirt I need! I’ve got a Craft Gossip post scheduled for tomorrow morning that features your free pattern: http://sewing.craftgossip.com/?p=86968 –Anne
Thanks Anne.
Do you have any suggestions for how to check for correct placement of the dart on the pattern? I can see in the top photo that the dart comes far too high on the model, right at the top of the bust when it should point to the apex. I’d like to avoid this mistake on my own fitting. How would I be sure of how much to lower the dart please? Can you tell me the measurement you used to place the dart for a 36 inch bust when drafting the pattern? Thanks.
Yes, the dart looks high, and it is a big dart it has to otherwise it would look like you are wearing a tent, we had to pin the back because she is wearing the biggest (18) size and the model is size 14/16, also her arm is higher on her hips, the dart on the size 18 is 10″ from the shoulder seam to the tip of the dart. Hope that helps! Cheers!
Susan, you can easily adjust the dart placement the Nancy Zieman way. Just draw a box/rectangle around the dart, cut out the box, and slide it down to the prefered placement, and tape. You can then fill in the space where the dart used to be, by tapeing in a piece of paper.
Lovely job on the pattern and tutorial, I can’t wait to sew this.
Thanks and have fun. Please let us know how you go.
Can I modify the pattern to eliminate the darts? I hate trying to fit darts! But it’s so pretty I may have to make an exception!
Absolutely, you can if you are familiar with flat pattern transformation.
Thanks SEW MUCH!!
Love this pattern! Thank you Mayra for the free pattern/tutorial! : )
I could see me adding a few inches to this to make this a easy dress pattern
Where can I download the instructions for this T Shirt? Thank you. Brenda
Hi Brenda, there are no separate instructions for this project at the moment. Hopefully you can follow along with the steps in the article once you’ve downloaded the PDF pattern. Please give it a try and let me know how you go.
Thank you for the pattern, it is exactly what I have been looking for. I hope I can find some appropriate fabric. Thanks again.
Thank you so much for this pattern! Very cute!
Sleeves, yes, thank you. I have “bat wings”, so I don’t care for sleeveless or the really short sleeves that is all the rage today.
Love your tutorials, they look so easy I almost believe I can do them. For someone who has never sewn a garment before what would you recommend I start with on your site? No one has ever inspired me to want to sew a garment but you, I basically only wear clothes because its the law. I’d rather quilt, embroider and applique. But I look at your clothes and how flattering they are and wow, I’m inspired. Great pictures, and since I am a very visual person, I can understand them. Thank you so much.
BTW, I love the fabric you used for this tee.
Ha, ha, ha, in that case Ila, I would start with underwear or a skirt, we have many free patterns that are easy to follow. Here is the link https://so-sew-easy.com/free-sewing-patterns/
let me know if you have any other questions!
Love the longer style, now have to find some knit fabric, Just wondering what the finished bust sizes are for the other sizes, I wear a RTW size 14 but pattern sizes are usually different.
Hi Lorna, thanks for the question. I’ve updated the post with these sizes: The pattern accommodates sizes 8, 10, 12, 14, 16, and 18 with corresponding bust sizes 36″, 38″, 40″, 42″, 44″ and 46″.
What are the bust measurements in inches for each size? Thanks!
Hi Michelle, thanks for the question. I’ve updated the post with these sizes: The pattern accommodates sizes 8, 10, 12, 14, 16, and 18 with corresponding bust sizes 36″, 38″, 40″, 42″, 44″ and 46″.
I have a full bust measurement of 47 inches. Should I do an FBA or will the stretch of the knit accomodate that. Otherwise I do have small shoulders….Thanks
Hi Betty, if you use the ITY knit that I used, it will stretch a lot. You probably don’t need to do an FBA but rather just take in the shoulders a bit. Let me know how you go.
Thanks so much for the pattern and the response !
Thank you Mayra for the pattern.
I love the material you made t-shirt out of. Beautiful
Love these kind of basic shirts!
Thank you Mayra. I have been toying these past weeks about making these tops, and here you pop up with the pattern. Would you also please consider showing us how to make easy summer shift dresses? Love your instructions and tutorials. Thankyouso much!
That’s great to hear. Please do let us know how you go with this pattern. Yes, we’ll work on some summer dresses. Stay tuned!
What is the size range on the pattern pieces? Looking forward to making this top once I know which size to trace. thank you for your time and expertise.
Hello Kate, you can download 8, 10, 12, 14, 16, 18. The size 18 as a finished garment will accommodate a 44″ bust without stretching the fabric. Hope that helps, if not let me know I am happy to help!