


Welcome to Episode 8 in the How to Sew A Skirt Sew-along series. The subject for today is: Neaten your seams and lining a skirt, part 1
If you have been following along in the Sew A Skirt series, then you have your basic skirt shape finished complete with darts and zipper. Now it's time to make it look nice on the inside too. Let's start with the seams.
Making nice neat seams
Having neat seams on the inside of your skirt fulfills two functions.
- It looks nicer
- It stops the fabric from fraying and the seams from gradually coming open
Our inside seams will be hidden by the skirt lining but that's no excuse for not finishing them nicely. We will want our seams to lie flat and not be too obvious from the outside so let's make a nice simple finish to keep them neat and prevent fraying.
In a simple lined skirt like this we can simply zig-zag or overcast along the raw seam edges. If you have an overcasting foot with your machine, this would be the top choice and you will normally have two or three overcasting stitch options – look in your manual if you aren't sure which one to use for your fabric. My machine has stitches for light weight, heavy weight and stretch fabrics.
This is what my overcast seam looks like – nice and flat and even and looks like ready to wear clothes.
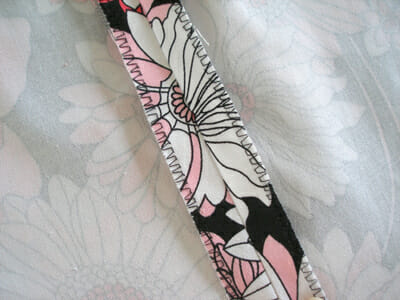
If you don't have the overcasting foot or stitch, then you can use a simple zig-zag stitch along the edge of your fabric to prevent fraying.
Press your seams afterwards for a nice flat finish.
Lining a skirt – the all-machine method
Our inside seams will be hidden by the skirt lining. So let's look at how easy it is to add a simple skirt lining.
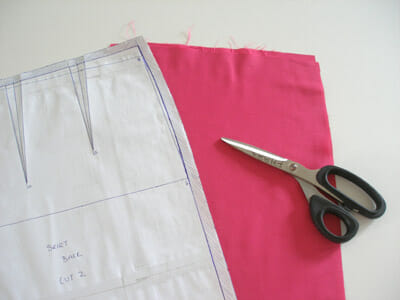
- Cut out your lining fabric using the exact same pattern pieces as you used for the main body of the skirt. However you will want your lining to be a little shorter than the skirt, so you can cut it an inch or so shorter.
- Now sew your side seams together, and neaten the inside seams like you did before. Press your seams open. You will have one long piece of fabric.
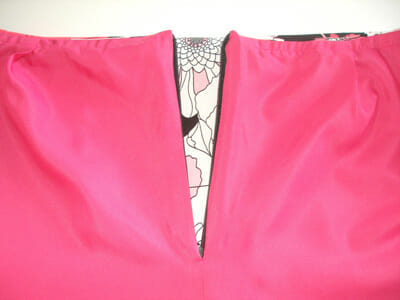
- Lay out your skirt with the right side out. Wrap the lining all the way around the skirt, with the right side of the lining facing the right side of the skirt. The seams will be visible on the outside.
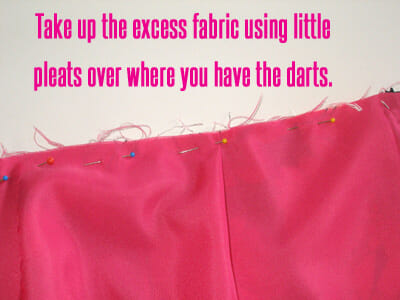
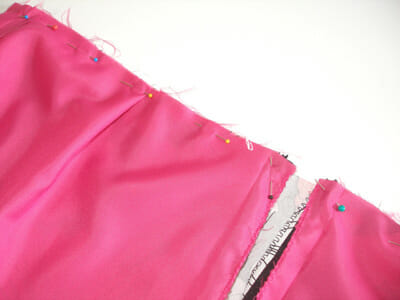
- Pin the lining to the skirt. Start at the side seams and match those first. Then pin the center front of the lining to the center front of the skirt. The lining is going to be bigger than the skirt because we didn't sew any darts.
- Use a little pleat in the fabric at the same place where the dart is in the skirt, to make the lining fit into the skirt waist between the side seams. Adjust the pleats until the fabric fits correctly.
- At the back center seam of the skirt, open out the seam allowances flat with the zipper on the top.
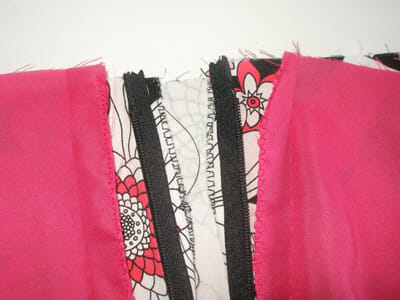
- Match the center back at the top with the lining fabric on both sides and pin in place.
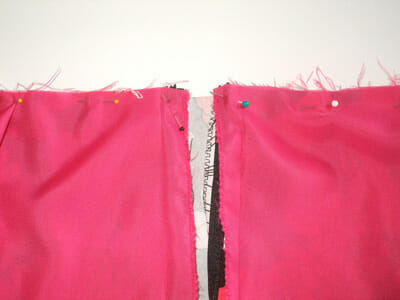
- Continue to pin all around the top of the skirt, pleating the lining fabric in the back to fit into the skirt waistband.
- If you feel now where the zip is, there is a little zipper stop at the top of each piece of tape about 5/8th of an inch from the top edge. This is where you will sew, just above these zipper stops.
- Take your fabric to the machine and sew a straight stitch all the way around the top of the skirt from one zip edge to the other, attaching the lining to the skirt at the waistband. Adjust your pleats if you need to as you sew around. Things are really starting to take shape now.
- Next, we want to make sure that lining stays in place and doesn't keep popping up over the top of the skirt, so we are going to ‘under stitch'.
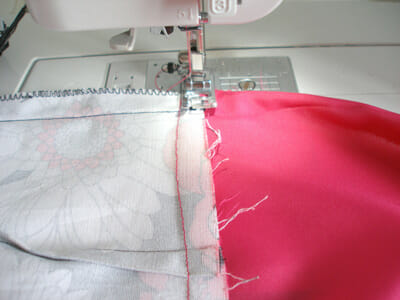
- Open out the skirt and the lining with the wrong side upwards to you can see the waist seam that you just sewed as in the photo above. Take it to the machine and sew along the seam allowance to keep the lining in place.
Great. We've completed the first stage on lining a skirt. The lining is now attached to the skirt at the waist and things are looking neat.
Our next step
A quick recap of what we have completed so far in case you have missed a step and need to review :
- Overview, tools and equipment and choosing your fabric
- Drafting your custom fit pattern, and all about ease and seam allowances
- Cutting your fabric and pattern matching
- Marking darts perfectly
- Sewing darts perfectly
- All about zipper feet
- Sewing an invisible zipper
Join me soon for the next step in our Sew A Skirt series – Skirt Lining part 2, Lining a Skirt by Machine.
If you want to know when the next post in the series is published, do sign up for the newsletter to get it right into your inbox.
Authored by: Deby at So Sew Easy
Never miss a post, and follow along with the Sew A Skirt tutorial series. I'll send all updates to your mailbox twice a week for you to keep and follow along at your own pace.
I'm really looking forward to seeing your skirt and featuring it on Sew So Easy!
I promise, no spam. Just an email once or twice a week with the new posts.


Well taught, even a beginner can follow instructions. Thankful.
When sewing the lining should you sew the dart if the pattern your using she darts?
Hi Jill, this depends on the pattern maker and if the patterns tell you to yes and the skirt is fitted a long the waist and higher hip. Normally you make a pleat because this allows ease on the lining. I would not sew the pleat if the fashion fabric is transparent and the lining can be seen or the skirt is made of a thick fabric such as felted wool. Just check, if the pleat makes a lump on the fashion fabric you need to make the dart.
Thank you! You were very helpful
I’m selling tulle skirts, and I don’t want them incredibly poofy and I want them to be comfortable. So I was wondering what type of fabric you would suggest to line it with?
HI Savannah,
I would use satin or a very soft knit.
Hi. I am very new to sewing, I have fabric for a skirt (orange and white) , but, its see-through. It knit material. I was thinking to buy some white knit for the liner. Not sure how to sew together though. please help :)))
How you would line the skirt really depends on the pattern you are using, how its made and what sort of waist band you have. You might just go for an easy option and join the two fabrics at the waist, letting the white lining just hang free. Or you could put the white and the orange together as you sew and treat it as one piece.
Which way is best for spandex material, yoga, style waistband?
It depends on your preference. You can make a fold over yoga style waistband, or a simple casing with elastic. The yoga waistband is thicker of course so some prefer to not add any extra there and use a slimline casing. Either works depending on the fabric, the stretch in it and the style of the skirt.
Thank you so much for this tutorial!
Can you tell me when doing the lining, do you sew all the raw edges together so it’s not one long piece? So need some help on this one. Thanks so much
Newbie lol
When you start off inserting the lining you should have one long piece made up for the front in the center and then the back piece on either side. Don’t sew up the center back seam until later. There are two lining tutorials split into two posts. The first one gets you started and then the second one shows how to finish around the zip and close that final seam so everything looks neat and is all sewn by machine. Let me know if you are still unsure. Deb
You are doing a great job with your series. You make sewing really easy! Thanks so much for sharing this with me at Bewitch Me & Titi! Hope to have you back tomorrow with more awesome shares! Hope you are having a lovely day!!!
Hugs
Cami @ TitiCrafty by Camila
Amazing idea and a beautiful choice of lining, we love the creativity!
This is awesome! I need to make some skirts and it will be nice to know how to line them!