


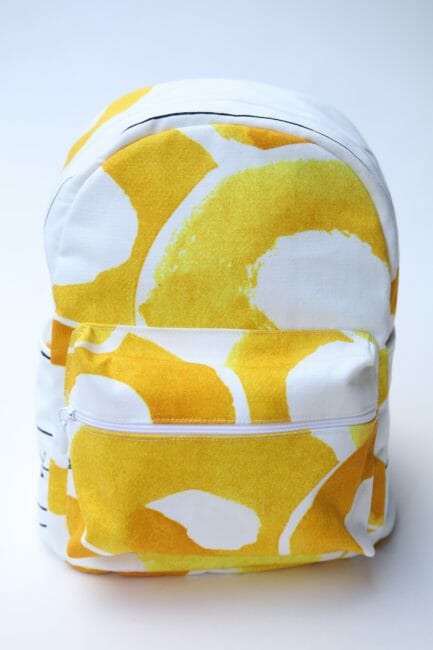
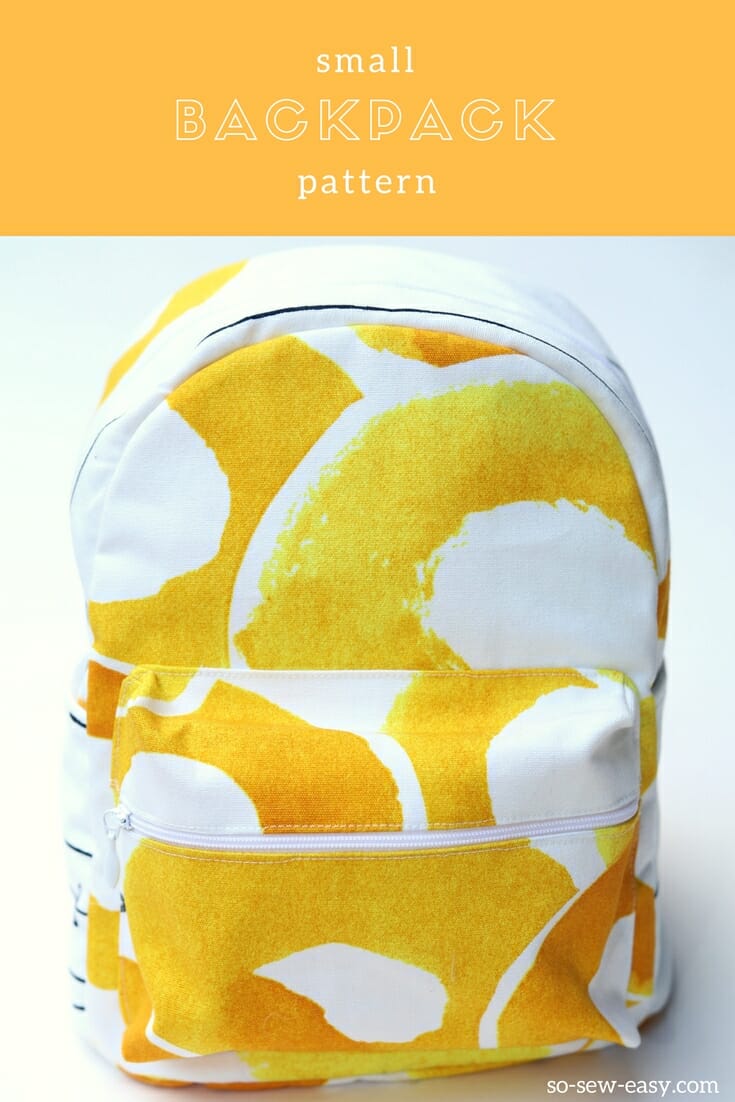
If you have been watching the size and style of bags lately, you've probably noticed all those impossibly cute little backpacks everyone is carrying. Along those lines, I've made this small backpack pattern to be small (and cute) but still big enough to be practical.
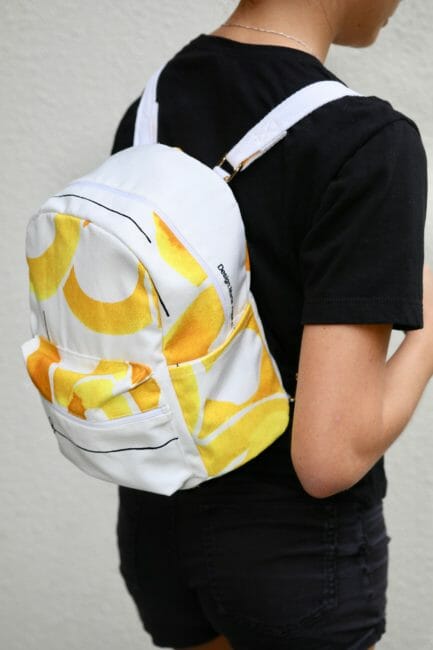
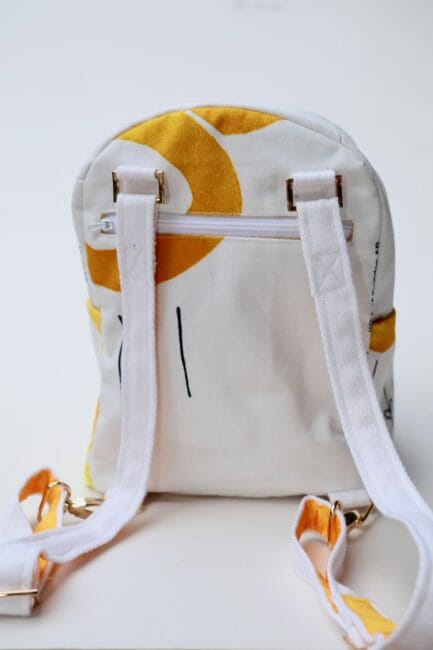
You can also use this small backpack as a cross-over or cross body bag as well. I made that way because I like to have options and truth-be-told, I am a bit paranoid with a backpack. I guess having grown up in Panama where, as the saying goes, “pickpockets can remove your socks without even taking off your shoes” I have had my share of missing money and wallets. This is why I've added a pocket in the back with a zipper. There's an internal pocket, also with a zipper, and even the outside pocket has a zipper. So if you can remember where you put your wallet, the chances of keeping it are high..
There's also a possibility of adding one more pocket to stash your mobile phone, but I will leave that up to you. I will show you how to add it you want it. Please note, however, it will not be included in the pattern, so this is probably for the intermediate to advanced sewists. The rest of the project is suitable for beginners.
This is not an easy-to-make backpack because it involve a few steps, so I have decided to offer this pattern and project as a kind of sew along. The first part will give you a general idea on how to make the backpack and the inside components. You'll find this below.
If you want to find all the parts and instructions to make this free small backpack project, the easiest way is to navigate to this page where you'll find links to all three parts and the video tutorial.
Part two will show you how to make the straps and attach them to the small backpack, and part three will show you how to assemble and finish the bag. Combine this with the our complete video tutorial, and you should have all you need to make this mini backpack pattern.
This is an advanced project but if you love to be challenged particularly if you have just started out making bags you will find rewarding to make. It will make a great accessory for your wardrobe or a fantastic gift for a friend or a loved one. I made two for this tutorial and I'm keeping one and giving the other to my teenage daughter. She loves it.
Video Tutorial
Materials:
- 1/2 yard of canvas, oilcloth, thick nylon fabric.
- 1/2 yard fusible interfacing
- 1/2 yard of lining
- 2″ cotton tape (66″ in total)
- 1″ ribbon (66″ in total)
- Thread to match
- One (1) 18″ Nylon zipper
- One (1) 10″ nylon zipper
- One (1) 10″ nylon zipper (inner pocket optional)
- Jeans needle or leather needle
- Four (4) D Rings
- Two (2) Lobsters Claw
- Two (2) 1″ Rectangular buckles for tensioning the straps

Tools:
- Zipper foot
- Scissors or a rotary cutter
- Walking foot (optional)
Small Backpack Pattern Download:
You can download the pattern for this Small Backpack from our account at Payhip.
For help downloading and printing PDF patterns, please CLICK HERE.
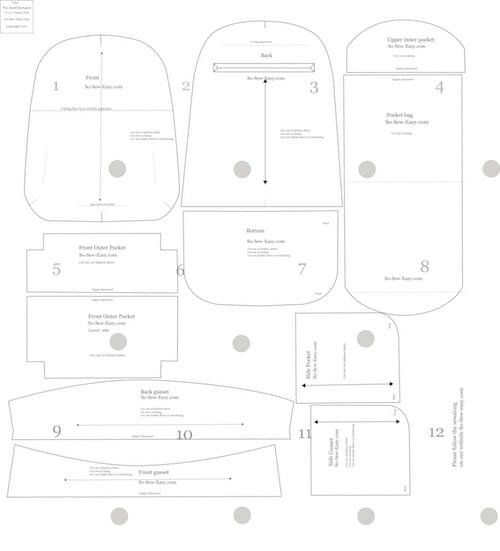
Pattern layout:
This is just meant to show you what the pattern will look like once it is printed and assembled.
Part One [of the Three Part Series]
In this part of the sew along, we're going to be printing the pattern, assembling the materials, and sewing the inside pocket as well as the gusset and the main zipper.
Cut all pattern pieces following the pattern.
A note on fusible interfacing: The use of fusible interfacing will depend on the fabric you choose to work with. Canvas and think upholstery fabric do not need it. Cotton quilting will need both in the outside fabric and it the lining.
I am using 100% cotton fabric from the upholstery section at IKEA and have opted to fuse a medium weight interfacing to both outside and lining fabrics. In hindsight, I wish I hadn't since it made it impossible to sew a cotton tape handle (to hand carry the bag) on the top of the backpack. I could have done it, had I used my industrial machine to finish the bag. However, not everyone has an industrial machine at home. Before placing the handle or using thick upholstery fabric make sure your machine can handle many layers of fabric.
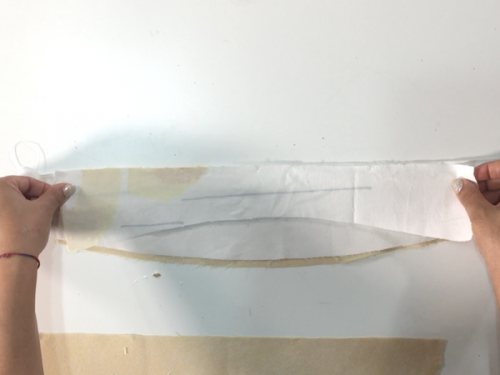
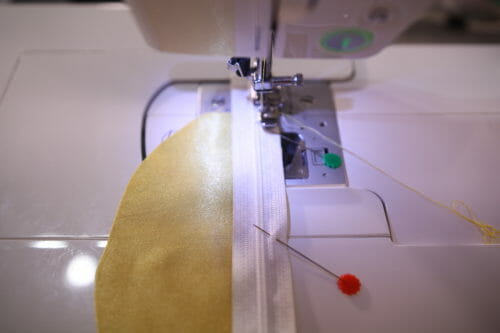
Step One: Attaching the outer zipper
Place the right side of the fashion fabric up.

Place the zipper right side down.
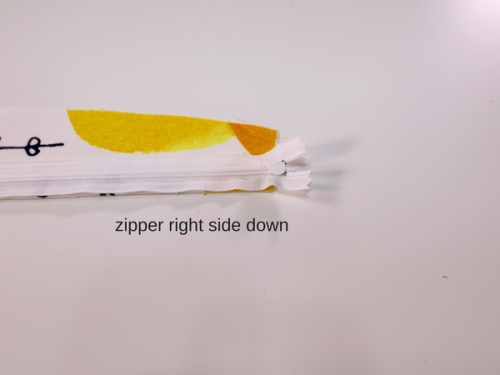
Place the lining wrong side up on top of the zipper.
This will make a sandwich with the fashion fabric.
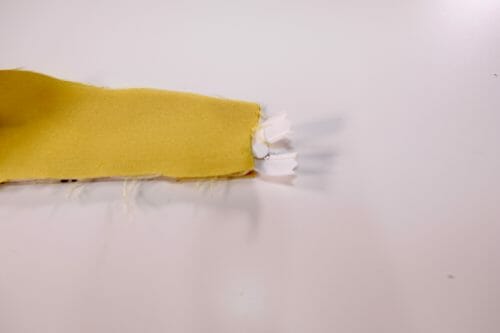
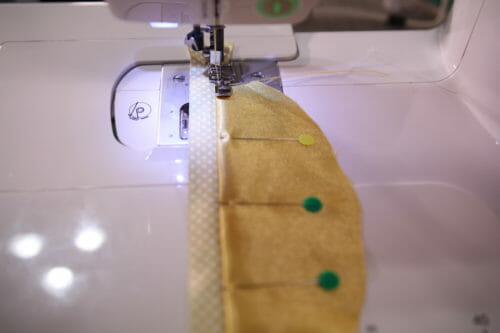
Use the zipper foot and sew at 3/8″. Once you have sewn the zipper down, open to turn to the work to the right side and iron. (We show this in the video tutorial, as this might be a bit confusing for the beginners in the group.)
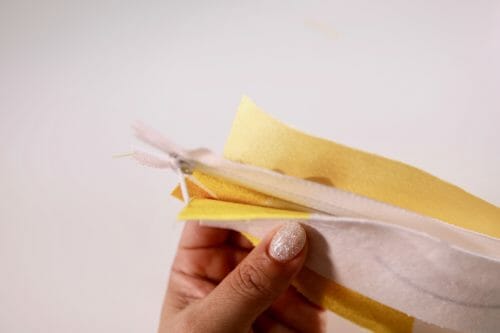
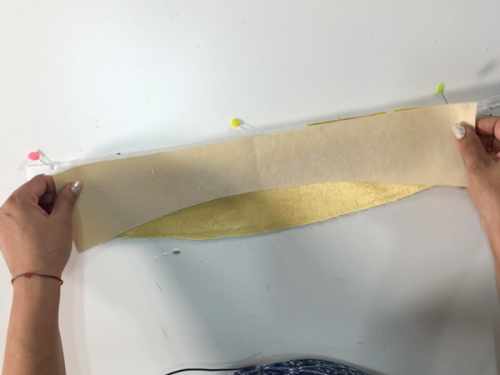
We will repeat the same procedure, but this time on the other side of the zipper. Lay the fabric right up and place the other side of the gusset wrong side up aligning the sides. Pin together and turn to the lining side.
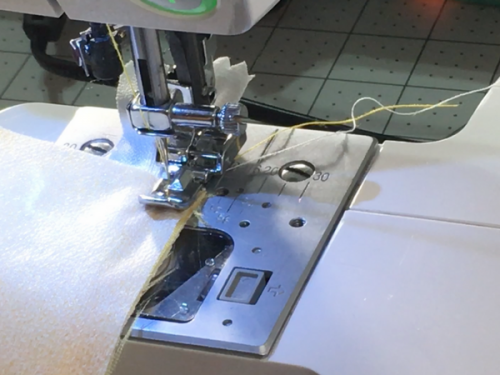
Pin the lining and sew at 3/8″. Iron once again and topstitch.
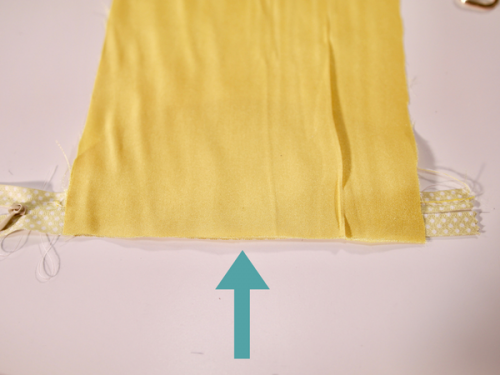
Sew 1/8″ from the edge using the zipper foot.
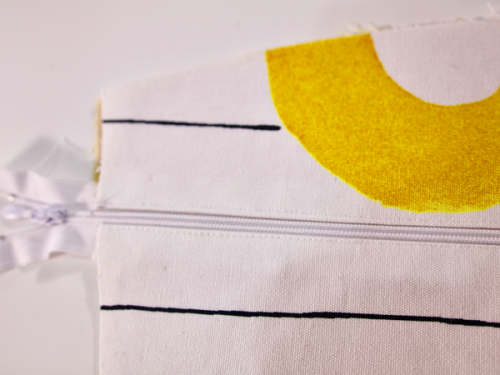
Pin the lining and fashion fabric and sew at 3/8″.
Top stitch 1/8″ from the seam and trim the seam allowance. You can trim the zipper to the edge of the gusset at this point as well.
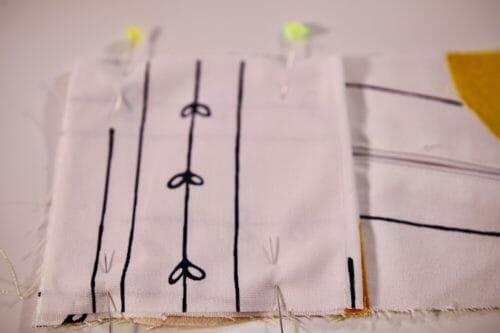
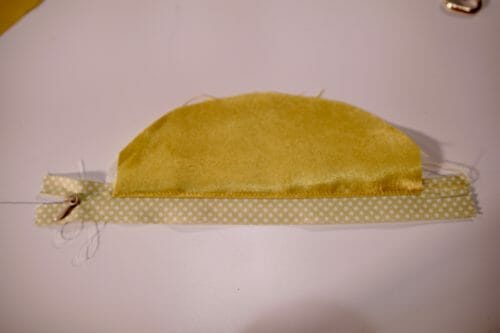
Step Two: Adding the lateral small pockets
Following the pattern, fold the top edge 1/2″ and iron. Use the crease to fold the edge 1/4″ in so it does not show.
Pin the pocket to the bottom of the gusset.
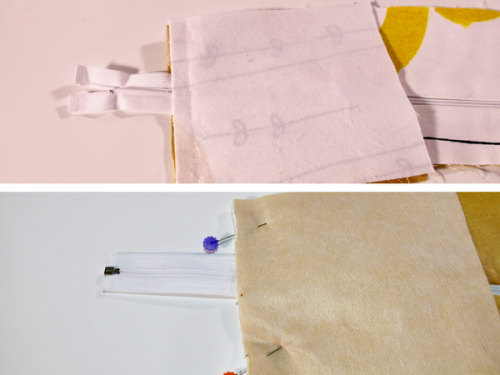
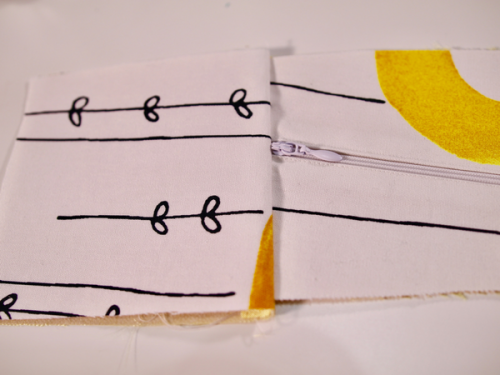
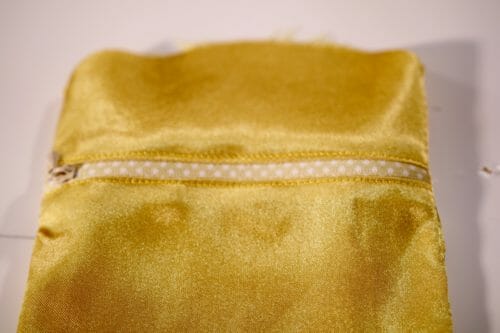
Step Three: Making the small inner pocket
I have chosen to use the lining to make this little pocket. This pocket is small enough for a small wallet but you can adapt it to a bigger size if you wish.
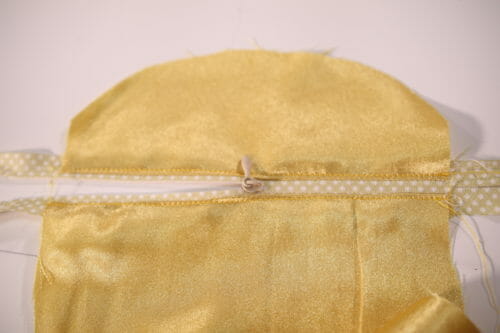
On the wrong side of the fabric, pin the zipper right side down and sew using your zipper foot.
Turn the fabric to the right side and topstitch the zipper at 1/8″.
Place your zipper horizontally with the piece you just sewed up.
Place the other part of the pocket right side down on the lower side of the zipper.
Sew the zipper using the zipper foot turn and topstitch at 1/8″.
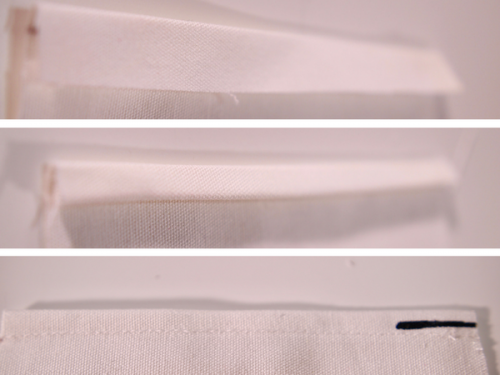
Open the zipper half way.
Sew, zigzag and trim both sides but not the top.
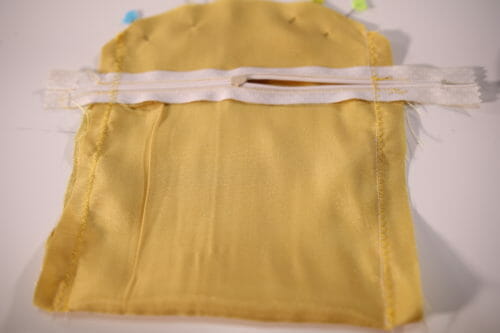
Iron your work.
Pin the pocket to the back lining of the small backpack.

As I have mentioned above, there is no pattern for the internal pocket that is big enough for your phone. However, this is very easy to add. Depending on your phone size.
Trace the bottom part of the front pattern side, add 1/2″ for seam allowance on the top fold and stitch as you did on the lateral small pockets.
End Of Part One Of This Mini Backpack Project
And you're done with this part of the project. I really hope you enjoyed this project so far. As a further refinement of this design, I am going to make one in leather which should be fantastic. When I am done will share it with you on Pinterest.

Access All Parts Of The Small Backpack Pattern
All three parts with a video tutorial are out! Click the link here or the panel below to find all three tutorials.


Love this! This may have to be my summer long project.. I am not the most advanced sewer!
Hi Maggie, there is a video with the tutorial. Enjoy!
I’m very unhappy with this pattern & instructions. I bought all the supplies, cut everything out to find the lining pieces do not match with the main fabric. The lining should have been cut out with wrong side of fabric up. Or did I miss something in the instructions. Now do I go out & buy another piece of lining fabric or just patch this up? I’ve already spent $50. This is the third correction I’ve found in this project. 🙁
Hi Andrea I am afraid i do not understand. How can the lining not match when it is supposed to be cut the same size as the main fabric using the same pattern piece? what do you mean on the third correction? What other mistakes have you found on the instructions. Let me know so I can improve the instructions. have you seen the video for this tutorial?
Where do you apply the interfacing?
On the main fabric, I used a very light one for the lining as well. If you use marine grade canvas, vinyl or 1.2 mm leather there is no need of interfacing.
Do not see where the interfacing is applied. Do you just fuse it to the lining pieces?
Hi Lori, the interfacing like any other interfacing is fused to the main fabric.
Thanks so much for this pattern. I really have troubles with the pictures. The fabric is to light I think. It’s right that, the side Gusset are more round in corner, than yours pictures shows? Thanks again for a lovely pattern
HI Janni, I did made 2 patterns and shared the easier one with you. The 2 rounded corners makes it easier to match the bottom as long as you keep with a consistent seam allowance and sew to the notch in the pattern.
Love this bag and want to make it, but I am confused. The very first piece that you put a zipper on…what is the piece and how long is the zipper? Have you done the video you spoke of yet?
Hi, the video should be out later today. Hopefully that will answer your question, otherwise please to let me know. Happy sewing!
Hi, correction, it will be out Wednesday this week. It’s about an hour long with lots of detail so it is taking a long time to edit.
Thank you for all you do and give us sewists. I’m excited to hone my ‘bag skills’.
You are most welcome Murna!
HI. II posted a question which seems to have disappeared from here. My question was should there be 2 side gussets rather than the one shown on the pattern pieces. THanks.
Oh I wish that I had this pattern before we did our trip to Costa Rica! It is exactly what I needed. I will be making this before I take any more trips. Mucho Gracias!
De nada señorita! A sido un placer!
Please could you tell me if there is a gusset for each side of the bag? The pattern says to only cut one side gusset, but I’m guessing I need to cut another one, but the other way round?
Hi Louise, yes there most be a mistake on the pattern. Cut 2 and thanks for pointing that out.
Thank you Mayra.
me encanta. Gracias
De nada, que distrutes!
Saludos,
Mayra
where might I find the tutorial for assembling the bag?? I got part one with a lot of guess work now can’t find any more instruction on the gussets etc. very poor pictures by the way, and I’m not new to this…
Thank you for the pattern. Great little bag. I’ve sewed the gussets to the main zip. However, I’m struggling n the next step. There’s only one side gusset? Is that right? Many thanks
Looks great! Please could you tell me how much cotton tape and ribbon I will need?
66″ of cotton tape and ribbon.
Do you have a picture of what the patterns pieces look like after taping together. I like to make sure I have the pattern put together correctly before I cut fabric
Hi Connie, I have added an image showing the pattern layout just below the pattern download box. Hope that helps and happy sewing!
Thank you for the pattern. I have everything cut out and interfaced ready to go. When will the video be ready as i’am having problems with the written instuctions.
I love this pattern and this will be my first bag. i’m excited to get started.
this is perfect. Thank you for the pattern.
Thank you SO much for this free pattern! We are taking a trip next month and this will be perfect!
Take a picture and share it! Love to see how it came out!
I thought part 2 was coming out today. I cannot find it. Can you please post a link or something? It seems something is missing in the first part. Shouldn’t there be two side gussets? (One for each side)
HI Dee, I fell down with food poisoning, I am never sick so it hit me hard. Do my best to publish in a few hours. Kind Regards,
Mayra
Did you line this with satin? Gorgeous!
Yes I did 🙂
Can’t wait to make this! Thank you for the pattern and tutorial!
You are welcome Kathleen
I’ve always loved backpacks esp when traveling but i usually bump into people so i’m looking forward to having this as a cross body. can’t wait for those instructions!
They will be out soon 🙂
So cute! Thanks for the free pattern!!!! Definitely adding to my “to make” list. Appreciate the tutorial too.
You are welcome Dawn!
Love this. Thanks so much for all your patterns.
Love this pattern! Best Valentines ever! Thank you for sharing!
after the SAL will there be a written patter to store away with my pattern for later. This looks like something I will be making a lot of.
Hi Dolores, the pattern is already available.
Thanks for the pattern! I’m a sucker for a backpack. LOL! I’ve made two and I enjoy the challenge. Can’t wait to get started!
I think you will be able to make this one in no time. Did you have a drop lining?
What a great project. What is a “cross over”? I know what a cross body bag is but have never heard of a cross over.
I think I got lost in translation, I mean you can make the 2 straps join and use it as a cross body bag when you are in a crowded space. I will add a picture at the end of the sewalong.
this is really cute but i would like to be able to have it easy to bring around to the front of you to access your things easier instead of taking it on and off
ohhhh my I sooo need this cute back pack for myself, I have back problems and my purse just keeps getting heavier and for no reasons.
So with this back pack I will feel so much better and my back will thank me.
THANK YOU: perfect for my grand-daughter!
You are welcome Marty, I think she will love it.
so excited to try this pattern but… the download from craftsy will only print out the first 4 pages and not the pattern pieces. is there something i am doing wrong?
Not sure, I notice it happens when they have a lot of traffic, you need to try latter.
I am such a fan. 🙂 This bag is adorable. What are the finished dimensions?
Hi AJ, it is 11″ x 8″ x 4″. Small but you can still carry a few things inside.
Gat small back pack! I can’t wait to make this bag! Thank you for sharing this pattern with us!
Thank you for this wonderful pattern. Can’t wait to start sewing this.
Oh, wonderful!!
I’ve been planning to sew small backpacks for the younger nieces and nephews, but figured I’d have to re-size an existing pattern. You just made life MUCH easier! Thank you!
Are there instructions with pattern for the crossbody option?
Hi Patti, that will be covered in part 2 on Tuesday when we make the straps. Stay tuned and happy sewing!
Love this bag Myra! You could easily have sold this pattern for money, but thanks SO MUCH for making it a free pattern! ? Happy Valentines Day!
Hi Pamela, thanks for the feedback and support. Glad you liked it. Happy Valentines Day to you too!
Mayra,
I am so enamored by your wonderful patterns and your ability to create from scratch. I have always wanted to learn how to make my own patterns that actually fit ME. What is your sewing background (teacher, etc.)? I am a self-taught sewer and have been sewing for 45 years and still have never grasped the idea of getting a good fit. I can follow a pattern exactly and do beautiful work but my attempt at arriving at a proper fit for myself or someone else is frustrating. I have read and studied books and even tried to make muslin patterns first but end up giving the finished product away or throwing it out. I’ve had few successes and so turned to doing projects that don’t require fitting expertise. Hence quilting and home projects.
I would like to get back into making clothing for myself for self-expression but keep hitting a brick wall. Do you have any tips?
Donna
Hi Donna, I hear you, I think this is the number one frustration and the reason many give up sewing for themselves. I will write an article about it and how to overcome the brick wall and my answer will surprise you. No I am not a teacher, I am in fact perhaps the absent minded teacher. Not very good at teaching at all, I try my hardest to see it through the beginner’s eyes, not easy because I need to slow down and because English is my second language. I did studied fashion design in the USA and I have had some tough bosses. I have a pad and pencil by my bedside and in my handbag always, ideas really come from the people around me, magazines, movies, stories, dreams, nature, music and travel. I never know what will inspire me and I need to be ready to capture the moment. Watching people is the best source of ideas and watching other artist no matter what the medium is the best way to stay inspired. I will share a design process and some resources and some tips to make clothes that fit you. Kind Regards, Mayra
This is soooo adorable! I will add it to my ridiculously long list of things to make! Thank you sew much!
Great tutorial. Fabric from swedish furniture store?
Great guess! Yup, indeed it is. I was going to highlight that in the comments but ran out of time.