


Today, I'm sharing an easy phone wallet organizer pattern and tutorial that you can make in about an hour. The design uses two standard fat quarters so you probably have the materials in your fabric stash already. This is a great project for both beginners as well as experienced sewists.
Phones are so expensive these days and we are trying to do whatever we can to prevent them from getting stolen, scratched, and cracked. It still seems to happen so often though so here's my attempt to keep my phone and my sunglasses separate from the rest of the things in my bag or what my daughter refers to as “my black hole”.
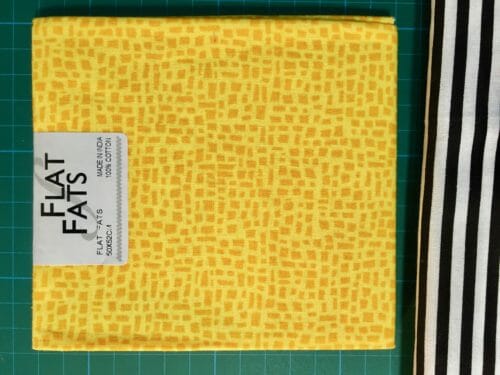
The trick with this phone wallet organizer is to use two very contrasting fabrics. The pattern is simple and easy to do, so to make the most of it to use a fabric combination with a punch. I'm using two fat quarters by the same company. I suggest you use the same brand to maintain a consistent quality of the print.
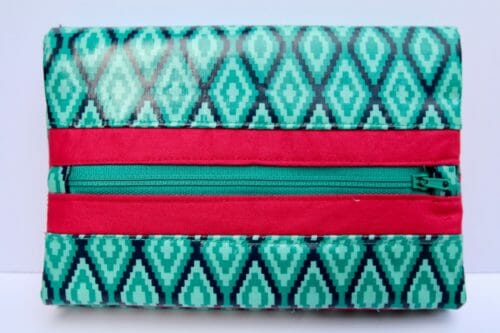
You'll note I'm also doing one in the same vinyl we used in the popular Mini Backpack Coin Purse project. That's a terrific fabric for this project as well and I used a bright red contrasting fabric which really makes the pattern on the vinyl stand out.

Materials:
- Two fat quarters of contrasting colors
- Thread to match
- One sew-in magnet or velcro
- fusible interfacing or stabilizer medium weight
- Two X 7″ zipper
Tools
- Zipper foot
- Loop Turner
Fabric Recommendations
Pattern Layout

Pattern Download
You can download the pattern for this Phone Wallet Organizer from our account at Payhip.
For help downloading and printing PDF patterns, please CLICK HERE.
How to print the phone wallet organizer pattern
As with all of our patterns, you will need Adobe Reader to print this pattern which is free to download from Adobe. Print on Landscape Mode and Actual Size.
Full Video Tutorial
How to cut the fabric
Rectangle A: Fashion Fabric (outside fabric)
Rectangle B: Contrasting Fabric
Rectangle C: Contrasting Fabric
Rectangle D: Contrasting Fabric
Rectangle F: Fashion Fabric (outside fabric)
Rectangle E: Fashion Fabric (outside fabric)
How to make your phone wallet organizer
Fuse all pieces first.
There are two large rectangles and four smaller rectangles in the pattern. The smallest of the small rectangles are for the zipper tab.
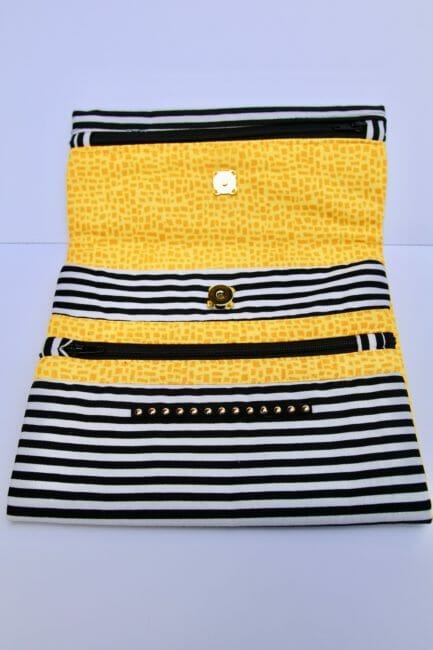
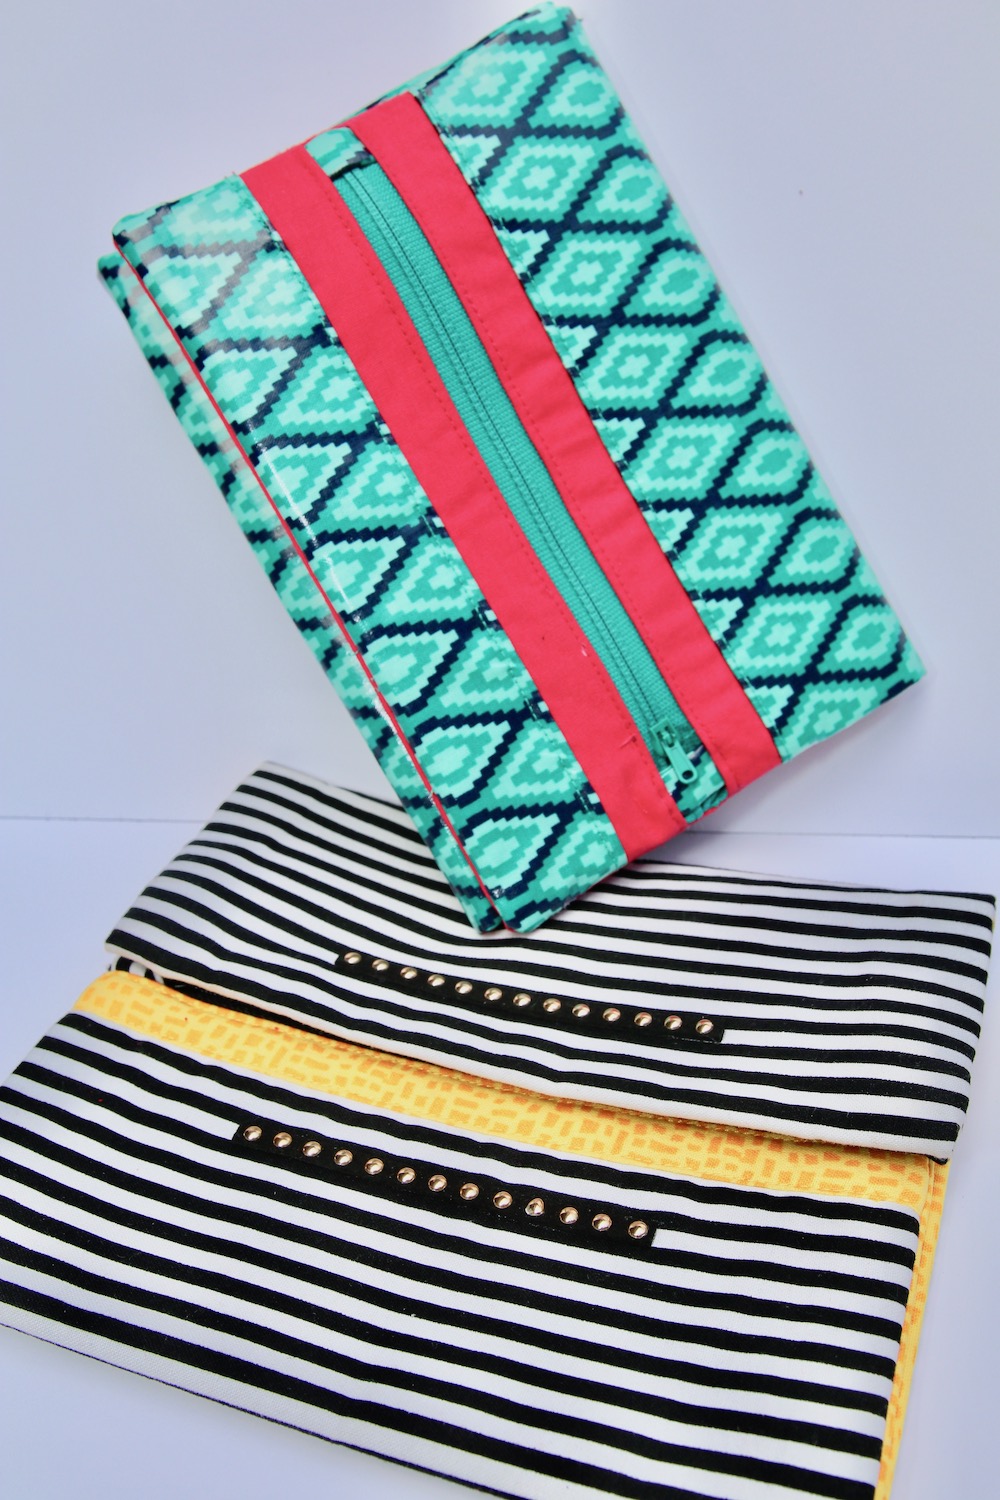
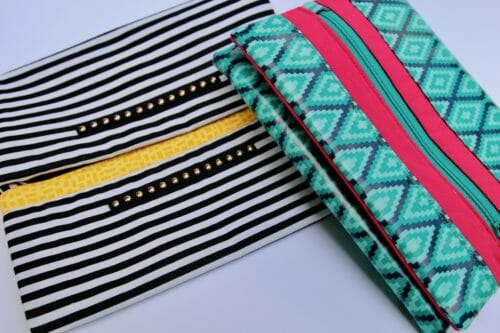
The placement of the magnet/velcro will give you the ability to make the wallet bigger or smaller. Both phone wallet organizers below are made with the same pattern but the green one folds completely in thirds and appears smaller, which the magnets on the black/white/yellow one are placed further toward the ends of the bag and it folds less tightly.
This phone wallet organizer project is for beginners who have made at least one bag and a zipper pouch before.
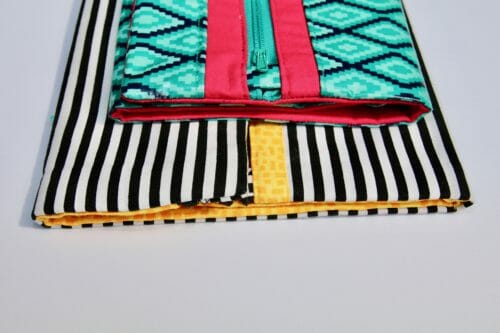
The green one is 7.25″ X 5.25″ when folded and the black/white/yellow one folds to 7.25″ X 6.75″.

The zippers are on opposite sides and so are the magnets.
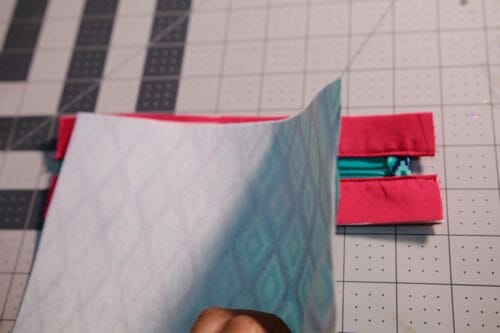
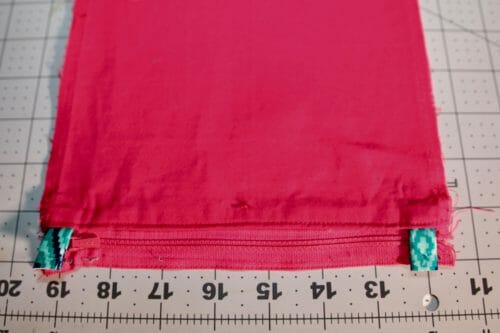
Step One: Make the zipper tabs
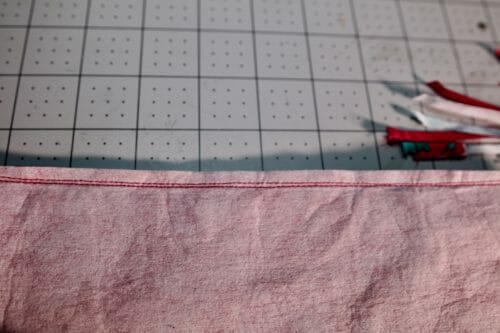
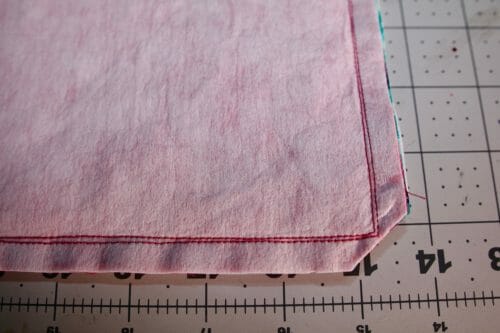
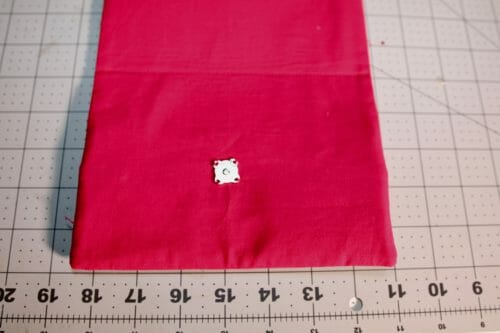
You'll start with the small rectangle labeled F. Sew the rectangle right sides (print sides together) together at 1/2″, reduce the seam allowance to 1/8″ and turn right side out using a loop turner.
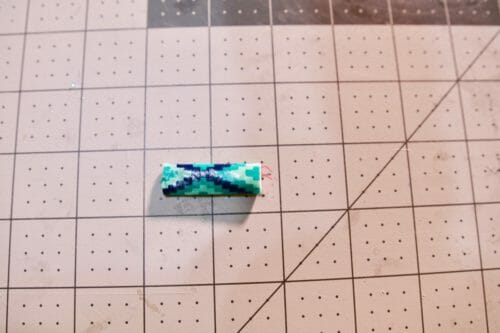
Cut the rectangle into four pieces. Below is one of the four pieces you will need.
Step Two: Making the outside
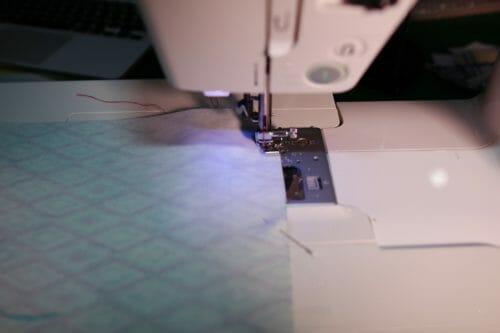
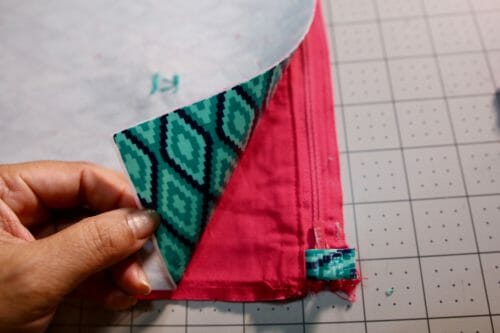
We will start by sewing the zipper to the rectangles. You will need rectangles A, C, and D.
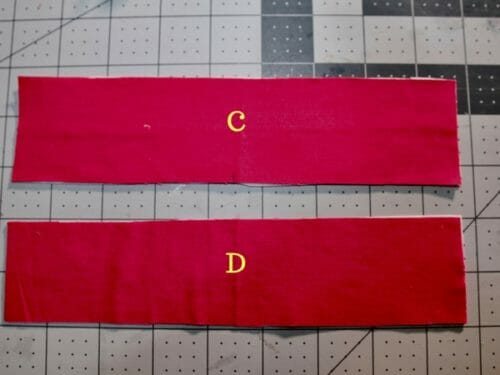

Fold in half C and D wrong sides together. Iron. Place zipper number one right side up. Pin the C and D on the top and bottom of the zipper and both zipper tabs leaving 1/2″. This is the same way you will sew the other zipper.
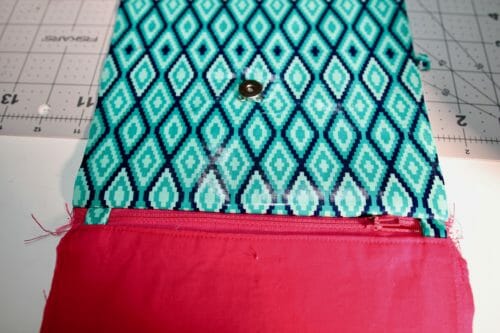
Pin rectangle A print side down and sew at 3/8″.
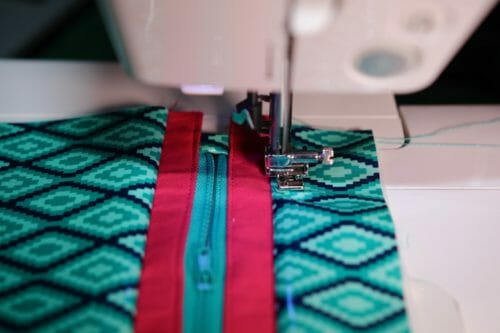
Place rectangle A print side down and pin.Sew at 3/8″.Add piece E on the other side of the zipper. Sew at 3/8″. Turn and topstitch at 1/8″ on both sides. Put this aside, before we can continue we need to attach the second zipper to the other rectangle on the step below.
Step Three: Add the inside and the second zipper
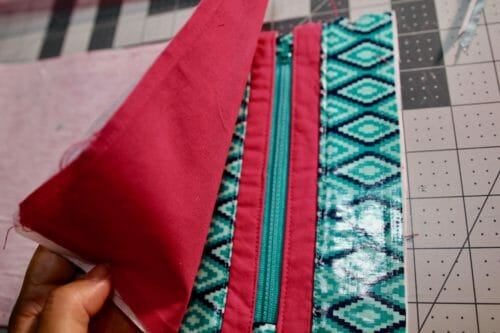
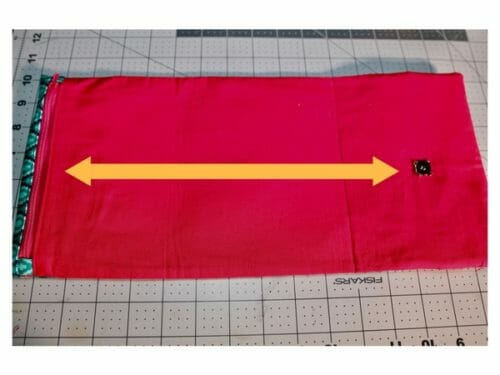
We are going to work on the bigger rectangle marked B. Fold one of the smaller sides 3.8″. A rectangle has two longer sides and two short sides. Pin zipper number two to rectangle B on the 3/8″ fold. Place the zipper tabs on the sides. Sew the zippers and tabs to the rectangle B. Sew rectangle B to the zipper. This is what you should have by now. Sew one of the magnets sides to rectangle A. Follow the pattern. Print sides together. The other zipper should be on the oposite side of the rectangle.

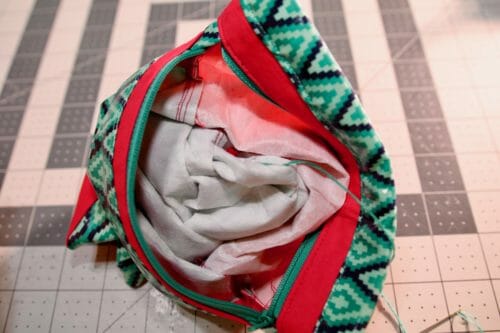
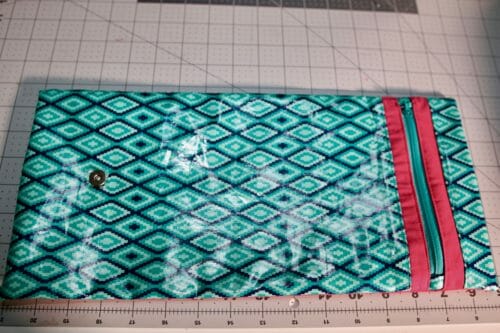

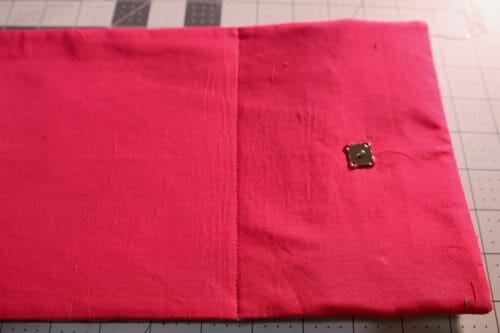
Leave one of the zippers open half way to be able to turn the wallet print side out. Sew at 3/8″. Do it twice to make the wallet stronger.Cut the seam allowance by half. Cut the corners off. Turn the wallet print side out. Open the zipper, seen above and sew the other side of the magnet.Sew a straight stitch 5″ from the edge.This stitching makes the wallet have one large pocket for your sunglasses and one smaller for your phone. This phone wallet organizer is done. If you want a different take on this pattern change the position of the magnets as I did in the yellow and striped one.
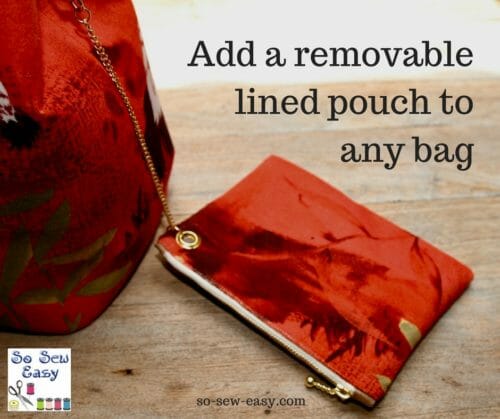
If you're interested in lining your phone wallet organizer, you can follow this tutorial on how to add a removable lined pouch to any bag and follow the same technique.
I think there is potential for improving this design. Let me have your take on this pattern in the comments below. As always, please feel free to share some pics of your work. Until next time!


thank you so much for these tutorials and patterns. It helps me expand my skills.
OMG like what up you guys! Remi her from Halifax! Make me famous…
ps liked the pouch!
Love the phone wallet been trying to figure it out on my own but have not succeeded so I can’t wait to try it! Thanks for all the great patterns!
Re: Easy Phone Wallet Organizer
Pattern says 2.25 x 8.25 by measures 2-1/8 x 8.25.
Which is correct?
I’m very grateful for your patterns and tutorials. Thank you.
I am so looking forward to seeing this pattern. Thank you much for offsite free.
Great easy project!!! Thank you for sharing. This project is pandemic friendly 🙂
Thanks for the pattern. I am already planning how to add some credit card slots to the central panel inside. Great video and instructions. 🙂
Is it advisable to use a magnetic clasp so close to a mobile phone?
I am always cautious with these things as I do not want to wipe my phone memory.
Perfect! ???? so-sew-easy is the best! Thankyou for your effort and your time! ????
Thank you so much for all your generosity! Love your patterns and your tutorials are so clear and easy to sew!
Adorable ???? & well explained.
Thanks ????
Step 3 says fold 3.8” then mention sewing 3/8”. I assume 3.8” should be 3/8”.
YES, it is I will make that more clear.
Thank you!
My pleasure!
hi! it’s a great idea! Can I sell products that I sew with your patterns?
I watched the Video. Thank you for posting. I’m a visual learner as written instructions are not easy for me to follow, so the video works for me.
It is my pleasure!
I am confused, I must have miscut because my main fabric is longer than the lining. I cut one 8.25″ x 14″ and the other 8.25″ x 15.25″. How do I finish this, do I have to
cut off some of the one. Are the zippers to be down about 3″. I have watched the video over 3 times. Please help.
[…] her winning visit, our winner identified the Phone Wallet Organizer as her […]
I’d love to see a photo of the open wallet with the phone in it. There’s not one on this post. I’ll try watching the video and open you show it there.
I agree with Joanne Carpenter……….show us a photo of the open wallet with the phone in place.
What you are looking for is already on the video. This is for a large Iphone.
Since I’ve been sewing for over 60 yrs ( started at age 5) I can’t say whether this pattern is difficult or not.
I think I will be sewing another zip into the one side at about 6 inches from the stitching line where the pocket id made for the phone. Then I;ll sew another line midway between the first stitching line and the opposite end of the wallet.
This will create a wallet with 3 pockets. I will use one for credit card, one for cash and the other for phone. I may put a little ring atone of the stitching lines so I can attach a wristlet type handle.
this will make a great dinner or lunch out “bag”. Thanks Mayra!!
Marlette, I think my pattern is simple and you are making changes that only someone with experience would be able to make, I am looking forward to your version. You have no idea how happy I am when people take what I make and run with their creativity. This is the point of this blog, to inspire you 🙂 A big hug from the cold cloudy Southern Hemisphere.
You make it look so easy, can’t wait to try.
I am not sure which pattern pieces need to be cut out with which fabrics. It doesn’t say, the first instruction is to fuse all pieces together. Can you tell us what pieces need to cut out with which fabrics and how many we need of each? Thanks!
Hi Katie, the cutting instructions are under the video, let me know if you have any other question.
Thank you for the free cell phone and sunglasses pattern. Can’t wait to try this one out, but have to finish a few projects first. I love bags and organizing bags. I just think it’s going to take more that a bag to get me organized. Love them though. Love you guys ideas. Keep it up.
Thank you, Pat, good luck with your projects! Hope you finish on time for Christmas!
Hi, just watched video – no instructions on how to attach the velco instead of magnetic closures. Thanks!
No, I did not show you how to attach it because I was not using it, the velcro was just a suggestion. Velcro comes with instructions on how to attach it, but I will be happy to make a video about it.
I love it too!
Reviews indicate the pattern may not be so easy. I see a video was to be available soon (post from you 10/04/17). Being more of a beginner, I need all the help I can get… Any date to start looking for it? The project looks like what I’ve been looking for my new plus phone. I look forward to getting started, but don’t want to get too frustrated…
Thank you in advance for making the video.
Hi Carol finally had the chance to post the video. let me know if you need any thing else.
Must be terribly dense. I can only see one green zipper and 1 red zipper. Where and how do you attach the second green zipper??? It looks, in step 3, like the outside piece is being attached to the first zipper on top of the C piece.
Hi Sheril, I’ll be posting an instructional video on this in the next day or so. Please stay tuned.
That’s what I don’t understand Sheril.
I am eagerly awaiting the video so that I can get this project completed but it’s a long time coming.
The video is out, hope you had a chance to watch it. If you have any further questions do not hesitate to drop me a line. Cheers!
Confused attaching Rectangle B. I sewed the turned edge to the zipper#2. Then it says Sew Rectangle B to the zipper. Won’t that result in a circle? The picture that follows appears to be Rectangle A which makes sense to me. Am I missing something?
Hi Mussy, I’ll have a video out in the next couple days to help illustrate this. Please stay tuned.
I have completed step 3 and have 2 zippered pouches. I have no idea how to sew them together as the tutorial becomes confusing. Any help would be appreciated.
Any chance of a video on how to make this lovely project please?
Hi Shezcal, the video is almost done. It takes me a while to do all the editing unfortunately. Will post in the next day or so though. Pls stay tuned and happy sewing!
It’s done! All within an afternoon into the evening.
Friend gave me the fabric and I just love it.
Fantastic Anne! I love it. Beautiful fabric choice.
Anne, that looks really great! Thanks for sharing!
Trying to wrap my head around the lining.
At some point in e.g. ( with only one zip) the lining and body are sewn somewhat seperatly, then turned inside out. Have done that.
But this has 2 zips….how do i d o that???
TIA for response(s).?
Hi, Anne, there are two zippers in the outside (shown in gree) and one in the inside (red) shown in the pattern as rectangle A and B. You have skipped step three entirely.
Myra, you say two zippers in the outside and one in the insider, that makes 3 zippers….very confusing.
Hi, Dab, there are only two zippers, check the list of materials, there are only two pockets.
Thanks Mayra. Not sure if you saw my post at the top but I am stuck with two zipped pouches and not sure what to do as the tutorial is a bit confusing. I would like to finish the project. Can you explain please?
Hi, I’ve almost finished editing the instructional video that will hopefully address any issues. Please give me another day or so. Kind regards, Mayra
This project looked really promising as something I could make for my husband (in browns and blacks maybe) for Christmas. Unfortunately I really am a beginner sewer and can’t even work out step one.
Sew it along the length of the long side or the short side? What is reduce the seam mean do I have to trim stuff of after sewing? Then I looked at step two and couldn’t work out where you had the zip so gave up reading any further. 🙁
I guess I’ll have to find something else to give him.
Hi, The video is out, perhaps you have had a chance to see it.
Forging ahead!!! Is there fusable interfacing on fabric?
Yes, all pieces have fusible interfacing, I have placed a link on the materials list to show you the one I used.
I made wondering if it safe to have magnets near my phone? Does anyone know? I would have thought keep your phone away from magnets.
I heard the same thing. I made purses with magnetic closure due to majority of requests. When I personally used one with my iPhone, I was constantly resetting it and having trouble with it. When I returned to zippers and buttons, the troubles disappeared.
I take that as my answer to the question about close proximity of magnets. Hope this helps.
This looks like it will be big enough for my new over sized phone! I just bought it and have bee looking for something like this online. I’d much rather make my own. Love it! I’m going to use some of the really pretty Asian prints out there, I think … or, maybe, the Aboriginal fabrics I bought last year … or
I may have to make some for my holiday giving, too. Thank you so much.
You are welcome Iris 🙂 whatever fabric you choose please load a picture on the comments section. I will look forward to your picture.
Hi Mayra,
Thank you for the free pattern of phone wallet organizer and mini backpack coin purse. You mentioned about buying a set of presser feet and showed pictures of various ones offered on Amazon. Please tell me which set you bought – was it the LemonBest brand? Are you satisfied with the products? Am considering buying a set.
Thank you
Hi Alicia, you need to read the feedback people leave. It works for some machines and not others. So the best is to research according to your machine brand. I have a Juki and some of the feet do not work as well, for example, the Teflon one. I had to buy a separate (Juki) one.
This is cool, plan to make one today…..question; has the magentic closure interfered or interacted with the phone? Is it far enough away?
I have an iPhone 7 Plus and have been using the phone wallet for over a year. It has not caused any problem at all but you can always use velcro instead.
Do you have a pattern for aLG phone case?
Hi, Sharon perhaps you can load a picture so I can see what case you are referring to and I will be happy to make one.
I have a 6s Plus, currently in a case with really powerful magnets and it seems to be okay so far. I really want to make this…but I wish it had a card holder in it.
There is no mention of interfacing, though the photos appear to show fat quarter fabrics backed with interfacing. Possibly some lightweight batting could be added.
The photos are unclear to me where to put the phone and sunglasses. Perhaps add a shot to show that. Otherwise looks cute and easy to make!
I love easy-fast project like this one…I will give it a try for sure!